Dell 5330dn Service Manual
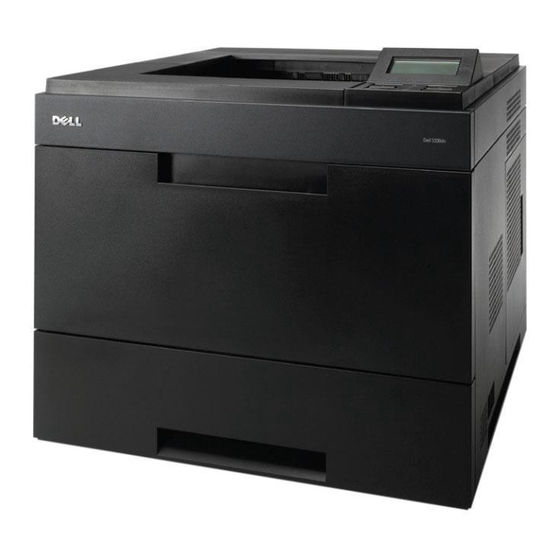
Dell 5330dn laser printer
Hide thumbs
Also See for 5330dn:
- User manual (181 pages) ,
- Product information manual (80 pages) ,
- Specification sheet (2 pages)
Table of Contents
Advertisement
Quick Links
Advertisement
Table of Contents
Troubleshooting

Related Manuals for Dell 5330dn


Summary of Contents for Dell 5330dn
- Page 1 Dell 5330dn Service Manual 31 Aug 2008...
- Page 2 Trademarks used in this text: Dell and the DELL logo are trademarks of Dell Inc. Other trademarks and trade names may be used in this document to refer to the entities claiming the marks and names of their products. Dell Inc. disclaims any proprietary interest in trademarks and trade names other than its own.
-
Page 3: Table Of Contents
Contents Precautions 1.1 Safety Warning •••••••••••••••••••••••••••••••••••••••••••••••••••••••1-1 1.2 Caution for safety ••••••••••••••••••••••••••••••••••••••••••••••••••••1-2 1.2.1 Toxic material ••••••••••••••••••••••••••••••••••••••••••••••••••••1-2 1.2.2 Electric Shock and Fire Safety Precautions •••••••••••••••1-2 1.2.3 Handling Precautions ••••••••••••••••••••••••••••••••••••••••••1-3 1.2.4 Assembly / Disassembly Precautions ••••••••••••••••••••••1-3 1.2.5 Disregarding this warning may cause bodily injury ••••••1-4 1.3 ESD Precautions •••••••••••••••••••••••••••••••••••••••••••••••••••••1-5 Product spec and feature 2.1 Product Specifications ••••••••••••••••••••••••••••••••••••••••••••••2-1... - Page 4 Continued 4.1.1 Tech mode •••••••••••••••••••••••••••••••••••••••••••••••••••••••4-1 4.1.2 Paper Path •••••••••••••••••••••••••••••••••••••••••••••••••••••••4-3 4.1.3 Printing a reports ••••••••••••••••••••••••••••••••••••••••••••• 4-10 4.1.4 Periodic Defective Image ••••••••••••••••••••••••••••••••••• 4-11 4.1.5 Clearing LCD Error Messages ••••••••••••••••••••••••••••• 4-12 4.2 Troubleshooting •••••••••••••••••••••••••••••••••••••••••••••••••••• 4-15 4.2.1 Procedure of Checking the Symptoms ••••••••••••••••••• 4-15 4.2.2 The cause and solution of image quality •••••••••••••••••...
- Page 5 Continued 5.19 Cassette Unit •••••••••••••••••••••••••••••••••••••••••••••••••••••• 5-46 5.20 SCF Unit •••••••••••••••••••••••••••••••••••••••••••••••••••••••••••• 5-48 5.21 Expander ••••••••••••••••••••••••••••••••••••••••••••••••••••••••••• 5-51 5.22 Main_HCF•••••••••••••••••••••••••••••••••••••••••••••••••••••••••• 5-55 5.23 HOU-L_HCF1 ••••••••••••••••••••••••••••••••••••••••••••••••••••• 5-57 5.24 HOU-L_HCF2 ••••••••••••••••••••••••••••••••••••••••••••••••••••• 5-59 5.25 HOU-L_HCF3 ••••••••••••••••••••••••••••••••••••••••••••••••••••• 5-61 5.26 LIFT_L_HCF ••••••••••••••••••••••••••••••••••••••••••••••••••••••• 5-63 5.27 LIFT_R_HCF •••••••••••••••••••••••••••••••••••••••••••••••••••••• 5-65 5.28 CASSETTE_HCF ••••••••••••••••••••••••••••••••••••••••••••••••• 5-67 5.29 DOOR FRONT_HCF ••••••••••••••••••••••••••••••••••••••••••••...
- Page 6 Continued 7.5.3 Installing USB Font Card •••••••••••••••••••••••••••••••••••••••7-9 7.5.4 Installing Optional Tray •••••••••••••••••••••••••••••••••••••••••7-8 7.5.5 Installing High Capacity Feeder •••••••••••••••••••••••••••• 7-13 7.5.6 Using the Hard Disk ••••••••••••••••••••••••••••••••••••••••••• 7-16 7.5.7 Installing an Output Expander •••••••••••••••••••••••••••••• 7-21...
-
Page 7: Precautions
High voltages and lasers inside this product are dangerous. This printer should only be serviced by a suitably trained and qualified service engineer. (2) Use only Dell replacement parts There are no user serviceable parts inside the printer. Do not make any unauthorized changes or additions to the printer, these could cause the printer to malfunction and create electric shock or fire... -
Page 8: Caution For Safety
Take care not to cut or damage the power cable or plugs when moving the machine. (9) Use caution during thunder or lightening storms. Dell recommend that this machine be disconnected from the power source when such weather conditions are expected. Do not touch the machine or the power cord if it is still connected to the wall socket in these weather conditions. -
Page 9: Handling Precautions
1.2.4 Assembly / Disassembly Precautions Replace parts carefully, always use Dell parts. Take care to note the exact location of parts and also cable routing before dismantling any part of the machine. Ensure all parts and cables are replaced correctly. -
Page 10: Disregarding This Warning May Cause Bodily Injury
Precautions 1.2.5 Disregarding this warning may cause bodily injury (1) Be careful with the high temperature part. The fuser unit works at a high temperature. Use caution when working on the printer. Wait for the fuser to cool down before disassembly. (2) Do not put finger or hair into the rotating parts. -
Page 11: Esd Precautions
Precautions 1.3 ESD Precautions Certain semiconductor devices can be easily damaged by static electricity. Such components are commonly called “Electrostatically Sensitive (ES) Devices” or ESDs. Examples of typical ESDs are: integrated circuits, some field effect transistors, and semiconductor “chip” components. The techniques outlined below should be followed to help reduce the incidence of component damage caused by static electricity. -
Page 12: Product Spec And Feature
2.1.2 Specifications • Product Specifications are subject to change without notice. See below for product specifications. 2.1.2.1 General Print Engine Item Dell 5330dn Engine Speed Simplex Up to 48 ppm in A4 (50 ppm in Letter) Duplex Up to 32 ipm in A4 (34 ipm in Letter) - Page 13 Product spec and feature 2.1.2.2 Controller & S/W Item Dell 5330dn Processor 500MHz Memory Std. 256MB Max. 768MB * Using 2-slot Dimm * One for a Basic slot: 256MB, Another for an Optional slot: 512M Printer PostScript3, PCL5e/PCL6, IBM ProPrinter, EPSON, PDF Direct V1.4...
-
Page 14: Paper Handling
Product spec and feature Item Dell 5330dn Interface Serial Parallel IEEE 1284 Hi-Speed USB 2.0 USB Host Hi-Speed USB 2.0(2 Port) Wired Network Ethernet 10/100/1000 Base TX (Internal) Wireless Network - 802.11 b/g Wireless LAN (Internal) User Interface 4-line Graphic LCD... - Page 15 Product spec and feature Item Dell 5330dn Sensing Paper empty sensor, Paper Size Sensor Optional Cassette Optional Tray Capacity 520 sheets @ 75g/ (20lb) Media sizes A4, A5, Letter, Legal, Executive, Folio, B5 Media types Plain Paper Media weight • Plain Paper 60~105gsm (16~28lb) •...
- Page 16 Product spec and feature 2.1.2.4 Consumables Item Dell 5330dn Developer Black Standard: Average Cartridge Yield 10K standard pages. High Yield: Average cartridge Yield 20K standard pages. Declared cartridge yield in accordance with ISO/IEC 19752. Encrypted CRUM Life detect Toner remaining volume would be traced via software 2.1.2.5 Reliability &...
- Page 17 Product spec and feature 2.1.2.7 Packing & Accessory Item Dell 5330dn In-Box • Dell Review and Fixed Driver Install CD-ROM Power Cable Quick Install Guide Warranty Registration Card User's Manual (PDF File) 10K Initial Print Cartridge USB Cable (Option) IEEE 1284 Cable(Option) 2.1.2.8 Options...
- Page 18 Product spec and feature 2.1.2.9 Others Item Dell 5330dn Performance Speed Be equal or better than LX T644 Resolution Be equal or better than LX T644 Service Service Item & 1. Transfer Roller : 150K pages Period 2. Fuser Unit : 150K pages 3.
-
Page 19: System Overview
Product spec and feature 2.2 System Overview This chapter describes the functions and operating principles of the main components. 2.2.1 Printer Components 2.2.1.1 Front View output support Output tray top cover Control panel Control board cover multi-purpose tray tray 1 (500-sheet paper feeder) optional trays (500-sheet paper feeder) -
Page 20: Rear View
Product spec and feature 2.2.1.2 Rear View rear cover duplex unit power switch network port USB port parallel port power receptacle Service Manual... - Page 21 Product spec and feature 2.2.1.3 OPE Panel display navigation zone command zone Button: Discription: 4-way Scroll, increasing or decreasing values. Confirms the selection on the screen. Stop an operation at any time. Sends you back to the upper menu level. Enter Menu mode and scroll through the available menus.
- Page 22 Product spec and feature 2.2.1.3.1 Dell 5330dn Mono Laser Printer Menu Function 1.Paper Setup 2.Reports 3.Settings Paper Size/Type Menu Map Setup Custom Setup Configuration Quality Default Source Demo page Finishing Tray Behavior Nerwork Settings Form Menu Bin Setup Job History...
- Page 23 Product spec and feature ■ Menu Map (User Mode) Ist level 2nd Level 3rd level 4th level 5th level Paper Setup Paper Size/Type Size Letter √ Legal Oficio Folio ISO B5 JIS B5 Statement Executive Monarch Env. DL Env. C5 Env. C6 Env.
- Page 24 Product spec and feature Paper Setup Bin Setup Link √ (continue..) (Shown when Bin De-Link installs) Reports Menu Map Configuration Demo page Network Settings Job History Job Meter PCL Font List PS Font List Error History Settings Setup Language English √ Deutsch Espanol Francais...
- Page 25 Product spec and feature Settings Finishing Duplex Off√ (continue..) (continue..) Long Edge Short Edge Duplex Margin Top Margin [0.0-10]mm:5.0 * Left Margin [0.0-10]mm:5.0 * Short Binding [0-22]mm:0 * Long Binding [0-22]mm:0 * Collation Off√ Seprator Sheet Off√ Print Blank Pages Print√...
- Page 26 Product spec and feature Wireless Netware Activate On√ (continue..) Frame Type Auto√ 802.2 802.3 Ethernet II SNAP AppleTalk Activate On√ View Name Host Name Enable√ Disable Parallel Port Enable√ Disable Wireless WLAN Settings Search List √ Custom Edit SSID WLAN Default WLAN Signal Clear Settings No√...
- Page 27 Product spec and feature Emulation Setup Symbol WINBALT (continue..) (continue..) (continue..) (continue..) SYMBOL WINGDING LEGAL ISO4 ISO6 ISO11 ISO15 ISO17 ISO21 ISO60 ISO69 PC775 PC1004 PC8 √ PC8DN PC850 PC852 PC8TK CYRILLC PCCYRIL GREEK Arabic8 WinArabic PC864 Farsi ISOArabic PC737 OCR-A OCR-B Point Size...
- Page 28 Product spec and feature 1. Press Menu ( 2. Press Scroll ( ) to highlight the desired setting and press Select ( 3. If the setting item has sub menus, repeat step 2. 4. Press Scroll ( to access the required value. 5.
- Page 29 Product spec and feature 2.2.1.3.4 Power Save Mode The Power Save mode allows your printer to reduce power consumption when it is not in actual use. You can turn this mode on by selecting the length of time for which the printer waits after a job is printed before it switches to a reduced power state.
-
Page 30: System Layout
Product spec and feature 2.2.2 System Layout Dell 5330dn is consisted of the Engine parts and F/W, and said engine parts is consisted of the mechanical parts comprising Frame, Feeding, Developing, Driving, Transferring, Fusing, Cabinet and H/W comprising the main control board, power board, operation panel, PC Interface. - Page 31 Product spec and feature 2.2.2.1 Feeding It is consists of a basic cassette, an MP tray for supplying different types of media : envelope, label special paper, duplex unit, and parts related to paper transferring. 1) Separation method Separate it from the friction pad mounted to the center of the cassette and apply retard roller that uses a spring clutch.
- Page 32 Product spec and feature 2.2.2.2 Transfer It consists of a PTL (Pre-transfer Lamp) and a transfer roller. A PTL sheds light on an OPC drum, lowers an electric potential of an OPC drum’s surface, and improves the efficiency of the transfer. A transfer roller transfers toner on an OPC drum to the paper.
-
Page 33: Print Cartridge
Product spec and feature 2.2.2.6 Print Cartridge By using the electronic photo process, it creates a visual image. In the print cartridge, the OPC unit and the print cartridge unit are in a body. The OPC unit has OPC drum and charging roller, and the print cartridge unit has toner, supply roller, developing roller, and blade (Doctor blade) - Developing Method: Non-contacting method - Toner : Non magnetic 1 component pulverized type toner... -
Page 34: Engine H/W Specifications
Product spec and feature 2.2.3 Engine H/W Specifications 2.2.3.1 Dell 5330dn (PCL) Main Board The Engine Board and the Controller Board are in one united board, and it is consisted of CPU part and print part in functional aspect. The CPU is functioned as the bus control, O/O handling, drivers, and PC interface. - Page 35 Product spec and feature Paper Empty Sensing The Paper empty sensor (Photo Interruptor) on the engine board informs the state of paper to CPU whether it is empty or not with operation of the actuator. When cassette is empty, it detects the fact by reading the D0 Bit of CPU, and then informs the fact by selecting the second LED(yellow) among the panel LEDs.
- Page 36 Product spec and feature 2.2.3.2 SMPS & HVPS board The SMPS supplies DC Power to the System. It takes 110V/220V and outputs the +5V, +24V to supply the power to the main board. The HVPS board creates the high voltage of THV/MHV/Supply/Dev and supplies it to the developer part for making best condition to display the image.
- Page 37 Product spec and feature • Fuser Voltage □ Input Voltage : 24 V DC ± 15% □ Output Voltage : 0V ~ 1KV DC ± 3% □ Output Voltage Rising Time : 50 ms Max □ Output Voltage Falling Time : 50 ms Max □...
- Page 38 Product spec and feature • Length of Power Cord : 1830±50mm • Power Switch : Use • Feature □ Insulating Resistance : 100 or more (at DC 500V) □ Insulating revisiting pressure : Must be no problem within 1 min. (at 1500Vac,10mA) □...
-
Page 39: Engine F/W
Product spec and feature 2.2.4 Engine F/W 1) Feeding If feeding from a cassette, the drive of the pickup roller is controlled by controlling the solenoid. The on/off of the solenoid is controlled by controlling the general output port or the external output port. If feeding from a manual feeder, decide to insert the paper according to the operation of the manual sensor, and by driving the main motor, insert the paper in front of the feed sensor. - Page 40 Product spec and feature 3) Transfer The charging voltage, developing voltage and the transfer voltage are controlled by PWM (Pulse Width Modulation). The each output voltage is changeable due to the PWM duty. The transfer voltage admitted when the paper passes the transfer roller is decided by environment recognition. The resistance value of the transfer roller is changed due to the surrounding environment or the environment of the set, and the voltage value, which changes due to the environments, is changed through AD converter.
-
Page 41: Disassembly And Reassembly
Disassembly and Reassembly 3. Disassembly and Reassembly 3.1 General Precautions on Disassembly When you disassemble and reassemble Releasing Plastic Latches components, you must use extreme caution. The close proximity of cables to moving parts makes Many of the parts are held in place with plastic proper routing a must. -
Page 42: General Disassembly
When replacing some parts, consult the disassembly map on next page. < Front View > COVER-DUMMY TOP STACKER -RX COVER-TOP LEVER-M-STACKING COVER-OPEN PANEL -LCD COVER-BAND RIGHT COVER-BAND RIGHT BADGE -DELL COVER-BAND FRONT COVER-SIDE LEFT COVER-SIDE RIGHT COVER-MP HANDLE -CASSETTE Service Manual... - Page 43 Disassembly and Reassembly ■ Disassembly Map Cassette Toner Cartridge Transfer roller Pick up roller No.1 No.2 No.3 No.4 Duplex Unit Rear Cover Fuser unit Side Cover No.5 No.6 No.7~8 No.9~11 Top Cover MP unit LSU unit HVPS board No.12~16 No.17~19 No.20~22 No.24 Deve/Main...
- Page 44 Disassembly and Reassembly 1. Remove the Cassette Unit Cassette Unit Cassette Unit 2. Open the Cover-Open and remove the Toner cartridge. Toner Cartridge Toner Cartridge 3. Remove the CAP-TR at left side of the Transfer roller. And remove the Transfer roller. CAP-TR CAP-TR Transfer roller...
- Page 45 Disassembly and Reassembly 4. Remove the Pick_up roller. Pick_up roller Pick_up roller 5. Remove the DUPLEX unit. Duplex Unit Duplex Unit Duplex Unit 6. Open the COVER-REAR. Remove the COVER-REAR after remove the PMO-Stripe. O-STRIPE O-STRIPE COVER-REAR COVER-REAR Service Manual...
- Page 46 Disassembly and Reassembly 7. Pull the Locker of the Fuser unit to the direction of arrow. 8. Take out the Fuser unit. Note If replacing the sub item of the Fuser unit, Thermostat Thermostat thermostat thermostat Consult the Exploded view. Service Manual...
- Page 47 Disassembly and Reassembly 9. To remove the COVER-SIDE (left/right), remove the 4 screws on rear side. 10. Remove the COVER-SIDE LEFT. 11. Remove the COVER-SIDE RIGHT. Service Manual...
- Page 48 Disassembly and Reassembly the 2 screws. 13. Open the COVER-TOP and unfasten the 2 screws. 14. Remove the 5 screws securing Controller shield Ass’y. And remove the COVER-SHIELD. Service Manual...
- Page 49 Disassembly and Reassembly 15. Unplug the harness from the Main board. 16. Pull the two hooks in both side and disassemble the Cover-Top. Note When removing the COVER-TOP, be careful not to break the 5 hinges. Service Manual...
- Page 50 Disassembly and Reassembly 17. To remove the MP-Unit, open the COVER-MP. And dislodge the Cover-MP from Arm-MP(L/R). Plate-Guide_Support Plate-Guide_Support COVER COVER 18. Remove the Arm-MP (L/R). 19. Remove the Spring and disassemble the Plate-Guide_Support. Spring Spring 3-10 Service Manual...
- Page 51 Disassembly and Reassembly If necessary, remove the Pick_up roller MP. (Life span: 150K) Pick_up roller MP Pick_up roller MP 20. To remove the LSU-Unit, remove the COVER-Frame Exit COVER-Frame Exit. 21. Remove the 3 screws. 3-11 Service Manual...
- Page 52 Disassembly and Reassembly 22. Unplug the harness from the Main board. Remove the LSU unit. 23. Remove the FPCPS(fuser press control power) board after remove the 3 screws. 24. Remove the HVPS board after remove the 8 screws and all harness. 3-12 Service Manual...
- Page 53 Disassembly and Reassembly 25. Remove the 3 screws. And remove the Main Fan & SMPS Fan (DC-Fan). DC-Fan DC-Fan Main Main DC-Fan DC-Fan SMPS SMPS 26. To remove the Main board, remove the 4 screws and all harness from Engine-Shield. 27.
- Page 54 Disassembly and Reassembly 28. Remove the DEVE motor Ass’y after remove the 4 screws. 29. Remove the clutch after remove the E-ring E-ring E-ring 30. Remove the Main motor Ass’y after remove the 5 screws. 3-14 Service Manual...
- Page 55 Disassembly and Reassembly 31. To remove SMPS board, turn upside and down the set. Remove the bar-cross bottom after remove the 2 screws. Bar-Cross Bottom Bar-Cross Bottom 32. Remove the GUIDE-DUP_R/L at both side of the Shield-SMPS. GUIDE-DUP L GUIDE-DUP L Hook 33.
- Page 56 Disassembly and Reassembly 34. Remove the washer with any tool (ex. tweezers). And remove the duplex gear. Duplex gear 35. Remove the 6 screws securing the SHIELD-SMPS. SHIELD-SMPS SHIELD-SMPS 36. Remove the screw from the edge of SHIELD-SMPS. And disassemble the Damper-Pick Up Damper-Pick Up Holder-P-Damper and Damper-Pick Up.
- Page 57 Disassembly and Reassembly 37. Lift the SMPS Ass’y up and unplug the harness. SMPS Ass’y SMPS Ass’y 3-17 Service Manual...
-
Page 58: Adjustment And Troubleshooting
Adjustment and Troubleshooting 4. Adjustment and Troubleshooting 4.1 Alignment and Adjustments This chapter describes the main functions for service, such as the product maintenance method, the test output related to maintenance and repair, Jam removing method, and so on. It includes the contents of manual. 4.1.1 Tech mode 4.1.1.1 Entrance method for Tech mode In order to enter the tech mode, the entering method should be special because this mode is developed for... - Page 59 Adjustment and Troubleshooting 4.1.1.2 Tech menu map Ist level 2nd Level 3rd level 4th level 5th level 6th level Data Setup HDD Format Margin Top Margin [-40~40] 0* Left Margin [-40~40] 0* Simplex Top Margin [-30~30] 0* Left Margin [-30~30] 0* Duplex Even Top Margin [-30~30] 0*...
-
Page 60: Paper Path
Adjustment and Troubleshooting 4.1.2 Paper Path <Jam 0> <Jam 1> <Jam 2> Service Manual... - Page 61 Adjustment and Troubleshooting <Jam Duplex 1> <Jam Duplex 0> • Simplex 1) A paper is fed from a cassette or MPF by a printing order. 2) The fed paper passes a paper feeding sensor. - If the sensor does not operate after feeding the paper, the Jam0 occurs. 3) The paper passes a paper exit sensor, and it comes out from a machine.
-
Page 62: Clearing Jams In The Paper Tray
Adjustment and Troubleshooting 4.1.2.1 Clearing Jams in the Paper Tray When a paper jam occurs, Paper Jam appears on the display. Refer to the table below to locate and clear the paper jam. Operator Panel Operator Panel Location of Jam Location of Jam Message Message... - Page 63 Adjustment and Troubleshooting Paper Feed Jam (optional trays) Multi-purpose Feeder Jam 1. Pull optional tray open. 1. If the paper is not feeding properly, pull the paper out of the printer. 2. Remove the jammed paper from the printer. If you cannot see the paper in this area or the paper does not move when pulled, go to the next 2.
- Page 64 Adjustment and Troubleshooting 3. Remove the jammed paper by gently pulling it Around the print cartridge straight out. Note : The fuser area is hot. Take care when removing paper from the printer. 1. Open the top cover and pull the toner cartridge out.
- Page 65 Adjustment and Troubleshooting 6. Pull the rear door strap. In the Paper Exit Area 1. Open and close the top cover. The paper is automatically ejected from the printer 2. Gently pull the paper out of the output tray. 7. While pushing the fuser lever to the right, open the fuser door.
- Page 66 Adjustment and Troubleshooting In the Duplex Unit Area Duplex jam 1 If the the duplex unit is not inserted correctly, paper 1. Open the rear door. jam may occur. Ensure that the duplex unit is inserted correctly. Duplex jam 0 1.
-
Page 67: Printing A Reports
Adjustment and Troubleshooting 4.1.3 Printing a reports This product has the several sample patterns for maintenance. With the sample patterns, check the existence of the abnormality. The patterns help to regularly maintain the product. 4.1.3.1 Reports Your printer comes with a set of Reports that helps you solve printing problems and obtain the best results from your printer. -
Page 68: Periodic Defective Image
Adjustment and Troubleshooting 4.1.4 Periodic Defective Image If the delinquent image regularly occurs in the printed-paper, it is due to delinquent or damaged roller. Refer to the table in below and check the condition of the roller. Roller Defective image Typical defect OPC Drum 94.4 mm... -
Page 69: Clearing Lcd Error Messages
Adjustment and Troubleshooting 4.1.5 Clearing LCD Error Messages Display Meaning Suggested solutions ADC Error There is a problem in your printer Unplug the power cord and plug it back in. ADC Not Confirm system. Error Close Toner Door The top cover is not securely Close the cover until it locks into place. - Page 70 Adjustment and Troubleshooting Display Meaning Suggested solutions Paper Jam 2... Paper has jammed in the paper exit Remove the jammed paper. area. Duplex jam 0... Paper has jammed during duplex Remove the jammed paper. printing. Duplex jam 1... Paper has jammed during duplex Remove the jammed paper.
- Page 71 A toner cartridge is not installed. Install a toner cartridge. Invalid Toner/ The toner cartridge you have Install a genuine Dell toner cartridge designed for Toner is not valid installed is not for your printer. your printer. for this machine IP Conflict/...
-
Page 72: Troubleshooting
Adjustment and Troubleshooting 4.2 Troubleshooting 4.2.1 Procedure of Checking the Symptoms Before attempting to repair the printer first obtain a detailed description of the problem from the customer. Power On - No Power - Power Module error OP Panel - Main PBA error - LCD Panel error Refer to Clearing LCD Indicate... -
Page 73: The Cause And Solution Of Image Quality
Adjustment and Troubleshooting 4.2.2 The cause and solution of image quality 1) Vertical Black Line and Band 1. Straight thin black vertical lines occur in the printing Description 2. Dark black vertical bands occurrs in the printing 4-16 Service Manual... - Page 74 Adjustment and Troubleshooting 2) Vertical White Line Description White vertical voids in the image. 4-17 Service Manual...
- Page 75 Adjustment and Troubleshooting 3) Horizontal Black Bands Dark or blurry horizontal stripes occur in the printing periodically Description (These may occurs at regular intervals down the page.) 4-18 Service Manual...
- Page 76 Adjustment and Troubleshooting 4) Black/White Spot 1. Dark or blurry spots occur periodically in the printing Description 2. White spots occur periodically in the printing 4-19 Service Manual...
- Page 77 Adjustment and Troubleshooting 5) Light Image Description The printed image is light, with no ghost. 4-20 Service Manual...
- Page 78 Adjustment and Troubleshooting 6) Dark image or Black Description The printed image is dark. 4-21 Service Manual...
- Page 79 Adjustment and Troubleshooting 7) Uneven Density Description Print Density is uneven between left and right. 4-22 Service Manual...
- Page 80 Adjustment and Troubleshooting 8) Background Description Light dark background appears in whole area of the printing. 4-23 Service Manual...
- Page 81 Adjustment and Troubleshooting 9) Ghost(1) Description Ghost occur at 94.4mm intervals of the OPC drum in the whole Printing 4-24 Service Manual...
- Page 82 Adjustment and Troubleshooting 10) Strain in the Face of the Page Description The background on the face of the printed page strained. 4-25 Service Manual...
- Page 83 Adjustment and Troubleshooting 11) Strains on Back of Page Description The back of the page is strained at 55.9 or 125.6 mm intervals. 4-26 Service Manual...
- Page 84 Adjustment and Troubleshooting 12) Blank Page Print out(1) Description Blank page is printed. 4-27 Service Manual...
-
Page 85: The Cause And Solution Of The Paper Feeding
Adjustment and Troubleshooting 4.2.3 The cause and solution of the paper feeding 1) Wrong Print Position Description Printing begins at wrong position on the paper. 4-28 Service Manual... - Page 86 Adjustment and Troubleshooting 2) JAM 0 1. Paper does not exit from the cassette. Description 2. Jam-0 occurs when the paper feeds into the printer 4-29 Service Manual...
- Page 87 Adjustment and Troubleshooting 3) JAM 1 1. Paper is jammed in front of or inside the fuser. Description 2. Paper is stuck in the exit roller and in the fuser just after passing through the Actuator-Feed 4-30 Service Manual...
- Page 88 Adjustment and Troubleshooting JAM 2 1. Recording paper is jammed in front of or inside the fuser. Description 2. Recording paper is stuck in the discharge roller and in the fuser just after passing through the Actuator-Feed. 4-31 Service Manual...
- Page 89 Adjustment and Troubleshooting 4) Duplex JAM 1 Description A Message ‘Duplex JAM 1’ is displayed in a LCD window. 4-32 Service Manual...
- Page 90 Adjustment and Troubleshooting 5) Duplex JAM 0 Description A message ‘Duplex JAM 0’ is displayed in a LCD window. 4-33 Service Manual...
- Page 91 Adjustment and Troubleshooting 6) Multi-Feeding Description Multiple sheets of paper are fed at once. 4-34 Service Manual...
- Page 92 Adjustment and Troubleshooting 7) Paper rolled in the fuser Description Paper rolled around fuser rollers or ‘Concertina’ jam 4-35 Service Manual...
- Page 93 Adjustment and Troubleshooting 8) Paper rolled on the OPC Drum Description Paper is rolled up in the OPC. 4-36 Service Manual...
-
Page 94: The Cause And Solution Of The Malfunction
Adjustment and Troubleshooting 4.2.4 The cause and solution of the malfunction 1) Fuser Error message “Engine Fuser Low Heat Error/Engine Fuser Over Heat Error” is displayed Description in a LCD panel. 4-37 Service Manual... - Page 95 Adjustment and Troubleshooting 2) LSU Unit Error Description message “Engine Hsyne Error” is displayed in a LCD panel. 4-38 Service Manual...
- Page 96 Adjustment and Troubleshooting 3) Paper Empty Error The paper lamp on the operator panel is on even when paper is loaded in the Description cassette. 4-39 Service Manual...
- Page 97 Adjustment and Troubleshooting 4) Cover open Error message “Colse Top Cover” is displayed in a LCD panel. Description The ERROR lamp is on even when the print cover is closed. 4-40 Service Manual...
- Page 98 Adjustment and Troubleshooting 5) No power Error Description When system power is turned on, all lamps on the operator panel do not come on. 4-41 Service Manual...
-
Page 99: Explodedview And Parts List
ExplodedView and Parts list 5. ExplodedView and Parts list Thumbnail ……………………………………… 5-2 5.18 Duplex Unit …………………………… 5-44 5.1 Main ………………………………………… 5-4 5.19 Cassette Unit ………………………… 5-46 5.2 Housing_Cover …………………………… 5-7 5.20 SCF Unit ……………………………… 5-48 5.3 Top Cover ………………………………… 5-9 5.21 Expander ………………………………... -
Page 100: Thumbnail
ExplodedView and Parts list Thumbnail 5.1 Main 5.2 Housing_Cover 5.3 Top Cover 5.4 Rear Cover 5.8 Frame2 5.5 Cover MP 5.6 Knock-Up MP 5.7 Frame1 5.9 Exit Solenoid 5.10 DEVE Motor 5.12 Idle Gear Unit 5.11 Main Motor 5.15 LSU Frame 5.16 REGI 5.13 Feed Unit 5.14 Feed Unit 3X5... - Page 101 ExplodedView and Parts list Thumbnail 5.21 Expander 5.22 Main_HCF 5.24 HOU-L_HCF2 5.23 HOU-L_HCF1 5.25 HOU-L_HCF3 5.26 LIFT_L_HCF 5.28 CASSETTE_HCF 5.27 LIFT_R_HCF 5.29 DOOR FRONT_HCF 5.31 PICK-UP_HCF 5.32 DRIVE_HCF 5.30 HOU-UPPER_HCF 5.34 CLUTCH_HCF 5.33 SUB-DRIVE_HCF Service Manual...
-
Page 102: Main
ExplodedView and Parts list 5.1 Main Service Manual... - Page 103 ExplodedView and Parts list Main Parts List SA : SERVICEAVAILABLE, SNA : SERVICE not AVAILABLE 0)*_code Drawer# Description Q’ty Service Remark ML-5050ND JC96-05026A ELA HOU-FRAME ETC JC44-00166A HVPS JC96-04066B ELA UNIT-LSU JC39-00436A CBF HARNESS-LSU JC96-05105A ELA-EXIT SOLENOID JC72-41292C PMO-CAP TR JC97-03422A ROLLER-TRANSFER JC96-01729B ELA UNIT-HOLDER TR R JC72-41142A PMO-BUSHING TR...
- Page 104 ExplodedView and Parts list Main Parts List SA : SERVICEAVAILABLE, SNA : SERVICE not AVAILABLE 0)*_code Drawer# Description Q’ty Service Remark JC96-04003C ELA HOU-SMPS_V1 27-1 JC63-01133A SHIELD-SMPS 27-2 JC62-00311A INSULATION-SMPS 27-3 JC44-00140A SMPS-V1 27-4 JC63-00707A SHEET-SMPS_SMALL 27-5 6003-000269 SCREW-TAPTITE JC71-00042A BAR-P_CROSS BOTTOM JC96-05151A ELA UNIT-CASSETTE JC96-05127A ELA-COVER TOP JC96-05143A ELA HOU-COVER...
-
Page 105: Housing_Cover
ExplodedView and Parts list 5.2 Housing_Cover Service Manual... - Page 106 ExplodedView and Parts list Housing_Cover Parts List SA : SERVICEAVAILABLE, SNA : SERVICE not AVAILABLE 0)*_code Drawer# Description Q’ty Service Remark JC96-05143A ELA HOU-COVER JC97-03234A MEA-COVER LEFT JC63-01949A COVER-LEFT JC63-01945A COVER-BAND-LEFT 6003-000196 SCREW-TAPTITE JC97-03235A MEA-COVER RIGHT JC63-01950A COVER-RIGHT JC63-01947A COVER-BAND-RIGHT JC63-01948A COVER-CONTROL BOX JC96-05128A ELA-COVER REAR JC63-01955A COVER-FRAME EXIT...
-
Page 107: Top Cover
ExplodedView and Parts list 5.3 Top Cover Service Manual... - Page 108 6003-000282 SCREW-TAPTITE JC92-02057A PBA-COVER_OPEN JC67-00316A CAP-COVER OPEN 6003-000196 SCREW-TAPTITE JC63-01953A COVER-OPEN JC61-02626A STACKER-RX JC64-00421A KEY-ENTER JC64-00422A KEY-MENU JC63-01946A COVER-BAND FRONT JC64-00440A BADGE-DELL 6003-000115 SCREW-TAPTITE JC73-00283A RUBBER-OPE JC63-01952A COVER-OPE BOARD JC92-02017A PBA-OP_PANEL JC07-00012A LCD-MODULE JC61-02556A BRACKET-LCD JC67-00315A LENS-STATUS 6003-000115 SCREW-TAPTITE JC64-00425A WINDOW-LCD...
-
Page 109: Rear Cover
ExplodedView and Parts list 5.4 Rear Cover 5-11 Service Manual... - Page 110 ExplodedView and Parts list Rear Cover Parts List SA : SERVICEAVAILABLE, SNA : SERVICE not AVAILABLE 0)*_code Drawer# Description Q’ty Service Remark JC96-05128A ELA-COVER REAR JC63-01958A COVER-REAR JC31-00115A PAN-BLOCK JC72-01359B PMO-STRIPE JC39-00993A HARNESS-REAR-JOINT2 JC61-02622A BRACKET-FEMALE 6003-000196 SCREW-TAPTITE JC64-00420A HANDLE-REAR COVER JC61-01404A BRACKET-P-HANDLE SCF 6107-001268 SPRING-TS...
-
Page 111: Cover Mp
ExplodedView and Parts list 5.5 Cover MP 5-13 Service Manual... - Page 112 ExplodedView and Parts list Cover MP Parts List SA : SERVICEAVAILABLE, SNA : SERVICE not AVAILABLE 0)*_code Drawer# Description Q’ty Service Remark JC97-03264A MEA UNIT-COVER MP JC63-01941A COVER-MP JC63-01966A TRAY-ASF_INPUT 5-14 Service Manual...
-
Page 113: Knock-Up Mp
ExplodedView and Parts list 5.6 Knock-Up MP 5-15 Service Manual... - Page 114 ExplodedView and Parts list Knock-Up MP Parts List SA : SERVICEAVAILABLE, SNA : SERVICE not AVAILABLE 0)*_code Drawer# Description Q’ty Service Remark JC97-03259A MEA UNIT-KNOCK_UP MP JC61-02644A PLATE-GUIDE_SUPPORT JC74-00011A MPR-PAD KNOCK UP JC72-01005C PMO SIDE-GUIDE MP(L) JC61-02645A GUIDE-SIDE_MP_R JG66-40003A GEAR PINION 6003-000264 SCREW TAPTITE JC66-00895A SHAFT-REINFORCEMENT...
-
Page 115: Frame1
ExplodedView and Parts list 5.7 Frame1 5-17 Service Manual... -
Page 116: Frame2
ExplodedView and Parts list 5.8 Frame2 5-18 Service Manual... -
Page 117: Frame Parts List
ExplodedView and Parts list Frame Parts List SA : SERVICEAVAILABLE, SNA : SERVICE not AVAILABLE 0)*_code Drawer# Description Q’ty Service Remark JC96-05026A ELA HOU-FRAME ETC 0205-001002 GREASE-BEARING 0.319 0205-001067 GREASE-GRAPHITE 0.005 0604-001095 PHOTO-INTERRUPTER 0604-001381 PHOTO-INTERRUPTER 6003-000196 SCREW-TAPTITE 6003-000269 SCREW-TAPTITE 6003-000282 SCREW-TAPTITE 6004-000001 RING-CS... - Page 118 ExplodedView and Parts list Frame Parts List SA : SERVICEAVAILABLE, SNA : SERVICE not AVAILABLE 0)*_code Drawer# Description Q’ty Service Remark JC61-02648A GUIDE-PATH JC61-40001A FOOT-ML80 6107-001517 SPRING ES JC61-70932A SPRING ETC-GUIDE DEVE JC63-00459A SHEET-SCAN LOWER JC63-00669A GROUND-P_GUIDE TR JC63-00672A GROUND--REGI ROLLER JC63-00673A GROUND-P-SCF_MAIN JC63-00674A GROUND-P-PICK_UP_MAIN JC63-00675A GROUND-P-PAPER_SIZE...
- Page 119 ExplodedView and Parts list Frame Parts List SA : SERVICEAVAILABLE, SNA : SERVICE not AVAILABLE 0)*_code Drawer# Description Q’ty Service Remark JC67-00036A CAP-M-WIRE PTL LOWER JC67-00039A CAP-M-GEAR JC67-00092A CAP-M-DEVE_MOTOR JC67-00093A CAP-M-GUIDE_HARNESS JC67-00097A CAP-M_SENSOR_FEED JC67-00099A CAP-M-HOUS_TERM JC67-00189A DUCT-FAN_MAIN JC67-00300A CAP-POWER JC68-01760A LABEL-INFORMATION JC70-00339A IPR-P_GROUND PLATE PAPER JC72-00317A PMO-GUIDE DEVE L JC72-00318A PMO-GUIDE DEVE R...
- Page 120 ExplodedView and Parts list Frame Parts List SA : SERVICEAVAILABLE, SNA : SERVICE not AVAILABLE 0)*_code Drawer# Description Q’ty Service Remark 112-5 JC61-70965A SPRING ETC-EMPTY 112-6 0604-001095 PHOTO-INTERRUPTER 112-7 JC39-00451A CBF HARNESS-MP EMPTY JC96-04120B ELA HOU-SENSOR_CHECK 113-1 0604-001381 PHOTO-INTERRUPTER 113-2 JC39-00451A CBF HARNESS-MP_EMPTY 113-3 JC67-00320A CAP-SENSOR_CHECK...
- Page 121 ExplodedView and Parts list Frame Parts List SA : SERVICEAVAILABLE, SNA : SERVICE not AVAILABLE 0)*_code Drawer# Description Q’ty Service Remark JC92-01262C PBA SUB-FEED-SENSOR CBF HARNESS 1000Mohm SUB-SEN_DETECT_DPX PBA DPX-JAM JC96-04854A ELA UNIT-FUSER 2LAMP 110V JC96-04854B ELA UNIT-FUSER 2LAMP 220V 5-23 Service Manual...
-
Page 122: Exit Solenoid
ExplodedView and Parts list 5.9 Exit Solenoid 5-24 Service Manual... - Page 123 ExplodedView and Parts list Exit Solenoid Parts List SA : SERVICEAVAILABLE, SNA : SERVICE not AVAILABLE 0)*_code Drawer# Description Q’ty Service Remark JC96-05105A ELA-EXIT SOLENOID JC66-00869A GEAR IDLE 25 JC66-40911A GEAR DP IDLE JC66-00100A GEAR-6 JC66-00856A GEAR-M-RDCN EXIT JC66-00855A GEAR-M-SWING DUPLEX JC61-01202A BRACKET-P-LINK SWING JC61-01205A BRACKET-P-EXIT JC33-00033A SOLENOID-DUPLEX...
-
Page 124: Deve Motor
ExplodedView and Parts list 5.10 DEVE Motor 5-26 Service Manual... - Page 125 ExplodedView and Parts list DEVE Motor Parts List SA : SERVICEAVAILABLE, SNA : SERVICE not AVAILABLE 0)*_code Drawer# Description Q’ty Service Remark JC96-05103A ELA-DEVE BLDC JC31-00039B MOTOR BLDC JC61-01201A BRACKET-P-DEVE JG61-40001A FOOT-SF4000 6003-000301 SCREW-TAPTITE JC39-00661A HARNESS-FUSER CONTROL JC61-01203A BRACKET-P-SWING JC66-00915A SHAFT-SWING DEVE 6031-001255 WASHER-PLAIN JC66-00871A GEAR-M-RDCN DEVE...
-
Page 126: Main Motor
ExplodedView and Parts list 5.11 Main Motor 5-28 Service Manual... - Page 127 ExplodedView and Parts list Main Motor Parts List SA : SERVICEAVAILABLE, SNA : SERVICE not AVAILABLE 0)*_code Drawer# Description Q’ty Service Remark JC96-05104A ELA-MAIN BLDC JC66-00875A GEAR-M-FUSER IDLE 1 JC66-00867A GEAR-M-OPC DRV JC66-00864A GEAR-M-REGI DRV JC66-00865A GEAR-M-RDCN REGI JC66-00866A GEAR-M-RDCN PICK UP JC66-00863A GEAR-M-PICK UP DRV JC66-00862A GEAR-M-FEED DRV JC66-00861A GEAR-M-MP DRV...
-
Page 128: Idle Gear Unit
ExplodedView and Parts list 5.12 Idle Gear Unit Refer to 5.7-109 5-30 Service Manual... - Page 129 ExplodedView and Parts list Idle Gear Unit Parts List SA : SERVICEAVAILABLE, SNA : SERVICE not AVAILABLE 0)*_code Drawer# Description Q’ty Service Remark JC97-02238A MEA UNIT-GEAR IDLE JC61-01200A BRACKET-P-GEAR IDLE JC66-00858A GEAR-M-FUSER DRV IN JC66-00868A CLUTCH-M-HUB JC66-01155A GEAR-FUSER RDCN OUT V 6031-001255 WASHER-PLAIN JC66-00872A GEAR-FUSER IDLE 3...
-
Page 130: Feed Unit
ExplodedView and Parts list 5.13 Feed Unit Refer to 5.7-104 5-32 Service Manual... - Page 131 ExplodedView and Parts list Feed Unit Parts List SA : SERVICEAVAILABLE, SNA : SERVICE not AVAILABLE 0)*_code Drawer# Description Q’ty Service Remark JC96-04119B ELA UNIT-FEED JC96-04114B ELA UNIT-SENSOR_CHARGE JC72-00382B PMO-BUSHING FEED JC66-10202A BEARING-PICK UP JC61-01725A FRAME-FEED JC66-01267A ROLLER-SHAFT_FEED JC61-01550A STOPPER-SPACER 5-33 Service Manual...
-
Page 132: Feed Unit 3X5
ExplodedView and Parts list 5.14 Feed Unit 3X5 Refer to 5.7-101 5-34 Service Manual... - Page 133 ExplodedView and Parts list Feed Unit 3X5 Parts List SA : SERVICEAVAILABLE, SNA : SERVICE not AVAILABLE 0)*_code Drawer# Description Q’ty Service Remark JC96-03425B ELA UNIT-FEED_3X5 JC73-00206A RUBBER-BELT_FEED JC61-01239A GUIDE-M SHAFT_BELT JC61-02624A GUIDE-TRANSFER_FRONT JC61-02703A PLATE-SAW JC61-02618A HOLDER-SAW JC66-00887A ROLLER-M IDLE_BELT JC66-01985A SHAFT-BELT_3X5 JC70-20901A IEX-SHAFT IDLE,F/UP JC65-00038A TERMINAL-SIDE_SAW...
-
Page 134: Lsu Frame
ExplodedView and Parts list 5.15 LSU Frame Refer to 5.7-103 5-36 Service Manual... - Page 135 ExplodedView and Parts list LSU Frame Parts List SA : SERVICEAVAILABLE, SNA : SERVICE not AVAILABLE 0)*_code Drawer# Description Q’ty Service Remark JC96-03960C ELA HOU-FRAME_LSU_LO 6003-000196 SCREW-TAPTITE JC61-01732A FRAME-PART_UPPER JC65-00004B TERMINAL-DEVE JC92-02091A PBA SUB-CRUM_IF JC96-04121B ELA UNIT-DEVE_ERASER 5-37 Service Manual...
-
Page 136: Regi
ExplodedView and Parts list 5.16 REGI 5-38 Service Manual... - Page 137 ExplodedView and Parts list REGI Parts List SA : SERVICEAVAILABLE, SNA : SERVICE not AVAILABLE 0)*_code Drawer# Description Q’ty Service Remark JC96-03959B ELA UNIT-REGI JC61-00674A GUIDE-P_REGI LOWER JC66-00450A ROLLER-REGI LOWER L JC66-00446A SHAFT-REGI UPPER JC66-00647A ROLLER-M_REGI IDLE L25 JC66-00648A ROLLER-M_REGI IDLE S25 6044-000231 RING-E 6107-001158...
-
Page 138: Fuser Unit
ExplodedView and Parts list 5.17 Fuser Unit 5-40 Service Manual... - Page 139 ExplodedView and Parts list Fuser Unit Parts List SA : SERVICEAVAILABLE, SNA : SERVICE not AVAILABLE 0)*_code Drawer# Description Q’ty Service Remark JC96-04854A ELA UNIT FUSER 2LAMP 110V JC96-04854B ELA UNIT FUSER 2LAMP 220V JC96-04913A ELA UNIT-FUSER_UPPER 110V JC96-04913B ELA UNIT-FUSER_UPPER 220V 6003-000196 SCREW-TAPTITE 6003-000282...
- Page 140 ExplodedView and Parts list Fuser Unit Parts List SA : SERVICEAVAILABLE, SNA : SERVICE not AVAILABLE 0)*_code Drawer# Description Q’ty Service Remark 1-31 JC75-00095A MEC-BRUSH ANTISTATIC JC97-03092A MEA UNIT-FUSER LOWER 6003-000282 SCREW-TAPTITE 6006-001078 SCREW-TAPTITE 6031-001533 WASHER-PLAIN 6107-001172 SPRING-CS 6107-001496 SPRING-CS 6107-001501 SPRING-CS 6601-001389...
- Page 141 ExplodedView and Parts list Fuser Unit Parts List SA : SERVICEAVAILABLE, SNA : SERVICE not AVAILABLE 0)*_code Drawer# Description Q’ty Service Remark JC97-03216A MEA UNIT-EXIT F_UP 6044-000125 RING-E 6044-000159 RING-C JC62-00313A TUBE-SMALL_F_UP JC62-00314A TUBE-MIDDLE_F_UP JC62-00315A TUBE-LARGE_F_UP JC66-01967A ROLLER-EXIT_F/UP JC62-00315A TUBE-LARGE_F_UP JC66-01967A ROLLER-EXIT_F/UP 5-43 Service Manual...
-
Page 142: Duplex Unit
ExplodedView and Parts list 5.18 Duplex Unit 5-44 Service Manual... - Page 143 ExplodedView and Parts list Duplex Unit Parts List SA : SERVICEAVAILABLE, SNA : SERVICE not AVAILABLE 0)*_code Drawer# Description Q’ty Service Remark JC96-05126A ELA UNIT-DUPLEX 6002-000440 SCREW-TAPPING 6003-000196 SCREW-TAPTITE 6107-001156 SPRING-TS 6602-001084 BELT-TIMING GEAR 6602-001588 BELT-TIMING GEAR JC61-00665A BUSH-M-FEED, DUP JC61-02615A FRAME-DUPLEX JC61-02616A GUIDE-UPPER JC61-02617A BRACKET-GUIDE ALIGN...
-
Page 144: Cassette Unit
ExplodedView and Parts list 5.19 Cassette Unit 5-46 Service Manual... - Page 145 ExplodedView and Parts list Cassette Unit Parts List SA : SERVICEAVAILABLE, SNA : SERVICE not AVAILABLE 0)*_code Drawer# Description Q’ty Service Remark JC96-05151A ELA UNIT-CASSETTE 6002-000440 SCREW-TAPPING JC66-01981A LINK-DOWN_L JC61-01244A GUIDE-P-SIDE_R JC61-01225D GUIDE-M_SIDE LOCK JC61-02612A FRAME-CASSETTE JC61-00751A GUIDE-P-REAR PAPER CST JC61-02649A GUIDE-REAR_PAPER JC61-02646A GUIDE-LOCK_REAR JC61-00414A SPRING ETC-GUIDE PAPER...
-
Page 146: Scf Unit
ExplodedView and Parts list 5.20 SCF Unit 5-48 Service Manual... - Page 147 ExplodedView and Parts list SCF Unit Parts List SA : SERVICEAVAILABLE, SNA : SERVICE not AVAILABLE 0)*_code Drawer# Description Q’ty Service Remark JC96-05159A ELA UNIT-SCF JC61-01247D FRAME-M_SCF JC97-02233A MEA UNIT-P/U_HOUSING JC96-05161A ELA UNIT-RETARD_SCF JC63-01136A GROUND-FRONT_BOTTOM JC66-01277A SHAFT-PICK UP_SCF JC63-01140A GROUND-P-REAR_BOTTOM JC81-03458A AS-UNIT_FEED1 6044-000125 RING-E...
- Page 148 ExplodedView and Parts list SCF Unit Parts List SA : SERVICEAVAILABLE, SNA : SERVICE not AVAILABLE 0)*_code Drawer# Description Q’ty Service Remark JC72-01369A SPONGE-COVER_L JC72-01370A SPONGE-COVER_R JC97-01401A MEA UNIT-TERMINAL_TR JC97-03270A MEA-GEAR ONEWAY 6044-000001 RING-CS JC63-01163A SHEET-GUIDE_PATH JC39-00990A CBF HARNESS-S_P_SIZE JB39-40532A CBF HARNESS-OPE JC39-00989A CBF HARNESS-S_EMPTY JC39-00973A CBF HARNESS-SCF JC39-00975B CBF HARNESS-MOTOR...
-
Page 149: Expander
ExplodedView and Parts list 5.21 Expander 5-51 Service Manual... - Page 150 ExplodedView and Parts list Expander Parts List SA : SERVICEAVAILABLE, SNA : SERVICE not AVAILABLE 0)*_code Drawer# Description Q’ty Service Remark MAS-0001A UNIT-EXPANDER MAS-FRME-BOTTOM_EXP MMO-10003A FRAME-BOTTOM-EXP JC61-40001A FPPT ML80 MPR-10004A GROUND-SOLENOID MPR-10005A GROUND-MOTOR MPR-10003A POLE-STACKER MMO-10012A CAP GEAR JC81-06335A AS-CONNECTOR MAIN EXP MAS FRAME MAIN_EXP MMO-10001A FRAME-MAIN-EXP MPR-10006A GROUND-SHAFT-L...
- Page 151 ExplodedView and Parts list Expander Parts List SA : SERVICEAVAILABLE, SNA : SERVICE not AVAILABLE 0)*_code Drawer# Description Q’ty Service Remark MAS-10002A ASS'Y-BRKT SOLENOID JC33-00008A SOLENOID MMO-10008A LEVER SOLENOID JC96-04622A ASSY-SOLENOID PICK-UP 5-4-1 JC33-00023A SOLENOID PICK-UP 5-4-2 JC66-01470A LEVER PICK-UP 5-4-3 6107-001348 SPRING-CS...
- Page 152 ExplodedView and Parts list Expander Parts List SA : SERVICEAVAILABLE, SNA : SERVICE not AVAILABLE 0)*_code Drawer# Description Q’ty Service Remark 18-2 JC72-20902A ST-PEX_ROLLER_F_UP 18-3 JC70-20901A ST-IEX-SHAFT-IDLE_F_UP 18-4 6107-001160 ST-SPRING-TS 18-5 JC64-00420A HANDLE-M_COVER REAR 18-6 JC61-01404A BRACKET-P-HANDLE SCF 18-7 MSP-30001A SPRING-TS HANDLE 18-8 JC64-00423A LEVER-M-REAR LOCK_L...
-
Page 153: Main_Hcf
ExplodedView and Parts list 5.22 Main_HCF 5-55 Service Manual... - Page 154 ExplodedView and Parts list Main_HCF Parts List SA : SERVICEAVAILABLE, SNA : SERVICE not AVAILABLE 0)*_code Drawer# Description Q’ty Service Remark JC96-05232A ELA HOU-L-HCF SUB PLATE-BOTTOM_HCF ELA HOU-UPPER_HCF JC92-01686A PBA SUB-SCF_COVEROPEN GEAR-GUIDE REAR JC66-00974A GEAR-M_FORWARD 6044-000125 RING-E(ID4) 6107-001259 SPRING-ES COVER-SIDE L COVER-SIDE R COVER-REAR MEA UNIT-DOOR FRONT...
-
Page 155: Hou-L_Hcf1
ExplodedView and Parts list 5.23 HOU-L_HCF1 5-57 Service Manual... - Page 156 ExplodedView and Parts list HOU-L_HCF1 Parts List SA : SERVICEAVAILABLE, SNA : SERVICE not AVAILABLE 0)*_code Drawer# Description Q’ty Service Remark ELA HOU-L-HCF(1) PLATE-BOTTOM BRKT-HOLDER SENSOR 0604-001095 PHOTO-INTERRUPTER JC63-00675A GROUND-P-PAPER_SIZE CASTER-M01030 CASTER-M01030 STABILITY-STAND_DELL 6001-000357 SCREW-TAPPING (M4X10) JC81-06072A TIMING BELT_S3M GEAR-PULLEY_FRONT PULLEY-UPPER BELT 6044-000129 RING-E (ID6)
-
Page 157: Hou-L_Hcf2
ExplodedView and Parts list 5.24 HOU-L_HCF2 5-59 Service Manual... - Page 158 ExplodedView and Parts list HOU-L_HCF2 Parts List SA : SERVICEAVAILABLE, SNA : SERVICE not AVAILABLE 0)*_code Drawer# Description Q’ty Service Remark ELA HOU-L-HCF(2) SUB PLATE-BOTTOM_HCF SUB-LIFT LEFT SUB-LIFT RIGHT SHAFT-PLATE LEVER ACTUATOR-PAPER CAPACITY_A ACTUATOR-PAPER CAPACITY_B GEAR-SHAFT_PC 6044-000129 RING-E (ID6) JC61-00426A BUSH-8/5 SPRING-PIN PULLEY PULLEY-LOWER BELT JC66-00854A GEAR-EXIT DUP Z21...
-
Page 159: Hou-L_Hcf3
ExplodedView and Parts list 5.25 HOU-L_HCF3 5-61 Service Manual... - Page 160 ExplodedView and Parts list HOU-L_HCF3 Parts List SA : SERVICEAVAILABLE, SNA : SERVICE not AVAILABLE 0)*_code Drawer# Description Q’ty Service Remark ELA HOU-L-HCF(3) SUB PLATE-BOTTOM_HCF JC70-11028A IPR-GROUND-TOP AS-UNIT SPRING ROLL GEAR-LIFT JC66-00856A GEAR-M-RDCN EXIT GEAR-REDUCTION_PC BRKT-GEAR-REDUCTION JC31-00109A AS-MOTOR GEARED BRKT-MOTOR SHAFT-GEARED JC66-00955A GEAR-M_LIFT COUPLING GUIDE-GEARED...
-
Page 161: Lift_L_Hcf
ExplodedView and Parts list 5.26 LIFT_L_HCF 5-63 Service Manual... - Page 162 ExplodedView and Parts list LIFT_L_HCF Parts List SA : SERVICEAVAILABLE, SNA : SERVICE not AVAILABLE 0)*_code Drawer# Description Q’ty Service Remark SUB-LIFT LEFT PLATE-LIFT L BRKT-KNOCK UP_L BELT-STOPPER TIMING BELT_S5M(625) BRKT-STOPPER ROLLER-GUIDE KU BRKT-GUIDE ROLLER(L) GROUND-LEFT_HCF JC66-00100A GEAR-6 6044-000231 RING-E(ID5) SPRING-TS_DR HOOK-LOCKER 6044-000129...
-
Page 163: Lift_R_Hcf
ExplodedView and Parts list 5.27 LIFT_R_HCF 5-65 Service Manual... - Page 164 ExplodedView and Parts list LIFT_R_HCF Parts List SA : SERVICEAVAILABLE, SNA : SERVICE not AVAILABLE 0)*_code Drawer# Description Q’ty Service Remark SUB-LIFT RIGHT PLATE-LIFT R BRKT-KNOCK UP_R BELT-STOPPER TIMING BELT_S5M(625) BRKT-STOPPER ROLLER-GUIDE KU BRKT-GUIDE ROLLER(L) GROUND-LEFT_HCF SPRING-TS_DR HOOK-LOCKER 6044-000129 RING-E(ID6) 6003-000269 SCREW-TAPTITE (M3X6) 6002-000440...
-
Page 165: Cassette_Hcf
ExplodedView and Parts list 5.28 ASSETTE_HCF 5-67 Service Manual... - Page 166 ExplodedView and Parts list ASSETTE_HCF Parts List SA : SERVICEAVAILABLE, SNA : SERVICE not AVAILABLE 0)*_code Drawer# Description Q’ty Service Remark ELA UNIT-CASSETTE_HCF 6002-000440 SCREW-TAPPING (M3X8) FRAME-CASSETTE 0604-001095 PHOTO-INTERRUPTER CBF HARNESS-PAPER LEVEL GROUND-REAR_HCF PLATE-PARER REAR RACK-GEAR REAR SHAFT-GUIDE REAR 6044-000231 RING-E(ID5) GEAR-GUIDE REAR PLATE-PAPER SIDE L...
-
Page 167: Door Front_Hcf
ExplodedView and Parts list 5.29 DOOR FRONT_HCF 5-69 Service Manual... - Page 168 ExplodedView and Parts list DOOR FRONT_HCF Parts List SA : SERVICEAVAILABLE, SNA : SERVICE not AVAILABLE 0)*_code Drawer# Description Q’ty Service Remark MEA UNIT-DOOR FRONT 6002-000440 SCREW-TAPPING (M3X8) 6003-000269 SCREW-TAPTITE (M3X6) COVER-FRONT JC61-01404A BRACKET-P-HANDLE SCF HANDLE-DOOR SPRING-TS_LOCK JC64-00423A LOCKER-REAR_L JC64-00424A LOCKER-REAR_R BRKT-HINGE BRKT-HINGE GEARED...
-
Page 169: Hou-Upper_Hcf
ExplodedView and Parts list 5.30 HOU-UPPER_HCF 5-71 Service Manual... - Page 170 ExplodedView and Parts list HOU-UPPER_HCF Parts List SA : SERVICEAVAILABLE, SNA : SERVICE not AVAILABLE 0)*_code Drawer# Description Q’ty Service Remark ELA HOU-UPPER_HCF PLATE-TOP_HCF ELA UNIT-PICK UP GUIDE-TOP REAR_DUMMY CBF HARNESS-HCF JC61-01742A HOLDER-CONNECTOR_SCF 6002-000440 SCREW-TAPPING (M3X8) 5-72 Service Manual...
-
Page 171: Pickup_Hcf
ExplodedView and Parts list 5.31 PICKUP_HCF 5-73 Service Manual... - Page 172 ExplodedView and Parts list PICKUP_HCF Parts List SA : SERVICEAVAILABLE, SNA : SERVICE not AVAILABLE 0)*_code Drawer# Description Q’ty Service Remark ELA UNIT-PICK UP FRAME-BASE_PICK UP 0604-001095 PHOTO-INTERRUPTER CBF HARNESS-SENSOR CBF HARNESS-ELEV MOTOR CBF HARNESS-COVER OPEN JC39-00477A HARNESS-MOTOR_SW GROUND-SHAFT PU ROLLER-HCF DRV BUSH-6_D(L5) 6044-000125...
-
Page 173: Drive_Hcf
ExplodedView and Parts list 5.32 DRIVE_HCF 5-75 Service Manual... - Page 174 ExplodedView and Parts list DRIVE_HCF Parts List SA : SERVICEAVAILABLE, SNA : SERVICE not AVAILABLE 0)*_code Drawer# Description Q’ty Service Remark ELA HOU-HCF DRIVE SUB-DRIVE SUB-CLUTCH 6003-000269 SCREW-TAPTITE (M3X6) 5-76 Service Manual...
-
Page 175: Sub-Drive_Hcf
ExplodedView and Parts list 5.33 SUB-DRIVE_HCF 5-77 Service Manual... - Page 176 ExplodedView and Parts list SUB-DRIVE_HCF Parts List SA : SERVICEAVAILABLE, SNA : SERVICE not AVAILABLE 0)*_code Drawer# Description Q’ty Service Remark SUB-DRIVE 6003-000301 SCREW-TAPTITE (M4X6) BRKT-DRIVE JC66-00965A GEAR-M_FD IDLE A SCF JC66-00966A GEAR-M_FD IDLE B SCF JC66-00967A GEAR-M_PU IDLE A SCF JC66-00968A GEAR-M_PU IDLE C SCF JC31-00090A...
-
Page 177: Clutch_Hcf
ExplodedView and Parts list 5.34 CLUTCH_HCF 5-79 Service Manual... - Page 178 ExplodedView and Parts list CLUTCH_HCF Parts List SA : SERVICEAVAILABLE, SNA : SERVICE not AVAILABLE 0)*_code Drawer# Description Q’ty Service Remark SUB-CLUTCH BRKT-CLUTCH GEAR-RETARD COUPLE SPRING-CS_COUPLE GEAR-RETARD 6044-000129 RING-E(ID6) BUSH-6_D(L5) JC66-00973A GEAR-M_PICKUP IDLE B SHAFT-EL24 CLUTCH 6044-000129 RING-E(ID6) CLUTCH-5K Z32(EL24) 5-80 Service Manual...
-
Page 179: System Diagram
System Diagram 6. System Diagram 6.1 Block Diagram Service Manual... -
Page 180: Connection Diagram
System Diagram 6.2 Connection Diagram 24VS 24VS CN12 CN19 DGND DGND MAIN BLDC DGND MOTOR nMAIN_MOT_ON MAIN BOARD MAIN_MOT_READY MAIN_MOT_CLK 24VS 24VS DGND DEV BLDC SMPS nDEV_MOT_READY DEV_MOT_CLK MOTOR nDEV_MOT_ON DEV_MOT_DIR 24VS DUPLEX SOLENOID FUSERLAMP_ON1 DPX_SOL FUSERLAMP_ON2 ZERO_CROSS_DET FUSER_RELAY_ON COVER FUSER_COVER 24V_EN 24VS... -
Page 181: Reference Information
Reference Information 7. Reference Information This chapter contains the tools list, list of abbreviations used in this manual, and a guide to the location space required when installing the printer. A definition of tests pages and Wireless Network information definition is also included. -
Page 182: Acronyms And Abbreviations
Reference Information 7.2 Acronyms and Abbreviations The table below explains abbreviations used in this service manual. The contents of this service manual are declared with abbreviations in many parts. Please refer to the table. Access Point Alternating Current Auto Power Control ASIC Application Specific Integrated Circuit ASSY... - Page 183 Reference Information integrated circuit Intelligent Drive electronics or Imbedded Drive Electronics IEEE Institute of Electrical and Electronics Engineers. Inc Isopropy Alcohol Images Per Minute local area network pound(s) Laser Beam Printer Liquid Crystal Display Light Emitting Diode Low temperature and low marshy place Laser Scanning Unit megabyte megahertz...
-
Page 184: Select A Location For The Printer
Reference Information 7.3 Select a location for the printer • Leave enough room to open the printer trays, covers, and allow for proper ventilation. (see diagram below) • Provide the proper environment : - A firm, level surface - Away from the direct airflow of air conditioners, heaters, or ventilators - Free of extreme fluctuations of temperature, sunlight, or humidity - Clean, dry, and free of dust Service Manual... -
Page 185: A4 Iso 19752 Standard Pattern
Reference Information 7.4 The Sample Pattern for the Test The sample pattern shown in below is the standard pattern used in the factory. The life of the toner cartridge and the printing speed are measured using the pattern shown below. (The image is 70% of the actual A4 size). -
Page 186: Installing Accessories
Additional printer memory is provided on a Dual In-line Memory Module (DIMM). The Dell 5330dn Mono Laser Printer has 256 MB of memory. It can be expanded to 768 MB. NOTE: Your printer supports only Dell DIMMs. Order Dell DIMMs online at www.dell.com. - Page 187 Reference Information 4. Locate the extra DIMM slot and align the notch on the DIMM with the groove at the DIMM slot, holding the DIMM by its edges. 5. Push the DIMM into the printer until it snaps into place. Ensure that the latches fit over the notches located on either side of the DIMM.
- Page 188 3. For Windows 2000, select Settings and then Printers. For Windows XP/2003, select Printers and Faxes. For Windows Vista, select Control Panel Hardware and Sound Printers. 4. Select the Dell 5330dn Mono Laser Printer PS printer. 5. Right-click the printer icon and select Properties. 6. Click Device Settings.
-
Page 189: Installing Usb Font Card
Once the card is installed, the printer automatically detects the additional fonts in the card. Please contact Dell sales team in your region for the USB font card. 1. Remove the new USB Font Card from its 4. -
Page 190: Installing Optional Tray
Reference Information 7.5.4 Installing Optional Tray You can increase the paper handling capacity of your printer by installing optional trays. Each tray holds 500 sheets of paper. 1. Power the printer off and unplug all cables from 4. Place the printer over the tray aligning the feet the printer. - Page 191 For Windows XP/2003, select Printers and Faxes. For Windows Vista, select Control Panel > Hardware and Sound > Printers. 3. Select the Dell 5330dn Mono Laser Printer. 4. Right-click the printer icon and select Properties. 5. Click the Printer tab and select your Optional Tray from the Optional Tray drop-down list.
- Page 192 For Windows XP/2003, select Printers and Faxes. For Windows Vista, select Control Panel > Hardware and Sound > Printers. 3. Select Dell 5330dn Mono Laser Printer PS. 4. Right-click the printer icon and select Properties. 5. Click the Device Settings tab and select Standard Capacity from the Tray 2 drop-down list.
-
Page 193: Installing High Capacity Feeder
Reference Information 7.5.5 Installing High Capacity Feeder To increase the paper handling capacity of your printer, install a High Capacity Feeder. A High Capacity Feeder holds 2100 sheets of plain paper. 1. Power off the printer and unplug all cables from the printer. 2. - Page 194 For Windows XP/2003, select Printers and Faxes. For Windows Vista, select Control Panel > Hardware and Sound > Printers. 3. Select the Dell 5330dn Mono Laser Printer. 4. Right-click the printer icon and select Properties. 5. Click the Printer tab and select your Optional Tray from the Optional Tray drop-down list.
- Page 195 For Windows XP/2003, select Printers and Faxes. For Windows Vista, select Control Panel > Hardware and Sound > Printers. 3. Select Dell 5330dn Mono Laser Printer PS. 4. Right-click the printer icon and select Properties. 5. Click the Device Settings tab and select High Capacity from the Tray 2 drop-down list.
-
Page 196: Using The Hard Disk
Reference Information 7.5.6 Using the Hard Disk Installing the hard disk allows the data from your computer to be sent to the printer’s hard disk print queue. This decreases the computer’s workload. You can also use various print features, such as storing a job in the hard disk, proofing a job, and printing private documents. - Page 197 3. For Windows XP/2003, select Printers and Faxes. For Windows Vista, select Control Panel > Hardware and Sound > Printers. Select the Dell 5330dn Mono Laser Printer. 4. Right-click the printer icon and select Properties. 5. Click the Printer tab, and check Optional Hard Disk Driver (HDD) 6.
-
Page 198: Printing With The Optional Hard Disk
Reference Information 7.5.6.3 Printing with the Optional Hard Disk After installing the optional hard disk, you can use the advanced printing features, such as storing or spooling a print job to the hard disk, proofing a job, and specifying the printing of a private job in the printer properties window. - Page 199 Reference Information Storing a job You can store jobs in the installed hard disk. 1. Open the file you want to store. 2. Select Print from the File menu. The Print window displays. 3. Click Properties. 4. Click the Other Options tab and click Job type. 5.
- Page 200 Reference Information Printing using the form files You can store up to 10 form files in the hard disk and have them printed with your document. First, you need to create a form file using the printer driver. 1. Press Menu. 2.
-
Page 201: Installing An Output Expander
Reference Information 7.5.7 Installing an Output Expander To increase the paper output capacity of your printer, install an Output Expander. An Output Expander holds 650 sheets of plain paper. 1. Power off the printer off and unplug all cables 4. Locate the Output Expander alignment pins and from the printer. - Page 202 Reference Information 6. Locate the slots on the Output Expander where 9. Flip the Output Expander stacker down. the stacker will be inserted. 7. Align the stacker, as shown. 10. Reconnect the power cord and cables to the printer and power on the printer. 8.
- Page 203 For Windows XP/2003, select Printers and Faxes. For Windows Vista, select Control Panel > Hardware and Sound > Printers. 3. Select the Dell 5330dn Mono Laser Printer. 4. Right-click the printer icon and select Properties. 5. Click the Printer tab and select Bin 1 from the Output Bin drop-down list.
- Page 204 For Windows XP/2003, select Printers and Faxes. For Windows Vista, select Control Panel > Hardware and Sound > Printers. 3. Select Dell 5330dn Mono Laser Printer PS. 4. Right-click the printer icon and select Properties. 5. Click the Device Settings tab and select Bin 1 from the Output Bin drop-down list.