D-Link mydlink DNR-312L User Manual
Network video recorder with hdmi
Hide thumbs
Also See for mydlink DNR-312L:
- User manual (97 pages) ,
- Quick installation manual (81 pages) ,
- Quick install manual (8 pages)

Related Manuals for D-Link mydlink DNR-312L


Summary of Contents for D-Link mydlink DNR-312L
-
Page 1: User Manual
Version 1.10 | 2014/08/12 User Manual mydlink Network Video Recorder with HDMI DNR-312L... - Page 2 Manual Overview D-Link reserves the right to revise this publication and to make changes in the content hereof without obligation to notify any person or organization of such revisions or changes. Information in this document may become obsolete as our services and websites develop and change.
-
Page 3: Table Of Contents
Setup Wizard - Mac ..............22 Camera Search ................62 Album .....................63 mydlink ..................23 Backup ....................64 mydlink Website ................23 Help ....................66 NVR Status ................24 Live Video ................25 Applications ................67 Playback .................26 D-Link NVR Search Utility - Windows ........67 D-Link DNR-312L User Manual... - Page 4 Table of Contents D-Link NVR Search Utility - Mac ..........69 Playback Manager ..............70 Remote Backup ................72 Verification Tool ................74 Troubleshooting ..............75 Technical Specifications ............76 D-Link DNR-312L User Manual...
-
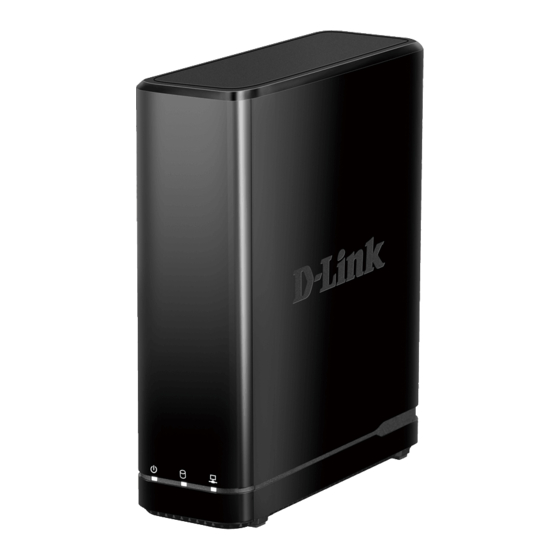
Page 5: Product Overview
Section 1 - Product Overview Product Overview Package Contents • D-Link DNR-312L mydlink Network Video Recorder with HDMI output • Ethernet Cable • Power Adapter • Manual and Software on CD • Quick Install Guide Note: Using a power supply with a different voltage than the one included with your product will cause damage and void the warranty for this product. -
Page 6: System Requirements
• One 3.5” SATA hard disk drive • Broadband Internet connection (for remote access) Network Requirements • Network camera(s) (refer to the D-Link website for a list of supported cameras) • 10/100/1000 Mbit Ethernet switch or router Computer with the following: Computer with Microsoft Windows 7, 8, Vista, or XP (with Service Pack 3);... -
Page 7: Introduction
Internet browser. The triplex function can keep recording video while you view live video or play back recordings at the same time. The NVR’s complete video management, display, and playback ability make it a convenient and reliable video recorder. D-Link DNR-312L User Manual... -
Page 8: Features
The SNMP consists of the following three key components: » Manager: Network-management station (NMS), a server which executes applications that monitor and control managed devices. D-Link DNR-312L User Manual... - Page 9 • The NVR can monitor trigger events from all cameras, such as from motion detection. These can be used to trigger e-mail notifications and recordings, all centrally handled by the NVR. Instant Live View • Full Screen: Enlarge the display to view full-screen live and recorded video views. D-Link DNR-312L User Manual...
- Page 10 • AVI Outputs: Raw video can be exported to AVI format. • Playback Speed Control: Playback speed control allows for fast forward or fast rewind, and step playback can display video one frame at a time. D-Link DNR-312L User Manual...
-
Page 11: Hardware Overview
A solid green light indicates that the device is connected to your network properly. This light will blink during Network LED data transfer. If the light is off, this indicates the device is not connected to your network. D-Link DNR-312L User Manual... -
Page 12: Rear Panel (Connections)
Gigabit Ethernet Port Connect the device to your router or switch using an Ethernet cable. HDMI Output Connect to your TV or monitor using an HDMI cable. Power Receptacle Connect the supplied power cord to the receptacle. D-Link DNR-312L User Manual... -
Page 13: Installation
Section 2 - Installation Installation NVR Software CD The Setup Wizard will walk you through installing and configuring your DNR-312L, including installing the hard drive and connecting it to your network. D-Link DNR-312L User Manual... -
Page 14: Setup Wizard - Windows
Note: The computer used to access the NVR must be on the same subnet as the NVR. If your network is using a DHCP server, the NVR will automatically be in the same subnet. D-Link DNR-312L User Manual... -
Page 15: Installing The Hard Drives
This step shows you how to open your NVR and install a hard drive. Open your NVR by sliding the cover back and pulling it out. Click Next to continue. Slide the hard drive into the open hard drive bay of your device. Click Next to continue. D-Link DNR-312L User Manual... - Page 16 Section 2 - Installation Use all six screws to attach the hard drive. Once the hard drive is installed, reattach the top cover by aligning the hooks to the notches clipping the cover into place. Click Next to continue. D-Link DNR-312L User Manual...
- Page 17 Click Next to continue. Connect one end of the Ethernet cable to the port at the back of the NVR and the other end of the Ethernet cable to your router. Click Next to continue. D-Link DNR-312L User Manual...
-
Page 18: Power And Device Selection
First, connect the power adapter to the power receptor on the back of the NVR. Press the power button to turn on the NVR. Click Next on the Setup Wizard to continue. Select your device from the device selection area. D-Link DNR-312L User Manual... -
Page 19: Admin Password
Admin ID is “admin” and the password is blank. Click Next to continue. In this step you can create a new password for the Admin username. It is strongly recommended you set a password. Click Next to continue. D-Link DNR-312L User Manual... -
Page 20: Set Up Your Hdd
Formatting the device will erase all data on the hard drive. Note: Select Skip if you are unsure of which settings to choose. Click Yes to format the hard drive. Warning: all data on the NVR will be erased. Click Next to continue. D-Link DNR-312L User Manual... -
Page 21: Set Up Your Internet Connection
If you don’t have the Internet connection information at this time, or you don’t want to connect to the Internet, the Setup Wizard will guide you to go through the Local Access process later. Click Next to continue. D-Link DNR-312L User Manual... -
Page 22: Configure Snmp
Section 2 - Installation Configure SNMP This step will allow the user to set up the SNMP parameters for NMS monitoring DNR-312L status. Click Next to continue. D-Link DNR-312L User Manual... -
Page 23: Adding Your Nvr To A Mydlink Account
Next to continue, otherwise select No, I need to sign up for a new account or I don’t want to sign up right now and follow the instructions. Click Next to continue. D-Link DNR-312L User Manual... -
Page 24: Search For Cameras
Click Next to continue. You can preview the discovered cameras by clicking on the green camera icon, or click Next to continue D-Link DNR-312L User Manual... - Page 25 NVR settings. Your device is now installed and ready for use. Make a note of the details presented and click on Go to NVR to log in to the NVR for further configuration, or click Finish. D-Link DNR-312L User Manual...
-
Page 26: Setup Wizard - Mac
NVR. Note: The computer used to access the NVR must be on the same subnet as the NVR. If your network is using a DHCP server, the NVR will automatically be in the same subnet. D-Link DNR-312L User Manual... -
Page 27: Mydlink
To connect to your NVR, click on the Connect button and provide your password to complete the login process. After you have connected to the NVR, you will be taken to the Live Video page. (Refer to”Live Video” on page 38) D-Link DNR-312L User Manual... -
Page 28: Nvr Status
• Check to make sure that the LED on your NVR is lit solid green. If you still cannot access your NVR, reset your NVR and run the NVR Setup Wizard again from the CD-ROM included in your package. D-Link DNR-312L User Manual... -
Page 29: Live Video
Use this control to view video in its native resolution. Record Use this control to start/stop recording. Save to Image Use this option to save a snapshot image. Glance Use this option to toggle glance mode. D-Link DNR-312L User Manual... -
Page 30: Playback
Zoom Control Use the + and - buttons to zoom in or out. Actual Size Use this control to view video in its native resolution. Save to Image Use this option to save a snapshot image. D-Link DNR-312L User Manual... -
Page 31: Open Recording
Available recordings are shown in the timeline. Blue bars indicate an Available Recordings event was recorded. Red bars indicate the camera is set to always record. Selected Period Click within the timeline to select a recording period. D-Link DNR-312L User Manual... -
Page 32: Status
Unused Space: This shows the amount of space available for recording on the storage device attached to the HDD or USB Port. Status: This shows if the storage device attached to the HDD or USB port is currently being recorded on. D-Link DNR-312L User Manual... -
Page 33: Nvr Info
NVR activated on: Displays the time and date that your device was added to mydlink. Advanced Setting: This section takes you to the login page for the NVR’s Web GUI Interface. After you log in, you can adjust advanced settings for the NVR. D-Link DNR-312L User Manual... -
Page 34: Mydlink View - Nvr App
“Adding Your NVR to a mydlink Account” on page 19 to learn how to add the NVR to your mydlink account.) Select your DNR- 312L from the device list to access the live video from the connected cameras. Now you can remotely access the live video, playback recorded videos, and manually enable or disable recording. D-Link DNR-312L User Manual... -
Page 35: First Use - Select Your Device
After starting the mydlink View - NVR app, your DNR-312L will be displayed in the My Device list. The app will connect to your DNR-312L, and you can then view live video and playback from your recordings archive via your device. D-Link DNR-312L User Manual... -
Page 36: Live View
Click on your DNR-312L to enter live the video view. Double-tap on one of the channels to start a single-channel live video. Double-tap again to return back to the grid view. D-Link DNR-312L User Manual... - Page 37 Use a two finger tap on the video stream again to disable the PTZ control panel. Note: The PTZ control function must be enabled on the camera connected to the DNR-312L in order for mydlink View-NVR to control the PTZ function. See “Live Video” on page 37 for more information. D-Link DNR-312L User Manual...
- Page 38 Complete the To, Cc/Bcc fields as required and tap Send to send the e-mail with snapshot attached or tap Cancel to cancel the operation. D-Link DNR-312L User Manual...
-
Page 39: Video Playback
) while in single channel mode to bring up the playback selection panel. Use the playback selection panel to scroll through your video recordings archive. Scroll to the date and time you wish to play back, and tap Play. D-Link DNR-312L User Manual... -
Page 40: Video Playback Control
Step forward for 1 second ( Use the speed panel ( ) to control the speed of video playback from x1 through x32 speed. Note: The quality of display performance will vary according to network bandwidth availability. D-Link DNR-312L User Manual... -
Page 41: Configuration
LIVE VIDEO - Shows the live video of network cameras and controls PTZ functions. PLAYBACK - Displays recorded video and exports snapshots or video. LOG OUT -Logs out of the NVR SHUT DOWN - Shuts down the NVR. D-Link DNR-312L User Manual... -
Page 42: Live Video
6. Right-clicking on the video will show the option to Full Screen. Press the ESC button on the keyboard to return to normal display. 7. Swap: Right-click on the video and select Swap to display a different video channel. D-Link DNR-312L User Manual... - Page 43 Actual Size: Switch the video to the actual size or fill the window. OSD: Display the information on the video. Snapshot: Click to take a snapshot and save it to an album Manual record: Click to enable or disable manual recording D-Link DNR-312L User Manual...
- Page 44 This function is only available with cameras that support the PTZ function. System Info: Displays Storage Information, such as HDD and USB drive information. Log: Displays the System, NVR, and Event logs. D-Link DNR-312L User Manual...
- Page 45 Scan Camera: Click Scan Camera and the NVR will use Admin as the user name and a blank password to automatically add any network cameras from the same local area network. D-Link DNR-312L User Manual...
-
Page 46: Playback
Click to increase or decrease the playback speed. Click the Cue In or Cue Out button to set the period Cue in/Cue Out for Save Video. Reverse/Step Click to pause the playback and move to next frame Forward or last frame. D-Link DNR-312L User Manual... -
Page 47: Menu Bar
This will let you back up the recordings stored on Backup the NVR to a USB drive, Samba server, or FTP server. Refer to “Backup” on page 64. This shows more information about using the NVR. Help Refer to “Help” on page 66. D-Link DNR-312L User Manual... -
Page 48: Setup Wizard
Section 4 - Configuration Setup Wizard The Setup Wizard, helps you set up and configure the basic settings of the NVR. Select the language you want to use, then click the Next button to start the wizard. D-Link DNR-312L User Manual... -
Page 49: Setup
Enable the Bonjour service to allow users to discover the DNR-312L with Apple devices. Enable Bonjour: Enter the name of the device that will be used to identify the DNR-312L when using Apple devices. Bonjour Name: D-Link DNR-312L User Manual... - Page 50 Select a dynamic DNS service provider from the pull-down list. Address: Host Enter your host name. For example: myhost.mydomain.net. Name: Username: Enter the username for your dynamic DNS account. Password: Enter the password for your dynamic DNS account. D-Link DNR-312L User Manual...
- Page 51 Note: Make sure you enter the IP address of the PC you use to access the NVR before enabling this option, or you may not be able to access it afterwards. Enable Enabling this will block all IP addresses in the blocked list from Blocked List: accessing your NVR. D-Link DNR-312L User Manual...
-
Page 52: Camera
Select the audio format. Enable Turn the microphone on and off. Microphone: Audio in Gain Select the audio in gain level. Level: Enable Enable audio out on the camera (if supported). Speaker: Audio Out Adjust the volume. Volume Level: D-Link DNR-312L User Manual... - Page 53 Section 4 - Configuration The Image tab has the following settings: Brightness: Adjust the brightness. Contrast: Adjust the contrast. Saturation: Adjust the saturation. Sharpness: Adjust the sharpness. D-Link DNR-312L User Manual...
-
Page 54: Schedule
Select a camera from the camera list, and click Delete Schedule to Schedule: delete the schedule for the selected camera. Copy Select a camera from the camera list, and click Copy Schedule to Schedule: create a duplicate schedule. D-Link DNR-312L User Manual... - Page 55 • Alternatively, you can drag the time bar to change the recording period. The red bar represents the Continuous Recording feature and the blue bar represents the Record on motion feature. D-Link DNR-312L User Manual...
-
Page 56: Event
Click this button and the system will send a test mail to verify whether your settings are correct. Adding Contacts Step 1: Insert the name of a new contact. Step 2: Insert the e-mail address of this new contact. Step 3: Click Add. D-Link DNR-312L User Manual... - Page 57 NVR. The maximum file size is 20K Bytes in BMP and JPG file format. You can then drag and drop camera icons onto the E-Map indicating camera placement. Edit: Upload your graphic map. Delete: Delete a camera icon from the map. D-Link DNR-312L User Manual...
-
Page 58: Event Settings
Buzzer will go off as an alert. E-Map: Select this option to update the camera status on the E-Map. E-Mail: Select this option to have e-mail sent to a specified SMTP account after receiving a camera event. D-Link DNR-312L User Manual... - Page 59 Displays the system log information. NVR Log: Displays the NVR log information such as when recording stops or the NVR system starts. NVR Event Displays the event log information such as motion detection or if a Log: camera is disconnected. D-Link DNR-312L User Manual...
-
Page 60: Maintenance
Displays the date. Date: Displays the bitrate. Bitrate: Displays the size in pixels. Size: Change the color of camera’s OSD. Color: Displays the camera number. Camera Number: Time: Displays the time. Frame Rate: Displays the frame rate. D-Link DNR-312L User Manual... -
Page 61: User Account
If the administrator password is lost, you may hold the reset button on the rear panel of the device to reset the NVR to factory defaults. Note: Resetting the device will erase all previously saved settings. D-Link DNR-312L User Manual... - Page 62 Enabling this option will allow the menu to auto-hide when not in use. Menu Auto Hide: Enable Auto Enabling this option will cause the system to automatically log in with the specified user account. Log in D-Link DNR-312L User Manual...
-
Page 63: Time And Date
Check the box to enable daylight savings time. You can select enable Saving Time: auto daylight saving, or manual daylight saving to manually set the month, week, day, hour and minute or when daylight saving starts. D-Link DNR-312L User Manual... -
Page 64: Firmware Upgrade
NVR’s USB port. Click Browse to search the USB drive for the firmware update file. Click Update to upgrade. The new version number will be displayed. You can check for firmware updates on the D-Link Support Page. D-Link DNR-312L User Manual... -
Page 65: Hard Drive
USB drive. Formatting the HDD and USB drive will erase all data on the drive. Note: Do not eject the USB drive without clicking eject first, or the files on the USB drive may become damaged. D-Link DNR-312L User Manual... -
Page 66: Camera Search
Step 4: Click Add to add the selected camera. Step 5: After clicking Add, the updated information will be displayed in the camera list. Repeat steps 2 through 5 to add other cameras to your list. D-Link DNR-312L User Manual... -
Page 67: Album
Section 4 - Configuration Album If you have taken screenshots from the live page, you can view them in the Album. You can also export or delete screenshots from this page. D-Link DNR-312L User Manual... -
Page 68: Backup
You can select whether to back up to a USB drive, a Samba server, or User Name: an FTP site. Start/Stop: Click Start to start a manual backup using the settings specified, or click Stop to stop a currently running backup. D-Link DNR-312L User Manual... - Page 69 Enter the folder path for the FTP server that you want to back up your recordings to. User Name: Enter the username for your FTP server account. Password: Enter the password for your FTP server account. D-Link DNR-312L User Manual...
-
Page 70: Help
Section 4 - Configuration Help The NVR Help page provides a list of support topics. D-Link DNR-312L User Manual... -
Page 71: Applications
NVR IP address, you can use the NVR Search Utility provided on the product CD to locate the device on your network and make any needed changes. Network The D-Link NVR Search Utility displays any NVR devices it Video detects on the network. - Page 72 Note: The computer used to access the NVR web-based configuration manager must be on the same subnet as the NVR. If your network is using a DHCP server and the computer receives IP settings from the DHCP server, the NVR will automatically be in the same subnet. D-Link DNR-312L User Manual...
-
Page 73: D-Link Nvr Search Utility - Mac
If you want to change the IP address before logging in or are unable to connect to the NVR IP address, you can use the NVR Search Utility provided on the product CD to locate the device on your network and make any needed changes. Network The D-Link NVR Search Utility displays any NVR devices it detects on Video the network. -
Page 74: Playback Manager
Select the date you would like to find the video records of. Highlight the video records that you would like to review. Click the OK button. Play Stop Select a camera/video and click this button to play/stop/pause a particular channel. Step forward Step backward D-Link DNR-312L User Manual... - Page 75 Section 5 - Applications Fast forward Rewind Set the start point of the export file. Set the end point of the export file. D-Link DNR-312L User Manual...
-
Page 76: Remote Backup
Section 5 - Applications Remote Backup You can run the remote backup application to back up your files. Run the application by going to Start > Programs > D-Link > DNR-312L > Remote Backup. Step 1: Input the IP address of your unit. - Page 77 Note: The computer used to access the remote backup application must be on the same subnet as the NVR. If your network is using a DHCP server and the computer receives IP settings from the DHCP server, the NVR will automatically be in the same subnet. D-Link DNR-312L User Manual...
-
Page 78: Verification Tool
Choose a folder with multiple files to list for verification. Remove File: Remove indicated file(s) from list. Select All: Select all files in the list for verification. Note: Choose the file type first before selecting files. D-Link DNR-312L User Manual... -
Page 79: Troubleshooting
Step 1: Open Internet Explorer and connect to your NVR. Step 2: The browser will ask whether to install ActiveX. Step 3: Click the upper bar to begin the installation process. Step 4: Click Install to complete the process. D-Link DNR-312L User Manual... -
Page 80: Technical Specifications
+ IE & NVR client support 9 channel playback + Digital zoom in to specific area CAMERAS SUPPORT + Supports all D-Link network cameras. Includes support for auto-discovery REMOTE PLAYBACK CONTROL and up to 3 megapixel resolution. + Playback with normal, fast forward/rewind, and step forward/rewind... -
Page 81: Hardware Specifications
+ DC-in jack + DNS Client + USB port for mouse device and USB flash drive + DHCP Server, Client + 3.5mm Audio in/out ports + DDNS Client (D-Link) + SMTP Client POWER ADAPTER + HTTP Server + DC 12 V/3 A...