Table of Contents
Advertisement
Quick Links
Advertisement
Table of Contents

Related Manuals for Bosch DIVAR IP 6000 1U


Summary of Contents for Bosch DIVAR IP 6000 1U
- Page 1 DIVAR IP 6000 1U DIP-6040-00N, DIP-6042-4HD, DIP-6043-4HD Installation manual...
-
Page 3: Table Of Contents
DIVAR IP 6000 1U Table of Contents | en Table of contents Safety precaution General safety precautions Electrical safety precautions ESD precautions Operating precautions Important notices FCC and ICES compliance System overview Chassis features Chassis components 2.2.1 Chassis 2.2.2 Backplane 2.2.3... - Page 4 | Table of Contents DIVAR IP 6000 1U 4.3.6 Installing the chassis into a Telco rack Turning on the system Appendix Motherboard 5.1.1 Motherboard layout 5.1.2 Motherboard component overview 5.1.3 Motherboard features 5.1.4 Block diagram Chipset overview PC health monitoring...
-
Page 5: Safety Precaution
DIVAR IP 6000 1U Safety precaution | en Safety precaution Observe the safety precautions in this chapter. General safety precautions Follow these rules to ensure general safety: – Keep the area around the system clean and free of clutter. –... -
Page 6: Electrical Safety Precautions
Installation should only be carried out by qualified customer service personnel in accordance with the applicable electrical regulations. Disposal Your Bosch product has been developed and manufactured using high- quality materials and components that can be reused. This symbol means that electronic and electrical devices that have reached the end of their working life must be disposed of separately from household waste. -
Page 7: Esd Precautions
DIVAR IP 6000 1U Safety precaution | en – Use only one hand when working with powered-on electrical equipment. This is to avoid making a complete circuit, which will cause electrical shock. Use extreme caution when using metal tools, which can easily damage any electrical components or circuit boards they come into contact with. -
Page 8: Important Notices
| Safety precaution DIVAR IP 6000 1U Note: Please handle used batteries carefully. Do not damage the battery in any way. A damaged battery may release hazardous materials into the environment. Do not discard a used battery in the garbage or a public landfill. Please comply with the regulations set up by your local hazardous waste management agency to dispose of your used battery properly. -
Page 9: System Overview
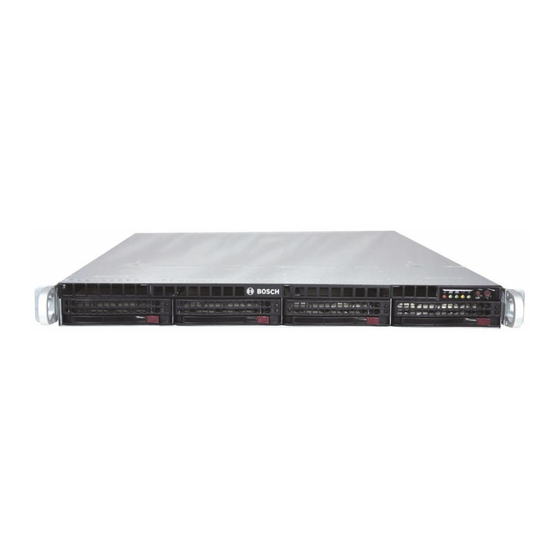
IP recording appliance for IT-minded customers seeking for a state-of-the-art “second generation” NVR recording solution. The DIVAR IP 6000 1U chassis features a unique and highly-optimized design. The chassis is equipped with high efficiency power supply. -
Page 10: Backplane
| System overview DIVAR IP 6000 1U 2.2.2 Backplane Each chassis comes with a 1U backplane. The backplane accepts SAS/SATA or SCSI hard drives. Warning! Use caution when servicing and working around the backplane. Hazardous voltage or energy is present on the backplane when the system is operating. Do not touch the backplane with any metal objects and make sure no ribbon cables touch the backplane. -
Page 11: Control Panel Buttons
DIVAR IP 6000 1U System overview | en 2.3.1 Control panel buttons The chassis includes two or three push-buttons located on the front panel: a reset button, a power on/off button, and a UID button. – Reset: The reset button is used to reboot the system. -
Page 12: Drive Carrier Leds
| System overview DIVAR IP 6000 1U – NiC2: A flashing LED indicates network activity on GLAN2. – NIC1: A flashing LED indicates network activity on GLAN1. – HDD: A flashing LED indicates IDE channel activity in the SAS/SATA drive, SCSI drive, and/or DVD-ROM drive activity. -
Page 13: Overheating
DIVAR IP 6000 1U System overview | en 2.3.5 Overheating The section lists actions that should be taken in the unlikely event the server overheats. Overheat temperature setting Some backplanes allow the overheat temperature to be set at 45, 50, or 55 by changing a jumper setting. -
Page 14: Chassis Setup And Maintenance
| Chassis setup and maintenance DIVAR IP 6000 1U Chassis setup and maintenance This chapter covers the steps required to install components and perform maintenance on the chassis. Caution! Review the warnings and precautions listed in the manual before setting up or servicing this chassis. -
Page 15: Installing A Hard Drive
DIVAR IP 6000 1U Chassis setup and maintenance | en Drive carrier Dummy drive To remove hard drive trays from the chassis: Press the release button on the drive carrier. This extends the drive carrier handle. Use the handle to pull the drive out of the chassis. - Page 16 | Chassis setup and maintenance DIVAR IP 6000 1U Remove the dummy drive from the carrier. Install a new drive into the carrier with the printed circuit board side facing down so that the mounting holes align with those in the carrier.
-
Page 17: Installing A Dvd-Rom Or Floppy Drive
Chassis setup and maintenance | en Notice! We recommend using the respective Bosch hard disk drives. The hard disk drives as one of the critical component are carefully selected by Bosch based on available failure rates. HDD – not delivered from Bosch – are not supported. Information on supported HDDs can be found in the datasheet in the Bosch Online Product Catalog. -
Page 18: Installing The Motherboard
| Chassis setup and maintenance DIVAR IP 6000 1U Installing the motherboard Motherboard problems will be handled by trained support people only. Installing the air shroud Air shrouds concentrate airflow to maximize fan efficiency. The air shroud does not require screws to set up. -
Page 19: System Fans
DIVAR IP 6000 1U Chassis setup and maintenance | en Do not operate the system without drives or drive trays in the drive bays. Use only recommended material. Make sure no wires or foreign objects obstruct air flow through the chassis. Pull all excess cabling out of the airflow path or use shorter cables. -
Page 20: Power Supply
If the power supply unit fails, the system will not shut down but you will need to replace the unit. The power supply can be replaced without turning off the system if a redundant power supply is available. Replacement units can be ordered directly from Bosch RMA desk. 2014.01 | V2 | DOC Installation manual... - Page 21 DIVAR IP 6000 1U Chassis setup and maintenance | en Release Tab To replace the power supply: Turn off the unit and unplug the power cord. If your chassis includes a redundant power supply (at least two power modules), you can leave the unit running and remove only one power supply.
-
Page 22: Rack Installation
You should inspect the box the chassis was shipped in and note if it was damaged in any way. If the chassis itself shows damage, file a damage claim with the carrier who delivered it and notify the respective Bosch RMA desk. You will also need it placed near at least one grounded power outlet. -
Page 23: General System Precautions
DIVAR IP 6000 1U Rack installation | en – If the rack is provided with stabilizing devices, install the stabilizers before mounting or servicing the unit in the rack. – This unit should be mounted at the bottom of the rack if it is the only unit in the rack. -
Page 24: Identifying The Sections Of The Rack Rails
| Rack installation DIVAR IP 6000 1U Notice! This rail will fit a rack between 26" and 33.5" deep. 4.3.1 Identifying the sections of the rack rails The chassis package includes two rail assemblies in the rack mounting kit. Each assembly consists of two sections: –... -
Page 25: Assembling The Outer Rails
DIVAR IP 6000 1U Rack installation | en To install the inner rails: Place the inner rail extensions on the side of the chassis aligning the hooks of the chassis with the rail extension holes. Make sure the extension faces "outward" just like the pre- attached inner rail. - Page 26 | Rack installation DIVAR IP 6000 1U To install the outer rails to the rack Attach the longer section of the outer rail to the outside of the shorter section of the outer rail. You must align the pins with the slides. Both ends of the outer rail must face the same direction in order to be secured to the rack.
-
Page 27: Installing The Chassis Into The Rack
DIVAR IP 6000 1U Rack installation | en 4.3.5 Installing the chassis into the rack Inner rail Outer rails Rail extension To install the chassis into a rack Confirm that chassis includes the inner rails and rail extensions. Also, confirm that the outer rails are installed on the rack. -
Page 28: Installing The Chassis Into A Telco Rack
| Rack installation DIVAR IP 6000 1U 4.3.6 Installing the chassis into a Telco rack To install the chassis into a Telco type rack, use two L-shaped brackets on either side of the chassis (four in total). First, determine how far the chassis will extend out the front of the rack. -
Page 29: Appendix
DIVAR IP 6000 1U Appendix | en Appendix This chapter gives information for supporting and troubleshooting. Motherboard All graphics shown in this chapter were based upon the latest PCB Revision available at the time of publishing of the manual. The motherboard you've received can differ from the graphics shown in this chapter. -
Page 30: Motherboard Component Overview
| Appendix DIVAR IP 6000 1U 5.1.2 Motherboard component overview Figure 5.2: Motherboard – component overview X8SIL/X8SIL-F/X8SIL-V jumpers Number Jumper Description Default JPUSB1 BP USB0/1 Wake-up Pins 1-2 (Enabled) JBT1 CMOS Clear JPES Energy Saving Feature Pins 2-3 (Disabled) - Page 31 DIVAR IP 6000 1U Appendix | en X8SIL/X8SIL-F/X8SIL-V headers/connectors Number Connector Description 4,16 COM1/COM2 COM1/2 Serial connection headers 33,32,27,23,7 Fans 1~5 System/CPU fan headers Floppy Floppy Disk Drive connector Alarm Reset Speaker header (Pins 3/4: Internal, 1~4:External) Front Panel Control header...
-
Page 32: Motherboard Features
| Appendix DIVAR IP 6000 1U 5.1.3 Motherboard features Single Intel Xeon 3400 series processor in an LGA1156 socket. Memory Four (4) 240-pin, DDR3 SDRAM DIMM sockets with support for up to 16GB of UDIMM or up to 32GB of RDIMM memory (ECC/ DDR3 1333/1066/800 MHz memory only.) - Page 33 DIVAR IP 6000 1U Appendix | en Two (2) USB ports on the rear IO panel Four (4) USB header connectors for front access One (1) Type A internal connector Keyboard/Mouse PS/2 Keyboard/Mouse ports on the I/O backplane Serial (COM) Ports...
-
Page 34: Block Diagram
| Appendix DIVAR IP 6000 1U Drivers and software for Intel 3400/3420 chipset utilities Other ROHS 6/6 (Full Compliance, Lead Free) Dimensions Micro ATX form factor, 9.6" x 9.6" 5.1.4 Block diagram The following graphic shows the block diagram of the motherboard. -
Page 35: Pc Health Monitoring
DIVAR IP 6000 1U Appendix | en better performance than comparable systems. The X8SIL/X8SIL-F/X8SIL-V also features a TCO timer (to enable the system to recover from a software/hardware lock), ECC Error Reporting, Function Disable and Intruder Detect. Intel 3400/3420 chipset features –... -
Page 36: Power Supply
| Appendix DIVAR IP 6000 1U the system to keep the required circuitry "alive". In case the system malfunctions and you want to turn off the power, just press and hold the power button for 4 seconds. The power will turn off and no power will be provided to the motherboard. -
Page 37: Overview Of The Nuvoton Bmc Controller
DIVAR IP 6000 1U Appendix | en For the X8SIL/X8SIL-F/X8SIL-V motherboard, iSCSI is supported on LAN 1. This can be enabled through the BIOS: Advanced => PCI/PnP Configuration => Onboard LAN1 Option ROM Select. Overview of the Nuvoton BMC controller... -
Page 38: Multiple Disks Failed - Theory
| Appendix DIVAR IP 6000 1U Basically, the RAID controller writes the raidconfiguration - information (COD = configuration- on-disk) in an only field on each disk managed by the controller. The data area of a disk is never used by this, no matter, how often you write and delete the RAID configuration. "New"... - Page 39 DIVAR IP 6000 1U Appendix | en - 2 disks missing - 2 disks "foreign configuration" or "unconfigured good" The rebuild only could start, when the other three disks were online before: the rebuild disk is "first fail", degraded RAID was rebuilding. "Foreign" disk is the "second fail" disk, one of the disks, from which the parity data was copied to the rebuilding disk before the crash.
- Page 40 | Appendix DIVAR IP 6000 1U In this example, we choose a start sequence 5800 (from 6412) and all 612 events left. We find a timestamp, that PD (Physical Drive) 6 was removed. PD 4 stops rebuilding. Finally, PD 4 is also removed.
- Page 41 DIVAR IP 6000 1U Appendix | en How to use the MegaCLI Command-Line Utility Use a bootable DOS USB stick with XMS manager "himem.sys" and start the MegaCLI.exe. Please see the command reference in MegaCLI Commandline Utility, page 47. The whole amount of log events can be seen with MegaCLI –AdpAliLog –aAll > evt.txt; but it takes a few minutes until the large file is written and it is too much information.
- Page 42 | Appendix DIVAR IP 6000 1U seqNum: 0x00001893 Time: Mon Jul 19 13:52:41 2010 Code: 0x00000065 Class: 2 Locale: 0x02 Event Description: Rebuild failed on PD 04(e0xfc/s4) due to source drive error Event Data: =========== Device ID: 4 Enclosure Index: 252...
-
Page 43: Multiple Disks Failed - Practice
DIVAR IP 6000 1U Appendix | en Adapter: 0 - Number of Events : 288 Adapter: 0 - Number of Events : 288 seqNum: 0x0000188f seqNum: 0x00001891 Time: Mon Jul 19 13:52:41 2010 Time: Mon Jul 19 13:52:41 2010 Code: 0x000000fc... - Page 44 | Appendix DIVAR IP 6000 1U All disks are seen, but configuration is marked as not importable; click Cancel and view Configuration 2. It is the same; this means, a complex situation requires manual interaction. Click to clear all configurations, ignore the warning.
- Page 45 DIVAR IP 6000 1U Appendix | en Use the event viewer or MegaCLI to identify the "first failed" disk. In this example, disk in Slot 4 was first fail, Slot 7 second fail. Click on "second fail" PD7 in the Logical View and you get in the Physical drive menu.
-
Page 46: Foreign Configuration Disk Appears In The Windows Gui After Booting
| Appendix DIVAR IP 6000 1U Now in logical view we see disk online and a degraded RAID. Click on disk 4 to get in the PD menu. Click on correct row, on "Global" or "dedicated Hot Spare" and on "go". -
Page 47: Megacli Commandline Utility
DIVAR IP 6000 1U Appendix | en An unconfigured good drive is displayed. Right-click this drive and choose a hotspare type. You see the rebuild is starting at once. 5.9.4 MegaCLI Commandline Utility [-Silent] [-AppLogFile filename] [-NoLog] [-page [N]] [-] is optional. - Page 48 | Appendix DIVAR IP 6000 1U MegaCli -v MegaCli -help|-h|? MegaCli -adpCount MegaCli -AdpSetProp {CacheFlushInterval -val} | { RebuildRate -val} | {PatrolReadRate -val} | {BgiRate -val} | {CCRate -val} | {ReconRate -val} | {SpinupDriveCount -val} | {SpinupDelay -val} | {CoercionMode -val} | {ClusterEnable -val} | {PredFailPollInterval -val}...
- Page 49 DIVAR IP 6000 1U Appendix | en | BootWithPinnedCache | AutoEnhancedImportDsply | AutoDetectBackPlaneDsbl | CopyBackDsbl | LoadBalanceMode | UseFDEOnlyEncrypt | WBSupport | EnableJBOD | DsblCacheBypass | ExposeEnclDevicesEnbl | DsblSpinDownHsp | SpinDownTime | PrCorrectUncfgdAreas -aN|-a0,1,2|-aALL | DsblSpinDownHSP -aN|-a0,1,2|-aALL MegaCli -AdpAllInfo -aN|-a0,1,2|-aALL...
- Page 50 | Appendix DIVAR IP 6000 1U -Lx|-L0,1,2|-Lall -aN|-a0,1,2|-aALL MegaCli -LDGetProp -Cache | -Access | -Name | -DskCache -Lx|-L0,1,2|-LALL -aN|-a0,1,2|-aALL MegaCli -getLdExpansionInfo -Lx|-L0,1,2|-Lall -aN|-a0,1,2|-aALL MegaCli -LdExpansion -pN -dontExpandArray -Lx|-L0,1,2|-Lall -aN|-a0,1,2|-aALL MegaCli -LDInit {-Start [-full]}|-Abort|-ShowProg|-ProgDsply -Lx|-L0,1,2|-LALL -aN|-a0,1,2|-aALL MegaCli -LDCC {-Start [-force]}|-Abort|-ShowProg|-ProgDsply -Lx|-L0,1,2|-LALL -aN|-a0,1,2|-...
- Page 51 DIVAR IP 6000 1U Appendix | en MegaCli -AdpEventLog -GetSinceReboot {-info -warning -critical -fatal} {-f <fileName>} -aN|- a0,1,2|-aALL MegaCli -AdpEventLog -IncludeDeleted {-info -warning -critical -fatal} {-f <fileName>} -aN|- a0,1,2|-aALL MegaCli -AdpEventLog -GetLatest n {-info -warning -critical -fatal} {-f <fileName>} -aN|-a0,1,2|- aALL MegaCli -AdpEventLog -GetCCIncon -f <fileName>...
- Page 52 | Appendix DIVAR IP 6000 1U MegaCli -AdpInfoCompare {-checkFw <string> | -checkID -hex | -checkBatt -val | -checkDimm - val} -aN|-a0,1,2|-aALL MegaCli -adpFwDump MegaCli -AdpNameRtn -aN|-a0,1,2|-aALL sssssssssss - It must be between eight and thirty-two characters and contain at least one number, one lowercase letter, one uppercase letter and one non-alphanumeric character.
- Page 54 Bosch Sicherheitssysteme GmbH Robert-Bosch-Ring 5 85630 Grasbrunn Germany www.boschsecurity.com © Bosch Sicherheitssysteme GmbH, 2014...