Advertisement
Quick Links
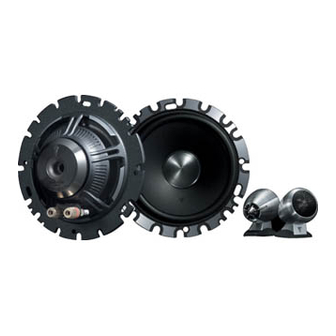
SEPARATE CUSTOM FIT SPEAKER
K-ES01
INSTRUCTION MANUAL
KENWOOD CORPORATION
B54-1210-20 (FHP)
Thank you for purchasing this product.
Please read this instruction manual thoroughly before installing speakers, and
install speakers correctly.
Tools required for installation
Phillips screwdriver, Flat-head screwdriver, Clip driver, Pliers, Nippers, Wrench,
Electric hand drill and bits, Cutting knife, Electrical tape, Scissors, Felt-tip pen
Safety caution
Be sure to observe the warning and caution provided below as they are critical for your safety.
The meanings of the symbols are as follows.
These indicate what must not be done.
(Inhibition marks)
Installation cautions
If the product is handled erroneously by ignoring the instruction of this mark,
WARNING
fatal hazard or serious injury on human body may result.
Work depending to instruction manual.
Remove battery connection before work.
When installing or wiring the product,
Before installing or wiring anything, be
be sure to follow strictly the instruction
sure to remove the cable from the nega-
and installation manuals of the product.
tive terminal of the battery.
(If the instructions are not observed
(Otherwise a shorting accident* may
strictly, the product may be displaced
occur, which could result in fire acci-
and hit you during braking and there
dent.)
may also be a risk of electric shock or
fire hazard.)
Remove negative terminal.
Please read thoroughly.
Be careful not to damage the tank and
Do not cut insulation tube in the middle
electric wiring.
of a power cord.
In case the product is installed by mak-
Do not use power cord for other prod-
ing holes on the vehicle chassis, be
ucts by cutting insulation tube in the
careful never to damage the gasoline
middle of a power cord.
tank, piping, electric wiring or other
(Otherwise a shorting accident* may
parts of the vehicle.
occur, which could result in fire acci-
(Otherwise fire hazard may result.)
dent.)
If the product is handled erroneously
CAUTION
by ignoring the instruction of this
mark, injury on human body, or dam-
age of product may result.
Do not pull the cord.
When you remove the connector, please
remove and lock it with the connector
main part, without pulling the cord.
Otherwise disconnection of a cord and
poor contact may result.
* Short-circuiting and shorting accident
Short-circuiting refers to the direct connection between the positive and negative poles of electricity. This may occur when a stripped cord (electric wiring) comes in
contact with another cord or metallic part of vehicle. Short-circuiting may produce spark, which may be caught by surrounding objects and result in fire hazard.
Cautions on use
Operate the car audio after stopping
Do not use loud volume.
the vehicle.
During driving, do not turn the listening vol-
ume too high at which you cannot hear the
The car audio system should be operated after
sound outside the vehicle.
having stopped the vehicle in a safe place.
(You may be unable to notice what is happen-
(Operating it while driving a vehicle may lead
ing outside the vehicle, and a traffic accident
to traffic accident.)
may result. )
Immediately stop operation in case of abnormality.
Should any of the following abnormal phenom-
• The product starts smoking.
ena is observed, immediately stop the use and
• Abnormal noise or odor is produced.
operation of the product.
(If the use of the product is continued, fire haz-
• No sound output.
ard or other accident may result.)
• Water is spilt on the product.
In this case, immediately switch the power off,
• A foreign object such as metal or a piece of
check safety and consult your dealer or nearest
paper gets inside the product.
KENWOOD service agent or distributor.
• Please install depending to this instruction manual. Please keep it carefully after fin-
ishing reading this. It is better to keep this manual together with the owner's manual
of your vehicle.
• For inquiries on installation, please consult your dealer or nearest service agent.
• Refer to guidance on attached sheet for inquiry about the product to our company.
Caution
1. When installing in some types of a car, it is necessary to remove the seat belt. It is
necessary to mount the bolt which fixes a seat belt by the specified force. For
inquiries on torque, please consult your dealer or your car shop.
2. When installing in some types of a car, you have to install using an installation kit.
For inquiries, please consult your dealer.
3. Depending on the year or grade of a car, some vehicles may have changed parts.
For inquiries, please consult your dealer.
About bolting torque
"The power to twist something" is called "torque."
Two persons grip each end of one bat, and twist in opposite direction, respectively. In this case, the person with the
thick bat side is more advantageous.
Thus, even if using the same force, turning something with a large radius will have larger twisting strength, or torque.
0.1m
1m
[Bolting torque of a screw] ; The power in which an adult tightens a
screw normally using an ordinary screwdriver is 1-2N·m (0.1-0.2kgf·m).
[Bolting torque of a bolt] ; The torque when tightening a bolt by 25kg
power using a wrench is 49N·m (5kgf·m).
1kg
10kg
Both are the same torque, 9.8N·m (1kgf·m).
This indicates what must be done.
(Imperative mark)
Use proper tools for the processing
Wrap cords with protective tape.
objects.
The cords near metallic parts of the
vehicle should be protected against
When tightening a bolt or nut, always be
sharp edge of the metallic parts by
sure to use the tool matching its size. If
wrapping insulating tape around them.
the securing torque of a part is speci-
(If a cord is damaged, electric shock or
fied, be sure to secure it with the speci-
short-circuiting* as well as fire hazard
fied force.
may result.)
(Otherwise the bolt or nut may be dam-
aged or detached during use.)
Do not open the back and top covers of
Use a fuse with the specified rating.
the product or modify it.
When the fuse is blown, first ensure that
there is no short-circuiting* between the
(This may lead to fire hazard or other
wired cords, then replace with a new
accident.)
fuse with the capacity (Ampere value)
• For inspection and servicing, consult
specified on the fuse box.
your dealer or nearest KENWOOD ser-
(Using other fuse than specified may
vice agent or distributor.
lead to fire hazard.)
• Servicing by the user may lead to fire
hazard or other accidents.
Please check the spec.
• For fuse replacement, refer to the
owner's manual of your vehicle.
Use provided parts for installation.
Inspect the vehicle after installation.
Be sure to install a product using pro-
After installation of the product, be sure
vided parts. When parts other than the
to check that the brake lamps, head
provided ones are used, a product may
lamps, direction indicators, windshield
fall off and hit the passenger while driv-
wipers, power window, etc. of the vehi-
ing, causing injury or product breakage.
cle function normally.
(If any of the vehicle functions are dam-
aged due to incorrect wiring , etc., traf-
fic accident may result. )
WARNING
Do not continue sound output at an
Do not open the back and top covers of
abnormal level.
the product or modify it.
Do not use the speakers for a long period at a
(This may lead to fire hazard or other acci-
high volume level at which the sound is dis-
dent.)
torted.
• For the inspection and servicing, consult your
(The system may be overheated and fire haz-
dealer or nearest KENWOOD service agent or
ard may result. )
distributor.
• Servicing by the user may lead to fire hazard
and other accidents.
CAUTION
Do not use the product for other purpose
than car use.
This product has been designed for installation and
operation in a vehicle. Do not use it for other pur-
pose.
(Otherwise imperfect installation may cause the
product to drop and cause injury.)
System connections
Connection example 1
Tweeter connection from center unit. (Tweeter is installed on the dashboard.)
Center unit
Black/Gray
Speaker output
Black
Black/Gray
Black
The high path filter for a tweeter is built in the main part of a tweeter.
Connection example 2
Tweeter connection from woofer. (Tweeter is installed on the door panel.)
Cut
Center unit
6Connection cord which is cut
(for tweeter)
8Erectro-tap (for woofer)
Refer to "Woofer connections" in this instruction manual.
Black/Gray
Connection cord
Black
of vehicle
The high path filter for a tweeter is built in the main part of a tweeter.
Connection example 3
If the tweeter level is too high.
Tweeter connection from center unit. (Tweeter is installed on the dashboard.)
Black/Gray
Center unit
Black
Black
Black/Gray
Speaker output
Black
Black/Gray
Black
Connection example 4
If the tweeter level is too high.
Tweeter connection from woofer. (Tweeter is installed on the door panel.)
Black/Gray
Black
Black
Center unit
8Erectro-tap (for woofer)
Refer to "Woofer connections" in this instruction manual.
Black/Gray
Connection cord
Black
of vehicle
Caution
• The terminal which is not used should be protected by electrical tape for shorting accident prevention.
• Be careful of the polarity of plus/minus and connect depending to the connection example.
Black/Gray
6Connection cord (for tweeter)
Black
8
Erectro-tap (for woofer)
Refer to "Woofer connections" in this instruction manual.
Black/Gray
~Connection cord
Black
(for woofer)
Vehicle connector
6Connection cord (for tweeter)
Black/Gray
Black/Gray
Black
Black
~Connection cord (for woofer)
Vehicle connector
7Sound Level Adjuster
(for tweeter)
Black/Gray
Black/Gray
Black/Gray
6Connection cord (for tweeter)
8
Erectro-tap (for woofer)
Refer to "Woofer connections" in this instruction manual.
Black/Gray
~Connection cord
Black
(for woofer)
Vehicle connector
7Sound Level Adjuster
(for tweeter)
Black/Gray
Black/Gray
Black/Gray
6Connection cord which is cut
(for tweeter)
Refer to "Connection exsample 2".
Black/Gray
Black
~Connection cord (for woofer)
Vehicle connector
Tweeter
Black/Gray
Red
Black
Black
Woofer
Tweeter
Black/Gray
Red
Black
Black
Woofer
Tweeter
Black/Gray
Red
Black
Black
Woofer
Tweeter
Black/Gray
Red
Black
Black
Woofer
Advertisement

Related Manuals for Kenwood K-ES01


Summary of Contents for Kenwood K-ES01
- Page 1 (This may lead to fire hazard or other acci- dent.) • For the inspection and servicing, consult your dealer or nearest KENWOOD service agent or distributor. • Servicing by the user may lead to fire hazard and other accidents.
- Page 2 4Mounting 2Tapping screw bracket 5Double-faced tape Removal of rivet • When the factory speaker is being fixed by rivets. 3Speed nut Woofer connections • Connection of vehicle connector and ~Connection cord Connect using 8Electro-tap. • Connection to woofer terminal Hold the side.