Table of Contents
Advertisement
Quick Links
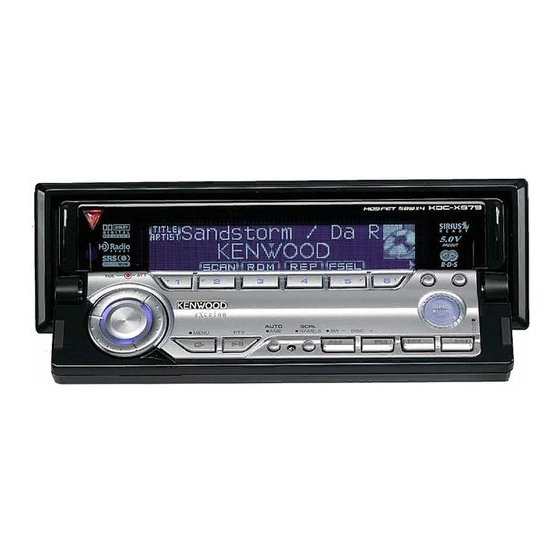
KDC-X979
KDC-MP925
KDC-X879
CD-RECEIVER
INSTRUCTION MANUAL
Take the time to read through this instruction manual.
Familiarity with installation and operation procedures will help you
obtain the best performance from your new CD-receiver.
For your records
Record the serial number, found on the back of the unit, in the spaces
designated on the warranty card, and in the space provided below. Refer to the
model and serial numbers whenever you call upon your KENWOOD dealer for
information or service on the product.
Model KDC-X979/MP925/X879 Serial number
© B64-2741-00/00 (KV)
Advertisement
Table of Contents

Related Manuals for Kenwood KDC-X879


Summary of Contents for Kenwood KDC-X879
- Page 1 Record the serial number, found on the back of the unit, in the spaces designated on the warranty card, and in the space provided below. Refer to the model and serial numbers whenever you call upon your KENWOOD dealer for information or service on the product.
-
Page 2: Table Of Contents
Switching Wallpaper selecting Text Display Switching Station/Disc Naming (SNPS/DNPS) Auxiliary Input Display Setting Panel Position Setting Theft Deterrent Panel Audio Control (KDC-MP925/KDC-X879) Subwoofer Output System Q (KDC-MP925/KDC-X879) System Q ( KDC-X979) Speaker Setting (KDC-MP925/KDC-X879) Dual Zone System Sound management features... -
Page 3: Installation Procedure
Selectable Illumination Triangle indicator setting Font Type Select Dimmer OFF Wait Time Setting Eject angle setting Panel action setting System Q Setting (KDC-X879) Audio Setup (KDC-X979) Built-in Amp Mute Setting B.M.S. (Bass Management System) (KDC-X979/KDC-X879) B.M.S. Frequency Offset (KDC-X979/KDC-X879) Traffic Information... -
Page 4: Warning
KENWOOD CORPORATION 2967-3, ISHIKAWA-CHO, HACHIOJI-SHI TOKYO, JAPAN KENWOOD CORP. CERTIFIES THIS EQUIPMENT CONFORMS TO DHHS REGULATIONS N0.21 CFR 1040. 10, CHAPTER 1, SUBCHAPTER J. Location : Bottom Panel FCC WARNING This equipment may generate or use radio frequency energy. -
Page 5: Safety Precautions
• If the unit starts to emit smoke or strange smells, turn off the power immediately and consult your Kenwood dealer. • Make sure not to get your fingers caught between the faceplate and the unit. • Be careful not to drop the unit or subject it to strong shock. - Page 6 KENWOOD disc changers/ CD players released in 1998 or later can be connected to this unit. Refer to the catalog or consult your Kenwood dealer for connectable models of disc changers/ CD players. Note that any KENWOOD disc changers/ CD players released in 1997 or earlier and disc changers made by other makers cannot be connected to this unit.
-
Page 7: Notes
Notes Cleaning the Unit If the faceplate of this unit is stained, wipe it with a dry soft cloth such as a silicon cloth. If the faceplate is stained badly, wipe the stain off with a cloth moistened with neutral cleaner, then wipe neutral detergent off. -
Page 8: About Cds
About CDs Handling CDs • Don’t touch the recording surface of the CD. • CD-R and CD-RW are easier to damage than a normal music CD. Use a CD-R or a CD-RW after reading the caution items on the package etc. •... -
Page 9: Notes On Multi-Function Key System
Notes on Multi-function Key System Multi-function Key System serves to control various functions with the [2] — [5] buttons. The basic operation of the Multi-function Key System is described below. What’s the Multi-function Key System? This unit is equipped with the Multi-function Key System that enables the operation of multiple functions with one button. -
Page 10: Notes On Playing Mp3/Wma
Notes on playing MP3/WMA Note, however, that the MP3/WMA recording media and formats acceptable are limited. When writing MP3/WMA, pay attention to the following restrictions. Acceptable media The MP3/WMA recording media acceptable to this unit are CD-ROM, CD-R, and CD-RW. When using CD-RW, do full format not quick format to prevent malfunction. - Page 11 Loading such a medium may produce loud noise to damage the speakers. • Do no attempt to play a medium containing a non-MP3/ WMA file with the MP3/WMA extension. The unit mistakes non-MP3/WMA files for MP3/WMA data as long as they have the MP3/WMA extension. •...
-
Page 12: Notes On Sound Management System
Notes on Sound Management System The KDC-X979 allows you to set up the best sound field to your car using the audio setup. This is the Sound Management System. There are two types of audio setup mode: Easy audio setup (called Easy mode) and Professional audio setup (called PRO mode). -
Page 13: General Features
General features Power Turning ON the Power Turn the vehicle ignition ON. The panel appears. Turing OFF the Power Turn the vehicle ignition OFF or press the [SRC] button for at least 1 second. The panel hides. • Do not apply force to the panel during operation. It can cause damage. -
Page 14: Selecting The Source
General features Selecting the Source Press the [SRC] button. Display Source required SIRIUS tuner (Optional accessory) "SIRIUS" Tuner or HD Radio (Optional accessory) "TUNER" or “HD RADIO” "Compact Disc" External disc (Optional accessory) "CD Changer" Auxiliary input "AUX" Standby (Illumination only mode) "STANDBY"... -
Page 15: Display Mode Switching
Display Mode Switching Switching the display mode. Select the key function section Press the [NEXT] button. Repeatedly press the button until "DISP" is displayed above the [3] (KDC-MP925/X879)/ [4] (KDC-X979) button. Refer to 'Notes on Multi-function Key System' (page 9). Enter display control mode Press the [3] ("DISP") (KDC-MP925/X879)/ [4] ("DISP") (KDC-X979) button. -
Page 16: Text Display Switching
General features Display:A Text Display Switching Switching the text display. Select the key function section Press the [NEXT] button. Repeatedly press the button until "DISP" is displayed above the [3]/ [4] button. Refer to 'Notes on Multi-function Key System' (page 9). Enter display control mode Press the [3]/ [4] ("DISP") button. - Page 17 Album name & Artist name is selected when the disc which does not have Disc title, Track title, Song title, Album name, or Artist name is played, Kenwood Logo are displayed. • If the text for the Sirius tuner source, including Channel name, etc.
-
Page 18: Graphic Part/ Spectrum Analyzer Display
General features Display:B/ Display:C/ Display:D Graphic part/ Spectrum Analyzer Display Switching Switching the graphic Display/ Spectrum analyzer display. Select the key function section Press the [NEXT] button. Repeatedly press the button until "DISP" is displayed above the [3]/ [4] button. Refer to 'Notes on Multi-function Key System' (page 9). - Page 19 Enter display control mode Press the [3]/ [4] ("DISP") button. Select the display mode Press the [2] ("MODE") button. Select the "Display:B"/ "Display:C" display. Select the text Press the [3] ("TEXT") button. • It can also be switched by pressing either [4] or [¢] button.
-
Page 20: Station/Disc Naming (Snps/Dnps)
Name Set mode closes. • Memory numbers - FM: 32 stations - AM: 16 stations - Internal CD player: 30 discs - External CD changer/ player: Varies according to the CD changer/ player. Refer to the CD changer/ player manual. -
Page 21: Panel Position Setting
Panel Position Setting Setting the angle or back-forward position of the control panel. Select the key function section Press the [NEXT] button. Repeatedly press the button until "PNL" is displayed above the [4]/ [5] button. Enter Panel Position Setting mode Press the [4] ("PNL") (KDC-MP925/X879)/ [5] ("PNL") (KDC-X979) button. -
Page 22: Audio Control (Kdc-Mp925/Kdc-X879)
General features Function of the KDC-MP925/KDC-X879 Audio Control Select the source for adjustment Press the [SRC] button. Select the key function section Press the [NEXT] button. Repeatedly press the button until "AUD" is displayed above the [2] button. Refer to 'Notes on Multi-function Key System' (page 9). -
Page 23: Subwoofer Output
• * Function of the KDC-X879 • According to the Bass Q Factor setting value, the frequencies that can be set in Bass Center Frequency change as shown below. Bass Q Factor Bass Center Frequency 1.00/1.25/1.50 60/70/80/100 2.00 60/70/80/150 • When the bass extend is set to ON, low frequency response is extended by 20%. -
Page 24: System Q (Kdc-Mp925/Kdc-X879)
General features Function of the KDC-MP925/KDC-X879 System Q You can recall the best sound setting preset for different types of music. Select the source to set Press the [SRC] button. Select the Sound type Press the [Q] button. Each time the button is pressed the sound setting switches. -
Page 25: Dual Zone System
In SIRIUS Tuner, External disc, or Auxiliary input source Dual Zone System Makes the sound different for the front channel and rear channel. Output the Internal source sound from either one of the front or rear channels, and the sound of other source from the Dual zone channel. -
Page 26: Sound Management Features (Kdc-X979)
Function of the KDC-X979 Sound management features Audio control Select the source for adjustment Press the [SRC] button. Select the key function section Press the [NEXT] button. Repeatedly press the button until "AD CTRL" is displayed above the [2] button. Refer to 'Notes on Multi-function Key System' (page 9). - Page 27 [2] "PLII" "MUSIC" (Music) [5] "FINE" "MOVIE" (Movie) "MATRIX" (Matrix) [3] "WOW" [5] "FINE" "LOW" (Low) "MIDDLE" (Middle) "HIGH" (High) "USER" (User) 2nd section Multi-function key operation Audio control item [2] "POSI" Position setting [3] "BL/F" [3] "BL" Balance setting [3] "F"...
-
Page 28: Audio Setup (Easy Mode)
Function of the KDC-X979 Sound management features Audio Setup (Easy mode) Selects the Easy mode of Audio setup See the 'Audio Setup' (page 48) and select "Audio Setup: Easy". Select the source for adjustment Press the [SRC] button. Select the key function section Press the [NEXT] button. - Page 29 1st section Audio setup Item Multi-function key operation [2] "FRONT" High Pass Filter Front "X’Over" [3] "REAR" High Pass Filter Rear [4] "CNTR" High Pass Filter Center [5] "SW" Low Pass Filter Subwoofer [5] "PHASE" Subwoofer Phase setting [2] "FRONT" DTA Front "DTA"...
-
Page 30: Audio Setup Memory (Pro Mode)
Sound management features Audio Setup Memory (PRO mode) Selects the PRO mode of Audio setup See the 'Audio Setup' (page 48) and select "Audio Setup: PRO". Select the source for adjustment Press the [SRC] button. Select the key function section Press the [NEXT] button. -
Page 31: Tuner Features
Tuner features Tuning Mode Choose the tuning mode. Press the [AUTO] button. Each time the button is pressed the Tuning mode switches as shown below. Tuning mode Display Operation Auto seek "Auto 1" Automatic search for a station. Preset station seek "Auto 2"... -
Page 32: Direct Access Tuning
Tuner features Function of remote Direct Access Tuning Entering the frequency and tuning. Select the band Press the [FM] or [AM] button. Enter Direct Access Tuning mode Press the [DIRECT] button on the remote. "– – – –" is displayed. Enter the frequency Press the number buttons on the remote. -
Page 33: Snpp (Station Name Preset Play)
Function of Remote SNPP (Station Name Preset Play) Display SNPS and Select the station. Enter SNPP mode Press the [DNPP] button on the remote. When "SNPP" is displayed, SNPS or PS displays in the FM1, FM2, FM3 and AM bands in order. •... -
Page 34: Rds Features
RDS features Radio Text Scroll Scrolling the displayed radio text. Press the [SCRL] button. Registration of a station as a PTY Registering a Program Type for stations with no PTY data. Receive the station you want to register Select the Program Type to register Refer to 'PTY (Program Type)' (page 35). -
Page 35: Pty (Program Type)
PTY (Program Type) Selecting the Program Type and searching for a station. Enter PTY mode Press the [PTY] button. "PTY Select" is displayed. • This function can't be used during a traffic bulletin or AM reception. Select the Program Type Press the [FM] or [AM] button. -
Page 36: Cd/Mp3/Wma/External Disc Control Features
CD/MP3/WMA/External disc control features Playing CD & MP3/WMA When there is no disc inserted Open the panel to insert disc Press the [0] button. Insert a disc. • When the faceplate has been slid open, it might interfere with the shift lever or something else. If this happens, pay attention to safety and move the shift lever or take an appropriate action, then operate the unit. -
Page 37: Playing External Disc
Press the [SRC] button. Select the display for the disc player you want. Display examples: Display Disc player "Compact Disc" CD player "CD Changer" CD changer "MD Changer" MD changer Pause and play Press the [38] button. -
Page 38: Track/File/Disc/Folder Repeat
CD/MP3/WMA/External disc control features Track/File/Disc/Folder Repeat Replaying the song, disc in the Disc changer or MP3/WMA folder you’re listening to. Select the key function section Press the [NEXT] button. Repeatedly press the button until "REP" is displayed above the [4] button. Refer to 'Notes on Multi-function Key System' (page 9). -
Page 39: Folder Select
Function of MP3/WMA Folder Select Quickly selecting the folder you want to listen to. Select the key function section Press the [NEXT] button. Repeatedly press the button until "FSEL" is displayed above the [5] button. Refer to 'Notes on Multi-function Key System' (page 9). -
Page 40: Sirius Tuner Control Features
SIRIUS tuner control features Band display Select SIRIUS Satellite Radio Mode Selecting the SIRIUS Satellite Radio Tuner (optional accessory) connected to this unit. Selecting SIRIUS Mode Press the [SRC] button. Select the "SIRIUS" display. • You need to subscribe to SIRIUS to receive the service by SIRIUS Satellite Radio. -
Page 41: Direct Access Tuning
Select the item for adjustment Press the desired [2] — [5] button. Each time the button is pressed the items that can be adjusted switch as shown below. Adjustment Item Search down in category Search up in category Search down for channel in selected category Search up for channel in selected category •... -
Page 42: Channel Scan
SIRIUS tuner control features Channel Scan Every receivable Channel is checked for 10 seconds. Start Channel Scan Press the [AUTO] button for at least 1 second. The channel number display blinks. Release it when the song you want to listen to is received Press the [AUTO] button for at 1 second. -
Page 43: Hd Radio Control Features
HD Radio control features Tuning Selecting the station. Select HD Radio source Press the [SRC] button. Select the "HD RADIO" display. Select the HF band Press the [FM] button. Each time the [FM] button is pressed it switches between the HF1, HF2, and HF3 bands. Select the HA band Press the [AM] button. -
Page 44: Auto Memory Entry
HD Radio control features Auto Memory Entry Putting a station with good reception in the memory automatically. Select the band for Auto Memory Entry Press the [FM] or [AM] button. Enter Menu mode Press the [MENU] button for at least 1 second. "MENU"... -
Page 45: Menu System
Menu system Menu System Setting during operation beep sound etc. functions. The Menu system basic operation method is explained here. The reference for the Menu items and their setting content is after this operation explanation. Enter Menu mode Press the [MENU] button for at least 1 second. "MENU"... -
Page 46: Security Code
Menu system In Standby mode Security Code Because authorization by the Security Code is required when it’s removed from the vehicle, personalizing this unit is by using the Security Code is a help in preventing theft. • When the Security Code function is activated, the code can’t be changed and the function can’t be released. -
Page 47: Date Adjustment
Date Adjustment Select Date Adjust mode Press the [FM] or [AM] button. Select the "Date Adjust" display. Enter Date Adjust mode Press the [4] or [¢] button for at least 1 second. The date display blinks. Selecting the item (day, month, or year) to adjust Press the [4] or [¢] button. -
Page 48: Dimmer
"Panel Control:2" The angle can be adjusted regardless of the panel position. Function of the KDC-X879 System Q Setting Setting whether the display indicates the System Q factors (Bass center frequency, Bass Q factor,... -
Page 49: Built-In Amp Mute Setting
Display Setting "AMP Mute: OFF" The built-in amplifier activates. "AMP Mute: ON" The built-in amplifier deactivates. Function of the KDC-X979/KDC-X879 B.M.S. (Bass Management System) Adjust the bass boost level of the external amplifier using the main unit. Display Setting "AMP Bass: Flat"... -
Page 50: Tuning Mode
Menu system In HD Radio mode Tuning Mode Sets the tuning mode. Tuning mode Display Operation Auto seek "Seek mode: Auto 1" Automatic search for a station. Preset station "Seek mode: Auto 2" Search in order of the seek stations in the Preset memory. -
Page 51: Cd Read Setting
'Graphic part/ Spectrum Analyzer Display Switching' (page 18) 'Wallpaper selecting' (page 18) • When you can’t download the pictures to this unit, there may be a problem with the CD-R/CD-RW write method. Refer to the URL http://www.kenwood.net-disp.com, and rewrite the CD-R/CD-RW. English... -
Page 52: Amp Control (Kdc-X979/Kdc-X879)
Menu system Function of the KDC-X979/KDC-X879 When LX AMP unit connecting AMP Control You can control the LX AMP connected to the unit. Select AMP Control mode Press the [FM] or [AM] button. Select the "AMP Control" display. Enter AMP Control mode Press the [4] or [¢] button for at least 1... -
Page 53: Basic Operations Of Remote
Basic Operations of remote FM/AM/DISC Loading and Replacing the battery Use two "AA"-size batteries. Slide the cover while pressing downwards to remove it as illustrated. Insert the batteries with the + and – poles aligned properly, following the illustration inside the case. 2WARNING •... -
Page 54: In Tuner Source
Basic Operations of remote In Tuner source [FM]/ [AM] buttons Select the band. Each time the [FM] button is pressed it switches between the FM1, FM2, and FM3 bands. [4]/ [¢] buttons Tune up or down band. [0] — [9] buttons Press buttons [1] —... -
Page 55: Accessories/Installation Procedure
Accessories/ Installation Procedure Accessories Installation Procedure 1. To prevent a short circuit, remove the key from the ignition and disconnect the - battery. 2. Make the proper input and output wire connections for each unit. 3. Connect the speaker wires of the wiring harness..1 4. -
Page 56: Connecting Wires To Terminals
Front left output (White) Rear right output (Red) Rear left output (White) AUX right input (Red) AUX left input (White) To KENWOOD disc changer/ Sirius satellite radio tuner/ External optional accessory To connect these leads, refer to the relevant instruction manuals. -
Page 57: Installation
Installation non-Japanese cars Metal mounting strap (commercially available) Firewall or metal support Bend the tabs of the mounting sleeve with a screwdriver or similar utensil and attach it in place. Phillips truss head sheet metal screw (commercially available) Screw (M4X8) (commercially available) •... -
Page 58: Locking The Backpanel To The Unit
Installation Locking the Backpanel to the unit If you want to fasten the faceplate to the main unit so that it does not fall off. Refer to the Removing the Backpanel function of the section on 'Theft Deterrent Panel' (page 21) and remove the Backpanel. -
Page 59: Removing The Unit
Removing the Unit Removing the hard rubber frame Engage the catch pins on the removal tool and remove the two locks on the upper level. Upper the frame and pull it forward as shown in the figure. Accessory2 Removal tool When the upper level is removed, remove the lower two locations. -
Page 60: Troubleshooting Guide
Troubleshooting Guide What might seem to be a malfunction in your unit may just be the result of slight misoperation or miswiring. Before calling service, first check the following table for possible problems. General The power does not turn ON. The fuse has blown. - Page 61 Even though Synchronize Clock is ON, the clock can’t be adjusted. The received RDS station isn’t sending time data. Receive another RDS station. The Dimmer function doesn’t work. The Dimmer wire isn’t connected correctly. Check the Dimmer wire connection. The panel is not hidden even when the power is turned off.
- Page 62 Troubleshooting Guide MP3/WMA source Cannot play an MP3/WMA. The media is scratched or dirty. Clean the media, referring to the CD cleaning of the section on 'About CDs' (page 8). The sound skips when an MP3/WMA is being played. The media is scratched or dirty. Clean the media, referring to the CD cleaning of the section on 'About CDs' (page 8).
- Page 63 This unit does not work properly for some reason. Press the reset button to download it again. If this error is still displayed, consult a local Kenwood dealer. No Display File: No file that can be downloaded is contained in the CD-ROM.
-
Page 64: Specifications
Full Bandwidth Power (at less than 1% THD) : 22 W x 4 Tone action (KDC-X879) Bass : 60 Hz – 150 Hz ±8 dB Middle : 500 Hz – 2 kHz ±8 dB Treble : 10 kHz – 17.5 kHz ±8 dB (KDC-MP925) Bass : 100 Hz ±8 dB...