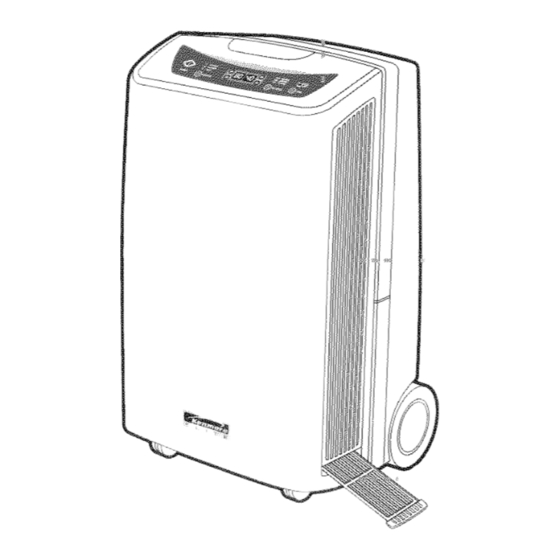
Summary of Contents for Kenmore 251.90701
- Page 1 Use & Care Guide Manual de Uso y Cuidado English / Espa_ol Model0 Modelo : 251.90701 K mo J8000004210 Sears Brands Management Corporation, Hoffman Estates, IL 60179 _O;_croban...
-
Page 2: Important Cautions
Sears Service ... Back Cover Dehumidifier Set-Up ... 6-7 Kenmore Elite Limited Warranty When installed, operated and maintained according to all instructions supplied with the product, if this appliance fails due to a defect in material and workmanship within one year from the date of purchase, call 1-800-4-MY-HOME _)to arrange for free repair. - Page 3 DO NOT USE AN EXTENSION CORD. • Install the dehumidifier on a level floor • Leave the dehumidifier in an upright strong enough to support the unit with a position for 30 minutes before turning on. full bucket of water, DEFROST OPERATION •...
- Page 4 At higher temperatures higherhumidity is normal When the collection bucket isfull, BUCKET FULL so the unit will run more often. indicator (12) will come on. The dehumidifier will Humidity not run until the bucket is empty. In this setting, Humidity allows you to manually...
-
Page 5: Cleaning The Exterior
Proper position of the bucket FILTERS and the float switch is required for the dehumidifier to turn on. 1. Snap open the bottom tab of filter located below the of side grill. (Fig.l) Grills are located on both sides of unit. - Page 6 6. Check to make sure that the pump drain 4. Improper pump hose is not both under water and sitting at drain hose a height above the dehumidifier - this can installation. cause a "back flow" of water from the hose to the dehumidifier.
- Page 7 TEMPERATURE HUMIDITY Ol_l ll_! SETTING PREFERENCES SENSOR ICON (1) (&%)flashes, indicating signal is being received from the main unit. Press SET (11) once to enter the "Setting If no signal is being received, the icon (_4) Mode." Press SET (11) and hold down for 1 appear.
- Page 8 • Estaci6n Remota de Monitorizaci6n • Manguera de Desag0e de Bomba de 18 pies • 2 pitas (2AAA) Garantia Limitada Kenmore Cuando sea instalado, operado y mantenido segQn todas las instrucciones proveidas con et producto, si este etectrodomestico manufactura dentro de 1 aSo despues de ta fecha de compra, flame al 1-800-4-MY- HOME ®para concertar ta reparaci6n gratis.
-
Page 9: Advertencias Importantes
ADVERTENCiAS IMPORTANTES PARA EL USO DE SU DESHUMIDIFICADOR. Para reducir el riesgo de incendio, descarga electrica, lesi6n, o daSo ai deshumidificador, ae deben de aeguir estas precaucionea de aeguridad: • No colocar el cable de alimentaci6n cerca • No desenchufe la ctavija det enchufe de una estufa. - Page 10 • Instale e tdeshumidificador sobre un seguira funcionando bobinas. sueto nivetado suficientemente fuerte para sostener launidad c onsucubeta UBICAClON ltena deagua. DESHUMIDIFICADOR • Para unmejor r endimiento, deje unespa- Utitice e tdeshumidificador: ciodealmenos 1 2-18 p ulgadas acada • enuns6tano p ara ayudar aevitar d aSos lado delaunidad p ara permitir una buena circulaci6n deaire.
- Page 11 ® ¢ ®® ® POWER ON/OFF (1) manualmente et nivet deseado de humedad, utitizando tas teclas con tas flechas de Si pulsa et bot6n una vez se enciende el deshumidificador, "ON", y si 1ovuetve a humedad (9) hacia arriba o abajo _. pulsar se apaga et deshumidificador, "OFF".
-
Page 12: Limpieza Del Exterior
OPClON 3 ,DRENAJE DEBOMBA 1.Quite L aTAPAde DRENAJE deta BOMBA, girando endirecci6n delas agujas del r etoj (Enrosque alreves) (Figura 1) 2. Quite l aTAPAdet orificio d edrenaje, tirando h acia f uera mientras este presionando etenganche hacia d entro. (Figura 2) Guardarla TAPADEL DRENAJEy el TAPON para usarlos en el futuro. - Page 13 Antes d ellamar para unservicio tecnico, intente l assiguientes sugerencias puede solucionar su problema sin ayuda ajena. PROBLEMAS POSIBLESCAUSAS El deshumidificador &Esta enchufado el cable de ali- no funciona cuando mentaci6n en un enchufe de tres se aprieta el bot6n paletas con toma de tierra? POWER ON.
- Page 14 atasala enlaplanta d earriba d onde e sta localizado reducir eltango a 165 pies, m ientras que la segunda pared r educira ettango a 87pies. Teniendo unmaximo de77pies detango d esepal restante. Subiendo por e lsueto h areducido et tango e fectivo aunos 3 8pies. Tipicamente Laestaci6n demonitorizaci6n remota es...
- Page 15 For troubleshooting, For repair - in your home - of all major brand appliances, lawn and garden equipment, or heating and cooling systems, no matter who made it, no matter who sold it ! For the replacement parts, accessories and owner's manuals that you need to do-it-yourself.


