Cisco Aironet 1100 Series Installation And Configuration Manual
Hide thumbs
Also See for Aironet 1100 Series:
- Hardware installation manual (116 pages) ,
- Hardware installation manual (122 pages)
Table of Contents
Advertisement
Cisco Aironet 1100 Series Access Point
Installation and Configuration Guide
Cisco IOS Release 12.2(4)JA
October, 2002
Corporate Headquarters
Cisco Systems, Inc.
170 West Tasman Drive
San Jose, CA 95134-1706
USA
http://www.cisco.com
Tel: 408 526-4000
800 553-NETS (6387)
Fax: 408 526-4100
Text Part Number: OL-2851-01
Advertisement
Table of Contents

Related Manuals for Cisco Aironet 1100 Series


Summary of Contents for Cisco Aironet 1100 Series
- Page 1 Cisco Aironet 1100 Series Access Point Installation and Configuration Guide Cisco IOS Release 12.2(4)JA October, 2002 Corporate Headquarters Cisco Systems, Inc. 170 West Tasman Drive San Jose, CA 95134-1706 http://www.cisco.com Tel: 408 526-4000 800 553-NETS (6387) Fax: 408 526-4100 Text Part Number: OL-2851-01...
- Page 2 FastTrack, the iQ Logo, iQ Net Readiness Scorecard, Networking Academy, ScriptShare, SMARTnet, TransPath, and Voice LAN are trademarks of Cisco Systems, Inc.; Changing the Way We Work, Live, Play, and Learn, Discover All That’s Possible, The Fastest Way to Increase Your Internet Quotient, and iQuick Study are service marks of Cisco Systems, Inc.;...
-
Page 3: Table Of Contents
Anti-Theft Features Software Features Management Options Roaming Client Devices Network Configuration Examples Root Unit on a Wired LAN Repeater Unit that Extends Wireless Range Central Unit in an All-Wireless Network Cisco Aironet 1100 Series Access Point Installation and Configuration Guide OL-2851-01... - Page 4 C H A P T E R Using the Web-Browser Interface for the First Time Using the Management Pages in the Web-Browser Interface Using Action Buttons Character Restrictions in Entry Fields Using Online Help Cisco Aironet 1100 Series Access Point Installation and Configuration Guide OL-2851-01...
- Page 5 Configuring RADIUS Authorization for User Privileged Access and Network Services 6-11 Displaying the RADIUS Configuration 6-12 Configuring the Access Point for Local Authentication and Authorization 6-12 Configuring the Access Point for Secure Shell 6-13 Understanding SSH 6-13 Cisco Aironet 1100 Series Access Point Installation and Configuration Guide OL-2851-01...
- Page 6 Configuring Radio Data Rates Configuring Radio Transmit Power Limiting the Power Level for Associated Client Devices Configuring Radio Channel Settings Enabling and Disabling World-Mode Disabling and Enabling Short Radio Preambles Cisco Aironet 1100 Series Access Point Installation and Configuration Guide OL-2851-01...
- Page 7 Configuring Authentication Types 10-6 Default Authentication Settings 10-6 Assigning Authentication Types to an SSID 10-6 Configuring Authentication Holdoffs, Timeouts, and Intervals 10-8 Matching Access Point and Client Device Authentication Types 10-9 Cisco Aironet 1100 Series Access Point Installation and Configuration Guide OL-2851-01...
- Page 8 13-4 Configuring QoS Using the Web-Browser Interface 13-4 Adjusting Radio Traffic Class Definitions 13-8 QoS Configuration Examples 13-10 Prioritizing for Voice Traffic 13-10 Prioritizing for Video Traffic 13-12 Cisco Aironet 1100 Series Access Point Installation and Configuration Guide viii OL-2851-01...
- Page 9 Configuring CDP 16-2 Default CDP Configuration 16-2 Configuring the CDP Characteristics 16-2 Disabling and Enabling CDP 16-3 Disabling and Enabling CDP on an Interface 16-4 Monitoring and Maintaining CDP 16-4 Cisco Aironet 1100 Series Access Point Installation and Configuration Guide OL-2851-01...
- Page 10 Displaying Information about Files on a File System 19-3 Changing Directories and Displaying the Working Directory 19-4 Creating and Removing Directories 19-4 Copying Files 19-5 Deleting Files 19-5 Creating, Displaying, and Extracting tar Files 19-6 Cisco Aironet 1100 Series Access Point Installation and Configuration Guide OL-2851-01...
- Page 11 Downloading an Image File by Using RCP 19-29 Uploading an Image File by Using RCP 19-31 Reloading the Image Using the Web Browser Interface 19-32 Browser HTTP Interface 19-32 Browser TFTP Interface 19-33 Cisco Aironet 1100 Series Access Point Installation and Configuration Guide OL-2851-01...
- Page 12 21-7 Browser HTTP Interface 21-7 Browser TFTP Interface 21-8 Obtaining the Access Point Image File 21-8 Obtaining the TFTP Server Software 21-8 Activating and Configuring the TFTP Server 21-9 Cisco Aironet 1100 Series Access Point Installation and Configuration Guide OL-2851-01...
- Page 13 European Community, Switzerland, Norway, Iceland, and Liechtenstein Declaration of Conformity with Regard to the R&TTE Directive 1999/5/EC Declaration of Conformity for RF Exposure Guidelines for Operating Cisco Aironet Access Points and Bridges in Japan Japanese Translation English Translation Channels and Antenna Settings...
- Page 14 Contents Access Point Specifications A P P E N D I X Error and Event Messages A P P E N D I X N D E X Cisco Aironet 1100 Series Access Point Installation and Configuration Guide OL-2851-01...
-
Page 15: Preface
Preface Audience This guide is for the networking professional who installs and manages the Cisco Aironet 1100 Series Access Point, hereafter referred to as the access point. To use this guide, you should have experience working with the Cisco IOS and be familiar with the concepts and terminology of wireless local area networks. - Page 16 Chapter 16, “Configuring CDP,” describes how to configure Cisco Discovery Protocol (CDP) on your access point. CDP is a device-discovery protocol that runs on all Cisco network equipment. Chapter 17, “Configuring SNMP,” describes how to configure the Simple Network Management Protocol (SNMP) on your access point.
-
Page 17: Conventions
Means reader take note. Notes contain helpful suggestions or references to materials not contained in Note this manual. Means reader be careful. In this situation, you might do something that could result equipment damage Caution or loss of data. Cisco Aironet 1100 Series Access Point Installation and Configuration Guide xvii OL-2851-01... - Page 18 (Para ver as traduções dos avisos que constam desta publicação, consulte o apêndice “Translated Safety Warnings” - “Traduções dos Avisos de Segurança”). Cisco Aironet 1100 Series Access Point Installation and Configuration Guide xviii OL-2851-01...
-
Page 19: Related Publications
• Click this link to browse to the Cisco Aironet documentation home page: http://www.cisco.com/univercd/cc/td/doc/product/wireless/index.htm To browse to the 1100 series access point documentation, select Aironet 1100 Series Wireless LAN Products > Cisco Aironet 1100 Series Access Points. Obtaining Documentation The following sections explain how to obtain documentation from Cisco Systems. -
Page 20: Ordering Documentation
We appreciate your comments. Obtaining Technical Assistance Cisco provides Cisco.com as a starting point for all technical assistance. Customers and partners can obtain online documentation, troubleshooting tips, and sample configurations from online tools by using the Cisco Technical Assistance Center (TAC) Web Site. Cisco.com registered users have complete access to the technical support resources on the Cisco TAC Web Site. -
Page 21: Technical Assistance Center
Cisco TAC Web Site You can use the Cisco TAC Web Site to resolve P3 and P4 issues yourself, saving both cost and time. The site provides around-the-clock access to online tools, knowledge bases, and software. To access the Cisco TAC Web Site, go to this URL: http://www.cisco.com/tac... -
Page 22: Cisco Tac Escalation Center
The Cisco TAC Escalation Center addresses priority level 1 or priority level 2 issues. These classifications are assigned when severe network degradation significantly impacts business operations. When you contact the TAC Escalation Center with a P1 or P2 problem, a Cisco TAC engineer automatically opens a case. -
Page 23: Chapter 1 Overview
C H A P T E R Overview Cisco Aironet 1100 Series Access Points (hereafter called access points) provide a secure, affordable, and easy-to-use wireless LAN solution that combines mobility and flexibility with the enterprise-class features required by networking professionals. With a management system based on Cisco IOS software, the 1100 series is a Wi-Fi certified, 802.11b-compliant wireless LAN transceiver. -
Page 24: Features
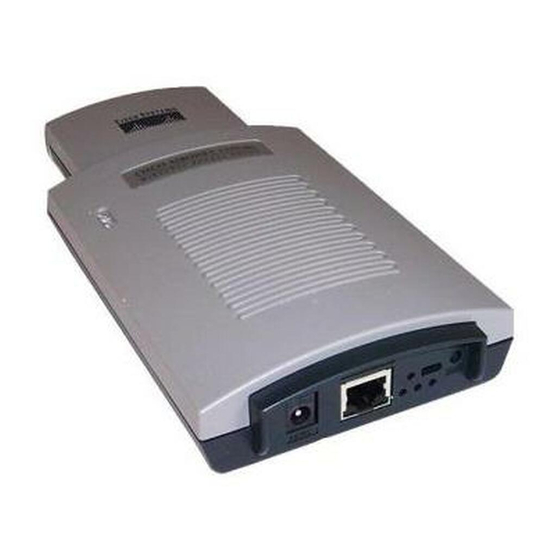
100BASE-T Ethernet LAN. The access point can receive power through the Ethernet cable from a power injector, switch, or power patch panel. The Ethernet MAC address is printed on the label on the back of the access point. Cisco Aironet 1100 Series Access Point Installation and Configuration Guide OL-2851-01... -
Page 25: Status Indicators
• Cisco Aironet Power Injector for 1100 and 1200 series access points – A switch capable of providing inline power, such as the Cisco Catalyst 3500XL, 3550, 4000, or – 6500 An inline power patch panel, such as the Cisco Catalyst Inline Power Patch Panel –... -
Page 26: Ul 2043 Certification
Spectralink's Netlink™ and Symbol’s Netvision™. Proxy Mobile IP—Use this feature to configure the access point to provide proxy mobile IP service • for clients that do not have mobile IP software installed. Cisco Aironet 1100 Series Access Point Installation and Configuration Guide OL-2851-01... -
Page 27: Management Options
Enhanced authentication services—Set up repeater access points to authenticate to your network • like other wireless client devices. After you provide a network username and password for the repeater, it authenticates to your network using LEAP, Cisco's wireless authentication method, and receives and uses dynamic WEP keys. Management Options You can use the access point management system through the following interfaces: The IOS command-line interface (CLI), which you use through a Telnet session. -
Page 28: Network Configuration Examples
LAN. Figure 1-3 Access Points as Root Units on a Wired LAN Access Point (Root Unit) Access Point Wired LAN (Root Unit) Cisco Aironet 1100 Series Access Point Installation and Configuration Guide OL-2851-01... -
Page 29: Repeater Unit That Extends Wireless Range
Consult the “Configuring a Repeater Access Point” section on page 18-3 for instructions on setting up an access point as a repeater. Non-Cisco client devices might have difficulty communicating with repeater access points. Note Figure 1-4 Access Point as Repeater... -
Page 30: Central Unit In An All-Wireless Network
Figure 1-5 shows an access point in an all-wireless network. Figure 1-5 Access Point as Central Unit in All-Wireless Network Access Point (Root Unit) Cisco Aironet 1100 Series Access Point Installation and Configuration Guide OL-2851-01... -
Page 31: Installing The Access Point
Basic Installation Guidelines, page 2-3 Unpacking the Access Point, page 2-3 • • Before Beginning the Installation, page 2-4 Installation Summary, page 2-4 • Connecting the Ethernet and Power Cables, page 2-5 • Cisco Aironet 1100 Series Access Point Installation and Configuration Guide OL-2851-01... -
Page 32: Chapter 2 Installing The Access Point
(RF) electromagnetic energy emitted by FCC certified equipment. When used with approved Cisco Aironet antennas, Cisco Aironet products meet the uncontrolled environmental limits found in OET-65 and ANSI C95.1, 1991. Proper installation of this radio according to the instructions found in this manual will result in user exposure that is substantially below the FCC recommended limits. -
Page 33: Unpacking The Access Point
Ensure that all items listed in the “Package Contents” section are included in the shipment. Check each Step 3 item for damage. If any item is damaged or missing, notify your authorized Cisco sales representative. Package Contents Each access point package contains the following items: Access point power pack •... -
Page 34: Before Beginning The Installation
For additional information, refer to Appendix D, “Mounting Instructions.” Cisco Aironet 1100 Series Access Point Installation and Configuration Guide OL-2851-01... -
Page 35: Connecting The Ethernet And Power Cables
Access Point The access point power options are listed below: A switch with inline power, such as a Cisco Catalyst 3500XL, 3550, 4000, or 6500 switch • An inline power patch panel, such as a Cisco Catalyst Inline Power Patch Panel •... -
Page 36: Connecting To An Ethernet Network With An Inline Power Source
1200 series access points only. Using the power injector with other Ethernet-ready devices can damage the equipment. The Cisco Aironet Power Injector for the 1100 and 1200 series is not tested to UL 2043 and should not Caution be placed in a building's environmental air space, such as above suspended ceilings. -
Page 37: Powering Up The Access Point
When the sequence is complete, you are ready to obtain the access point’s IP address and perform an initial configuration. Refer to Chapter 3, “Configuring the Access Point for the First Time,” instructions on assigning basic settings to the access point. Cisco Aironet 1100 Series Access Point Installation and Configuration Guide OL-2851-01... - Page 38 Chapter 2 Installing the Access Point Connecting the Ethernet and Power Cables Cisco Aironet 1100 Series Access Point Installation and Configuration Guide OL-2851-01...
- Page 39 • Using the IP Setup Utility, page 3-8 Assigning an IP Address Using the CLI, page 3-11 • • Using a Telnet Session to Access the CLI, page 3-11 Cisco Aironet 1100 Series Access Point Installation and Configuration Guide OL-2851-01...
-
Page 40: Before You Start
Password window appears. Enter your username in the User Name field. The default username is Cisco. Step 3 Enter the access point password in the Password field and press Enter. The default password is Cisco. Step 4 The Summary Status page appears. -
Page 41: Obtaining And Assigning An Ip Address
– Use the Cisco IP Setup Utility (IPSU) to identify the assigned address. You can also use IPSU to assign an IP address to the access point if it did not receive an IP address from the DHCP server. -
Page 42: Assigning Basic Settings
Password screen appears. Press Tab to bypass the Username field and advance to the Password field. Step 3 Enter the case-sensitive password Cisco and press Enter. The Summary Status page appears. Figure 3-1 Step 4 shows the Summary Status page. - Page 43 Assigning Basic Settings Figure 3-1 Summary Status Page Click Express Setup. The Express Setup screen appears. Figure 3-2 shows the Express Setup page. Step 5 Figure 3-2 Express Setup Page Cisco Aironet 1100 Series Access Point Installation and Configuration Guide OL-2851-01...
- Page 44 Settings page. Clicking Custom takes you to the Network Interfaces: Radio-802.11b Settings page. • Aironet Extensions—Enable this setting if there are only Cisco Aironet devices on your wireless LAN. Cisco Aironet 1100 Series Access Point Installation and Configuration Guide OL-2851-01...
-
Page 45: Default Settings On The Express Setup Page
Role in Radio Network Access point (root) Optimize Radio Network for Throughput Aironet Extensions Enable SNMP Community defaultCommunity 1. When you assign multiple SSIDs, this setting no longer appears. Cisco Aironet 1100 Series Access Point Installation and Configuration Guide OL-2851-01... -
Page 46: Protecting Your Wireless Lan
IP address and the SSID. Obtaining and Installing IPSU IPSU is available on the Cisco web site. Follow these steps to obtain and install IPSU: Use your Internet browser to access the Cisco Software Center at the following URL: Step 1 http://www.cisco.com/public/sw-center/sw-wireless.shtml... -
Page 47: Using Ipsu To Find The Access Point's Ip Address
DHCP-assigned IP address. To change the access point IP address from the default value using IPSU, refer to the “Using IPSU to Set the Access Point’s IP Address and SSID” section on page 3-10. Cisco Aironet 1100 Series Access Point Installation and Configuration Guide OL-2851-01... -
Page 48: Using Ipsu To Set The Access Point's Ip Address And Ssid
Enter the SSID you want to assign to the access point in the SSID field. You cannot set the SSID without also setting the IP address. However, you can set the IP address Note without setting the SSID. Cisco Aironet 1100 Series Access Point Installation and Configuration Guide 3-10 OL-2851-01... -
Page 49: Assigning An Ip Address Using The Cli
Windows 2000, type open followed by the access point’s IP address. In the Host Name field, type the access point’s IP address and click Connect. Step 3 Cisco Aironet 1100 Series Access Point Installation and Configuration Guide 3-11 OL-2851-01... - Page 50 Chapter 3 Configuring the Access Point for the First Time Using a Telnet Session to Access the CLI Cisco Aironet 1100 Series Access Point Installation and Configuration Guide 3-12 OL-2851-01...
-
Page 51: Chapter 4 Using The Web-Browser Interface
The access point web-browser interface is fully compatible with Microsoft Internet Explorer (version Note 5.x or later) or Netscape Navigator (version 4.x). Cisco Aironet 1100 Series Access Point Installation and Configuration Guide OL-2851-01... -
Page 52: Using The Web-Browser Interface For The First Time
Clicking Cancel cancels any changes you made on the page and keeps you on that page. Changes are only applied when you click Apply. Figure 4-1 shows the web-browser interface home page. Cisco Aironet 1100 Series Access Point Installation and Configuration Guide OL-2851-01... -
Page 53: Using Action Buttons
Displays a list of infrastructure devices on your wireless LAN. Association Displays a list of all devices on your wireless LAN, listing their system names, network roles, and parent-client relationships. Cisco Aironet 1100 Series Access Point Installation and Configuration Guide OL-2851-01... - Page 54 Updates status information or statistics displayed on a page. Cancel Discards changes to the page and remains on the page. Back Discards any changes made to the page and returns to the previous page. Cisco Aironet 1100 Series Access Point Installation and Configuration Guide OL-2851-01...
-
Page 55: Character Restrictions In Entry Fields
Using the Web-Browser Interface Using Online Help Character Restrictions in Entry Fields Because the 1100 series access point uses Cisco IOS software, there are certain characters that you cannot use in the entry fields on the web-browser interface. Table 4-2 lists the illegal characters and the fields in which you cannot use them. - Page 56 Chapter 4 Using the Web-Browser Interface Using Online Help Cisco Aironet 1100 Series Access Point Installation and Configuration Guide OL-2851-01...
-
Page 57: Using The Command-Line Interface
Using Command History, page 5-4 Using Editing Features, page 5-5 • • Searching and Filtering Output of show and more Commands, page 5-8 Accessing the CLI, page 5-8 • Cisco Aironet 1100 Series Access Point Installation and Configuration Guide OL-2851-01... -
Page 58: Ios Command Modes
IOS Command Modes IOS Command Modes The Cisco IOS user interface is divided into many different modes. The commands available to you depend on which mode you are currently in. Enter a question mark (?) at the system prompt to obtain a list of commands available for each command mode. -
Page 59: C H A P T E R 5 Using The Command-Line Interface
Use the command without the keyword no to re-enable a disabled feature or to enable a feature that is disabled by default. Cisco Aironet 1100 Series Access Point Installation and Configuration Guide OL-2851-01... -
Page 60: Understanding Cli Messages
By default, the access point records ten command lines in its history buffer. Beginning in privileged EXEC mode, enter this command to change the number of command lines that the access point records during the current terminal session: ap# terminal history size number-of-lines Cisco Aironet 1100 Series Access Point Installation and Configuration Guide OL-2851-01... -
Page 61: Recalling Commands
Editing Commands through Keystrokes, page 5-6 • • Editing Command Lines that Wrap, page 5-7 Enabling and Disabling Editing Features Although enhanced editing mode is automatically enabled, you can disable it. Cisco Aironet 1100 Series Access Point Installation and Configuration Guide OL-2851-01... -
Page 62: Editing Commands Through Keystrokes
Capitalize at the cursor. capitalize a set of letters. Esc L Change the word at the cursor to lowercase. Esc U Capitalize letters from the cursor to the end of the word. Cisco Aironet 1100 Series Access Point Installation and Configuration Guide OL-2851-01... -
Page 63: Editing Command Lines That Wrap
The dollar sign ($) appears at the end of the line to show that the line has been scrolled to the right: ap(config)# access-list 101 permit tcp 131.108.2.5 255.255.255.0 131.108.1$ Cisco Aironet 1100 Series Access Point Installation and Configuration Guide OL-2851-01... -
Page 64: Searching And Filtering Output Of Show And More Commands
Windows 2000, type open followed by the access point’s IP address. Step 3 In the Host Name field, type the access point’s IP address and click Connect. Cisco Aironet 1100 Series Access Point Installation and Configuration Guide OL-2851-01... -
Page 65: Opening The Cli With Secure Shell
At the username and password prompts, enter your administrator username and password. The default Step 4 username is Cisco, and the default password is Cisco. The default enable password is also Cisco. Usernames and passwords are case-sensitive. Opening the CLI with Secure Shell Secure Shell Protocol is a protocol that provides a secure, remote connection to networking devices set up to use it. - Page 66 Chapter 5 Using the Command-Line Interface Accessing the CLI Cisco Aironet 1100 Series Access Point Installation and Configuration Guide 5-10 OL-2851-01...
-
Page 67: Administering The Access Point
Configuring the Access Point for Secure Shell, page 6-13 Managing the System Time and Date, page 6-14 • Configuring a System Name and Prompt, page 6-29 • Creating a Banner, page 6-31 • Cisco Aironet 1100 Series Access Point Installation and Configuration Guide OL-2851-01... -
Page 68: Chapter 6 Administering The Access Point
Password protection restricts access to a network or network device. Privilege levels define what commands users can issue after they have logged into a network device. For complete syntax and usage information for the commands used in this section, refer to the Cisco IOS Note Security Command Reference for Release 12.1. -
Page 69: Setting Or Changing A Static Enable Password
Default Password and Privilege Levels (continued) Feature Default Setting Enable secret password and privilege level The default enable password is Cisco. The default is level 15 (privileged EXEC level). The password is encrypted before it is written to the configuration file. Line password Default password is Cisco. -
Page 70: Protecting Enable And Enable Secret Passwords With Encryption
Encryption prevents the password from being readable in the configuration file. Step 4 Return to privileged EXEC mode. Step 5 copy running-config startup-config (Optional) Save your entries in the configuration file. Cisco Aironet 1100 Series Access Point Installation and Configuration Guide OL-2851-01... -
Page 71: Configuring Username And Password Pairs
Step 2. Step 4 Return to privileged EXEC mode. Step 5 show running-config Verify your entries. Step 6 copy running-config startup-config (Optional) Save your entries in the configuration file. Cisco Aironet 1100 Series Access Point Installation and Configuration Guide OL-2851-01... -
Page 72: Configuring Multiple Privilege Levels
For password, specify a string from 1 to 25 alphanumeric characters. • The string cannot start with a number, is case sensitive, and allows spaces but ignores leading spaces. By default, no password is defined. Cisco Aironet 1100 Series Access Point Installation and Configuration Guide OL-2851-01... -
Page 73: Logging Into And Exiting A Privilege Level
RADIUS is facilitated through AAA and can be enabled only through AAA commands. Note For complete syntax and usage information for the commands used in this section, refer to the Cisco IOS Security Command Reference for Release 12.2. Cisco Aironet 1100 Series Access Point Installation and Configuration Guide... -
Page 74: Default Radius Configuration
Beginning in privileged EXEC mode, follow these steps to configure login authentication. This procedure is required. Command Purpose Step 1 configure terminal Enter global configuration mode. Step 2 aaa new-model Enable AAA. Cisco Aironet 1100 Series Access Point Installation and Configuration Guide OL-2851-01... -
Page 75: Defining Aaa Server Groups
You select a subset of the configured server hosts and use them for a particular service. The server group is used with a global server-host list, which lists the IP addresses of the selected server hosts. Cisco Aironet 1100 Series Access Point Installation and Configuration Guide OL-2851-01... - Page 76 Set the timeout, retransmit, and encryption key values to use with the specific RADIUS host. Cisco Aironet 1100 Series Access Point Installation and Configuration Guide 6-10 OL-2851-01...
-
Page 77: Configuring Radius Authorization For User Privileged Access And Network Services
Use the local database if authentication was not performed by using RADIUS. Authorization is bypassed for authenticated users who log in through the CLI even if authorization has Note been configured. Cisco Aironet 1100 Series Access Point Installation and Configuration Guide 6-11 OL-2851-01... -
Page 78: Displaying The Radius Configuration
Configure user AAA authorization to determine if the user is allowed to run an EXEC shell by checking the local database. Step 5 aaa authorization network local Configure user AAA authorization for all network-related service requests. Cisco Aironet 1100 Series Access Point Installation and Configuration Guide 6-12 OL-2851-01... -
Page 79: Configuring The Access Point For Secure Shell
Local Authentication and Authorization” section on page 6-12) For more information about SSH, refer to the “Configuring Secure Shell” section in the Cisco IOS Security Configuration Guide for Release 12.2. Cisco Aironet 1100 Series Access Point Installation and Configuration Guide... -
Page 80: Configuring Ssh
You can manage the system time and date on your access point automatically, using the Network Time Protocol (NTP), or manually, by setting the time and date on the access point. For complete syntax and usage information for the commands used in this section, refer to the Cisco IOS Note Configuration Fundamentals Command Reference for Release 12.2. -
Page 81: Understanding Network Time Protocol
Cisco’s implementation of NTP does not support stratum 1 service; it is not possible to connect to a radio or atomic clock. We recommend that the time service for your network be derived from the public NTP servers available on the IP Internet. -
Page 82: Configuring Ntp
Workstations Configuring NTP Cisco Aironet 1100 Series Access Points do not have a hardware-supported clock, and they cannot function as an NTP master clock to which peers synchronize themselves when an external NTP source is not available. These access points also have no hardware support for a calendar. As a result, the ntp update-calendar and the ntp master global configuration commands are not available. -
Page 83: Default Ntp Configuration
The access point does not synchronize to a device unless both have one of these authentication keys, and the key number is specified by the ntp trusted-key key-number command. Cisco Aironet 1100 Series Access Point Installation and Configuration Guide 6-17 OL-2851-01... - Page 84 This example shows how to configure the access point to synchronize only to devices providing authentication key 42 in the device’s NTP packets: AP(config)# ntp authenticate AP(config)# ntp authentication-key 42 md5 aNiceKey AP(config)# ntp trusted-key 42 Cisco Aironet 1100 Series Access Point Installation and Configuration Guide 6-18 OL-2851-01...
-
Page 85: Configuring Ntp Associations
This example shows how to configure the access point to synchronize its system clock with the clock of the peer at IP address 172.16.22.44 using NTP version 2: AP(config)# ntp server 172.16.22.44 version 2 Cisco Aironet 1100 Series Access Point Installation and Configuration Guide 6-19 OL-2851-01... -
Page 86: Configuring Ntp Broadcast Service
To disable the interface from sending NTP broadcast packets, use the no ntp broadcast interface configuration command. This example shows how to configure an interface to send NTP version 2 packets: AP(config)# interface gigabitethernet0/1 AP(config-if)# ntp broadcast version 2 Cisco Aironet 1100 Series Access Point Installation and Configuration Guide 6-20 OL-2851-01... -
Page 87: Configuring Ntp Access Restrictions
You can control NTP access on two levels as described in these sections: • Creating an Access Group and Assigning a Basic IP Access List, page 6-22 Disabling NTP Services on a Specific Interface, page 6-23 • Cisco Aironet 1100 Series Access Point Installation and Configuration Guide 6-21 OL-2851-01... - Page 88 NTP control queries from a device whose address passes the access list criteria. Cisco Aironet 1100 Series Access Point Installation and Configuration Guide 6-22 OL-2851-01...
-
Page 89: Configuring The Source Ip Address For Ntp Packets
IP address for all NTP packets. The address is taken from the specified interface. This command is useful if the address on an interface cannot be used as the destination for reply packets. Cisco Aironet 1100 Series Access Point Installation and Configuration Guide 6-23 OL-2851-01... -
Page 90: Displaying The Ntp Configuration
• • show ntp status For detailed information about the fields in these displays, refer to the Cisco IOS Configuration Fundamentals Command Reference for Release 12.1. Configuring Time and Date Manually If no other source of time is available, you can manually configure the time and date after the system is restarted. -
Page 91: Setting The System Clock
The symbol that precedes the show clock display has this meaning: *—Time is not authoritative. • • (blank)—Time is authoritative. • .—Time is authoritative, but NTP is not synchronized. Cisco Aironet 1100 Series Access Point Installation and Configuration Guide 6-25 OL-2851-01... -
Page 92: Configuring The Time Zone
Atlantic Canada (AST) is UTC-3.5, where the 3 means 3 hours and .5 means 50 percent. In this case, the necessary command is clock timezone AST -3 30. To set the time to UTC, use the no clock timezone global configuration command. Cisco Aironet 1100 Series Access Point Installation and Configuration Guide 6-26 OL-2851-01... -
Page 93: Configuring Summer Time (Daylight Saving Time)
This example shows how to specify that summer time starts on the first Sunday in April at 02:00 and ends on the last Sunday in October at 02:00: AP(config)# clock summer-time PDT recurring 1 Sunday April 2:00 last Sunday October 2:00 Cisco Aironet 1100 Series Access Point Installation and Configuration Guide 6-27 OL-2851-01... - Page 94 This example shows how to set summer time to start on October 12, 2000, at 02:00, and end on April 26, 2001, at 02:00: AP(config)# clock summer-time pdt date 12 October 2000 2:00 26 April 2001 2:00 Cisco Aironet 1100 Series Access Point Installation and Configuration Guide 6-28 OL-2851-01...
-
Page 95: Configuring A System Name And Prompt
For complete syntax and usage information for the commands used in this section, refer to the Cisco IOS Note Configuration Fundamentals Command Reference and the Cisco IOS IP and IP Routing Command Reference for Release 12.1. -
Page 96: Understanding Dns
Domain names are pieced together with periods (.) as the delimiting characters. For example, Cisco Systems is a commercial organization that IP identifies by a com domain name, so its domain name is cisco.com. A specific device in this domain, such as the File Transfer Protocol (FTP) system, is identified as ftp.cisco.com. -
Page 97: Displaying The Dns Configuration
The login banner also displays on all connected terminals. It is displayed after the MOTD banner and before the login prompts. For complete syntax and usage information for the commands used in this section, refer to the Cisco IOS Note Configuration Fundamentals Command Reference for Release 12.1. -
Page 98: Default Banner Configuration
This example shows the banner displayed from the previous configuration: Unix> telnet 172.2.5.4 Trying 172.2.5.4... Connected to 172.2.5.4. Escape character is '^]'. This is a secure site. Only authorized users are allowed. For access, contact technical support. Cisco Aironet 1100 Series Access Point Installation and Configuration Guide 6-32 OL-2851-01... -
Page 99: Configuring A Login Banner
This example shows how to configure a login banner for the access point using the dollar sign ($) symbol as the beginning and ending delimiter: AP(config)# banner login $ Access for authorized users only. Please enter your username and password. AP(config)# Cisco Aironet 1100 Series Access Point Installation and Configuration Guide 6-33 OL-2851-01... - Page 100 Chapter 6 Administering the Access Point Creating a Banner Cisco Aironet 1100 Series Access Point Installation and Configuration Guide 6-34 OL-2851-01...
-
Page 101: Configuring Radio Settings
Configuring the Beacon Period and the DTIM, page 7-12 • Configure RTS Threshold and Retries, page 7-12 • Configuring the Maximum Data Retries, page 7-13 • Configuring the Fragmentation Threshold, page 7-13 • Cisco Aironet 1100 Series Access Point Installation and Configuration Guide OL-2851-01... -
Page 102: Disabling And Enabling The Radio Interface
(non-root) device that is not connected to the wired LAN. Figure 7-1 shows a root access point and a repeater access point. Figure 7-1 Root and Repeater Access Points Access Point Wired LAN (Root Unit) Access Point (Repeater) Cisco Aironet 1100 Series Access Point Installation and Configuration Guide OL-2851-01... -
Page 103: Configuring Radio Data Rates
11-Mbps rate to Basic and set the other data rates to Enabled. To set up the access point to serve only client devices operating at 1 and 2 Mbps, set 1 and 2 to Basic and set the rest of the data rates to Enabled. Cisco Aironet 1100 Series Access Point Installation and Configuration Guide OL-2851-01... - Page 104 0 ap1100(config-if)# no speed basic-11.0 ap1100(config-if)# end Data rate 11 is set to basic, and the rest of the data rates are set to disabled. Cisco Aironet 1100 Series Access Point Installation and Configuration Guide OL-2851-01...
-
Page 105: Configuring Radio Transmit Power
Use the no form of the client power command to disable the maximum power level for associated clients. Aironet extensions must be enabled to limit the power level on associated client devices. Aironet Note extensions are enabled by default. Cisco Aironet 1100 Series Access Point Installation and Configuration Guide OL-2851-01... -
Page 106: Configuring Radio Channel Settings
Configuring Radio Channel Settings Configuring Radio Channel Settings The factory setting for Cisco wireless LAN systems is Radio Channel 6 transmitting at 2437 MHz. To overcome an interference problem, other channel settings are available. The channel settings on your access point correspond to the frequencies available in your regulatory domain. See Appendix C, “Channels and Antenna Settings,”... -
Page 107: Enabling And Disabling World-Mode
Long—A long preamble ensures compatibility between the access point and all early models of • Cisco Aironet Wireless LAN Adapters (PC4800 and PC4800A). If these client devices do not associate to your access points, you should use short preambles. Short preambles are enabled by default. -
Page 108: Configuring Transmit And Receive Antennas
Set the transmit antenna to diversity, left, or right. {diversity | left | right} Note For best performance, leave the transmit antenna setting at the default setting, diversity. Cisco Aironet 1100 Series Access Point Installation and Configuration Guide OL-2851-01... -
Page 109: Disabling And Enabling Aironet Extensions
(Optional) Save your entries in the configuration file. Disabling and Enabling Aironet Extensions By default, the access point uses Cisco Aironet 802.11 extensions to detect the capabilities of Cisco Aironet client devices and to support features that require specific interaction between the access point and associated client devices. -
Page 110: Configuring The Ethernet Encapsulation Transformation Method
Enabling and Disabling Reliable Multicast to Workgroup Bridges Reliable multicast messages from the access point to workgroup bridges allows approximately 20 Cisco Aironet Workgroup Bridges to associate to the access point. The default setting, disabled, allows more than 20 workgroup bridges to associate to the access point. -
Page 111: Enabling And Disabling Public Secure Packet Forwarding
Chapter 7 Configuring Radio Settings Enabling and Disabling Public Secure Packet Forwarding A Cisco Aironet Workgroup Bridge provides a wireless LAN connection for up to eight Ethernet-enabled devices. Beginning in privileged EXEC mode, follow these steps to configure the encapsulation transformation... -
Page 112: Configuring The Beacon Period And The Dtim
Return to privileged EXEC mode. Step 6 copy running-config startup-config (Optional) Save your entries in the configuration file. Use the no form of the command to reset the RTS settings to defaults. Cisco Aironet 1100 Series Access Point Installation and Configuration Guide 7-12 OL-2851-01... -
Page 113: Configuring The Maximum Data Retries
Return to privileged EXEC mode. Step 5 copy running-config startup-config (Optional) Save your entries in the configuration file. Use the no form of the command to reset the setting to defaults. Cisco Aironet 1100 Series Access Point Installation and Configuration Guide 7-13 OL-2851-01... - Page 114 Chapter 7 Configuring Radio Settings Configuring the Fragmentation Threshold Cisco Aironet 1100 Series Access Point Installation and Configuration Guide 7-14 OL-2851-01...
-
Page 115: Chapter 8 Configuring Multiple Ssids
This chapter describes how to configure and manage multiple service set identifiers (SSIDs) on the access point. This chapter contains these sections: Understanding Multiple SSIDs, page 8-2 • Configuring Multiple SSIDs, page 8-2 • Cisco Aironet 1100 Series Access Point Installation and Configuration Guide OL-2851-01... -
Page 116: Understanding Multiple Ssids
These sections contain configuration information for multiple SSIDs: Default SSID Configuration, page 8-3 • Creating an SSID, page 8-3 • Using a RADIUS Server to Restrict SSIDs, page 8-4 • Cisco Aironet 1100 Series Access Point Installation and Configuration Guide OL-2851-01... -
Page 117: Default Ssid Configuration
SSID. If you designate an SSID as the infrastructure SSID, infrastructure devices must associate to the access point using that SSID unless you also enter the optional keyword. Cisco Aironet 1100 Series Access Point Installation and Configuration Guide OL-2851-01... -
Page 118: Using A Radius Server To Restrict Ssids
The allowed list of SSIDs from the RADIUS server are in the form of Cisco VSAs. The Internet Engineering Task Force (IETF) draft standard specifies a method for communicating vendor-specific information between the access point and the RADIUS server by using the vendor-specific attribute (attribute 26). - Page 119 Configuring Multiple SSIDs using the format recommended in the specification. Cisco’s vendor-ID is 9, and the supported option has vendor-type 1, which is named cisco-avpair. The Radius server is allowed to have zero or more SSID VSAs per client. In this example, the following AV pair adds the SSID batman to the list of allowed SSIDs for a user: cisco-avpair= ”ssid=batman”...
- Page 120 Chapter 8 Configuring Multiple SSIDs Configuring Multiple SSIDs Cisco Aironet 1100 Series Access Point Installation and Configuration Guide OL-2851-01...
-
Page 121: Chapter 9 Configuring Wep And Wep Features
This chapter describes how to configure Wired Equivalent Privacy (WEP), Message Integrity Check (MIC), Temporal Key Integrity Protocol (TKIP), and broadcast key rotation. This chapter contains these sections: Understanding WEP, page 9-2 • Configuring WEP and WEP Features, page 9-2 • Cisco Aironet 1100 Series Access Point Installation and Configuration Guide OL-2851-01... -
Page 122: Understanding Wep
WEP key and changes it at the interval you select. Broadcast key rotation is an excellent alternative to TKIP if your wireless LAN supports wireless client devices that are not Cisco devices or that cannot be upgraded to the latest firmware for Cisco client devices. Configuring WEP and WEP Features... -
Page 123: Creating Wep Keys
Beginning in privileged EXEC mode, follow these steps to enable WEP, TKIP, and MIC: Command Purpose Step 1 configure terminal Enter global configuration mode. Step 2 interface dot11radio 0 Enter interface configuration mode for the radio interface. Cisco Aironet 1100 Series Access Point Installation and Configuration Guide OL-2851-01... -
Page 124: Enabling And Disabling Broadcast Key Rotation
This example enables broadcast key rotation on VLAN 22 and sets the rotation interval to 300 seconds: ap1100# configure terminal ap1100(config)# configure interface dot11radio 0 ap1100(config-if)# broadcast-key vlan 22 change 300 ap1100(config-ssid)# end Cisco Aironet 1100 Series Access Point Installation and Configuration Guide OL-2851-01... -
Page 125: Chapter 10 Configuring Authentication Types
This chapter describes how to configure authentication types on the access point. This chapter contains these sections: Understanding Authentication Types, page 10-2 • Configuring Authentication Types, page 10-6 • Matching Access Point and Client Device Authentication Types, page 10-9 • Cisco Aironet 1100 Series Access Point Installation and Configuration Guide 10-1 OL-2851-01... -
Page 126: Understanding Authentication Types
2. Authentication response Shared Key Authentication to the Access Point Cisco provides shared key authentication to comply with the IEEE 802.11b standard. However, because of shared key’s security flaws, we recommend that you avoid using it. During shared key authentication, the access point sends an unencrypted challenge text string to any device attempting to communicate with the access point. -
Page 127: Eap Authentication To The Network
When you enable EAP on your access points and client devices, authentication to the network occurs in the steps shown in Figure 10-3: Cisco Aironet 1100 Series Access Point Installation and Configuration Guide 10-3 OL-2851-01... - Page 128 If you use EAP authentication, you can select open or shared key authentication, but you don’t have to. Note EAP authentication controls authentication both to your access point and to your network. Cisco Aironet 1100 Series Access Point Installation and Configuration Guide 10-4 OL-2851-01...
-
Page 129: Mac Address Authentication To The Network
If MAC authentication fails, the access point waits for the client device to attempt EAP authentication. See the “Assigning Authentication Types to an SSID” section on page 10-6 for instructions on setting up this combination of authentications. Cisco Aironet 1100 Series Access Point Installation and Configuration Guide 10-5 OL-2851-01... -
Page 130: Configuring Authentication Types
Create an SSID and enter SSID configuration mode for the new SSID. The SSID can consist of up to 32 alphanumeric characters. SSIDs are case sensitive. Cisco Aironet 1100 Series Access Point Installation and Configuration Guide 10-6 OL-2851-01... - Page 131 MAC address authentication. For list-name, specify the authentication method list. • (Optional) Set the SSID’s authentication type to shared key with EAP authentication. For list-name, specify the authentication method list. Cisco Aironet 1100 Series Access Point Installation and Configuration Guide 10-7 OL-2851-01...
-
Page 132: Configuring Authentication Holdoffs, Timeouts, And Intervals
Enter the number of seconds the access point should wait for a reply from a client attempting to authenticate before the authentication fails. Enter a value from 1 to 65555 seconds. Cisco Aironet 1100 Series Access Point Installation and Configuration Guide 10-8 OL-2851-01... -
Page 133: Matching Access Point And Client Device Authentication Types
Refer to the Cisco Aironet Wireless LAN Client Adapters Installation and Configuration Guide for Windows for instructions on setting authentication types on wireless client adapters. Refer to Chapter 9, “Configuring... - Page 134 Select Enable network access Set up and enable WEP and enable to configure card control using IEEE 802.1X and Require EAP and Open PEAP as the EAP Type Authentication Cisco Aironet 1100 Series Access Point Installation and Configuration Guide 10-10 OL-2851-01...
- Page 135 Set up and enable WEP with full to configure card control using IEEE 802.1X and encryption and enable Require SIM Authentication as the EAP EAP and Open Authentication Type Cisco Aironet 1100 Series Access Point Installation and Configuration Guide 10-11 OL-2851-01...
- Page 136 Chapter 10 Configuring Authentication Types Matching Access Point and Client Device Authentication Types Cisco Aironet 1100 Series Access Point Installation and Configuration Guide 10-12 OL-2851-01...
-
Page 137: Chapter 11 Configuring Radius Servers
RADIUS is facilitated through AAA and can be enabled only through AAA commands. For complete syntax and usage information for the commands used in this section, refer to the Cisco IOS Note Security Command Reference for Release 12.2. -
Page 138: Understanding Radius
Switch-to-switch or router-to-router situations. RADIUS does not provide two-way authentication. • RADIUS can be used to authenticate from one device to a non-Cisco device if the non-Cisco device requires authentication. Networks using a variety of services. RADIUS generally binds a user to one service model. - Page 139 RADIUS server to the wireless client device. See the “Assigning Authentication Types to an SSID” section on page 10-6 for instructions on setting up client authentication using a RADIUS server. Cisco Aironet 1100 Series Access Point Installation and Configuration Guide 11-3 OL-2851-01...
-
Page 140: Configuring Radius
Identifying the RADIUS Server Host Access point-to-RADIUS-server communication involves several components: Host name or IP address • Authentication destination port • Accounting destination port • Key string • Cisco Aironet 1100 Series Access Point Installation and Configuration Guide 11-4 OL-2851-01... - Page 141 Beginning in privileged EXEC mode, follow these steps to configure per-server RADIUS server communication. This procedure is required. Command Purpose Step 1 configure terminal Enter global configuration mode. Step 2 aaa new-model Enable AAA. Cisco Aironet 1100 Series Access Point Installation and Configuration Guide 11-5 OL-2851-01...
- Page 142 This example shows how to configure one RADIUS server to be used for authentication and another to be used for accounting: AP(config)# radius-server host 172.29.36.49 auth-port 1612 key rad1 AP(config)# radius-server host 172.20.36.50 acct-port 1618 key rad2 Cisco Aironet 1100 Series Access Point Installation and Configuration Guide 11-6 OL-2851-01...
-
Page 143: Configuring Radius Login Authentication
Beginning in privileged EXEC mode, follow these steps to configure login authentication. This procedure is required. Command Purpose Step 1 configure terminal Enter global configuration mode. Step 2 aaa new-model Enable AAA. Cisco Aironet 1100 Series Access Point Installation and Configuration Guide 11-7 OL-2851-01... - Page 144 {default | list-name} method1 [method2...] global configuration command. To either disable RADIUS authentication for logins or to return to the default value, use the no login authentication {default | list-name} line configuration command. Cisco Aironet 1100 Series Access Point Installation and Configuration Guide 11-8 OL-2851-01...
-
Page 145: Defining Aaa Server Groups
Beginning in privileged EXEC mode, follow these steps to define the AAA server group and associate a particular RADIUS server with it: Command Purpose Step 1 configure terminal Enter global configuration mode. Step 2 aaa new-model Enable AAA. Cisco Aironet 1100 Series Access Point Installation and Configuration Guide 11-9 OL-2851-01... - Page 146 Step 8 copy running-config startup-config (Optional) Save your entries in the configuration file. Step 9 Enable RADIUS login authentication. See the “Configuring RADIUS Login Authentication” section on page 11-7. Cisco Aironet 1100 Series Access Point Installation and Configuration Guide 11-10 OL-2851-01...
-
Page 147: Configuring Radius Authorization For User Privileged Access And Network Services
Use the local database if authentication was not performed by using RADIUS. • Note Authorization is bypassed for authenticated users who log in through the CLI even if authorization has been configured. Cisco Aironet 1100 Series Access Point Installation and Configuration Guide 11-11 OL-2851-01... -
Page 148: Starting Radius Accounting
(AV) pairs and is stored on the security server. This data can then be analyzed for network management, client billing, or auditing. Beginning in privileged EXEC mode, follow these steps to enable RADIUS accounting for each Cisco IOS privilege level and for network services:... -
Page 149: Configuring Settings For All Radius Servers
The Cisco RADIUS implementation supports one vendor-specific option by using the format recommended in the specification. Cisco’s vendor-ID is 9, and the supported option has vendor-type 1, which is named cisco-avpair. The value is a string with this format:... -
Page 150: Configuring The Access Point For Vendor-Proprietary Radius Server Communication
Configuring RADIUS Servers Configuring RADIUS Protocol is a value of the Cisco protocol attribute for a particular type of authorization. Attribute and value are an appropriate AV pair defined in the Cisco TACACS+ specification, and sep is = for mandatory attributes and * for optional attributes. This allows the full set of features available for TACACS+ authorization to also be used for RADIUS. -
Page 151: Displaying The Radius Configuration
AP(config)# radius-server host 172.20.30.15 nonstandard AP(config)# radius-server key rad124 Displaying the RADIUS Configuration To display the RADIUS configuration, use the show running-config privileged EXEC command. Cisco Aironet 1100 Series Access Point Installation and Configuration Guide 11-15 OL-2851-01... - Page 152 Chapter 11 Configuring RADIUS Servers Displaying the RADIUS Configuration Cisco Aironet 1100 Series Access Point Installation and Configuration Guide 11-16 OL-2851-01...
-
Page 153: Chapter 12 Configuring Vlans
LAN. These sections describe how to configure your access point to support VLANs: Understanding VLANs, page 12-2 • Configuring VLANs, page 12-4 • VLAN Configuration Example, page 12-7 • Cisco Aironet 1100 Series Access Point Installation and Configuration Guide 12-1 OL-2851-01... -
Page 154: Understanding Vlans
VLAN are 802.11Q tagged before they are forwarded onto the wired network. Figure 12-1 shows the difference between traditional physical LAN segmentation and logical VLAN segmentation with wireless devices connected. Cisco Aironet 1100 Series Access Point Installation and Configuration Guide 12-2 OL-2851-01... -
Page 155: Related Documents
SSID 3 Related Documents These documents provide more detailed information pertaining to VLAN design and configuration: Cisco IOS Switching Services Configuration Guide. Click this link to browse to this document: • http://www.cisco.com/univercd/cc/td/doc/product/software/ios122/122cgcr/fswtch_c/index.htm Cisco Internetwork Design Guide. Click this link to browse to this document: •... -
Page 156: Incorporating Wireless Devices Into Vlans
Ethernet ports. For detailed instructions on assigning authentication types to SSIDs, see Chapter 10, “Configuring Authentication Types.” For instructions on assigning other settings to SSIDs, Chapter 8, “Configuring Multiple SSIDs.” Cisco Aironet 1100 Series Access Point Installation and Configuration Guide 12-4 OL-2851-01... - Page 157 Enable the VLAN on the radio and Ethernet ports as the native VLAN ap1100# configure terminal ap1100(config)# interface dot11radio0 ap1100(config-if)# ssid batman ap1100(config-ssid)# vlan 1 ap1100(config-ssid)# exit ap1100(config)# interface dot11radio0.1 ap1100(config-subif)# encapsulation dot1q 1 native ap1100(config-subif)# exit Cisco Aironet 1100 Series Access Point Installation and Configuration Guide 12-5 OL-2851-01...
-
Page 158: Using A Radius Server To Assign Users To Vlans
Bridging Bridge Group 1 201688 Bridging Bridge Group 1 201688 Virtual LAN ID: 2 (IEEE 802.1Q Encapsulation) vLAN Trunk Interfaces: Dot11Radio0.2 FastEthernet0.2 Virtual-Dot11Radio0.2 Protocols Configured: Address: Received: Transmitted: Cisco Aironet 1100 Series Access Point Installation and Configuration Guide 12-6 OL-2851-01... -
Page 159: Vlan Configuration Example
• internal files, access student databases, and view internal information such as human resources, payroll, and other faculty-related material. Faculty users are required to authenticate using Cisco LEAP. Student access—Lowest level of access; users can access school’s Intranet and the Internet, obtain •... - Page 160 VLAN. This bridge group is moved to the native subinterface automatically to maintain the link to bridge virtual interface (BVI) 1, which represents both the radio and Ethernet interfaces. Cisco Aironet 1100 Series Access Point Installation and Configuration Guide 12-8 OL-2851-01...
- Page 161 2 unicast-flooding bridge-group 2 spanning-disabled When you configure a bridge group on the FastEthernet interface, these commands are set automatically: no bridge-group 2 source-learning bridge-group 2 spanning-disabled Cisco Aironet 1100 Series Access Point Installation and Configuration Guide 12-9 OL-2851-01...
- Page 162 Chapter 12 Configuring VLANs VLAN Configuration Example Cisco Aironet 1100 Series Access Point Installation and Configuration Guide 12-10 OL-2851-01...
-
Page 163: Chapter 13 Configuring Qos
It sends the packets without any assurance of reliability, delay bounds, or throughput. For complete syntax and usage information for the commands used in this chapter, refer to the Cisco Note Aironet 1100 Series Access Point Command Reference for this release. -
Page 164: Understanding Qos For Wireless Lans
They support Spectralink phones using the class-map IP protocol clause with the protocol value set • to 119. To contrast the wireless LAN QoS implementation with the QoS implementation on other Cisco network devices, see the Cisco IOS Quality of Service Solutions Configuration Guide at this URL: http://www.cisco.com/univercd/cc/td/doc/product/software/ios122/122cgcr/fqos_c/index.htm Impact of QoS on a Wireless LAN Wireless LAN QoS features are a subset of the proposed 802.11e draft. -
Page 165: Precedence Of Qos Settings
QoS is disabled by default. This section describes how to configure QoS on your access point. It contains this configuration information: Configuration Guidelines, page 13-4 • Configuring QoS Using the Web-Browser Interface, page 13-4 • Adjusting Radio Traffic Class Definitions, page 13-8 • Cisco Aironet 1100 Series Access Point Installation and Configuration Guide 13-3 OL-2851-01... -
Page 166: Configuration Guidelines
This section describes configuring QoS using the web-browser interface. For a list of IOS commands for configuring QoS using the CLI, consult the Cisco Aironet 1100 Series Access Point Command Reference. Follow these steps to browse to the command reference: Click this link to browse to the Cisco Aironet documentation home page: http://www.cisco.com/univercd/cc/td/doc/product/wireless/index.htm... - Page 167 If the packets that you need to prioritize contain IP precedence information in the IP header TOS field, Step 4 select an IP precedence classification from the IP Precedence drop-down menu. Menu selections include: Routine (0) • Cisco Aironet 1100 Series Access Point Installation and Configuration Guide 13-5 OL-2851-01...
- Page 168 Assured Forwarding — Class 4 Low • Assured Forwarding — Class 4 Medium • Assured Forwarding — Class 4 High • Class Selector 1 • Class Selector 2 • Cisco Aironet 1100 Series Access Point Installation and Configuration Guide 13-6 OL-2851-01...
- Page 169 If you want the access point to give priority to all voice packets regardless of VLAN, click the Advanced Step 17 tab. Figure 13-3 shows the QoS Policies - Advanced page. Cisco Aironet 1100 Series Access Point Installation and Configuration Guide 13-7 OL-2851-01...
-
Page 170: Adjusting Radio Traffic Class Definitions
2. The access point computes Contention Window values with this equation: CW = 2 ** X minus 1 where X is the value from Table 13-1. Cisco Aironet 1100 Series Access Point Installation and Configuration Guide 13-8 OL-2851-01... - Page 171 Background Spare Excellent Effort Controlled Load Video <100ms Latency Voice <100ms Latency Network Control Figure 13-4 shows the Radio Traffic Classes page. Figure 13-4 Radio Traffic Classes Page Cisco Aironet 1100 Series Access Point Installation and Configuration Guide 13-9 OL-2851-01...
-
Page 172: Qos Configuration Examples
Spectralink phones (protocol 119 packets). The user applies the voice_policy to the incoming and outgoing radio ports and to the outgoing Ethernet port for VLAN 77. Figure 13-5 shows the administrator’s QoS Policies page. Cisco Aironet 1100 Series Access Point Installation and Configuration Guide 13-10 OL-2851-01... - Page 173 The network administrator also enables the QoS element for wireless phones setting on the QoS Policies - Advanced page. This setting gives priority to all voice traffic regardless of VLAN. Cisco Aironet 1100 Series Access Point Installation and Configuration Guide 13-11...
-
Page 174: Prioritizing For Video Traffic
The user applies the video_policy to the incoming and outgoing radio ports and to the outgoing Ethernet port for VLAN 87. Figure 13-6 shows the administrator’s QoS Policies page. Figure 13-6 QoS Policies Page for Video Example Cisco Aironet 1100 Series Access Point Installation and Configuration Guide 13-12 OL-2851-01... -
Page 175: Chapter 14 Configuring Proxy Mobile Ip
This chapter describes how to configure your access point’s proxy mobile IP feature. This chapter contains these sections: Understanding Proxy Mobile IP, page 14-2 • Configuring Proxy Mobile IP, page 14-6 • Cisco Aironet 1100 Series Access Point Installation and Configuration Guide 14-1 OL-2851-01... -
Page 176: Understanding Proxy Mobile Ip
An access point with proxy mobile IP enabled. The access point proxies on behalf of the visiting • client device, performing all mobile IP services for the device. Cisco Aironet 1100 Series Access Point Installation and Configuration Guide 14-2 OL-2851-01... -
Page 177: How Proxy Mobile Ip Works
During the agent discovery phase, the home agent and the foreign agent advertise their services on the network by using the ICMP Router Discovery Protocol (IRDP). The access point listens to these advertisements. Cisco Aironet 1100 Series Access Point Installation and Configuration Guide 14-3 OL-2851-01... -
Page 178: Subnet Map Exchange
This process supports client devices that have already roamed to foreign networks. If the home agent does not respond, the AAP deletes the home agent entry from the subnet map table. Cisco Aironet 1100 Series Access Point Installation and Configuration Guide 14-4... -
Page 179: Registration
The tunnel mode that the access point supports is IP Encapsulation within IP Encapsulation. Cisco Aironet 1100 Series Access Point Installation and Configuration Guide 14-5 OL-2851-01... -
Page 180: Proxy Mobile Ip Security
If your authoritative access points receive their IP addresses through DHCP, use the access point • host names to specify the AAPs in the proxy mobile IP configuration. Proxy mobile IP does not support broadcast and multicast traffic for visiting clients. • Cisco Aironet 1100 Series Access Point Installation and Configuration Guide 14-6 OL-2851-01... -
Page 181: Configuring Proxy Mobile Ip On Your Wired Lan
Step 5 interface fastethernet 0 Enter interface configuration mode for the Ethernet port. Step 6 ip proxy-mobile Enable proxy mobile IP on the Ethernet port. Cisco Aironet 1100 Series Access Point Installation and Configuration Guide 14-7 OL-2851-01... - Page 182 0 ap1100(config-if)# ip proxy-mobile ap1100(config-if)# ssid tsunami ap1100(config-if-ssid)# ip proxy-mobile ap1100(config-if-ssid)# exit ap1100(config-if)# exit ap1100(config)# interface bvi1 ap1100(config-if)# ip proxy-mobile ap1100(config-if-ssid)# end Cisco Aironet 1100 Series Access Point Installation and Configuration Guide 14-8 OL-2851-01...
-
Page 183: Chapter 15 Configuring Filters
This chapter contains these sections: Understanding Filters, page 15-2 • Configuring Filters Using the CLI, page 15-2 • Configuring Filters Using the Web-Browser Interface, page 15-2 • Cisco Aironet 1100 Series Access Point Installation and Configuration Guide 15-1 OL-2851-01... -
Page 184: Understanding Filters
To configure filters using IOS commands, you use access control lists (ACLs) and bridge groups. You can find explanations of these concepts and instructions for implementing them in these documents: Cisco IOS Bridging and IBM Networking Configuration Guide, Release 12.2. Click this link to •... -
Page 185: Creating A Mac Address Filter
(ACL) for the filter. Step 4 Enter a MAC address in the Add MAC Address field. Enter the address with periods separating the three groups of four characters (0040.9612.3456, for example). Cisco Aironet 1100 Series Access Point Installation and Configuration Guide 15-3 OL-2851-01... - Page 186 Step 12 both the Ethernet and radio ports, and to either or both incoming and outgoing packets. Click Apply. The filter is enabled on the selected ports. Step 13 Cisco Aironet 1100 Series Access Point Installation and Configuration Guide 15-4 OL-2851-01...
-
Page 187: Configuring And Enabling Ip Filters
Use the IP Filters page to create IP filters for the access point. Figure 15-3 shows the IP Filters page. Cisco Aironet 1100 Series Access Point Installation and Configuration Guide 15-5 OL-2851-01... -
Page 188: Creating An Ip Filter
To edit an existing filter, select the filter name from the Create/Edit Filter Index menu. Step 3 Enter a descriptive name for the new filter in the Filter Name field. Cisco Aironet 1100 Series Access Point Installation and Configuration Guide 15-6 OL-2851-01... - Page 189 Apply Filters page. Step 16 Click the Apply Filters tab to return to the Apply Filters page. Figure 15-4 shows the Apply Filters page. Cisco Aironet 1100 Series Access Point Installation and Configuration Guide 15-7 OL-2851-01...
-
Page 190: Configuring And Enabling Ethertype Filters
You can apply the filters you create to either or both the Ethernet and radio ports and to either or both incoming and outgoing packets. Use the Ethertype Filters page to create Ethertype filters for the access point. Figure 15-5 shows the Ethertype Filters page. Cisco Aironet 1100 Series Access Point Installation and Configuration Guide 15-8 OL-2851-01... -
Page 191: Creating An Ethertype Filter
Click Add. The Ethertype appears in the Filters Classes field. To remove the Ethertype from the Filters Step 7 Classes list, select it and click Delete Class. Repeat Step 4 through Step 7 to add Ethertypes to the filter. Cisco Aironet 1100 Series Access Point Installation and Configuration Guide 15-9 OL-2851-01... - Page 192 Ethernet and radio ports, and to either or both incoming and outgoing packets. Step 12 Click Apply. The filter is enabled on the selected ports. Cisco Aironet 1100 Series Access Point Installation and Configuration Guide 15-10 OL-2851-01...
-
Page 193: Chapter 16 Configuring Cdp
Configuring CDP This chapter describes how to configure Cisco Discovery Protocol (CDP) on your access point. For complete syntax and usage information for the commands used in this chapter, refer to the Cisco Note Aironet 1100 Series Access Point Command Reference for this release and the Cisco IOS Configuration Fundamentals Command Reference for Release 12.2. -
Page 194: Understanding Cdp
Understanding CDP Understanding CDP Cisco Discovery Protocol (CDP) is a device-discovery protocol that runs on all Cisco network equipment. Each device sends identifying messages to a multicast address, and each device monitors the messages sent by other devices. Information in CDP packets is used in network management software such as CiscoWorks2000. -
Page 195: Disabling And Enabling Cdp
Enable CDP after disabling it. Step 3 Return to privileged EXEC mode. This example shows how to enable CDP if it has been disabled. AP# configure terminal AP(config)# cdp run AP(config)# end Cisco Aironet 1100 Series Access Point Installation and Configuration Guide 16-3 OL-2851-01... -
Page 196: Disabling And Enabling Cdp On An Interface
Delete the CDP table of information about neighbors. show cdp Display global information, such as frequency of transmissions and the holdtime for packets being sent. Cisco Aironet 1100 Series Access Point Installation and Configuration Guide 16-4 OL-2851-01... - Page 197 Duplex: full ------------------------- Device ID: idf2-1-lab-l3.cisco.com Entry address(es): IP address: 10.1.1.10 Platform: cisco WS-C3524-XL, Capabilities: Trans-Bridge Switch Interface: GigabitEthernet0/1, Port ID (outgoing port): FastEthernet0/10 Holdtime : 141 sec Cisco Aironet 1100 Series Access Point Installation and Configuration Guide 16-5 OL-2851-01...
- Page 198 S - Switch, H - Host, I - IGMP, r - Repeater Device ID Local Intrfce Holdtme Capability Platform Port ID Perdido2 Gig 0/6 R S I WS-C3550-1Gig Perdido2 Gig 0/5 R S I WS-C3550-1Gig Cisco Aironet 1100 Series Access Point Installation and Configuration Guide 16-6 OL-2851-01...
- Page 199 Hdr syntax: 0, Chksum error: 0, Encaps failed: 0 No memory: 0, Invalid packet: 0, Fragmented: 0 CDP version 1 advertisements output: 0, Input: 0 CDP version 2 advertisements output: 50882, Input: 52510 Cisco Aironet 1100 Series Access Point Installation and Configuration Guide 16-7 OL-2851-01...
- Page 200 Chapter 16 Configuring CDP Monitoring and Maintaining CDP Cisco Aironet 1100 Series Access Point Installation and Configuration Guide 16-8 OL-2851-01...
-
Page 201: Chapter 17 Configuring Snmp
This chapter describes how to configure the Simple Network Management Protocol (SNMP) on your access point. For complete syntax and usage information for the commands used in this chapter, refer to the Cisco Note Aironet 1100 Series Access Point Command Reference for this release and to the Cisco IOS Configuration Fundamentals Command Reference for Release 12.2. -
Page 202: Understanding Snmp
SNMPv1. Error return codes now report the error type. Cisco Aironet 1100 Series Access Point Installation and Configuration Guide 17-2... -
Page 203: Snmp Manager Functions
A community string can have one of these attributes: Read-only—Gives read access to authorized management stations to all objects in the MIB except • the community strings, but does not allow write access Cisco Aironet 1100 Series Access Point Installation and Configuration Guide 17-3 OL-2851-01... -
Page 204: Default Snmp Configuration
Configuring Trap Managers and Enabling Traps, page 17-7 • Setting the Agent Contact and Location Information, page 17-9 • Using the snmp-server view Command, page 17-9 • SNMP Examples, page 17-9 • Cisco Aironet 1100 Series Access Point Installation and Configuration Guide 17-4 OL-2851-01... -
Page 205: Default Snmp Configuration
A MIB view, which defines the subset of all MIB objects accessible to the given community • Read and write or read-only permission for the MIB objects accessible to the community Cisco Aironet 1100 Series Access Point Installation and Configuration Guide 17-5 OL-2851-01... - Page 206 This example shows how to assign the string comaccess to SNMP, to allow read-only access, and to specify that IP access list 4 can use the community string to gain access to the access point SNMP agent: AP(config)# snmp-server community comaccess ro 4 Cisco Aironet 1100 Series Access Point Installation and Configuration Guide 17-6 OL-2851-01...
-
Page 207: Configuring Trap Managers And Enabling Traps
These notification types are always enabled. You can use the snmp-server host global configuration command to a specific host to receive the notification types listed in Table 17-3. Cisco Aironet 1100 Series Access Point Installation and Configuration Guide 17-7 OL-2851-01... - Page 208 To remove the specified host from receiving traps, use the no snmp-server host host global configuration command. To disable a specific trap type, use the no snmp-server enable traps notification-types global configuration command. Cisco Aironet 1100 Series Access Point Installation and Configuration Guide 17-8 OL-2851-01...
-
Page 209: Setting The Agent Contact And Location Information
AP(config)# snmp-server community public AP(config)# snmp-server enable traps config AP(config)# snmp-server host 192.180.1.27 version 2c public AP(config)# snmp-server host 192.180.1.111 version 1 public AP(config)# snmp-server host 192.180.1.33 public Cisco Aironet 1100 Series Access Point Installation and Configuration Guide 17-9 OL-2851-01... -
Page 210: Displaying Snmp Status
AP(config)# snmp-server enable traps entity AP(config)# snmp-server host cisco.com restricted entity This example shows how to enable the access point to send all traps to the host myhost.cisco.com using the community string public: AP(config)# snmp-server enable traps AP(config)# snmp-server host myhost.cisco.com public... -
Page 211: Configuring Repeater And Standby Access Points
Understanding Repeater Access Points, page 18-2 • Configuring a Repeater Access Point, page 18-3 • Understanding Hot Standby, page 18-7 • • Configuring a Hot Standby Access Point, page 18-7 Cisco Aironet 1100 Series Access Point Installation and Configuration Guide 18-1 OL-2851-01... -
Page 212: Understanding Repeater Access Points
Aironet extensions, which are enabled by default, improve the access point's ability to understand the capabilities of Cisco Aironet client devices associated with the access point. Disabling Aironet extensions sometimes improves the interoperability between the access point and non-Cisco client devices. -
Page 213: Configuring A Repeater Access Point
Guidelines for Repeaters, page 18-4 • Setting Up a Repeater, page 18-4 • Verifying Repeater Operation, page 18-5 • Setting Up a Repeater as a LEAP Client, page 18-6 • Cisco Aironet 1100 Series Access Point Installation and Configuration Guide 18-3 OL-2851-01... -
Page 214: Default Configuration
• coverage area of your wireless LAN, but they drastically reduce throughput. Use repeaters when most if not all client devices that associate with the repeaters are Cisco Aironet • clients. Non-Cisco client devices sometimes have trouble communicating with repeater access points. -
Page 215: Verifying Repeater Operation
The repeater access point should also appear as associated with the root access point in the root access point's Association Table. Cisco Aironet 1100 Series Access Point Installation and Configuration Guide 18-5 OL-2851-01... -
Page 216: Setting Up A Repeater As A Leap Client
You can set up a repeater access point to authenticate to your network like other wireless client devices. After you provide a network username and password for the repeater access point, it authenticates to your network using LEAP, Cisco's wireless authentication method, and receives and uses dynamic WEP keys. -
Page 217: Understanding Hot Standby
Enter global configuration mode. Step 2 iapp standby mac-address Puts the access point into standby mode and specifies the MAC address of the monitored access point. Cisco Aironet 1100 Series Access Point Installation and Configuration Guide 18-7 OL-2851-01... - Page 218 This command displays the MAC address of the standby access point, the standby timeout, and the poll-frequency values. If no standby access point is configured, this message appears: no iapp standby mac-address Cisco Aironet 1100 Series Access Point Installation and Configuration Guide 18-8 OL-2851-01...
-
Page 219: Chapter 19 Managing Firmware And Configurations
This chapter describes how to manipulate the Flash file system, how to copy configuration files, and how to archive (upload and download) software images. For complete syntax and usage information for the commands used in this chapter, refer to the Cisco Note Aironet 1100 Series Access Point Command Reference for this release and the Cisco IOS Configuration Fundamentals Command Reference for Release 12.2. -
Page 220: Working With The Flash File System
Table 19-1 show file systems Field Descriptions Field Value Size(b) Amount of memory in the file system in bytes. Free(b) Amount of free memory in the file system in bytes. Cisco Aironet 1100 Series Access Point Installation and Configuration Guide 19-2 OL-2851-01... -
Page 221: Setting The Default File System
Similarly, before copying a Flash configuration file to another location, you might want to verify its filename for use in another command. Cisco Aironet 1100 Series Access Point Installation and Configuration Guide 19-3... -
Page 222: Changing Directories And Displaying The Working Directory
Step 3 dir filesystem: Verify your entry. To delete a directory with all its files and subdirectories, use the delete /force /recursive filesystem:/file-url privileged EXEC command. Cisco Aironet 1100 Series Access Point Installation and Configuration Guide 19-4 OL-2851-01... -
Page 223: Copying Files
When you no longer need a file on a Flash memory device, you can permanently delete it. To delete a file or directory from a specified Flash device, use the delete [/force] [/recursive] [filesystem:]/file-url privileged EXEC command. When files are deleted, their contents cannot be recovered. Caution Cisco Aironet 1100 Series Access Point Installation and Configuration Guide 19-5 OL-2851-01... -
Page 224: Creating, Displaying, And Extracting Tar Files
/create tftp:172.20.10.30/saved.tar flash:/new-configs Displaying the Contents of a tar File To display the contents of a tar file on the screen, use this privileged EXEC command: archive tar /table source-url Cisco Aironet 1100 Series Access Point Installation and Configuration Guide 19-6 OL-2851-01... -
Page 225: Extracting A Tar File
For flash:/file-url, specify the location on the local Flash file system into which the tar file is extracted. You can also specify an optional list of files or directories within the tar file for extraction. If none are specified, all files and directories are extracted. Cisco Aironet 1100 Series Access Point Installation and Configuration Guide 19-7 OL-2851-01... -
Page 226: Displaying The Contents Of A File
This section describes how to create, load, and maintain configuration files. Configuration files contain commands entered to customize the function of the Cisco IOS software. To better benefit from these instructions, your access point contains a minimal default running configuration for interacting with the system software. -
Page 227: Guidelines For Creating And Using Configuration Files
In this case, you would change the running configuration but not save the configuration by using the copy running-config startup-config privileged EXEC command. The running configuration is saved in DRAM; the startup configuration is stored in the NVRAM section of Flash memory. Cisco Aironet 1100 Series Access Point Installation and Configuration Guide 19-9 OL-2851-01... -
Page 228: Creating A Configuration File By Using A Text Editor
Check connectivity to the TFTP server by using the ping command. Cisco Aironet 1100 Series Access Point Installation and Configuration Guide 19-10... - Page 229 Step 2 Upload the access point configuration to the TFTP server. Specify the IP address or host name of the Step 3 TFTP server and the destination filename. Cisco Aironet 1100 Series Access Point Installation and Configuration Guide 19-11 OL-2851-01...
-
Page 230: Copying Configuration Files By Using Ftp
The FTP protocol requires a client to send a remote username and password on each FTP request to a server. When you copy a configuration file from the access point to a server by using FTP, the Cisco IOS software sends the first valid username in this list: The username specified in the copy command if a username is specified. - Page 231 IP address of 172.16.101.101 and to load and run those commands on the access point: ap# copy ftp://netadmin1:mypass@172.16.101.101/host1-confg system:running-config Configure using host1-confg from 172.16.101.101? [confirm] Cisco Aironet 1100 Series Access Point Installation and Configuration Guide 19-13 OL-2851-01...
-
Page 232: Uploading A Configuration File By Using Ftp
This example shows how to copy the running configuration file named ap2-confg to the netadmin1 directory on the remote host with an IP address of 172.16.101.101: ap# copy system:running-config ftp://netadmin1:mypass@172.16.101.101/ap2-confg Write file ap2-confg on host 172.16.101.101?[confirm] Cisco Aironet 1100 Series Access Point Installation and Configuration Guide 19-14 OL-2851-01... -
Page 233: Copying Configuration Files By Using Rcp
The RCP requires a client to send a remote username with each RCP request to a server. When you copy a configuration file from the access point to a server, the Cisco IOS software sends the first valid username in this list: The username specified in the copy command if a username is specified. - Page 234 This step is required only if you override the default remote username (see Steps 4 and 5). Step 4 ip rcmd remote-username username (Optional) Specify the remote username. Cisco Aironet 1100 Series Access Point Installation and Configuration Guide 19-16 OL-2851-01...
-
Page 235: Name Of Configuration File[Rtr2-Confg]? Host2-Confg
This step is required only if you override the default remote username (see Steps 4 and 5). Step 4 ip rcmd remote-username username (Optional) Specify the remote username. Cisco Aironet 1100 Series Access Point Installation and Configuration Guide 19-17 OL-2851-01... -
Page 236: Clearing Configuration Information
Depending on the setting of the file prompt global configuration command, you might be prompted for confirmation before you delete a file. By default, the access point prompts for confirmation on destructive file operations. For more information about the file prompt command, refer to the Cisco IOS Command Reference for Release 12.1. -
Page 237: Image Location On The Access Point
Flash memory. tar File Format of Images on a Server or Cisco.com Software images located on a server or downloaded from Cisco.com are provided in a tar file format, which contains these files: •... -
Page 238: Copying Image Files By Using Tftp
During upload operations, if you are overwriting an existing file (including an empty file, if you had • to create one) on the server, ensure that the permissions on the file are set correctly. Permissions on the file should be world-write. Cisco Aironet 1100 Series Access Point Installation and Configuration Guide 19-20 OL-2851-01... -
Page 239: Command
To avoid an unsuccessful download, use the archive download-sw /safe command, which downloads Note the image first and does not delete the current running version until the download succeeds. Cisco Aironet 1100 Series Access Point Installation and Configuration Guide 19-21 OL-2851-01... - Page 240 The archive upload-sw privileged EXEC command builds an image file on the server by uploading these files in order: info, the IOS image, the HTML files, and info.ver. After these files are uploaded, the upload algorithm creates the tar file format. Cisco Aironet 1100 Series Access Point Installation and Configuration Guide 19-22 OL-2851-01...
-
Page 241: Copying Image Files By Using Ftp
The FTP protocol requires a client to send a remote username and password on each FTP request to a server. When you copy an image file from the access point to a server by using FTP, the Cisco IOS software sends the first valid username in this list: The username specified in the archive download-sw or archive upload-sw privileged EXEC •... -
Page 242: Step 3 Configure Terminal
(Optional) Change the default remote username. Step 5 ip ftp password password (Optional) Change the default password. Step 6 Return to privileged EXEC mode. Cisco Aironet 1100 Series Access Point Installation and Configuration Guide 19-24 OL-2851-01... -
Page 243: Ftp:[[//Username[:Password]@Location]/Directory]
If the Flash device has sufficient space to hold two images and you want to overwrite one of these images with the same version, you must specify the /overwrite option. Cisco Aironet 1100 Series Access Point Installation and Configuration Guide 19-25... -
Page 244: Verify That The Ftp Server Is Properly Configured By Referring To The "Preparing To Download Or Upload A Configuration File By Using Ftp" Section On Page
(see Steps 4, 5, and 6). Step 4 ip ftp username username (Optional) Change the default remote username. Step 5 ip ftp password password (Optional) Change the default password. Cisco Aironet 1100 Series Access Point Installation and Configuration Guide 19-26 OL-2851-01... -
Page 245: Copying Image Files By Using Rcp
If the destination file does not exist, RCP creates it for you. Cisco Aironet 1100 Series Access Point Installation and Configuration Guide 19-27... - Page 246 RCP requires a client to send a remote username on each RCP request to a server. When you copy an image from the access point to a server by using RCP, the Cisco IOS software sends the first valid username in this list: The username specified in the archive download-sw or archive upload-sw privileged EXEC •...
- Page 247 This step is required only if you override the default remote username (see Steps 4 and 5). Step 4 ip rcmd remote-username username (Optional) Specify the remote username. Step 5 Return to privileged EXEC mode. Cisco Aironet 1100 Series Access Point Installation and Configuration Guide 19-29 OL-2851-01...
- Page 248 Flash device whether or not it is the same as the new one, downloads the new image, and then reloads the software. Cisco Aironet 1100 Series Access Point Installation and Configuration Guide 19-30...
- Page 249 This step is required only if you override the default remote username (see Steps 4 and 5). Step 4 ip rcmd remote-username username (Optional) Specify the remote username. Cisco Aironet 1100 Series Access Point Installation and Configuration Guide 19-31 OL-2851-01...
-
Page 250: Reloading The Image Using The Web Browser Interface
Click the System Software tab and then click Software Upgrade. The HTTP Upgrade screen appears. Step 5 Click the Browse button to locate the image file on your PC. Step 6 Cisco Aironet 1100 Series Access Point Installation and Configuration Guide 19-32 OL-2851-01... -
Page 251: Browser Tftp Interface
If the file is located in the TFTP root directory, enter only the filename. Click the Upload button. Step 9 For additional information click the Help icon on the Software Upgrade screen. Cisco Aironet 1100 Series Access Point Installation and Configuration Guide 19-33 OL-2851-01... - Page 252 Chapter 19 Managing Firmware and Configurations Working with Software Images Cisco Aironet 1100 Series Access Point Installation and Configuration Guide 19-34 OL-2851-01...
-
Page 253: Chapter 20 Configuring System Message Logging
Configuring System Message Logging This chapter describes how to configure system message logging on your access point. For complete syntax and usage information for the commands used in this chapter, refer to the Cisco IOS Note Configuration Fundamentals Command Reference for Release 12.2. -
Page 254: Configuring System Message Logging
The part of the message preceding the percent sign depends on the setting of the service sequence-numbers, service timestamps log datetime, service timestamps log datetime [localtime] [msec] [show-timezone], or service timestamps log uptime global configuration command. Cisco Aironet 1100 Series Access Point Installation and Configuration Guide 20-2 OL-2851-01... -
Page 255: Default System Message Logging Configuration
System message logging to the console Enabled Console severity Debugging (and numerically lower levels; Table 20-3 on page 20-7) Logging buffer size 4096 bytes Logging history size 1 message Cisco Aironet 1100 Series Access Point Installation and Configuration Guide 20-3 OL-2851-01... -
Page 256: Disabling And Enabling Message Logging
“Enabling and Disabling Timestamps on Log Messages” section on page 20-6. To re-enable message logging after it has been disabled, use the logging on global configuration command. Cisco Aironet 1100 Series Access Point Installation and Configuration Guide 20-4 OL-2851-01... -
Page 257: Setting The Message Display Destination Device
To disable logging to the console, use the no logging console global configuration command. To disable logging to a file, use the no logging file [severity-level-number | type] global configuration command. Cisco Aironet 1100 Series Access Point Installation and Configuration Guide 20-5... -
Page 258: Enabling And Disabling Timestamps On Log Messages
Verify your entries. Step 5 copy running-config startup-config (Optional) Save your entries in the configuration file. To disable sequence numbers, use the no service sequence-numbers global configuration command. Cisco Aironet 1100 Series Access Point Installation and Configuration Guide 20-6 OL-2851-01... -
Page 259: Defining The Message Severity Level
Table 20-3 Message Logging Level Keywords Level Keyword Level Description Syslog Definition emergencies System unstable LOG_EMERG alerts Immediate action needed LOG_ALERT Cisco Aironet 1100 Series Access Point Installation and Configuration Guide 20-7 OL-2851-01... -
Page 260: Limiting Syslog Messages Sent To The History Table And To Snmp
Specify the number of syslog messages that can be stored in the history table. The default is to store one message. The range is 1 to 500 messages. Step 4 Return to privileged EXEC mode. Cisco Aironet 1100 Series Access Point Installation and Configuration Guide 20-8 OL-2851-01... -
Page 261: Setting A Logging Rate Limit
To disable the rate limit, use the no logging rate-limit global configuration command. Configuring UNIX Syslog Servers The next sections describe how to configure the 4.3 BSD UNIX server syslog daemon and define the UNIX system logging facility. Cisco Aironet 1100 Series Access Point Installation and Configuration Guide 20-9 OL-2851-01... -
Page 262: Logging Messages To A Unix Syslog Daemon
Limit messages logged to the syslog servers. Be default, syslog servers receive informational messages and lower. See Table 20-3 on page 20-7 for level keywords. Cisco Aironet 1100 Series Access Point Installation and Configuration Guide 20-10 OL-2851-01... -
Page 263: Displaying The Logging Configuration
To display the current logging configuration and the contents of the log buffer, use the show logging privileged EXEC command. For information about the fields in this display, refer to the Cisco IOS Configuration Fundamentals Command Reference for Release 12.2. - Page 264 Chapter 20 Configuring System Message Logging Displaying the Logging Configuration Cisco Aironet 1100 Series Access Point Installation and Configuration Guide 20-12 OL-2851-01...
-
Page 265: Chapter 21 Troubleshooting
C H A P T E R Troubleshooting This chapter provides troubleshooting procedures for basic problems with the access point. For the most up-to-date, detailed troubleshooting information, refer to the Cisco TAC website at the following URL (select Top Issues and then select Wireless Technologies): http://www.cisco.com/tac Sections in this chapter include: •... -
Page 266: Checking The Top Panel Indicators
The radio indicator blinks green to indicate radio traffic activity. The light is normally off, but it blinks green whenever a packet is received or transmitted over the access point’s radio. Cisco Aironet 1100 Series Access Point Installation and Configuration Guide 21-2... - Page 267 – Amber – Resetting the configuration options to Reset factory defaults. Failure Firmware failure; try disconnecting and reconnecting unit power. Firmware – – Loading new firmware image. Upgrade Cisco Aironet 1100 Series Access Point Installation and Configuration Guide 21-3 OL-2851-01...
-
Page 268: Checking Basic Settings
You can use the MODE button on the access point or the web-browser interface. The following steps reset all configuration settings to factory defaults, including passwords, WEP keys, Note the IP address, and the SSID. Cisco Aironet 1100 Series Access Point Installation and Configuration Guide 21-4 OL-2851-01... -
Page 269: Using The Mode Button
If the access point is configured with a static IP address, the IP address does not change. Note After the access point reboots, you must reconfigure the access point by using the Web browser interface, Step 8 the Telnet interface, or IOS commands. Cisco Aironet 1100 Series Access Point Installation and Configuration Guide 21-5 OL-2851-01... -
Page 270: Reloading The Access Point Image
Step 7 blinking green. After the access point reboots, you must reconfigure the access point by using the Web interface, the Step 8 Telnet interface, or IOS commands. Cisco Aironet 1100 Series Access Point Installation and Configuration Guide 21-6 OL-2851-01... -
Page 271: Web Browser Interface
Click the System Software tab and then click Software Upgrade. The HTTP Upgrade screen appears. Step 5 Click the TFTP Upgrade tab. Step 6 Enter the IP address for the TFTP server in the TFTP Server field. Step 7 Cisco Aironet 1100 Series Access Point Installation and Configuration Guide 21-7 OL-2851-01... -
Page 272: Obtaining The Access Point Image File
For additional information click the Help icon on the Software Upgrade screen. Obtaining the Access Point Image File The access point image file can be obtained from the Cisco.com software center using the following steps: Use your Internet browser to access the Cisco Software Center at the following URL: Step 1 http://www.cisco.com/public/sw-center/sw-wireless.shtml... -
Page 273: Translated Safety Warnings
Dipole Antenna Installation Warning, page A-2 • Explosive Device Proximity Warning, page A-3 • Lightning Activity Warning, page A-4 • Installation Warning, page A-5 • Circuit Breaker (15A) Warning, page A-5 • Cisco Aironet 1100 Series Access Point Installation and Configuration Guide OL-2851-01... -
Page 274: Dipole Antenna Installation Warning
Comunicaciones (FCC) es preciso ubicar las antenas dipolo a un mínimo de 20 cm (7,9 pulgadas) o más del cuerpo de las personas. Varning! För att följa FCC-exponeringsgränserna för radiofrekvens (RF), bör dipolsantenner placeras på minst 20 cm avstånd från alla människor. Cisco Aironet 1100 Series Access Point Installation and Configuration Guide OL-2851-01... -
Page 275: Explosive Device Proximity Warning
Varning! Använd inte den trådlösa nätverksenheten i närheten av oskyddade tändhattar eller i en explosiv miljö om inte enheten modifierats för att kunna användas i sådana sammanhang. Cisco Aironet 1100 Series Access Point Installation and Configuration Guide OL-2851-01... -
Page 276: Lightning Activity Warning
No operar el sistema ni conectar o desconectar cables durante el transcurso de descargas eléctricas en la atmósfera. Varning! Vid åska skall du aldrig utföra arbete på systemet eller ansluta eller koppla loss kablar. Cisco Aironet 1100 Series Access Point Installation and Configuration Guide OL-2851-01... -
Page 277: Installation Warning
électrique du local. Vérifier qu'un fusible ou qu'un disjoncteur de 120 V alt., 15 A U.S. maximum (240 V alt., 10 A international) est utilisé sur les conducteurs de phase (conducteurs de charge). Cisco Aironet 1100 Series Access Point Installation and Configuration Guide OL-2851-01... - Page 278 Denna produkt är beroende av i byggnaden installerat kortslutningsskydd (överströmsskydd). Kontrollera att säkring eller överspänningsskydd används på fasledarna (samtliga strömförande ledare) för internationellt bruk max. 240 V växelström, 10 A (i USA max. 120 V växelström, 15 A). Cisco Aironet 1100 Series Access Point Installation and Configuration Guide OL-2851-01...
-
Page 279: Appendix
European Community, Switzerland, Norway, Iceland, and Liechtenstein, page B-3 Declaration of Conformity for RF Exposure, page B-4 • • Guidelines for Operating Cisco Aironet Access Points and Bridges in Japan, page B-5 Cisco Aironet 1100 Series Access Point Installation and Configuration Guide OL-2851-01... -
Page 280: Manufacturers Federal Communication Commission Declaration Of Conformity Statement
The Part 15 radio device operates on a non-interference basis with other devices operating at this Caution frequency. Any changes or modification to said product not expressly approved by Cisco could void the user’s authority to operate this device. Department of Communications—Canada... -
Page 281: European Community, Switzerland, Norway, Iceland, And Liechtenstein
Deze apparatuur voldoet aan de belangrijkste eisen en andere voorzieningen van richtlijn 1999/5/EC. Norsk: Dette utstyret er i samsvar med de grunnleggende krav og andre relevante bestemmelser i EU-directiv 1999/5/EC. Cisco Aironet 1100 Series Access Point Installation and Configuration Guide OL-2851-01... -
Page 282: Declaration Of Conformity For Rf Exposure
This equipment is intended to be used in all EU and EFTA countries. Outdoor use may be restricted to Note certain frequencies and/or may require a license for operation. For more details, contact Cisco Corporate Compliance. Combinations of power levels and antennas resulting in a radiated power level of above 100 mW eirp are... -
Page 283: Guidelines For Operating Cisco Aironet Access Points And Bridges In Japan
Guidelines for Operating Cisco Aironet Access Points and Bridges in Japan Guidelines for Operating Cisco Aironet Access Points and Bridges in Japan This section provides guidelines for avoiding interference when operating Cisco Aironet access points and bridges in Japan. These guidelines are provided in both Japanese and English. Japanese Translation... - Page 284 Appendix B Declarations of Conformity and Regulatory Information Guidelines for Operating Cisco Aironet Access Points and Bridges in Japan Cisco Aironet 1100 Series Access Point Installation and Configuration Guide OL-2851-01...
-
Page 285: Appendix
This appendix lists the access point radio channels and the maximum power levels supported by the world’s regulatory domains. The following topics are covered in this appendix: Channels, page C-2 • Maximum Power Levels, page C-3 • Cisco Aironet 1100 Series Access Point Installation and Configuration Guide OL-2851-01... -
Page 286: Channels
10 mW EIRP and channels 10 through 13 can be used with up to 100mW EIRP. Users are responsible for ensuring that the channel set configuration is in compliance with the regulatory standards of France. Cisco Aironet 1100 Series Access Point Installation and Configuration Guide OL-2851-01... -
Page 287: Maximum Power Levels
9 through 13 can be used indoors and outdoors with up to 650mW EIRP. Users are responsible for ensuring that the channel set configuration is in compliance with the regulatory standards of Mexico. Cisco Aironet 1100 Series Access Point Installation and Configuration Guide OL-2851-01... - Page 288 Appendix C Channels and Antenna Settings Maximum Power Levels Cisco Aironet 1100 Series Access Point Installation and Configuration Guide OL-2851-01...
-
Page 289: Appendix
Using the Security Hasp Adapter, page D-6 • • Mounting on a Cubical Wall Partition, page D-7 Using the Desktop Holster, page D-8 • Using the Cable Lock Feature, page D-9 • Cisco Aironet 1100 Series Access Point Installation and Configuration Guide OL-2851-01... -
Page 290: Overview
You can use the security hasp adapter, provided by Cisco, to secure the access point with a padlock when you use the wall or ceiling mounting bracket. The security hasp adapter provides maximum physical security for your access point. -
Page 291: Mounting On A Horizontal Or Vertical Surface
Line up the mounting slots on the access point with the mounting rail on the mounting bracket and slide Step 5 down the mounting rails until it clicks into place. Cisco Aironet 1100 Series Access Point Installation and Configuration Guide OL-2851-01... -
Page 292: Mounting On A Suspended Ceiling
Attach the wall or ceiling mounting bracket to the caddy fastener studs and start a Keps nut on each stud. Use a wrench or pliers to tighten the Keps nuts. Do not overtighten. Step 7 Cisco Aironet 1100 Series Access Point Installation and Configuration Guide OL-2851-01... - Page 293 Line up the mounting slots on the access point with the mounting rail on the wall or ceiling mounting Step 8 bracket and slide it down the mounting rails until it clicks into place. See Figure D-3. Figure D-3 Access Point Mounting Slots Cisco Aironet 1100 Series Access Point Installation and Configuration Guide OL-2851-01...
-
Page 294: Using The Security Hasp Adapter
Secure the adapter to the security hasp with a padlock. Your installation will look similar to Figure D-5. Step 4 Figure D-5 Security Hasp with Padlock Cisco Aironet 1100 Series Access Point Installation and Configuration Guide OL-2851-01... -
Page 295: Mounting On A Cubical Wall Partition
Position the mounting bracket over the partition wall and adjust it to fit. See Figure D-6. Step 6 Figure D-6 Cubicle Wall Bracket Cisco Aironet 1100 Series Access Point Installation and Configuration Guide OL-2851-01... -
Page 296: Using The Desktop Holster
Insert the access point into the holster while guiding the cables so that they do not interfere with the sides of the holster. You will hear a click when the access point locks into place. See Figure D-7. Figure D-7 Desktop Holster Cisco Aironet 1100 Series Access Point Installation and Configuration Guide OL-2851-01... -
Page 297: Using The Cable Lock Feature
Follow these steps to install the security cable. Note Cisco recommends using a Kensington Notebook Microstar (model number 64068) to secure your access point. Loop the security cable around a nearby immovable object. - Page 298 Appendix D Mounting Instructions Using the Cable Lock Feature Cisco Aironet 1100 Series Access Point Installation and Configuration Guide D-10 OL-2851-01...
-
Page 299: Appendix
In each table, the Protocol column lists the protocol name, the Additional Identifier column lists other names for the same protocol, and the ISO Designator column lists the numeric designator for each protocol. Cisco Aironet 1100 Series Access Point Installation and Configuration Guide OL-2851-01... - Page 300 Novell IPX (old) — 0x8137 Novell IPX (new) 0x8138 EAPOL (old) — 0x8180 EAPOL (new) — 0x888E Telxon TXP 0x8729 Aironet DDP 0x872D Enet Config Test — 0x9000 NetBUI — 0xF0F0 Cisco Aironet 1100 Series Access Point Installation and Configuration Guide OL-2851-01...
- Page 301 Internet Group Management Protocol IGMP Transmission Control Protocol Exterior Gateway Protocol — CHAOS — User Datagram Protocol XNS-IDP ISO-TP4 ISO-CNLP CNLP Banyan VINES VINES Encapsulation Header encap_hdr Spectralink Voice Protocol Spectralink — Cisco Aironet 1100 Series Access Point Installation and Configuration Guide OL-2851-01...
- Page 302 — BOOTP Server — BOOTP Client — TFTP — gopher — netrjs finger — Hypertext Transport Protocol HTTP ttylink link Kerberos v5 Kerberos krb5 supdup — hostname hostnames Cisco Aironet 1100 Series Access Point Installation and Configuration Guide OL-2851-01...
- Page 303 ISO CMIP Management Over IP CMIP Management Over IP cmip-man CMOT ISO CMIP Agent Over IP cmip-agent X Display Manager Control xdmcp Protocol NeXTStep Window Server NeXTStep Border Gateway Protocol Prospero — Internet Relay Chap Cisco Aironet 1100 Series Access Point Installation and Configuration Guide OL-2851-01...
- Page 304 SAMBA swat SUP debugging supfiledbg 1127 ingreslock — 1524 Prospero non-priveleged prospero-np 1525 RADIUS — 1812 Concurrent Versions System 2401 Cisco IAPP — 2887 Radio Free Ethernet 5002 Cisco Aironet 1100 Series Access Point Installation and Configuration Guide OL-2851-01...
-
Page 305: Appendix
Supported MIBs This appendix lists the Simple Network Management Protocol (SNMP) Management Information Bases (MIBs) that the access point supports for this software release. The Cisco IOS SNMP agent supports both SNMPv1 and SNMPv2. This appendix contains these sections: MIB List, page F-1 •... -
Page 306: Using Ftp To Access The Mib Files
Use the get MIB_filename command to obtain a copy of the MIB file. Step 5 You can also access information about MIBs on the Cisco web site: Note http://www.cisco.com/public/sw-center/netmgmt/cmtk/mibs.shtml Cisco Aironet 1100 Series Access Point Installation and Configuration Guide... -
Page 307: Appendix
A P P E N D I X Access Point Specifications This appendix provides technical specifications for the Cisco Aironet 1100 Series Access Point. Table G-1 lists the technical specifications for the access point. Table G-1 Access Point Specifications Category... - Page 308 Cisco Aironet 1100 series power injectors and the universal Caution power supplies are not tested to UL 2043 and should not be placed in a building’s air-handling spaces, such as above suspended ceilings. Cisco Aironet 1100 Series Access Point Installation and Configuration Guide OL-2851-01...
-
Page 309: Appendix
A station associated to an access point. None. Station [char] [mac] Associated DOT11-6-ADD: Interface [interface], A station associated to an access point. None. Station [mac] Associated to Parent [mac] Cisco Aironet 1100 Series Access Point Installation and Configuration Guide OL-2851-01... - Page 310 Access Point is unavailable reached to obtainthe subnet map table. same information regarding Authoritative and regular access points. PMIP-6-START: Proxy Mobile IP Proxy Mobile IP service has started. None. services has started Cisco Aironet 1100 Series Access Point Installation and Configuration Guide OL-2851-01...
- Page 311 DOT11-4-LINK_DOWN: Radio parent The connection to the parent access point None. lost: [chars] was lost for the displayed reason. The unit will try to find a new parent access point. Cisco Aironet 1100 Series Access Point Installation and Configuration Guide OL-2851-01...
- Page 312 This appears, and report it to your technical [hex], min [hex]). message indicates that a process received support representative. an event that it did not know how to handle. Cisco Aironet 1100 Series Access Point Installation and Configuration Guide OL-2851-01...
-
Page 313: I N D E X
10-3 editing features authoritative time source, described 6-15 enabling and disabling authorization keystroke editing with RADIUS 6-11, 11-11 wrapped lines error messages filtering command output getting help Cisco Aironet 1100 Series Access Point Installation and Configuration Guide IN-1 OL-2851-01... - Page 314 FTP 19-14 preparing 19-10, 19-13, 19-16 using RCP 19-17 reasons for 19-8 using TFTP 19-11 using FTP 19-13 connections, secure remote 6-13 using RCP 19-16 Cisco Aironet 1100 Series Access Point Installation and Configuration Guide IN-2 OL-2851-01...
- Page 315 19-14 severity levels 20-7 image files system message format 20-2 deleting old image 19-26 Ethernet indicator 21-2 downloading 19-24 extended temperature range preparing the server 19-23 uploading 19-26 Cisco Aironet 1100 Series Access Point Installation and Configuration Guide IN-3 OL-2851-01...
- Page 316 ISO designators for protocols 16-4 key features Network-EAP 10-3 Network Time Protocol See NTP no commands LEAP authentication associations setting on client and access point 10-9 authenticating 6-17 LED indicators Cisco Aironet 1100 Series Access Point Installation and Configuration Guide IN-4 OL-2851-01...
- Page 317 6-8, 11-7 PEAP authentication authorization 6-11, 11-11 setting on client and access point communication, global 10-10 11-5, 11-13 power communication, per-server 11-4, 11-5 connecting multiple UDP ports 11-5 Cisco Aironet 1100 Series Access Point Installation and Configuration Guide IN-5 OL-2851-01...
- Page 318 NMS 20-8 overview manager functions 17-3 passwords and privilege levels MIBs RADIUS 6-7, 11-1 location of overview 17-2, 17-4 1157, SNMPv1 17-2 snmp-server view 17-9 Cisco Aironet 1100 Series Access Point Installation and Configuration Guide IN-6 OL-2851-01...
- Page 319 See system message logging tar files system clock creating 19-6 configuring displaying the contents of 19-6 daylight saving time 6-27 extracting 19-7 manually 6-25 image file format 19-19 Cisco Aironet 1100 Series Access Point Installation and Configuration Guide IN-7 OL-2851-01...
- Page 320 20-2 weight with EAP 10-3 WEP key 21-4 UNIX syslog servers daemon configuration 20-10 facilities supported 20-11 message logging configuration 20-10 unpacking upgrading software images Cisco Aironet 1100 Series Access Point Installation and Configuration Guide IN-8 OL-2851-01...