Table of Contents
Advertisement
LPT0784-001A
COPYRIGHT © 2002 VICTOR COMPANY OF JAPAN, LTD.
Dear Customer,
Thank you for purchasing the JVC VHS video cassette recorder.
Before use, please read the safety information and precautions to
ensure safe use of your new VCR.
CAUTIONS
The lightning flash with arrowhead symbol, within
an equilateral triangle, is intended to alert the user
to the presence of uninsulated "dangerous voltage"
within the product's enclosure that may be of
sufficient magnitude to constitute a risk of electric
shock to persons.
The exclamation point within an equilateral triangle
is intended to alert the user to the presence of
important operating and maintenance (servicing)
instructions in the literature accompanying the
appliance.
WARNING
:
TO PREVENT FIRE OR SHOCK HAZARD, DO NOT EXPOSE THIS
UNIT TO RAIN OR MOISTURE.
CAUTION:
This video cassette recorder should be used with AC 120V~, 60Hz
only.
To prevent electric shocks and fire hazards, DO NOT use any other
power source.
CAUTION:
TO PREVENT ELECTRIC SHOCK, MATCH WIDE BLADE OF PLUG
TO WIDE SLOT, FULLY INSERT.
ATTENTION:
POUR ÉVITER LES CHOCS ÉLECTRIQUES, INTRODUIRE LA LAME
LA PLUS LARGE DE LA FICHE DANS LA BORNE
CORRESPONDANTE DE LA PRISE ET POUSSER JUSQU'AU FOND.
Note to CATV system installer:
This reminder is provided to call the CATV system installer's
attention to Article 820-40 of the NEC that provides guidelines
for proper grounding and, in particular, specifies that the cable
ground shall be connected to the grounding system of the
building, as close to the point of cable entry as practical.
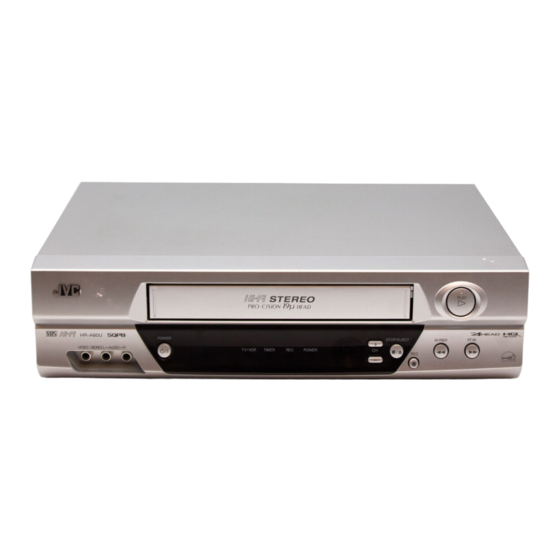
VIDEO CASSETTE RECORDER
HR-A60U
INSTRUCTIONS
NOTE:
Changes or modifications not approved by JVC could void user's
authority to operate the equipment.
This equipment has been tested and found to comply with the
limits for a Class B digital device, pursuant to Part 15 of the FCC
Rules. These limits are designed to provide reasonable protection
against harmful interference in a residential installation. This
equipment generates, uses, and can radiate radio frequency
energy and if not installed and used in accordance with the
instructions, may cause harmful interference to radio
communications. However, there is no guarantee that interference
will not occur in a particular installation. If this equipment does
cause harmful interference to radio or television reception, which
can be determined by turning the equipment off and on, the user
is encouraged to try to correct the interference by one or more of
the following measures:
Failure to heed the following precautions may result in damage
to the VCR, Remote or video cassette.
1 DO NOT place the VCR . . .
2. DO NOT block the VCR's ventilation openings.
3. DO NOT place heavy objects on the VCR or on the Remote.
4. DO NOT place anything which might spill on the top of the VCR
5. AVOID violent shocks to the VCR during transport.
For Customer Use:
• Cassettes marked "VHS" (or "S-VHS") can be used with this video
• This model is equipped with SQPB (S-VHS QUASI PLAYBACK)
• HQ VHS is compatible with existing VHS equipment.
• As an Energy Star® Partner, JVC has determined that this
Reorient or relocate the receiving antenna.
Increase the separation between the equipment and receiver.
Connect the equipment into an outlet on a circuit different from
that to which the receiver is connected.
Consult the dealer or an experienced radio/TV technician for help.
...in an environment prone to extreme temperatures or humidity.
...in direct sunlight.
...in a dusty environment.
...in an environment where strong magnetic fields are generated.
...on a surface that is unstable or subject to vibration.
or on the Remote.
Enter below the Model No. and Serial No. which are located
on the rear of cabinet. Retain this information for future
reference.
Model No.
Serial No.
cassette recorder. However, S-VHS recording is not possible with
this model.
that makes it possible to play back S-VHS recordings with
regular VHS resolution.
product or product model meets the Energy Star® guidelines for
energy efficiency.
Printed in Thailand
K
J4F90401A
02/12
Advertisement
Table of Contents

Related Manuals for JVC HR-A60U


Summary of Contents for JVC HR-A60U
- Page 1 S-VHS recordings with regular VHS resolution. • HQ VHS is compatible with existing VHS equipment. • As an Energy Star® Partner, JVC has determined that this product or product model meets the Energy Star® guidelines for energy efficiency.
-
Page 2: Important Product Safety Instructions
IMPORTANT PRODUCT SAFETY INSTRUCTIONS Electrical energy can perform many useful functions. But improper use can result in potential electrical shock or fire hazards. This product has been engineered and manufactured to assure your personal safety. In order not to defeat the built-in safeguards, observe the following basic rules for its installation, use and servicing. -
Page 3: Buttons, Connectors And Indicators
• The picture is unclear or no picture appears. Buttons, Connectors and Indicators Front Panel POWER STOP/EJECT Cassette loading slot VIDEO/AUDIO (L/R) input connectors TV/VCR indicator TIMER indicator POWER indicator REC indicator Rear Panel UHF/VHF IN (ANT) UHF/VHF OUT (TV) VIDEO/AUDIO (L/R) OUT... - Page 4 B code signals. On-screen display If you press DISPLAY on the Remote, you can see the current VCR status on the TV screen. Press DISPLAY again to exit on-screen display. The indications are not recorded even if the VCR is in the recording mode.
-
Page 5: Initial Settings
Set VCR channel To view playback of a recorded tape, or to watch a program selected by the VCR's channel selector, the TV must be set to channel 3 or 4 (video channel) when a TV is connected with the 75 ohm coaxial cable only. -
Page 6: Manual Clock Setting
VCR’s memory. In addition to normal VHF and UHF channels, this VCR can receive up to 113 Cable TV channels. To use this VCR with an antenna, set the TV/CATV menu option to the TV mode. -
Page 7: Setting Channels Manually - Manual Channel Set
VCR. • Do not apply too much pressure when inserting. • The VCR turns on, and the counter is reset, automatically. • If the cassette’s record safety tab has been removed, playback begins automatically. -
Page 8: Playback Features
) on the Remote. Eject the tape Press STOP/EJECT (I/ ) on the VCR. • You can also eject the cassette when the VCR is turned off. Turn off the VCR Press POWER on the OR Press POWER ( Remote. -
Page 9: Basic Recording
NOTES: • Press REC to increase Watching one program while recording another During recording… • If you connect the TV and the VCR only using the RF (I/ ) on the VCR. connection to view pictures from the VCR, press TV/VCR on the Remote so that TV/VCR indicator goes off. -
Page 10: Timer Recording
125 (CATV), 11:00 - 11:30 PM on timer program number 1 (Tape speed: EP). When a TV is connected with an audio/video cable, turn the TV and this VCR on and select the video input mode on the Press MENU on the Remote. Check the “TIMER REC SET”... -
Page 11: Other Functions
– Timer Recordings – IF THE PROGRAM OVERLAPS ANOTHER NOTE: Do not overlap programs as portions of the conflicting programs will be lost. The first recording time has priority over the next recording time as shown in the diagram. 8 : 00 9 : 00 Program 1 Program 2... - Page 12 JVC TV Remote Control This Remote can control some functions (TV POWER, INPUT, TV CH –/+ and TV VOL –/+) of a remote controllable JVC TV without setting. NOTE: • It’s not possible to operate a unit not equipped with a remote sensor.
-
Page 13: Before Requesting Service
Try another tape. Aim it at the remote sensor. Operate within 15 feet (5 meters) reduce the light in the room. Clear the path of the beam. Replace the batteries. Insert correctly. Set to TV, or turn off the VCR power button. -
Page 14: Specifications
Specifications GENERAL Power requirement Power consumption Power on Power off Temperature Operating Storage Operating position Dimensions (W x H x D) Weight Format Maximum recording time VIDEO/AUDIO Signal system Recording/Playback system Signal-to-noise ratio Horizontal resolution Frequency range Normal audio Hi-Fi audio Input/Output TUNER Tuning system... - Page 15 Sophisticated electronic products may require occasional service. Just as quality is a keyword in the engineering and production of the wide array of JVC products, service is the key to maintaining the high level performance for which JVC is world famous. The JVC service and engineering organization stands behind our products.
-
Page 16: Warranty (Only In U.s.a.)
WHAT WE WILL DO: If this product is found to be defective, JVC will repair or replace defective parts at no charge to the original owner. Such repair and replacement services shall be rendered by JVC during normal business hours at JVC authorized service centers. Parts used for replacement are warranted only for the remainder of the Warranty Period.