Cisco TelePresence MX200 Administrator's Manual
Hide thumbs
Also See for TelePresence MX200:
- Administrator's manual (125 pages) ,
- User manual (79 pages) ,
- Quick start manual (12 pages)
Table of Contents
Advertisement
Quick Links
Cisco TelePresence MX200 and MX300
Administrator Guide
Contents
Introduction
Web interface
System settings
Setting passwords
Appendices
Software version TC7.2
AUGUST 2014
MX200
MX300
Administrator guide
for Cisco TelePresence MX200 and MX300 (1
generation)
st
D14850.10 MX200 and MX300 Administrator Guide TC7.2, AUGUST 2014.
www.cisco.com — Copyright © 2011–2014 Cisco Systems, Inc. All rights reserved.
1
Advertisement
Chapters
Table of Contents

Related Manuals for Cisco TelePresence MX200


Summary of Contents for Cisco TelePresence MX200
-
Page 1: Administrator Guide
Setting passwords Appendices Software version TC7.2 AUGUST 2014 MX200 MX300 Administrator guide for Cisco TelePresence MX200 and MX300 (1 generation) D14850.10 MX200 and MX300 Administrator Guide TC7.2, AUGUST 2014. www.cisco.com — Copyright © 2011–2014 Cisco Systems, Inc. All rights reserved. -
Page 2: Table Of Contents
Upgrading the system software..........47 MX300 (1 generation). Cisco TelePresence MX200 and MX300 at a glance ....8 Backup and restore ..............48 Our main objective with this Administrator guide is to address Reverting to the previously used software version ....49 your goals and needs. - Page 3 Technical specification ............120 Supported RFCs ..............122 User documentation on the Cisco web site ......123 Intellectual property rights .............124 Cisco contacts ..............124 D14850.10 MX200 and MX300 Administrator Guide TC7.2, AUGUST 2014. www.cisco.com — Copyright © 2011–2014 Cisco Systems, Inc. All rights reserved.
- Page 4 Cisco TelePresence MX200 and MX300 Administrator Guide Contents Introduction Introduction Web interface System settings Setting passwords Appendices Chapter 1 Introduction D14850.10 MX200 and MX300 Administrator Guide TC7.2, AUGUST 2014. www.cisco.com — Copyright © 2011–2014 Cisco Systems, Inc. All rights reserved.
-
Page 5: User Documentation
• Cisco TelePresence MX200 • Administering TC Endpoints on CUCM: Tasks to perform to start using the product with the Cisco Unified Communications Manager (CUCM) Note that MX300 G2 (second generation MX300) is covered • Administrator guide (this guide): in a separate guide. -
Page 6: What's New In This Version
SystemUnit Name • Video OSD TodaysBookings • Standby StandbyAction • Audio DefaultVolume • Conference 1 MaxTotalReceiveCallRate • Conference 1 MaxTotalTransmitCallRate D14850.10 MX200 and MX300 Administrator Guide TC7.2, AUGUST 2014. www.cisco.com — Copyright © 2011–2014 Cisco Systems, Inc. All rights reserved. - Page 7 H323 Profile [1] Encryption MinKeySize Video Input Source[n] Type OLD: <other/camera/PC/DVD/document_camera> NetworkServices Medianet Metadata NEW: <other/camera/PC/DVD/document_camera/ Peripherals Profile TouchPanels whiteboard> Time OlsonZone D14850.10 MX200 and MX300 Administrator Guide TC7.2, AUGUST 2014. www.cisco.com — Copyright © 2011–2014 Cisco Systems, Inc. All rights reserved.
-
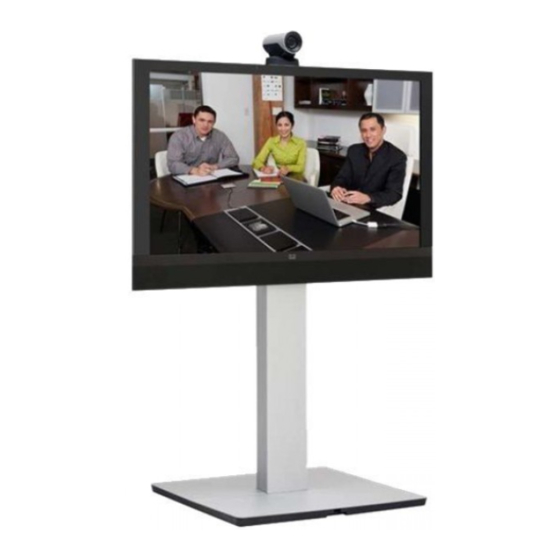
Page 8: Cisco Telepresence Mx200 And Mx300 At A Glance
Capabilities for large conferences and transparent escalation from point-to-point to multipoint calls using the Cisco TelePresence Multiway™ technology. MX300 MX200 D14850.10 MX200 and MX300 Administrator Guide TC7.2, AUGUST 2014. www.cisco.com — Copyright © 2011–2014 Cisco Systems, Inc. All rights reserved. - Page 9 MX200 mounting options (floor stand, table stand, wall mount) MX200: 1 external microphone (+ 1 optional) MX300: 2 external microphones Touch controller D14850.10 MX200 and MX300 Administrator Guide TC7.2, AUGUST 2014. www.cisco.com — Copyright © 2011–2014 Cisco Systems, Inc. All rights reserved.
-
Page 10: Web Interface
Cisco TelePresence MX200 and MX300 Administrator Guide Contents Introduction Web interface Web interface System settings Setting passwords Appendices Chapter 2 Web interface D14850.10 MX200 and MX300 Administrator Guide TC7.2, AUGUST 2014. www.cisco.com — Copyright © 2011–2014 Cisco Systems, Inc. All rights reserved. -
Page 11: Accessing The Web Interface
Signing out Hover the mouse over the user name and choose Sign out from the drop-down list. D14850.10 MX200 and MX300 Administrator Guide TC7.2, AUGUST 2014. www.cisco.com — Copyright © 2011–2014 Cisco Systems, Inc. All rights reserved. -
Page 12: Changing The System Password
Change password for the change to take effect. If the password currently is not set, leave Current password field blank. D14850.10 MX200 and MX300 Administrator Guide TC7.2, AUGUST 2014. www.cisco.com — Copyright © 2011–2014 Cisco Systems, Inc. All rights reserved. -
Page 13: The Interactive Menu
Startup Scripts Security You can read more about user administration, user roles and access rights in the ► User administration section. D14850.10 MX200 and MX300 Administrator Guide TC7.2, AUGUST 2014. www.cisco.com — Copyright © 2011–2014 Cisco Systems, Inc. All rights reserved. -
Page 14: System Information
The system information shown in the illustration serve as an example. Your system may be different. D14850.10 MX200 and MX300 Administrator Guide TC7.2, AUGUST 2014. www.cisco.com — Copyright © 2011–2014 Cisco Systems, Inc. All rights reserved. -
Page 15: Placing A Call
URI or number. click the button for that participant is on hold. participant. D14850.10 MX200 and MX300 Administrator Guide TC7.2, AUGUST 2014. www.cisco.com — Copyright © 2011–2014 Cisco Systems, Inc. All rights reserved. -
Page 16: Sharing Content
1. Choose a Presentation source from the drop-down list. 2. Click Start Presentation. Stop content sharing: Click the Stop Presentation button that is present while sharing. D14850.10 MX200 and MX300 Administrator Guide TC7.2, AUGUST 2014. www.cisco.com — Copyright © 2011–2014 Cisco Systems, Inc. All rights reserved. -
Page 17: Controlling And Monitoring A Call
Click the button again to hide the information. Call details If necessary, scroll your browser to see the call details. D14850.10 MX200 and MX300 Administrator Guide TC7.2, AUGUST 2014. www.cisco.com — Copyright © 2011–2014 Cisco Systems, Inc. All rights reserved. -
Page 18: Controlling Your Camera
If a camera preset is defined it is listed here. Click the preset’s name to move the camera(s) to the preset position. Click to close the window. D14850.10 MX200 and MX300 Administrator Guide TC7.2, AUGUST 2014. www.cisco.com — Copyright © 2011–2014 Cisco Systems, Inc. All rights reserved. -
Page 19: Local Layout Control
The set of layouts to choose from depends on the system configurations. You may change the layout while in a call. D14850.10 MX200 and MX300 Administrator Guide TC7.2, AUGUST 2014. www.cisco.com — Copyright © 2011–2014 Cisco Systems, Inc. All rights reserved. -
Page 20: Capturing Snapshots
(main source and presentation source) approximately every two seconds. Snapshots from the video system D14850.10 MX200 and MX300 Administrator Guide TC7.2, AUGUST 2014. www.cisco.com — Copyright © 2011–2014 Cisco Systems, Inc. All rights reserved. -
Page 21: Controlling The Far End Camera
3. Use the left and right arrows to pan the camera; the up and down arrows to tilt it; and to zoom in and out. D14850.10 MX200 and MX300 Administrator Guide TC7.2, AUGUST 2014. www.cisco.com — Copyright © 2011–2014 Cisco Systems, Inc. All rights reserved. -
Page 22: Accessing Call Information
Check this box, if you do not want to receive such notifications. Opening the Call Control page Click Open Call Control to go straight to the Call Control page. D14850.10 MX200 and MX300 Administrator Guide TC7.2, AUGUST 2014. www.cisco.com — Copyright © 2011–2014 Cisco Systems, Inc. All rights reserved. -
Page 23: System Configuration
The configuration shown in the illustration serve as an example. Your system may be configured differently. D14850.10 MX200 and MX300 Administrator Guide TC7.2, AUGUST 2014. www.cisco.com — Copyright © 2011–2014 Cisco Systems, Inc. All rights reserved. -
Page 24: Changing System Settings
The configuration shown in the illustration serve as an example. Your system may be configured differently. D14850.10 MX200 and MX300 Administrator Guide TC7.2, AUGUST 2014. www.cisco.com — Copyright © 2011–2014 Cisco Systems, Inc. All rights reserved. -
Page 25: System Status
The status shown in the illustration serve as an example. The status of your system may be different. D14850.10 MX200 and MX300 Administrator Guide TC7.2, AUGUST 2014. www.cisco.com — Copyright © 2011–2014 Cisco Systems, Inc. All rights reserved. -
Page 26: Managing The Favorites List
Note that only the first contact method appears in the Favorites list on the Touch controller. D14850.10 MX200 and MX300 Administrator Guide TC7.2, AUGUST 2014. www.cisco.com — Copyright © 2011–2014 Cisco Systems, Inc. All rights reserved. -
Page 27: Favorite List Folders
Delete to remove the folder and all its contacts and sub-folders. Confirm your choice in the dialog that pops up. D14850.10 MX200 and MX300 Administrator Guide TC7.2, AUGUST 2014. www.cisco.com — Copyright © 2011–2014 Cisco Systems, Inc. All rights reserved. -
Page 28: Choosing A Wallpaper
You cannot delete a predefined wallpaper. Maximum file size: 2 MByte The custom wallpaper will be automatically activated once uploaded. D14850.10 MX200 and MX300 Administrator Guide TC7.2, AUGUST 2014. www.cisco.com — Copyright © 2011–2014 Cisco Systems, Inc. All rights reserved. -
Page 29: Choosing A Ringtone
Use the stop button ( ) to end the playback. Set the ringtone volume Use the slide bar to adjust the ringtone volume. D14850.10 MX200 and MX300 Administrator Guide TC7.2, AUGUST 2014. www.cisco.com — Copyright © 2011–2014 Cisco Systems, Inc. All rights reserved. -
Page 30: Peripherals Overview
► http://www.cisco.com/go/isdnlink-docs The peripherals shown in the illustration serve as examples. Your system may have different peripherals and video input/output configurations. D14850.10 MX200 and MX300 Administrator Guide TC7.2, AUGUST 2014. www.cisco.com — Copyright © 2011–2014 Cisco Systems, Inc. All rights reserved. -
Page 31: User Administration
An administrator user account with full access rights, like the default admin user, must possess all the three roles. D14850.10 MX200 and MX300 Administrator Guide TC7.2, AUGUST 2014. www.cisco.com — Copyright © 2011–2014 Cisco Systems, Inc. All rights reserved. - Page 32 Back button to leave without making any changes. The password is used with the web interface and command line interface. D14850.10 MX200 and MX300 Administrator Guide TC7.2, AUGUST 2014. www.cisco.com — Copyright © 2011–2014 Cisco Systems, Inc. All rights reserved.
- Page 33 Back button to leave without making any changes. The password is used with the web interface and command line interface. D14850.10 MX200 and MX300 Administrator Guide TC7.2, AUGUST 2014. www.cisco.com — Copyright © 2011–2014 Cisco Systems, Inc. All rights reserved.
- Page 34 1. Click the name of an existing user to open the Editing user window. 2. Click Delete <user name>... and confirm when prompted. D14850.10 MX200 and MX300 Administrator Guide TC7.2, AUGUST 2014. www.cisco.com — Copyright © 2011–2014 Cisco Systems, Inc. All rights reserved.
-
Page 35: Adding A Sign In Banner
Enter the message that you want to present to the user when signing in, and click Save to activate the banner. D14850.10 MX200 and MX300 Administrator Guide TC7.2, AUGUST 2014. www.cisco.com — Copyright © 2011–2014 Cisco Systems, Inc. All rights reserved. -
Page 36: Managing The Video System's Certificates
The certificates and certificate issuers shown in the illustration serve as examples. Your system may have other certificate(s). D14850.10 MX200 and MX300 Administrator Guide TC7.2, AUGUST 2014. www.cisco.com — Copyright © 2011–2014 Cisco Systems, Inc. All rights reserved. -
Page 37: Managing The List Of Trusted Certificate Authorities
CA certificate list (file format: .PEM). The certificate and certificate issuers shown in the illustration serve as examples. Your system will have other certificate(s). D14850.10 MX200 and MX300 Administrator Guide TC7.2, AUGUST 2014. www.cisco.com — Copyright © 2011–2014 Cisco Systems, Inc. All rights reserved. - Page 38 If the audit server cannot be authenticated, the logs will not be sent. Always upload the list of trusted certificate authorities before enabling secure audit logging. D14850.10 MX200 and MX300 Administrator Guide TC7.2, AUGUST 2014. www.cisco.com — Copyright © 2011–2014 Cisco Systems, Inc. All rights reserved.
-
Page 39: Managing Pre-Installed Certificates For Edge Provisioning
The certificate and certificate issuers shown in the illustration serve as examples. Your system will have other certificate(s). D14850.10 MX200 and MX300 Administrator Guide TC7.2, AUGUST 2014. www.cisco.com — Copyright © 2011–2014 Cisco Systems, Inc. All rights reserved. -
Page 40: Setting Strong Security Mode
Disable strong security mode..Confirm your choice in the dialog box that appears The system will restart automatically. D14850.10 MX200 and MX300 Administrator Guide TC7.2, AUGUST 2014. www.cisco.com — Copyright © 2011–2014 Cisco Systems, Inc. All rights reserved. -
Page 41: Changing The Persistency Mode
You can also see the status by checking Security > Persistency on the Configuration > System Status page. D14850.10 MX200 and MX300 Administrator Guide TC7.2, AUGUST 2014. www.cisco.com — Copyright © 2011–2014 Cisco Systems, Inc. All rights reserved. -
Page 42: Deleting Trust Lists (Cucm Only)
For more information about CUCM and trust lists, read the Administering TC Endpoints on CUCM guide available on the Cisco web site. D14850.10 MX200 and MX300 Administrator Guide TC7.2, AUGUST 2014. www.cisco.com — Copyright © 2011–2014 Cisco Systems, Inc. All rights reserved. -
Page 43: Troubleshooting
The messages shown in the illustration serve as examples. Your system may show other information. D14850.10 MX200 and MX300 Administrator Guide TC7.2, AUGUST 2014. www.cisco.com — Copyright © 2011–2014 Cisco Systems, Inc. All rights reserved. -
Page 44: Downloading Log Files
The log files shown in the illustration serve as examples. Your system may have other files. D14850.10 MX200 and MX300 Administrator Guide TC7.2, AUGUST 2014. www.cisco.com — Copyright © 2011–2014 Cisco Systems, Inc. All rights reserved. -
Page 45: Starting Extended Logging
As default, the network traffic is not captured. Use the drop down menu if you want to include a full or partial capture of the network traffic. D14850.10 MX200 and MX300 Administrator Guide TC7.2, AUGUST 2014. www.cisco.com — Copyright © 2011–2014 Cisco Systems, Inc. All rights reserved. -
Page 46: Capturing Screenshots
30 seconds before the screenshot is ready. All captured snapshots are included in the list above the buttons. Click the screenshot ID to display the image. D14850.10 MX200 and MX300 Administrator Guide TC7.2, AUGUST 2014. www.cisco.com — Copyright © 2011–2014 Cisco Systems, Inc. All rights reserved. -
Page 47: Upgrading The System Software
Click Browse... and find the downloaded .pkg file that contains the new software. Release key If you do not have the required key(s), contact your Cisco ii. Check the Upgrade automatically after upload check representative to obtain them. You need a valid release key to be able to use the video... -
Page 48: Backup And Restore
Click Restore to reconfigure the system as defined in the file. D14850.10 MX200 and MX300 Administrator Guide TC7.2, AUGUST 2014. www.cisco.com — Copyright © 2011–2014 Cisco Systems, Inc. All rights reserved. -
Page 49: Reverting To The Previously Used Software Version
Reverting to the previously used software version should only be done by a system administrator or in contact with Cisco technical support. We strongly recommend that you backup your system’s log files and configuration before you swap to the other software image. -
Page 50: Factory Reset
Read about software swapping in the ► Reverting to the previously used software version section. D14850.10 MX200 and MX300 Administrator Guide TC7.2, AUGUST 2014. www.cisco.com — Copyright © 2011–2014 Cisco Systems, Inc. All rights reserved. -
Page 51: Remote Support User
4. Cisco TAC will generate a password. The remote support user is valid for seven days, or until it is deleted. D14850.10 MX200 and MX300 Administrator Guide TC7.2, AUGUST 2014. www.cisco.com — Copyright © 2011–2014 Cisco Systems, Inc. All rights reserved. -
Page 52: Restarting The System
The system cannot be turned on again remotely; you must press its power button physically to turn it on. D14850.10 MX200 and MX300 Administrator Guide TC7.2, AUGUST 2014. www.cisco.com — Copyright © 2011–2014 Cisco Systems, Inc. All rights reserved. -
Page 53: System Settings
Cisco TelePresence MX200 and MX300 Administrator Guide Contents Introduction Web interface System settings System settings Setting passwords Appendices Chapter 3 System settings D14850.10 MX200 and MX300 Administrator Guide TC7.2, AUGUST 2014. www.cisco.com — Copyright © 2011–2014 Cisco Systems, Inc. All rights reserved. -
Page 54: Overview Of The System Settings
Conference [1..1] MaxTotalTransmitCallRate ......64 that appears when you tap the contact information in the upper, left corner of the Touch controller. D14850.10 MX200 and MX300 Administrator Guide TC7.2, AUGUST 2014. www.cisco.com — Copyright © 2011–2014 Cisco Systems, Inc. All rights reserved. - Page 55 SIP Profile [1..1] Turn BandwidthProbe ........92 NetworkServices HTTPS OCSP URL ........80 SIP Profile [1..1] Turn DiscoverMode ........92 D14850.10 MX200 and MX300 Administrator Guide TC7.2, AUGUST 2014. www.cisco.com — Copyright © 2011–2014 Cisco Systems, Inc. All rights reserved.
- Page 56 Video CamCtrlPip CallSetup Duration ........101 Video OSD LoginRequired ............ 109 Video CamCtrlPip CallSetup Mode ........101 Video OSD MenuStartupMode ..........108 D14850.10 MX200 and MX300 Administrator Guide TC7.2, AUGUST 2014. www.cisco.com — Copyright © 2011–2014 Cisco Systems, Inc. All rights reserved.
-
Page 57: Audio Settings
-34.5 dB to 15 dB (0.5 dB steps). The value 0 means that the audio is switched off. Audio DefaultVolume: 50 Example: D14850.10 MX200 and MX300 Administrator Guide TC7.2, AUGUST 2014. www.cisco.com — Copyright © 2011–2014 Cisco Systems, Inc. All rights reserved. -
Page 58: Audio Volume
-34.5 dB to 15 dB (0.5 dB steps). The value 0 means that the audio is switched off. Audio Volume: 50 Example: D14850.10 MX200 and MX300 Administrator Guide TC7.2, AUGUST 2014. www.cisco.com — Copyright © 2011–2014 Cisco Systems, Inc. All rights reserved. -
Page 59: Cameras Settings
Manual: In manual mode the gamma value is changed with the gamma level setting, ref: Cameras Camera 1 Brightness Mode: Auto Example: Cameras Camera [1..n] Gamma Level. Cameras Camera 1 Gamma Mode: Auto Example: D14850.10 MX200 and MX300 Administrator Guide TC7.2, AUGUST 2014. www.cisco.com — Copyright © 2011–2014 Cisco Systems, Inc. All rights reserved. - Page 60 Requires user role: ADMIN Value space: <1..16> Range: Select a value from 1 to 16. Cameras Camera 1 Whitebalance Level: 1 Example: D14850.10 MX200 and MX300 Administrator Guide TC7.2, AUGUST 2014. www.cisco.com — Copyright © 2011–2014 Cisco Systems, Inc. All rights reserved.
-
Page 61: Conference Settings
Set the auto answer mode. Use the Conference AutoAnswer Delay setting if you want the Cisco TelePresence Server using the video system's interfaces (not available from the TRC5 system to wait a number of seconds before answering the call, and use the Conference remote control and on-screen display). -
Page 62: Conference [1..1] Micunmuteondisconnect Mode
Range: Select the number of minutes (between 0 and 1440, i.e. 24 hours) before the Do Not Disturb session times out automatically. Conference 1 DoNotDisturb DefaultTimeOut: 60 Example: D14850.10 MX200 and MX300 Administrator Guide TC7.2, AUGUST 2014. www.cisco.com — Copyright © 2011–2014 Cisco Systems, Inc. All rights reserved. - Page 63 H320: H320 ensures that calls are set up as H.320 calls (only applicable if connected to a Cisco TelePresence ISDN Link gateway). Conference 1 DefaultCall Protocol: H323 Example: D14850.10 MX200 and MX300 Administrator Guide TC7.2, AUGUST 2014. www.cisco.com — Copyright © 2011–2014 Cisco Systems, Inc. All rights reserved.
-
Page 64: Conference [1..1] Presentation Relayquality
Range: 1 to 10. Conference 1 VideoBandwidth PresentationChannel Weight: 5 Example: Conference [1..1] Presentation RelayQuality Not applicable in this version. D14850.10 MX200 and MX300 Administrator Guide TC7.2, AUGUST 2014. www.cisco.com — Copyright © 2011–2014 Cisco Systems, Inc. All rights reserved. -
Page 65: Conference [1..1] Presentation Onplacedonhold
Conference [1..1] Multipoint Mode Define how the video system handles multiparty video conferences. If registered to a Cisco TelePresence Video Communication Server (VCS), the video system can use the MultiWay network solution. MultiWay requires that the video network includes a multipoint control unit (MCU). If registered to a Cisco Unified Communications Manager (CUCM), the video system can use the CUCM conference bridge. -
Page 66: Facilityservice Settings
Requires user role: ADMIN Value space: <S: 0, 255> Format: String with a maximum of 255 characters. FacilityService Service 1 Number: "" Example: D14850.10 MX200 and MX300 Administrator Guide TC7.2, AUGUST 2014. www.cisco.com — Copyright © 2011–2014 Cisco Systems, Inc. All rights reserved. -
Page 67: H323 Settings
Requires user role: ADMIN Value space: <S: 0, 64> Format: A valid IPv4 address or IPv6 address. H323 NAT Address: "" Example: D14850.10 MX200 and MX300 Administrator Guide TC7.2, AUGUST 2014. www.cisco.com — Copyright © 2011–2014 Cisco Systems, Inc. All rights reserved. - Page 68 1024bit: The minimum size is 1024 bit. 2048bit: The minimum size is 2048 bit. H323 Profile 1 Encryption MinKeySize: 1024bit Example: D14850.10 MX200 and MX300 Administrator Guide TC7.2, AUGUST 2014. www.cisco.com — Copyright © 2011–2014 Cisco Systems, Inc. All rights reserved.
-
Page 69: H323 Profile [1..1] Portallocation
Static: When set to Static the ports are given within a static predefined range [5555-6555]. H323 Profile 1 PortAllocation: Dynamic Example: D14850.10 MX200 and MX300 Administrator Guide TC7.2, AUGUST 2014. www.cisco.com — Copyright © 2011–2014 Cisco Systems, Inc. All rights reserved. -
Page 70: Logging Settings
Contents Introduction Web interface System settings System settings Setting passwords Appendices Logging settings Logging Mode Not applicable in this version. D14850.10 MX200 and MX300 Administrator Guide TC7.2, AUGUST 2014. www.cisco.com — Copyright © 2011–2014 Cisco Systems, Inc. All rights reserved. -
Page 71: Network Settings
DHCPv6 server. The Network IPv6 DHCPOptions setting determines which method to use. Network 1 IPv6 Assignment: Autoconf Example: D14850.10 MX200 and MX300 Administrator Guide TC7.2, AUGUST 2014. www.cisco.com — Copyright © 2011–2014 Cisco Systems, Inc. All rights reserved. - Page 72 Network [1..1] DHCP RequestTFTPServerAddress Enter the static IPv6 network address for the system. This setting is only applicable when the This setting is used only for video systems that are registered to a Cisco Unified Network IPv6 Assignment is set to Static.
- Page 73 0 (best effort). Network 1 QoS Diffserv Audio: 0 Example: Network 1 QoS Diffserv Data: 0 Example: D14850.10 MX200 and MX300 Administrator Guide TC7.2, AUGUST 2014. www.cisco.com — Copyright © 2011–2014 Cisco Systems, Inc. All rights reserved.
- Page 74 Range: Select a value between 0 to 63 - the higher the number, the higher the priority. The default value is 0 (best effort). Network 1 QoS Diffserv ICMPv6: 0 Example: D14850.10 MX200 and MX300 Administrator Guide TC7.2, AUGUST 2014. www.cisco.com — Copyright © 2011–2014 Cisco Systems, Inc. All rights reserved.
- Page 75 Requires user role: ADMIN Value space: <S: 0, 64> Format: String with a maximum of 64 characters. Network 1 IEEE8021X Identity: "" Example: D14850.10 MX200 and MX300 Administrator Guide TC7.2, AUGUST 2014. www.cisco.com — Copyright © 2011–2014 Cisco Systems, Inc. All rights reserved.
- Page 76 Set the network traffic control mode to decide how to control the video packets transmission Set the Peap (Protected Extensible Authentication Protocol) mode. Authenticates LAN clients speed. without the need for client certificates. Developed by Microsoft, Cisco and RSA Security. Requires user role: ADMIN Requires user role: ADMIN Value space: <Off/On>...
-
Page 77: Network [1..1] Remoteaccess Allow
Requires user role: ADMIN Value space: <Auto/Manual/Off> Auto: The Cisco Discovery Protocol (CDP), if available, assigns an id to the voice VLAN. If CDP is not available, VLAN is not enabled. Manual: The VLAN ID is set manually using the Network VLAN Voice VlanId setting. If CDP is available, the manually set value will be overruled by the value assigned by CDP. -
Page 78: Networkservices Settings
Off: Disable the possibility to place and receive SIP calls. On: Enable the possibility to place and receive SIP calls (default). NetworkServices SIP Mode: On Example: D14850.10 MX200 and MX300 Administrator Guide TC7.2, AUGUST 2014. www.cisco.com — Copyright © 2011–2014 Cisco Systems, Inc. All rights reserved. - Page 79 NetworkServices HTTPS OCSP Mode: Off Example: Off: The HTTPS protocol is disabled. On: The HTTPS protocol is enabled. NetworkServices HTTPS Mode: On Example: D14850.10 MX200 and MX300 Administrator Guide TC7.2, AUGUST 2014. www.cisco.com — Copyright © 2011–2014 Cisco Systems, Inc. All rights reserved.
-
Page 80: Networkservices Medianet Metadata
Example: NetworkServices Medianet Metadata NetworkServices SNMP Mode Switch On or Off the capability to tag media flows with metadata related to the Cisco Medianet deployment. SNMP (Simple Network Management Protocol) is used in network management systems to monitor network-attached devices (routers, servers, switches, projectors, etc) for conditions Requires user role: ADMIN that warrant administrative attention. -
Page 81: Networkservices Ctms Mode
SNMP Agent in the codec. The default password is "public". Requires user role: ADMIN If you have the Cisco TelePresence Management Suite (TMS) you must make sure the same SNMP Community is configured there too. NOTE: The SNMP Community password is case Value space: <Off/On>... -
Page 82: Networkservices Ctms Encryption
NetworkServices CTMS Encryption This setting indicates whether or not the video system supports encryption when participating in a multiparty meeting controlled by a Cisco TelePresence Multipoint Switch (CTMS). CTMS allows three security settings for meetings: non-secure (not encrypted), best effort (encrypted if all participants support encryption, otherwise not encrypted) and secure (always encrypted). -
Page 83: Peripherals Settings
If the number of connected touch panels does not match this setting, the diagnostics service will report it as an inconsistency. Note that only one Cisco Touch controller is supported in this version. Requires user role: ADMIN Value space: <NotSet/Minimum1/0/1/2/3/4/5>... -
Page 84: Phonebook Settings
VCS: Select VCS if the phonebook is located on the Cisco TelePresence Video Communication Server. TMS: Select TMS if the phonebook is located on the Cisco TelePresence Management Suite server. Callway: Select Callway if the phonebook is to be provided by the WebEx TelePresence subscription service (formerly called CallWay). -
Page 85: Provisioning Settings
Select the HTTP method to be used for the provisioning. Auto: The provisioning server will automatically be selected by the video system. Requires user role: ADMIN TMS: The video system will be configured using TMS (Cisco TelePresence Management System). Value space: <GET/POST>... -
Page 86: Provisioning Externalmanager Protocol
Value space: <S: 0, 64> Format: String with a maximum of 64 characters. Only applicable when the endpoint is provisioned by Cisco Unified Communication Manager (CUCM) and an alternate CUCM is available for redundancy. Enter the address of the alternate Provisioning ExternalManager Domain: "any.domain.com"... -
Page 87: Rtp Settings
Requires user role: ADMIN Value space: <1120..65535> Range: Select a value from 1120 to 65535. RTP Ports Range Stop: 2486 Example: D14850.10 MX200 and MX300 Administrator Guide TC7.2, AUGUST 2014. www.cisco.com — Copyright © 2011–2014 Cisco Systems, Inc. All rights reserved. -
Page 88: Security Settings
Manual: Will use the port value defined in the Security Audit Server Port setting. Example: Security Audit Server PortAssignment: Auto Example: D14850.10 MX200 and MX300 Administrator Guide TC7.2, AUGUST 2014. www.cisco.com — Copyright © 2011–2014 Cisco Systems, Inc. All rights reserved. -
Page 89: Security Session Showlastlogon
Range: Select a value between 1 and 10000 seconds; or select 0 when inactivity should not enforce automatic logout. Security Session InactivityTimeout: 0 Example: D14850.10 MX200 and MX300 Administrator Guide TC7.2, AUGUST 2014. www.cisco.com — Copyright © 2011–2014 Cisco Systems, Inc. All rights reserved. -
Page 90: Serialport Settings
SerialPort settings SerialPort Mode Enable/disable the serial port. You will need a console cable made for the purpose. A description is found on Cisco Support Forum. Make a search for "Making a Console Cable and Consoling In". Requires user role: ADMIN Value space: <Off/On>... -
Page 91: Sip Settings
SIP ListenPort: On Example: SIP OCSP Mode Not applicable in this version. SIP OCSP DefaultResponder Not applicable in this version. D14850.10 MX200 and MX300 Administrator Guide TC7.2, AUGUST 2014. www.cisco.com — Copyright © 2011–2014 Cisco Systems, Inc. All rights reserved. - Page 92 On: When set to On, the system will search for available Turn servers in DNS, and before making calls the system will test if port allocation is possible. SIP Profile Turn DiscoverMode: On Example: D14850.10 MX200 and MX300 Administrator Guide TC7.2, AUGUST 2014. www.cisco.com — Copyright © 2011–2014 Cisco Systems, Inc. All rights reserved.
- Page 93 Format: String with a maximum of 128 characters. SIP Profile 1 TlsVerify: Off Example: SIP Profile 1 Authentication 1 LoginName: "" Example: D14850.10 MX200 and MX300 Administrator Guide TC7.2, AUGUST 2014. www.cisco.com — Copyright © 2011–2014 Cisco Systems, Inc. All rights reserved.
- Page 94 Off: Connect to the single proxy configured first in Proxy Address list. On: Set up multiple outbound connections to servers in the Proxy Address list. Standard: Use this when registering to standard SIP Proxy (tested with Cisco TelePresence VCS and Broadsoft)
-
Page 95: Standby Settings
DefaultCameraPosition: After a reboot the camera position will be set to the factory default position. Standby BootAction: DefaultCameraPosition Example: D14850.10 MX200 and MX300 Administrator Guide TC7.2, AUGUST 2014. www.cisco.com — Copyright © 2011–2014 Cisco Systems, Inc. All rights reserved. -
Page 96: Systemunit Settings
Requires user role: ADMIN Value space: <Off/On> Off: Disable logging. On: Enable logging. SystemUnit CallLogging Mode: On Example: D14850.10 MX200 and MX300 Administrator Guide TC7.2, AUGUST 2014. www.cisco.com — Copyright © 2011–2014 Cisco Systems, Inc. All rights reserved. -
Page 97: Time Settings
Time DateFormat: DD _ MM _ YY Example: Time Zone This has been replaced with the Time OlsonZone setting as of software version TC7.2. D14850.10 MX200 and MX300 Administrator Guide TC7.2, AUGUST 2014. www.cisco.com — Copyright © 2011–2014 Cisco Systems, Inc. All rights reserved. -
Page 98: Time Olsonzone
North_Dakota/New_Salem, America/Ojinaga, America/Panama, America/Pangnirtung, America/ Istanbul, Europe/Jersey, Europe/Kaliningrad, Europe/Kiev, Europe/Lisbon, Europe/Ljubljana, Paramaribo, America/Phoenix, America/Port-au-Prince, America/Port_of_Spain, America/ Europe/London, Europe/Luxembourg, Europe/Madrid, Europe/Malta, Europe/Mariehamn, D14850.10 MX200 and MX300 Administrator Guide TC7.2, AUGUST 2014. www.cisco.com — Copyright © 2011–2014 Cisco Systems, Inc. All rights reserved. - Page 99 Universal, W-SU, WET, Zulu> Range: Select a time zone from the list. Range: Select a time zone from the list time zones. Example: D14850.10 MX200 and MX300 Administrator Guide TC7.2, AUGUST 2014. www.cisco.com — Copyright © 2011–2014 Cisco Systems, Inc. All rights reserved.
-
Page 100: Userinterface Settings
On: The user preferences are available from the Settings menu on the Touch controller. UserInterface UserPreferences: Off Example: D14850.10 MX200 and MX300 Administrator Guide TC7.2, AUGUST 2014. www.cisco.com — Copyright © 2011–2014 Cisco Systems, Inc. All rights reserved. -
Page 101: Video Settings
Range: Choose for how long self-view remains on. The valid range is between 1 and 60 seconds. Video CamCtrlPip CallSetup Duration: 10 Example: D14850.10 MX200 and MX300 Administrator Guide TC7.2, AUGUST 2014. www.cisco.com — Copyright © 2011–2014 Cisco Systems, Inc. All rights reserved. - Page 102 DVI: Select DVI when you want to use the DVI as input source 1. Video Input Source 1 Connector: DVI Example: D14850.10 MX200 and MX300 Administrator Guide TC7.2, AUGUST 2014. www.cisco.com — Copyright © 2011–2014 Cisco Systems, Inc. All rights reserved.
-
Page 103: Video Input Source [1..2] Presentationselection
IfSignal: When set to IfSignal, the menu selection for the video input source will only be visible when a presentation source is connected to the video input. Video Input Source 1 Visibility: IfSignal Example: D14850.10 MX200 and MX300 Administrator Guide TC7.2, AUGUST 2014. www.cisco.com — Copyright © 2011–2014 Cisco Systems, Inc. All rights reserved. - Page 104 Rather high resolutions will be used. Video Input Source 2 OptimalDefinition Profile: Normal Example: D14850.10 MX200 and MX300 Administrator Guide TC7.2, AUGUST 2014. www.cisco.com — Copyright © 2011–2014 Cisco Systems, Inc. All rights reserved.
-
Page 105: Video Layout Presentationdefault View
Minimized: The presentation starts up in PIP mode. Maximized: The presentation starts up in full screen mode. Video Layout PresentationDefault View: Default Example: D14850.10 MX200 and MX300 Administrator Guide TC7.2, AUGUST 2014. www.cisco.com — Copyright © 2011–2014 Cisco Systems, Inc. All rights reserved. - Page 106 Off: No adjustment of the aspect ratio. On: Let the system automatically adjust aspect ratio. Video Layout Scaling: On Example: D14850.10 MX200 and MX300 Administrator Guide TC7.2, AUGUST 2014. www.cisco.com — Copyright © 2011–2014 Cisco Systems, Inc. All rights reserved.
- Page 107 LowerRight: The presentation PiP will appear in the lower right corner of the screen. Video PIP Presentation DefaultValue Position: Current Example: D14850.10 MX200 and MX300 Administrator Guide TC7.2, AUGUST 2014. www.cisco.com — Copyright © 2011–2014 Cisco Systems, Inc. All rights reserved.
-
Page 108: Video Selfviewdefault Pipposition
Current: When leaving a call, the self-view picture will be kept on the same output as it was during the call. Video SelfviewDefault OnMonitorRole: Current Example: D14850.10 MX200 and MX300 Administrator Guide TC7.2, AUGUST 2014. www.cisco.com — Copyright © 2011–2014 Cisco Systems, Inc. All rights reserved. - Page 109 This setting is not applicable for this product. Range: Select a value from 0 to 100. Video Output LCD 1 Brightness: 50 Example: D14850.10 MX200 and MX300 Administrator Guide TC7.2, AUGUST 2014. www.cisco.com — Copyright © 2011–2014 Cisco Systems, Inc. All rights reserved.
-
Page 110: Video Wallpaper
Do not change this setting manually; keep the default setting. Value space: <First> First: Show the main video stream and presentation on the internal monitor. D14850.10 MX200 and MX300 Administrator Guide TC7.2, AUGUST 2014. www.cisco.com — Copyright © 2011–2014 Cisco Systems, Inc. All rights reserved. -
Page 111: Experimental Settings
Setting passwords Appendices Experimental settings The Experimental settings are for testing only and should not be used unless agreed with Cisco. These settings are not documented and WILL change in later releases. D14850.10 MX200 and MX300 Administrator Guide TC7.2, AUGUST 2014. -
Page 112: Setting Passwords
Cisco TelePresence MX200 and MX300 Administrator Guide Contents Introduction Web interface System settings Setting passwords Setting passwords Appendices Chapter 4 Setting passwords D14850.10 MX200 and MX300 Administrator Guide TC7.2, AUGUST 2014. www.cisco.com — Copyright © 2011–2014 Cisco Systems, Inc. All rights reserved. -
Page 113: Setting The System Password
You can read more about how to create and manage user ► User administration accounts in the section. D14850.10 MX200 and MX300 Administrator Guide TC7.2, AUGUST 2014. www.cisco.com — Copyright © 2011–2014 Cisco Systems, Inc. All rights reserved. -
Page 114: Appendices
Cisco TelePresence MX200 and MX300 Administrator Guide Contents Introduction Web interface System settings Setting passwords Appendices Appendices Appendices D14850.10 MX200 and MX300 Administrator Guide TC7.2, AUGUST 2014. www.cisco.com — Copyright © 2011–2014 Cisco Systems, Inc. All rights reserved. -
Page 115: Cisco Vcs Provisioning
Read the Cisco TMS Provisioning Deployment Guide to find in this guide. Examples showing either the default value or an how to upload the file to Cisco TMS, and how to set the example value are included. desired values for the parameters to be provisioned. If not set by Cisco TMS, the default values will be used. -
Page 116: Optimal Definition Profiles
1024 × 576 1280 × 720 1280 × 720 1280 × 720 1280 × 720 1280 × 720 ► System settings chapter. D14850.10 MX200 and MX300 Administrator Guide TC7.2, AUGUST 2014. www.cisco.com — Copyright © 2011–2014 Cisco Systems, Inc. All rights reserved. -
Page 117: Clearpath — Packet Loss Resilience
Go to System Configuration (on the web interface): • Navigate to Conference 1 > PacketLossResilience > Mode Choose Off to disable ClearPath and On to enable ClearPath. D14850.10 MX200 and MX300 Administrator Guide TC7.2, AUGUST 2014. www.cisco.com — Copyright © 2011–2014 Cisco Systems, Inc. All rights reserved. -
Page 118: Factory Resetting The Video System
Touch controller. D14850.10 MX200 and MX300 Administrator Guide TC7.2, AUGUST 2014. www.cisco.com — Copyright © 2011–2014 Cisco Systems, Inc. All rights reserved. -
Page 119: Factory Resetting The Touch 8 Control Panel
(approximately 10 seconds). 3. Press the Mute button twice. The Touch controller automatically reverts to the default factory settings and restarts. D14850.10 MX200 and MX300 Administrator Guide TC7.2, AUGUST 2014. www.cisco.com — Copyright © 2011–2014 Cisco Systems, Inc. All rights reserved. -
Page 120: Technical Specification
• Cet appareil numérique de la classe A est • Brightness: 450 cd/m2 60°C) conforme à la norme NMB-003 du Canada D14850.10 MX200 and MX300 Administrator Guide TC7.2, AUGUST 2014. www.cisco.com — Copyright © 2011–2014 Cisco Systems, Inc. All rights reserved. - Page 121 All images in these materials are for representational purposes only, actual products may differ. • H.245 dual-tone multifrequency (DTMF) tones in Cisco and the Cisco Logo are trademarks of Cisco Systems, Inc. and/or its affiliates in the U.S. and other H.323 countries.
-
Page 122: Supported Rfcs
RFC 3890 A Transport Independent Bandwidth Modifier Feedback for SDP • RFC 4587 RTP Payload Format for H.261 Video Streams D14850.10 MX200 and MX300 Administrator Guide TC7.2, AUGUST 2014. www.cisco.com — Copyright © 2011–2014 Cisco Systems, Inc. All rights reserved. -
Page 123: User Documentation On The Cisco Web Site
Setting passwords Appendices Appendices User documentation on the Cisco web site In general, user documentation for the Cisco TelePresence products is available here: The documents are organized in the following categories: Installation guides: ► http://www.cisco.com/go/telepresence/docs Install and Upgrade > Install and Upgrade Guides You have to choose your product category in the right pane until you find your product. -
Page 124: Intellectual Property Rights
NOTWITHSTANDING ANY OTHER WARRANTY HEREIN, ALL DOCUMENT FILES AND SOFTWARE OF THESE SUPPLIERS ARE On our web site you will find an overview of the worldwide Cisco contacts. PROVIDED “AS IS” WITH ALL FAULTS. CISCO AND THE ABOVE- NAMED SUPPLIERS DISCLAIM ALL WARRANTIES, EXPRESSED Go to: ►...