
Related Manuals for JVC 2A73501A


Summary of Contents for JVC 2A73501A
-
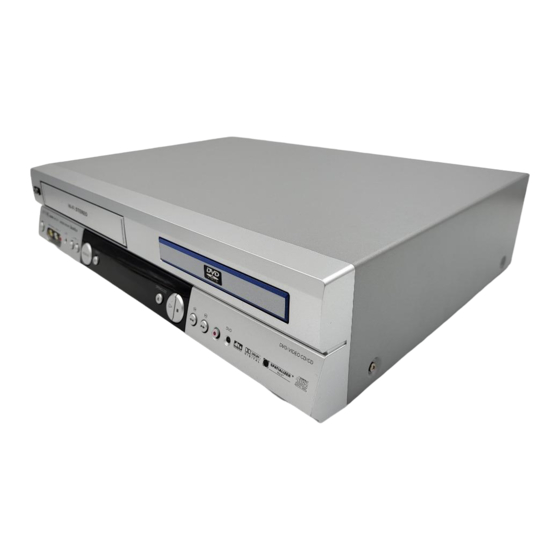
Page 1: Dvd Player
DVD PLAYER Hi-Fi VIDEO CASSETTE RECORDER USER’S GUIDE For model: HR-XV1EU DIGITAL VIDEO LPT0715-001A... -
Page 2: Safety Precautions
Safety Precautions SAFETY FIRST The rating plate and the safety caution are on the rear of the unit. WARNING: DANGEROUS VOLTAGE INSIDE WARNING: TO PREVENT FIRE OR SHOCK HAZARD, DO NOT EXPOSE THIS UNIT TO RAIN OR MOISTURE. CAUTION When you are not using the recorder for a long period of time, it is recommended that you disconnect the power cord from the mains outlet. - Page 3 For ItaIy: “It is declared that this product, brand JVC, conforms to the Ministry Decree n. 548 of 28 Aug.’95 published in the Official Gazette of the Italian Republic n. 301 of 28 Dec.’95” The STANDBY/ON button does not completely shut off mains power from the unit, but switches operating current on and off.
-
Page 4: Features
Features Video Cassette Recorder • High Quality (HQ) Images • On-Screen Displays (OSD) • Nicam Hi-Fi Stereo Audio Recording and Playback • ATS- Automatic Tuning System • CATV Tuner with Hyperband • 80 Memories for presets • Auto Time Setting •... -
Page 5: Table Of Contents
Before using your unit Safety Precautions ... 2 Features ... 4 Contents ... 5 Parts and functions ... 6 Display ... 7 Remote control ... 8 Connections and Installation ... 10 Playback connection ... 11 Setting up the VCR section Setting the TV to the AV-Channel ... -
Page 6: Parts And Functions
Parts and functions Front VCR/DVD mode selector button Cassette Loading Slot POWER button PR +/– buttons AUDIO (L/R)/ VCR indicator VIDEO IN jacks Rear AC power cord DVD OPTICAL DIGITAL AUDIO OUT jack DVD COAXIAL DIGITAL AUDIO OUT jack DVD AUDIO (L/R) OUT jacks DVD S-VIDEO OUT jack OPEN/CLOSE button EJECT button... -
Page 7: Display
Display window Display VCR mode Playback (lights) / Auto resume (flashes) Still picture DVD disc is inserted. CD is inserted. Clock display (colon[ : ] flashes) 10 : 00 01 : 00 Counter display by hour/minute at VCR/DVD / by minute/second at CD Track number display for CD TV channel position display CH 2... -
Page 8: Remote Control
NOTE: • It’s not possible to operate a unit not equipped with a remote sensor. • This Remote can control a JVC TV only. • When you operate the VCR or DVD, the TV/VCR/DVD switch must be slided to VCR/DVD again. Otherwise the DVD/ VCR may not operate properly. - Page 9 Change the custom code for remote control If you operate this DVD/VCR with another JVC’s VCR simultaneously arranging them side by side, the both recorders will react to this remote control. In this case, you can change the remote control and DVD/VCR to other frequency (“...
-
Page 10: Connections And Installation
Connections and Installation Connect your DVD/VCR to your home's antenna and to your TV-set as shown in the illustration. When you have finished these connections you connect your DVD/VCR to the 230 V / 50 Hz mains. Antenna-Input DVD/VCR AC power cord 230V/50 Hz Connect a TV with the Scart socket In addition to the coaxial cable connection, connect also with scart cable. -
Page 11: Playback Connection
The exact arrangement you use to interconnect various video and audio components to the DVD/VCR is dependent on the model and features of each component. Check the Owner's Manual provided with each component for the location of SCART socket. Connection to a Satellite Receiver If a Satellite Receiver is used, we recommend the following configuration: Satellite Antenna... - Page 12 Playback connection Connect to a Stereo Amplifier with Audio Output If your DVD/VCR is connected to a stereo amplifier, the video soundtrack can output through the loudspeakers of the stereo system. DVD/VCR Connect to an AV Amplifier with built-in digital surround If you are using an Amplifier with a built-in digital surround as follows, you can enjoy the various audio systems such as Dolby Digital and DTS by using the Coaxial Digital Output.
-
Page 13: Setting The Tv To The Av-Channel
We recommend that television and DVD/VCR are being connected with a scart cable. In this case, the setting of AV-channel is not necessary. Picture and sound of video cassette will be transmit- ted to television through the scart cable automatically. Please read the next page. In case of no scart cable connection, you must set the television to the AV- channel. -
Page 14: Setting The On-Screen Language
Setting the On-screen language Turn on your TV and select the AV- Program position, on which you have already set your DVD/VCR. (it will happen automatically by Scart-cable connection). So you can follow up the all setting on TV screen. NOTES: •... -
Page 15: Ats Automatic Tuning System And Auto Time/Date Setting
ATS Automatic Tuning System and Auto Time/Date Setting This VCR has a built-in TV receiver module. Before you can record a TV program, all the available TV stations must be tuned in and preset in the memory. The ATS function (Automatic Tuning System) allows all the locally available TV stations to be automati- cally stored and sorted according to... -
Page 16: Ats
Skipping unwanted TV stations (Skip those TV stations that are not wanted to be selected by pressing the PR button.) Preparation: • Turn ON the TV and set to the video input mode. • Make sure TV/VCR/DVD switch has been slided to VCR/DVD. Then press VCR to select the VCR mode. - Page 17 Reassigning TV station positions Preparation: • Turn ON the TV and set to the video input mode. • Make sure TV/VCR/DVD switch has been slided to VCR/DVD. Then press VCR to select the VCR mode. (The VCR indicator will light) Example: Reassign the TV station under No.
- Page 18 Changing TV station names For a number of TV stations (such as MTV) no name code will be displayed because these TV stations do not provide the necessary information. You can enter the respective names yourself. Moreover, unwanted station codes can be changed by the user. Note: When a wrong character is entered, press CANCEL and enter the correct...
-
Page 19: Setting The Time And Date
If the time and date is not be displayed for some reasons after the ATS function has been completed, a manual clock adjustment will be required. Note: • In case of a power failure the clock will continue to operate for another 30 min- utes with quartz-controlled precision. -
Page 20: Manual Tv Station Presetting
Manual TV station presetting ATS stores the broadcast automatically. However if you do the ATS under unfavorable receiving conditions, some broadcasts happen to be not finded by ATS. For these broadcasts, you can store also by manual. Note: Occasionally, the auto search might catch a weak signal and stop. - Page 21 The Fine Tuning adjustment Under a normal receiving condition, the station-search will stops automatically at the best receiving position. That picture will appear without disturbance. This receiving position will be memorized automatically. The Fine Tuning can not be memorized additionally. In rare case of bad receiving condition, the station-search might not stop at the best receiving position.
-
Page 22: Loading And Unloading A Cassette Tape
Loading and Unloading a Cassette Tape Use only video cassette tapes marked • Cassettes marked “VHS” (or “S-VHS”) can be used with this video cassette recorder. However, S-VHS recording is not possible with this model. • This model is equipped with SQPB (S-VHS QUASI PLAYBACK) that makes it possible to play back S-VHS recordings with regular VHS resolution. -
Page 23: Cassette Tape Playback
NOTES: • This VCR selects the playback tape speed SP or LP automatically. • The Cassette tape and DVD disc can be played back simultaneously. If you press VCR or DVD, the tape playback and DVD playback alternate with each other on the screen. -
Page 24: Special Playback/Playback Sharpness
Special playback/Playback sharpness/Skip Search Special playback Picture Search Reverse picture search function Press x 1 or x 2 during the playback. Forward picture search function Press x 1 or x 2 during the playback. To return to playback: Press Still Picture Press 4 during playback. -
Page 25: Repeat Playback
NOTE: If the unit is turned off or starts record- ing, the repeat mode is canceled. Repeat Playback Normal repeat playback The entire video tape will be played until its end. The tape will then automatically rewind to the beginning and the playback will be repeated. -
Page 26: Counter Display
Counter Display ZERO RETURN function This function makes tape-rewinding stop at the counter 00:00:00 position automatically. Note: • When you load a video cassette, the dis- play indication changes to "00:00". • The counter display does not function on non-recorded (blank) sections of the tape. -
Page 27: Video Index Search System
Whenever a recording is begun an invisible index mark is recorded on the tape. These index marks are all identical, and each mark means: "Here starts a new recording". Every DVD/VCR equipped with the Video Index Search System (VISS) can locate these marks at the beginning of any recording. -
Page 28: Recording A Tv Program
Recording a TV Program Notes: • Since the DVD/VCR has a built-in TV tuner the TV set may be turned off when recording. The TV set may only be used to check for accurate program adjust- ments or to monitor recordings. •... - Page 29 Recording with a SCART Cable: You can record a program using the TV receiver of the DVD/VCR and at the same time watch another program on the TV set using its receiver. As the DVD/VCR automatically switches the TV set the following points should be observed: Auto Rewind Feature The DVD/VCR will automatically rewind...
-
Page 30: Instant Timer Recording (Itr)
Instant Timer Recording (ITR) The instant timer recording feature provides a simple and convenient way to make a timed recording. Note: • If you wish to watch the DVD playback during the ITR, press DVD to change to DVD mode and perform the DVD play- back (see page 42). - Page 31 Look up the S number codes in an appropriate TV program magazine. Select the desired TV program for recording and refer to the number code next to it. Note: • The built-in timer stores 8 memories. If the “PROGRAM FULL” indicationappears, you must delete one memory (see page 34).
-
Page 32: Showview ® -Recording
® -Recording Example: You receive NBC on program position 12. In case of the first S -recording for NBC, 2 bars will blink at the CH-line. Enter 12 with number keys. Press 1 and then 2 within 2 seconds (if the 2-press was too late, the display 1 will be replaced with 2). -
Page 33: Timer-Recording
Timer recording can be programmed on the TV-screen with the remote control. The built-in timer allows automatic unattended recording of up to 8 programs within 1 month. Note: In the event of a power failure the data of the automatic recording will be maintained in the built-in memory for about 30 minutes. - Page 34 Timer-Recording Press OK to accept them. To enter other programs, repeat steps 2 through 4. • To return to the normal screen, press SET UP MENU twice. Press •. The clock symbol ( display and the DVD/VCR stands by for recording. At the same time, VCR mode will change to DVD mode automatically.
-
Page 35: Detailed Description Of The Vps/Pdc Function
Detailed Description of the VPS/PDC Function VPS/PDC is a service provided by the public TV station. When you select a VPS/PDC-compatible TV station and activate the VPS/PDC function, the beginning and the end of the timer recording will be controlled by the TV station. -
Page 36: Nicam/German A2 Stereo Recording And Playback
NICAM/German A2 Stereo Recording and Playback This DVD/VCR is capable of recording sound in Hi-Fi system. The recording will be performed automatically. NICAM STEREO broadcasts are recorded in its original sound system regardless of the setting. If you wish to record NICAM programmes, select NICAM "AUTO"... - Page 37 NICAM/German A2 Stereo Recording and Playback Note: When playing HiFi cassette tapes recorded on another VCR, the sound output may be distorted. This is normal and no indication of a unit malfunction. Try to minimize sound distortions by using SET +/– or change to MONO by pressing of A.MONITOR.
-
Page 38: Audio Mixing
Audio Mixing When playing audio dubbed video tapes, press A.MONITOR to select the sound you want to listen to. Press A.MONITOR repeatedly until "MONO" is displayed on the screen to listen only to the dubbed sound. In case of the other on-screen indications only the original sound will be output. -
Page 39: Duplicating A Video Tape
When you try to connect with a cable, make sure the power of both units have been turned off. Connect the recording unit with the TV. Therefore you can just watch what the recording unit is recording. Load a blank cassette tape with the erase prevention tab intact into the recording DVD/VCR. -
Page 40: Disc
Disc This unit applies to DVD discs from Region 2 only. The loaded Disc (DVD, Video-CD, Audio-CD and MP3-CD) will be recognized automatically. The suitable Disc-formats are: DVD, CD-R and CD-RW. Some CD-R/RW discs may be incompatible. This DVD/VCR uses the PAL color system. The NTSC-DVDs can be playback on PAL 60Hz. Do not play DVD-ROM, DVD-Audio, CDV, CD-G or Photo CD to prevent accidental erasure of prerecorded material. -
Page 41: Setting Setup Language
The setup language can be selected. If the DVD/VCR does not operate properly: Static electricity, etc., may affect the player's operation. Disconnect the AC power cord once, then connect it again. Setting setup language Preparation: • Turn ON the TV and set to the video input mode. •... -
Page 42: Playback Procedure
Playback procedure NOTES: • If a non-compatible disc is loaded, "Please Check Disc", "Disc playback unauthorized Consult owners manual for further information" or "Parental Lock" will appear on the TV screen according to the type of loaded disc. In this case, check your disc again (See pages 40 and 50, 51). •... -
Page 43: Special Playback
Note: There may be a slight delay be- tween pressing the button and the function activation. NOTES: • The unit is capable of holding a still video image or On screen display image on your television screen indefinitely. If you leave the still video image or On screen display image displayed on your TV for an extended period of time, you risk permanent damage to your... -
Page 44: Dvd Picture Signal Selection/Zooming
DVD Picture Signal Selection/Zooming You can select the output signal of DVD playback picture to the TV screen as an VIDEO signal or a RGB signal. Note: • Picture Signal Selection is only avail- able for connecting with a 21 pin Scart Cable. -
Page 45: Repeat Playback
NOTES: • Some discs may not work with the repeat operation. • In A-B repeat mode, subtitles near point A or B may not appear. • During the A-B Repeat Playback the ANGLE feature will not operate. • You may not be able to set A-B Re- peat, depending on the scenes of the DVD. -
Page 46: Memory Playback/Random Playback
Memory playback/Random playback NOTES: • The memory playback is cancelled when press 3 during memory playback. • Random playback can not be combined with Repeat playback. • You can program up to 30 selections into the memory. • Depending on the DVD, Chapter Random operation may not work during playback. -
Page 47: Mp3 Playback
This player can play back the MP3-data which has been recorded on CD-R or CD- RW. To produce the MP3-data, you need a Windows-PC with CD-ROM drive and a MP3- encoding Software (not supplied). The Apple-HFS-System can not be played. MP3 CD Information Limitations on MP3 CD playback •... -
Page 48: Changing Soundtrack Language / Changing Subtitles Language
Changing soundtrack language / Changing Subtitles language NOTES: • If the desired language is not heard after pressing A.MONITOR several times, the language is not recorded on the disc. • Changing soundtrack or subtitle language is cancelled when you open the disc tray or turn the power off. -
Page 49: Changing Angles / Title Selection / Dvd Menu
Changing angles / Title selection / DVD menu NOTE: Depending on the DVD, you may not be able to change the angles even if multi-angles are recorded on the disc, or you may be unable to select the title, and a “title menu” may simply be called a “menu”... -
Page 50: Parental Control
Parental control Some discs are specified not suitable for children. Such discs can be prevented from play back with the unit. NOTES: • If each setup (page 50~59) has been completed, the unit can always be worked under the same conditions (especially with DVD discs). - Page 51 Country/Area Code AUSTRALIA BELGIUM CANADA CHINA CHINA HONG KONG DENMARK FINLAND FRANCE GERMANY INDONESIA ITALY JAPAN MALAYSIA Press to select the paren- tal lock level, then press OK (En- ter). You cannot play DVD discs rated higher than the level you selected unless you cancel the parental lock function.
-
Page 52: Setting Menu Language
Setting menu language You can select the language of the disc menu messages of DVDs. Preparation: • Turn ON the TV and set to the video input mode. • Make sure TV/VCR/DVD switch has been slided to VCR/DVD. Then press DVD to select the DVD mode. (The DVD indicator will light) Press SET UP MENU in the stop mode. -
Page 53: Setting Audio Soundtrack Language
The same audio soundtrack language can always be selected by your unit even if you replace the disc or turn the power off. NOTES: • If the selected language is not re- corded on the disc, the original lan- guage will be heard. •... -
Page 54: Setting Subtitle Language
Setting subtitle language The same subtitle language can always be selected even if you replace the disc or turn the power off. NOTES: • If the selected language is not recorded on the disc, the first-priority language is selected. • Some DVD discs may be set to display Subtitles in a different language than you selected. -
Page 55: Setting The Aspect Ratio Of Tv Screen / Setting On Screen Display
Setting the aspect ratio of TV screen / Setting on Screen display You can select the aspect ratio for your TV. NOTES: • The displayable picture size is preset on the DVD video disc. Therefore, the playback picture of some DVD video discs may not conform to the picture size you select. -
Page 56: Setting Audio
Setting Audio NOTES: • The Dynamic Range Control function works only during playback of Dolby Digital recorded discs. • The level of Dynamic Range Control may differ depending on the DVD video disc. • The vocal output feature is used during playback of Dolby Digital (multi-channel) recorded DVD KARAOKE discs. -
Page 57: Setting Operation
Preparation: • Turn ON the TV and set to the video input mode. • Make sure TV/VCR/DVD switch has been slided to VCR/DVD. Then press DVD to select the DVD mode. (The DVD indicator will light) Pause/Still Select the resolution of still pictures. Press SET UP MENU in the stop mode. -
Page 58: Selecting The Sound Enhancement (E.a.m.)/Setting Background/Setting Screen Saver
Selecting the sound enhancement (E.A.M.)/Setting Background/ Setting Screen Saver Preparation: • Turn ON the TV and set to the video input mode. • Make sure TV/VCR/DVD switch has been slided to VCR/DVD. Then press DVD to select the DVD mode. (The DVD indicator will light) Selecting the sound enhancement (E.A.M.*) You can easily switch a preferred audio enhancement. -
Page 59: Setting Initial Setup/Output Sound Conversion Table
Setting initial setup/output sound conversion table You can install the initial system setting. Output sound conversion table You can select the output sound format corresponding to your system connection (see page 56). Discs Recording system Dolby Digital 48 kHz/16 bit 48 kHz/20 bit DVD video 48 kHz/24 bit... -
Page 60: Status Display Of Disc
Status display of Disc You can view information on the operation status and access and settings. With each press of OSD, the status of the disc will appear on the screen and change as follows. Symbol mark of the feature you selected is displayed. -
Page 61: Table Of Languages
Enter the appropriate code for the initial settings"Menu", "Audio" and/or "Subtitle" (see pages 52~54). Abbreviation Language – – – No alternate language CHI (ZH) Chinese DUT (NL) Dutch ENG (EN) English FRE (FR) French GER (DE) German ITA (IT) ltalian JPN (JA) Japanese KOR (KO) -
Page 62: Problems And Troubleshooting
No picture. No sound. The remote control does not function. The DVD-keys on the RCU of the other JVC RECEIVER/TV is not effective. TV recording does not work. Timer recording does not work. Noise bars on screen. Display is not shown in your language. -
Page 63: Video Head Cleaning
Problems and troubleshooting / Video head cleaning SYMPTOMS No 4:3 (16:9) picture No on-screen display No surround sound The unit or remote operation key is not functioning. Playback does not start when the title is selected. Audio soundtrack and/or subtitle language is not changed when you play back a DVD. -
Page 64: Specifications
DVD : Wavelength: 640 - 660 nm ACCESSORIES: Remote control x 1 75 ohm Coaxial Cable x 1 Battery (UM-3) x 2 2A73501A 02/04 VIDEO: 1 Vp-p, 75 Ω AUDIO: 500 mV, 50 k Ω 500 mV, 50 k Ω...