Table of Contents
Advertisement
Service
This manual is to be used by qualified appliance
technicians only. Maytag does not assume any
responsibility for property damage or personal
injury for improper service procedures done by
an unqualified person.
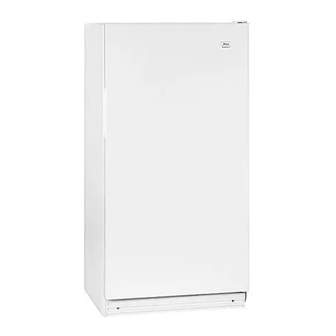
Upright
Freezers
This Base Manual covers general information
Refer to individual Technical Sheet
for information on specific models
This manual includes, but is
not limited to the following:
Amana
AFU1202BW
AFU1505BW
AFU1567BW
AFU1705BW
AFU1767BW
AFU2005BW
AFU2067BW
AQU1525AEW
Maytag
MQU1554AEW
MQU1556AEW
MQU2056ARW
MQU2057AEW
16023585
September 2004
Advertisement
Table of Contents

Related Manuals for Maytag AFU1202BW


Summary of Contents for Maytag AFU1202BW
- Page 1 Service This manual is to be used by qualified appliance technicians only. Maytag does not assume any This Base Manual covers general information responsibility for property damage or personal injury for improper service procedures done by Refer to individual Technical Sheet an unqualified person.
-
Page 2: Important Information
Important Notices for Servicers and Consumers Maytag will not be responsible for personal injury or property damage from improper service procedures. Pride and workmanship go into every product to provide our customers with quality products. It is possible, however, that during its lifetime a product may require service. -
Page 3: Table Of Contents
Wiring Diagram and Schematic ......50-51 Checking Timer ............20 Defrost Heater and Thermostat No-Defrosting Models ..........20 Freezer Fan No-Defrosting Models ......21 Testing Freezer Fan Motor ........21 Performance Data ..........22 Troubleshooting ............ 23-25 16023585 ©2004 Maytag Services... -
Page 4: Model Identification
An explanation of coding contained in Type position is shown below. Amana & Maytag Model Identification Color W ⎯ White Feature Package 1 ⎯ 3 ⎯ Good 4 ⎯... -
Page 5: Installation Instructions
• Freezers are currently rated for domestic use, not designed for commercial application. • Confirm the following items are installed. Free-O-Frost™ Upright Freezer Models Defrost drain pan behind toe grille. Standard Upright Freezer Models Drain plug in bottom front of freezer liner. (some models) 16023585 ©2004 Maytag Services... -
Page 6: Door Handle
Voltage must be in the range shown on Freezer Wiring Diagram. 2. Check freezer is reasonably level. 3. Check lid gasket seal. 4. Be sure light(s) work. 5. Check lock. 6. Wipe off any dirt and smudges. 16023585 ©2004 Maytag Services... -
Page 7: General Instructions
Maytag also recommends contacting an authorized "just a few days". When you get rid of your old servicer if service is required after warranty expires. -
Page 8: Operating Instructions
-5° to freezer cabinet wall. 50°F. Put thermometer snugly between frozen packages in freezer. Wait 5–8 hours. If freezer temperature is not 0° to 2°F, adjust control, one number at a time. Check again after 5–8 hours. 16023585 ©2004 Maytag Services... -
Page 9: Features
Chicken (fresh) 9–12 Chicken (cooked) 1–3 Duck Goose Turkey (fresh) 6–12 Turkey (cooked) 1–3 3–6 Fish Vegetables Fruits Bread and Pastries Bread 1–3 Yeast Rolls 1–3 Layer Cake 2–4 Fruit Pie (unbaked) 1–2 Ice Cream, Sherbert 16023585 ©2004 Maytag Services... -
Page 10: Care And Cleaning
Door Gaskets 1. Clean door gaskets every three months or more frequently if necessary. 2. Rinse and dry gaskets thoroughly. 3. Apply a light film of petroleum jelly on cabinet hinge side to keep gaskets pliable. 16023585 ©2004 Maytag Services... -
Page 11: Defrosting
6. Wash all interior surfaces including door, floor and appliance bulb for manual defrost models and 40-watt for walls. auto defrost models. 7. Replace inside drain plug. Drain plug must be properly installed for efficient operation. 16023585 ©2004 Maytag Services... -
Page 12: General Tips
Automatic timer sounds like an electronic clock that snaps in and out of the defrost cycle. 8. Insulation Foam insulation is very energy efficient and has excellent insulating capabilities. However, foam insulation is not as sound absorbent as previously used fiberglass insulation. 16023585 ©2004 Maytag Services... -
Page 13: Operating Sounds
Runs faster for higher in freezers. efficiency and has a higher pitched hum or pulsating sound. Defrost drain pan:* Dripping sound is defrost water falling onto drain pan. * Frost-free models only 16023585 ©2004 Maytag Services... -
Page 14: Component Testing
8. Suction and Head pressures are listed in the specification chart. Condenser Condenser Evaporator Heat exchanger Heat exchanger Suction Dryer line Drier Discharge Suction line line Compressor Discharge Compressor line Evaporator Refrigerant Flow Diagram Manual Defrost Refrigerant Flow Diagram Automatic Defrost 16023585 ©2004 Maytag Services... -
Page 15: Testing Main Condenser
However, it may be necessary to allow as much as 24 hours for test results to verify no leaks exist. If there are no leaks, reconnect the tubing. Evacuate and recharge the system. Tube process Compressor Cutting or Unsoldering Points Refrigerated Shelf Models 16023585 ©2004 Maytag Services... -
Page 16: Testing For Leaks
After replacing an electrical component, always verify the ground wire is reconnected. Capacitor The electrical outlet from which the appliance is to connections receive its power should always be checked to verify it is properly wired. Compressor Tester 16023585 ©2004 Maytag Services... -
Page 17: Capacitor
Reverse the meter leads and indication will be the same. If testing with a digital meter, the only indication will be, capacitor has a direct short. 16023585 ©2004 Maytag Services... -
Page 18: Ptc Relay
If compressor runs all the time, even though freezer temperature is below the control cut-out point, make the following applicable check On refrigerated shelf models, check control feeler tube attachment to underside of shelf front for a positive thermal contact. 16023585 ©2004 Maytag Services... -
Page 19: Temperature Control
Cut-in Cut-out 45° cut-in 135° 315° 15 ± 3 −6.8 ± 2 −18.4 ± 2 −29.2 ± 2 Timer 14 ± 3 +8 ± 2 −8 ± 2 −22 or below MID 180° Line Control (red) 16023585 ©2004 Maytag Services... -
Page 20: Checking Timer
(1st click) and end defrost cycle (2nd click) defrost heater are operative. positions. The 1st and 2nd clicks are only a few degrees of shaft rotation apart. Turn the shaft slowly and stop immediately when the 1st click is heard. 16023585 ©2004 Maytag Services... -
Page 21: Freezer Fan No-Defrosting Models
If motor fails to operate, remove and replace. Green White Orange White Circulating Fan and Wiring With Coil Cover Removed 16023585 ©2004 Maytag Services... -
Page 22: Performance Data
140−160 45−55 135−155 1.2−1.5 −2 110° 145−165 90−100 175−195 1.2−1.6 −4 −2 19.6 Foam 70° 135−155 40−50 95−115 1.2−1.5 12 uF −4 −2 210 V 90° 140−160 60−70 130−150 1.2−1.5 −2 110° 145−165 90−100 175−195 1.3−1.6 16023585 ©2004 Maytag Services... -
Page 26: Disassembly Procedures
Before cutting the tube, not reduced. verify it will be long enough to reconnect to the replacement compressor. If not, unsolder the joints. 16023585 ©2004 Maytag Services... -
Page 27: Refrigerated Shelf Model
27.Pinch process tube and cut off the service valve. rails. Push outward on liner side just above front Solder the joint and test for leaks. retainer embossment. Lift shelf front free of retainer. If necessary, repeat this operation on opposite side. 16023585 ©2004 Maytag Services... -
Page 28: Replacing Heat Exchanger No-Defrosting Models
11. Disconnect heater lead from defrost thermostat. 12.Remove defrost thermostat from coil header to release the front tang. See following illustration. Heat Exchanger To Freezer Coil Joints No-Defrost Models 18. Transfer rubber insulating sleeve to replacement heat 16023585 ©2004 Maytag Services... -
Page 29: Replacing Freezer Shelving Refrigerated Shelf Models
17.Connect wiring to freezer light, if equipped, and safe disposal. fasten top freezer plate, verifying all spacers are in 4. Remove butyl sealer from tube entry hole in the place. 18. Secure control feeler tube to correct shelf with the 16023585 ©2004 Maytag Services... -
Page 30: Replacing Freezer Coil No-Defrosting Models
13. Detach green grounding wire from freezer coil header. on fan motor. 14. Remove screws securing freezer coil to coil mounting panel. The coil is now free to be removed. 15. Straighten heat exchanger tubing to pass through the 16023585 ©2004 Maytag Services... -
Page 31: Replacing Light Switch
11. Reinstall control knob. Plug in power cord and check on the mount-panel. freezer operation. 27.Join white defrost heater lead and white lead-in wire with spade connector and attach spade terminal on Replacing Heater fan motor. 28. Connect defrost thermostat lead and fasten thermostat 16023585 ©2004 Maytag Services... -
Page 32: Replacing Freezer Fan Motor
When installing radiant heater do not touch the heater glass. Salt and oil on the hands may cause serious damage. Thermostat may be loosened for replacement by merely spreading front tangs of retainer clips. Defrost Thermostat and Mounting Clip 16023585 ©2004 Maytag Services... -
Page 33: Cabinet Door Assembly
Top door hinge Tapping plate Outer door panel Washer Serial plate Bezel Bushing Door handle Door gasket Lock assembly Insert Door shelf trim Bushing Kickplate Washer Inner door liner Spacer Clip Lower door hinge Bottom hinge 16023585 ©2004 Maytag Services... -
Page 34: Door Handle
Removing the Door Handle position. 1. Bow insert slightly and unhook top and bottom from door handle. 2. Remove mounting screws which secure the handle. NOTE: Longer mounting screw must be used to attach the bottom of door handle. 16023585 ©2004 Maytag Services... -
Page 35: Removing Door Lock Assembly
Examine the cabinet flange for transfer of chalk or dampness. Failure of the transfer indicates areas of poor seal. 16023585 ©2004 Maytag Services... -
Page 36: Cabinet Assembly
Light assembly Light assembly Shelve Cover gasket Cabinet inner Cabinet liner inner Evaportator liner Drain tube cap cover Drain Drain tube tube Gate brackets Gate brackets grommet grommet Wire gate Cabinet leveller Wire gate Cabinet leveller 16023585 ©2004 Maytag Services... -
Page 37: Service Information
If a “gurgling” sound is heard, capillary tube is not on the overload protector. restricted. Check for a leak or check operating pressures. 16023585 ©2004 Maytag Services... -
Page 38: Checking Operating Pressures
Indicates a leak in the high side of the system. Both gauges will show progressively less pressure. Simply purging air from the system is not practical. The system being undercharged due to the loss of refrigerant. Evacuate, purge, and recharge the system 16023585 ©2004 Maytag Services... -
Page 39: Operational Testing
2. Excessive Lid Opening: • Freezer is not designed to be operated as a refrigerator. Length of time and number of lid openings should be kept to minimum. 16023585 ©2004 Maytag Services... -
Page 40: Refrigeration System Complaints
Overload thermostat has failed. c. In case of freeze-ups, the unit's current draw (amperage) will usually be low, about 70 percent of serial plate. 16023585 ©2004 Maytag Services... -
Page 41: Refrigerant Leaks
• Once presence of a leak has been determined (from If evaporator leak is at unknown location, contact factory symptoms described above), locate leak. for permission to replace unit if product is under • First, test all joints in compressor compartment. Hold warranty. 16023585 ©2004 Maytag Services... -
Page 42: Evacuation And Charging Procedures
• Clean, dry HFC134a compatible copper tubing must be used when replacing tubing. • Avoid system contamination by using Towerdraw E610 evaporating oil, when flaring, swaging, or cutting refrigeration tubing. 16023585 ©2004 Maytag Services... -
Page 43: Hfc134A Service Information
Container may explode if heated due to resulting pressure rise. Combustion products are toxic. Storage conditions Procedures/rules for Same CFC12 also apply for HFC134a. Disposal procedures Recycle or reclaim Same 16023585 ©2004 Maytag Services... -
Page 44: Service Equipment
• Dry nitrogen 99.5% minimum purity, with -40°C (-40°F) or lower dew point • Crimp tool • Tube bender • Micron vacuum gauge • * Process tube adaptor kit • Heat trap paste • * Appliance grade HFC134a 16023585 ©2004 Maytag Services... -
Page 45: Replacement Hfc134A Service Compressor
10.Connect all tubing. Apply flux to compressor stubs must be air free. To reduce risk of air contamination and braze all the joints. Flux must be wiped off after follow evacuation procedures exactly. brazing. 11. Install a new drier. 16023585 ©2004 Maytag Services... - Page 46 1000 microns or below, system is ready for charging. closed. • If micron rises above 1000 micron level and stabilizes, open valve “A” to vacuum pump and continue evacuating. 16023585 ©2004 Maytag Services...
-
Page 47: Dehydrating Sealed Refrigeration System
• Copper to copper joints: SIL-FOS (alloy of 15% silver, 80% copper, and 5% phosphorous). Use without flux. Recommended brazing temperature is approximately 1400°F. DO NOT USE FOR COPPER TO STEEL CONNECTION. • Copper to steel joints: SILVER SOLDER (alloy of 16023585 ©2004 Maytag Services... -
Page 48: Line Piercing Valves
6° of rotation. small leaks in the high side, soap bubble solution will need to be performed. Turn cut-in or cut-out screws clockwise to obtain colder operating temperatures. NOTE: Use soap bubble solution only when the system 16023585 ©2004 Maytag Services... -
Page 49: Cabinet Shell
Drain System No-Defrost Models Drain tube grommets should never need replacing unless it has deteriorated. If drain system becomes clogged, push a length of plastic cloths line completely through and flush with warm water. 16023585 ©2004 Maytag Services... -
Page 50: Wiring Diagram And Schematic
Ground schematic 1 - Outer case 2 - Compressor 3 - Control Black 4 - Light plate Capacitor White Compressor Green No Interior Light (Optional) Manual Defrost Models AFU1202BW AFU1705BW AFU1505BW AFU2005BW AQU1525AEW MQU2056ARW MQU1554AEW MQU2057AEW MQU1556AEW 16023585 ©2004 Maytag Services... -
Page 51: Wiring Diagram And Schematic
2 - Compressor POWER 3 - Control GROUND SUPPLY 4 - Light Plate 5 - Fan Motor 6- Coil Cover Compressor Coil Cover Control Light Plate Fan Motor Outer Case Frost Free Models AFU1567BW AFU1767BW AFU2067BW 16023585 ©2004 Maytag Services...