Epson Stylus Pro 7700 Service Manual
Large format color inkjet printer
Hide thumbs
Also See for Stylus Pro 7700:
- Service manual (440 pages) ,
- Network manual (43 pages) ,
- Unpacking and setup manual (30 pages)
Table of Contents
Advertisement
Quick Links
Advertisement
Chapters
Table of Contents
Troubleshooting

Related Manuals for Epson Stylus Pro 7700


Summary of Contents for Epson Stylus Pro 7700
-
Page 1: Service Manual
SERVICE MANUAL Large Format Color Inkjet Printer Epson Stylus Pro 7700/7710 Epson Stylus Pro 7700M/7710M Epson Stylus Pro 7900/7910 Epson Stylus Pro 9700/9710 Epson Stylus Pro 9900/9910 Epson Stylus Pro WT7900/WT7910 Epson Stylus Pro 9890/9908 Epson Stylus Pro 7890/7908 Confidential... - Page 2 The contents of this manual are subject to change without notice. All efforts have been made to ensure the accuracy of the contents of this manual. However, should any errors be detected, SEIKO EPSON would greatly appreciate being informed of them.
- Page 3 2. MAKE CERTAIN THAT THE SOURCE VOLTAGES IS THE SAME AS THE RATED VOLTAGE, LISTED ON THE SERIAL NUMBER/RATING PLATE. IF THE EPSON PRODUCT HAS A PRIMARY AC RATING DIFFERENT FROM AVAILABLE POWER SOURCE, DO NOT CONNECT IT TO THE POWER SOURCE.
-
Page 4: Chapter 1 Product Description
Provides preventive maintenance procedures and the lists of Epson-approved lubricants and adhesives required for servicing the product. CHAPTER 7.Epson Stylus Pro 7700M/7710M (Copy Mode) Describes the copy mode features and basic specifications of Epson Stylus Pro 7700M/7710M CHAPTER 8.APPENDIX Provides the following additional information for reference: •... -
Page 5: Symbols Used In This Manual
Symbols Used in this Manual Various symbols are used throughout this manual either to provide additional information on a specific topic or to warn of possible danger present during a procedure or an action. Be aware of all symbols when they are used, and always read NOTE, CAUTION, or WARNING messages. Indicates an operating or maintenance procedure, practice or condition that is necessary to keep the product’s quality. - Page 6 Revision Status Revision Date of Issue Description October 20, 2008 First release November 25, 2008 Full-fledged revision Revised All chapters • Various cautions have been added and some wrong mentions have been corrected. Chapter 1 • "1.5.2 Maintenance Mode" (p.73) : setting value for roll paper tension has been added.
- Page 7 Revision Date of Issue Description Revised All chapters • Information of Epson Stylus Pro 7700/Epson Stylus Pro 7710/Epson Stylus Pro 9700/Epson Stylus Pro 9710 has been added. Chapter 1 • "1.2.6 Auto Take-up Reel Unit" (p.26) : added • "1.2.5 Reliability/Durability" (p.24) : revised •...
- Page 8 All chapters • Information of Epson Stylus Pro WT7900/Epson Stylus Pro WT7910 has been added. Chapter 1 • Information for Epson Stylus Pro WT7900/Epson Stylus Pro WT7910, ClearProof Film and basket for Epson Special Film have been added. Chapter 3 •...
- Page 9 "1.3.3 Printable Area" (p.41) : minimum for roll paper width has been revised. • "1.5.3 Serviceman Mode" (p.74) : "CL5" in "C/D" column in "Cleaning" menu of Epson Stylus Pro WT7900/Epson Stylus Pro WT7910 has been added. Chapter 3 •...
- Page 10 Revision Date of Issue Description Revised All chapters • Information of Epson Stylus Pro 7890/7908/9890/9908 has been added. Chapter 4 October 8, 2010 • "4.4.6.7 Ink Holder Board Assy L" (p.290) : newly added. • "4.4.6.8 Ink Holder Board Assy R" (p.292) : newly added.
-
Page 11: Table Of Contents
Revision Date of Issue Description Revised Chapter 1 • "1.2.1 Basic Specifications" (p.20) : Resolution of 7700/7710/770M/7710M/9700/9710 has been changed. • "1.2.5 Reliability/Durability" (p.24): Life of ink tube used for Pro7890/7908 has been revised. / Cutter life was revised. Chapter 3 •... - Page 12 1.3.4 Borderless Printing Specification .............. 42 3.7.1 Remedies for Print Quality Troubles ............149 1.3.5 Cutting of Roll Paper ................. 43 3.7.2 Remedies for Print Quality Troubles when Using Epson Stylus Pro WT7900/ 1.4 Hardware Specifications ..................44 WT7910 ....................152 1.4.1 Dimensions and Weight ................
- Page 13 6.5 Lubrication ....................... 452 5.4.13 Initial Ink Charge Flag ON/OFF ............403 5.4.14 Initial Ink Charge ................... 403 Chapter 7 Epson Stylus Pro 7700M/7710M (Copy Mode) 5.5 PF Related Adjustment ..................404 7.1 Overview ......................460 5.5.1 PF Timing Belt Tension Adjustment ............404 5.5.2 Skew Check .....................
- Page 14 8.2.1 Epson Stylus Pro 7900/7910/9900/9910/7890/7908/9890/9908 ..... 468 8.2.2 Epson Stylus Pro 7700/7710/7700M/7710M/9700/9710 ......471 8.2.3 Epson Stylus Pro WT7900/WT7910 ............474 8.2.4 Epson Stylus Pro 7700M/7710M (Copy Mode) ........477 8.3 Part names used in this manual ................ 479 8.4 Parts List ......................481 8.5 Exploded Diagram ....................
- Page 15 C H A P T E R PRODUCT DESCRIPTION Confidential...
-
Page 16: Product Description
WT7900/WT7910/9890/9908/7890/7908 is a wide-format color inkjet printer that assigned in colors by nozzles. supports up to 44 inch-wide (Super B0)/24 inch-wide (Super A1) paper. The main features are; Table 1-2. Ink Colors (Epson Stylus Pro 7700/7710/7700M/7710M/9700/9710) Supports very large-sized paper Color Abbreviation... - Page 17 Enlarges the image scanned by the scanner and prints the enlarged image. Matte Black User interface Cyan Copying can be started with one touch of the [OK] button on Epson Stylus Pro Vivid Magenta 7700M/7710M or the [Start] button on the scanner. Yellow...
- Page 18 Epson Stylus Pro 7700/7710/7700M/7710M/7900/7910/9700/9710/9900/9910/WT7900/WT7910/9890/9908/7890/7908 Revision I Nozzle set configuration Options The following options are available. Auto Take-up Reel (Epson Stylus Pro 9700/9710/9900/9910/9890/9908 only) Epson Stylus Winds the roll paper automatically Pro 7900/ SpectroProofer 7910/9900/ 9910 (Epson Stylus Pro 7900/7910/9900/9910/WT7900/WT7910/9890/9908/7890/ Epson Stylus...
- Page 19 Epson Stylus Pro 7700/7710/7700M/7710M/7900/7910/9700/9710/9900/9910/WT7900/WT7910/9890/9908/7890/7908 Revision I SpectroProofer (Option) Mounting the SpectroProofer equipped with the drying function makes automatic color measurement after printing available. Full-fledged spectrophotometer realizes high precision color measurement. Selectable from specifications with/without the UV filter, which enables the users to configure colorimetric system adjusted with their workflow Cooling fans for drying ink stabilizes color in less than 2 minutes.
-
Page 20: Basic Specifications
Epson Stylus Pro 7700/7710/7700M/7710M/7900/7910/9700/9710/9900/9910/WT7900/WT7910/9890/9908/7890/7908 Revision I 1.2 Basic Specifications 1.2.1 Basic Specifications Specification Item Epson Stylus Pro 7700/7710/7700M/ Epson Stylus Pro 7900/7910/9900/9910 Epson Stylus Pro WT7900/WT7910 Epson Stylus Pro 9890/9908/7890/7908 7710M/9700/9710 Print method On-demand inkjet Black system: Black system: Black system:... -
Page 21: Electric Specifications
Epson Stylus Pro 7700/7710/7700M/7710M/7900/7910/9700/9710/9900/9910/WT7900/WT7910/9890/9908/7890/7908 Revision I 1.2.2 Electric Specifications Item Specification Leek current 0.25 mA or less Item Specification Conforms to International Energy Star Program Rated voltage 100 to 240 VAC (Category: the harmonic restraint measure guideline) Compliance with regulations... -
Page 22: Ink Specifications
Epson Stylus Pro 7700/7710/7700M/7710M/7900/7910/9700/9710/9900/9910/WT7900/WT7910/9890/9908/7890/7908 Revision I 1.2.3 Ink Specifications Specification Item Epson Stylus Pro 7700/7710/7700M/ Epson Stylus Pro 7900/7910/9900/9910 Epson Stylus Pro WT7900/WT7910 Epson Stylus Pro 9890/9908/7890/7908 7710M/9700/9710 Form Exclusive ink cartridge Black system: Photo black Black system: Photo black, Matte black,... -
Page 23: General Specifications
Epson Stylus Pro 7700/7710/7700M/7710M/7900/7910/9700/9710/9900/9910/WT7900/WT7910/9890/9908/7890/7908 Revision I 1.2.4 General Specifications Item Specification Operating: 10 to 35 °C Storage (before unpacked): -20 to 60 °C Temperature (within 120 hours under 60 °C, and within 1 month under 40 °C) Storage (after unpacked): -20 to 40 °C (within 1 month under 40°C) -
Page 24: Reliability/Durability
Approx. 20,000 pages (reference value) Approx. 20,000 pages (reference value) Approx. 20,000 pages (reference value) (Super A1 size/EPSON Pump Cap motor (Super B0 size /EPSON paper/Quality mode/ (Super A1 size /EPSON paper/Quality mode/ (Super B0 size /EPSON paper/Quality mode/ paper/Continuous Parts... - Page 25 Epson Stylus Pro 7700/7710/7700M/7710M/7900/7910/9700/9710/9900/9910/WT7900/WT7910/9890/9908/7890/7908 Revision I SpectroProofer Item Specified values Until any one of the following conditions is met. Mounter 5 years 200,000 paths for color measurement PRODUCT DESCRIPTION Basic Specifications Confidential...
-
Page 26: Auto Take-Up Reel Unit
Epson Stylus Pro 7700/7710/7700M/7710M/7900/7910/9700/9710/9900/9910/WT7900/WT7910/9890/9908/7890/7908 Revision I 1.2.6 Auto Take-up Reel Unit Item Specified values Paper Width 406 to 1,118 mm 2-inch core: 1.3 to 40 m Paper length 3-inch core: 1.6 to 30.5 m Rotation speed Max. 40 rpm Weight 6.9 kg... -
Page 27: Printing Specifications
Epson Stylus Pro 7700/7710/7700M/7710M/7900/7910/9700/9710/9900/9910/WT7900/WT7910/9890/9908/7890/7908 Revision I 1.3 Printing Specifications 1.3.2 Paper Specification 1.3.2.1 Supported Paper 1.3.1 Paper Feed Specifications The following explains the supported paper sizes and thickness. Item Specification Do not use wrinkled, scuffed, torn, or soiled paper. C A U T I O N... - Page 28 24 inches (Super A1), 728 mm (B1) 36 inches (Super A0) , 44 inches (Super B0) Note *1: Borderless printing is not available for Epson Stylus Pro WT7900/WT7910. *2: Not supported for Epson Stylus Pro 7890/7908. PRODUCT DESCRIPTION Printing Specifications...
- Page 29 Borderless printing can be made on commercially available paper, however, note that the availability is restricted by the paper size. *2: Not supported for Epson Stylus Pro 7700/7710/7900/7910/WT7900/WT7910/7890/7908. *3: Auto Take-up Reel Unit is used. (only Pro 9700/9710/9900/9910/9890/9908) *4: When using the tensioner included in the Auto Take-up Reel Unit of Pro 9700/9710/9900/9910.
- Page 30 • Matte Black: --- 406mm 16" Premium Premium Luster Photo 508mm 20" 0.27mm 3" Standard Photo Paper Luster Photo • Photo Black: Epson Stylus Pro Paper (260) Paper (260) 7700_7710_9700_9710 610mm 24" PremiumLusterPhotoPaper260.icc 914mm* 36"* • Matte Black: --- 1118mm* 44"* 406mm 16"...
- Page 31 Epson Stylus Pro 7700/7710/7700M/7710M/7900/7910/9700/9710/9900/9910/WT7900/WT7910/9890/9908/7890/7908 Revision I Table 1-5. Designated Roll Paper List Size Take-up* Applied model ICC Profile Upper: Pro7900/7910/9900/9910/9890/ Roll Borderless Auto Black Core Name Thickness 9908/7890/7908 Driver Setting Paper Print Diameter Forward Backward inch Tension Lower:Pro7700/7710/7700M/7710M/ 9700/9710 420mm (A2) •...
- Page 32 Epson Stylus Pro 7700/7710/7700M/7710M/7900/7910/9700/9710/9900/9910/WT7900/WT7910/9890/9908/7890/7908 Revision I Table 1-5. Designated Roll Paper List Size Take-up* Applied model ICC Profile Upper: Pro7900/7910/9900/9910/9890/ Roll Borderless Auto Black Core Name Thickness 9908/7890/7908 Driver Setting Paper Print Diameter Forward Backward inch Tension Lower:Pro7700/7710/7700M/7710M/ 9700/9710 330mm 13"...
- Page 33 Epson Stylus Pro 7700/7710/7700M/7710M/7900/7910/9700/9710/9900/9910/WT7900/WT7910/9890/9908/7890/7908 Revision I Table 1-5. Designated Roll Paper List Size Take-up* Applied model ICC Profile Upper: Pro7900/7910/9900/9910/9890/ Roll Borderless Auto Black Core Name Thickness 9908/7890/7908 Driver Setting Paper Print Diameter Forward Backward inch Tension Lower:Pro7700/7710/7700M/7710M/ 9700/9710 • Photo Black: --- •...
- Page 34 Epson Stylus Pro 7700/7710/7700M/7710M/7900/7910/9700/9710/9900/9910/WT7900/WT7910/9890/9908/7890/7908 Revision I Table 1-5. Designated Roll Paper List Size Take-up* Applied model ICC Profile Upper: Pro7900/7910/9900/9910/9890/ Roll Borderless Auto Black Core Name Thickness 9908/7890/7908 Driver Setting Paper Print Diameter Forward Backward inch Tension Lower:Pro7700/7710/7700M/7710M/ 9700/9710 432mm 17"...
- Page 35 Epson Stylus Pro 7700/7710/7700M/7710M/7900/7910/9700/9710/9900/9910/WT7900/WT7910/9890/9908/7890/7908 Revision I Table 1-5. Designated Roll Paper List Size Take-up* Applied model ICC Profile Upper: Pro7900/7910/9900/9910/9890/ Roll Borderless Auto Black Core Name Thickness 9908/7890/7908 Driver Setting Paper Print Diameter Forward Backward inch Tension Lower:Pro7700/7710/7700M/7710M/ 9700/9710 432mm 17"...
- Page 36 Epson Stylus Pro 7700/7710/7700M/7710M/7900/7910/9700/9710/9900/9910/WT7900/WT7910/9890/9908/7890/7908 Revision I Table 1-5. Designated Roll Paper List Size Take-up* Applied model ICC Profile Upper: Pro7900/7910/9900/9910/9890/ Roll Borderless Auto Black Core Name Thickness 9908/7890/7908 Driver Setting Paper Print Diameter Forward Backward inch Tension Lower:Pro7700/7710/7700M/7710M/ 9700/9710 610mm 24"...
- Page 37 Borderless printing on the borderless printing available paper (OK) may result in drop in print quality or fail to produce complete borderless (white margins may appear) due to expanding of the paper. Borderless printing can be made on commercially available paper, however, note that the availability is restricted by the paper size. *2: Not supported for Epson Stylus Pro 7700/7710. Table 1-6. Designated Cut Sheet List...
- Page 38 Epson Stylus Pro 7700/7710/7700M/7710M/7900/7910/9700/9710/9900/9910/WT7900/WT7910/9890/9908/7890/7908 Revision I Table 1-6. Designated Cut Sheet List Applied model ICC Profile Borderless Upper: Pro7900/7910/9900/9910/ Name Size Thickness Driver Setting Black Ink Print 9890/9908/7890/7908 Lower: Pro7700/7710/7700M/7710M/9700/9710 • Photo Black: Super A3/B Pro9900_7900PremiumLusterPhotoPaper.icc • Matte Black: --- ✔...
- Page 39 Epson Stylus Pro 7700/7710/7700M/7710M/7900/7910/9700/9710/9900/9910/WT7900/WT7910/9890/9908/7890/7908 Revision I Table 1-6. Designated Cut Sheet List Applied model ICC Profile Borderless Upper: Pro7900/7910/9900/9910/ Name Size Thickness Driver Setting Black Ink Print 9890/9908/7890/7908 Lower: Pro7700/7710/7700M/7710M/9700/9710 • Photo Black: Super A3 Pro9900_7900PhotoQualityInkJetPaper.icc ✔ • Matte Black: --- Photo Quality ✔...
- Page 40 Epson Stylus Pro 7700/7710/7700M/7710M/7900/7910/9700/9710/9900/9910/WT7900/WT7910/9890/9908/7890/7908 Revision I Table 1-6. Designated Cut Sheet List Applied model ICC Profile Borderless Upper: Pro7900/7910/9900/9910/ Name Size Thickness Driver Setting Black Ink Print 9890/9908/7890/7908 Lower: Pro7700/7710/7700M/7710M/9700/9710 • Photo Black: Pro9900_7900TexturedFineArtPaper_PK.icc 24" x 30" • Matte Black: Textured Fine Pro9900_7900TexturedFineArtPaper_MK.icc...
-
Page 41: Printable Area
Epson Stylus Pro 7700/7710/7700M/7710M/7900/7910/9700/9710/9900/9910/WT7900/WT7910/9890/9908/7890/7908 Revision I 1.3.3 Printable Area Note "*1": When the Default is selected, “a” becomes 20mm and “c” becomes 15mm for the following paper types; Premium Glossy Photo Paper(250), Premium Semigloss Photo Paper(250), and Premium Luster Photo Paper(260). -
Page 42: Borderless Printing Specification
Epson Stylus Pro 7700/7710/7700M/7710M/7900/7910/9700/9710/9900/9910/WT7900/WT7910/9890/9908/7890/7908 Revision I 1.3.4 Borderless Printing Specification Table 1-7. Borderless Printing Mode Driver Setting Printer Operation Remarks AVAILABLE PAPER TYPE Prints an image bleeding it off • Printing is interrupted for cutting off the top the all edges of paper. -
Page 43: Cutting Of Roll Paper
Epson Stylus Pro 7700/7710/7700M/7710M/7900/7910/9700/9710/9900/9910/WT7900/WT7910/9890/9908/7890/7908 Revision I 1.3.5 Cutting of Roll Paper HOW TO CUT The printer offers two ways of cutting for roll paper. Auto cut The printer automatically cuts paper with the built-in cutter each time a page is... -
Page 44: Hardware Specifications
Note *: Excluding the ink cartridges and paper 1,218mm Note "*1": The depth is 1442 mm when the Basket for Epson Special Film is installed. 667mm Pro 9700/Pro 9710/Pro 9900/Pro 9910/Pro 9890/Pro 9908: 1,864mm Pro 7700/Pro7710/Pro 7900/Pro 7910/ProWT7900/WT7910/Pro 7890/Pro 7908: 1,356mm Figure 1-3. - Page 45 Epson Stylus Pro 7700/7710/7700M/7710M/7900/7910/9700/9710/9900/9910/WT7900/WT7910/9890/9908/7890/7908 Revision I OPTIONS External Dimensions Model Weight Width Depth Height <Mounter> Mounter for Pro 9900/Pro 9910 1,295 mm 199 mm 267 mm Approx. 13.4 kg Pro 9890/Pro 9908 Mounter for Pro 7900/Pro 7910/ 787 mm 199 mm 267 mm Approx.
-
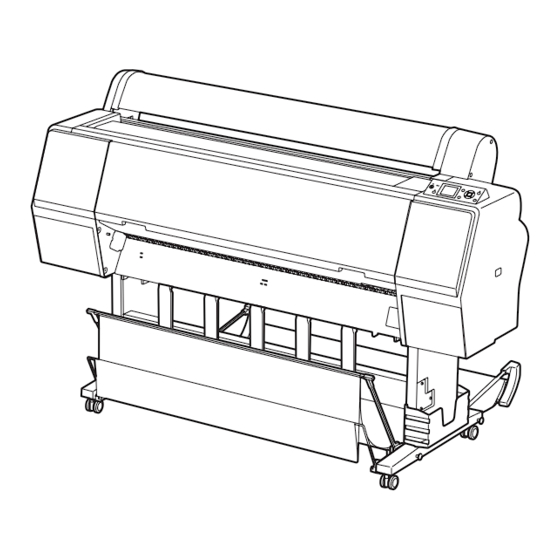
Page 46: Part Names
Handle part Film guides Ink Cover Ink Cover Handle part Basket cloth Storing string Manual Box Figure 1-6. Part Names (Basket for Epson Special Film) Front Cover OPTIONS Paper Basket Paper Guides Option Interface Connector Movable Unit Network Interface Connector... -
Page 47: Option Correspondence Table
Epson Stylus Pro 7700/7710/7700M/7710M/7900/7910/9700/9710/9900/9910/WT7900/WT7910/9890/9908/7890/7908 Revision I 1.4.3 Option Correspondence Table Handle Auto Take-up SpectroProofer SpectroProofer Basket for Epson Model Cover Handle Reel Unit 24” 44” Special Film Pro 9900/ Supported Not supported Supported Not supported Pro 9910 Pro 7900/ Not supported... -
Page 48: Control Panel
Epson Stylus Pro 7700/7710/7700M/7710M/7900/7910/9700/9710/9900/9910/WT7900/WT7910/9890/9908/7890/7908 Revision I 1.5 Control Panel BUTTONS [Paper Feed [Paper Secure] (reverse)] button button [Power] button Epson Stylus Pro 7900/7910/ 9900/9910/ *See the right column [OK] button 9890/9908/7890/7908 [Black Ink Change] button [Menu] Epson Stylus Pro 7700/7710/... - Page 49 Epson Stylus Pro 7700/7710/7700M/7710M/7900/7910/9700/9710/9900/9910/WT7900/WT7910/9890/9908/7890/7908 Revision I BUTTONS NOTE *1 : Epson Stylus Pro 7900/7910/9900/9910/9890/9908/7890/7908 only. *2 : Epson Stylus Pro 7700/7710/7700M/7710M/9700/9710/WT9700/ WT9710 only. *3 : Epson Stylus Pro 7700M/7710M only. Function Button Name When pressed normally When pressed down for 3 sec.
- Page 50 Epson Stylus Pro 7700/7710/7700M/7710M/7900/7910/9700/9710/9900/9910/WT7900/WT7910/9890/9908/7890/7908 Revision I Function Button Name When pressed normally When pressed down for 3 sec. For panel setting • When roll paper is loaded: Feeds the paper forward. • When roll paper is not loaded: Does not function.
- Page 51 The installed ink cartridge is nearly expended. The printer is ready to print data. NOTE: The figure is for Epson Stylus Pro 7900/7910/9900/9910. • The printer is in the Menu mode or pause mode. • The printer has an error.
- Page 52 Epson Stylus Pro 7700/7710/7700M/7710M/7900/7910/9700/9710/9900/9910/WT7900/WT7910/9890/9908/7890/7908 Revision I Item Description Message Printer status, operating status, or an error message is displayed. Normal indication Displays the setting of “Platen Gap”. Epson Stylus Pro 7900/7910/9900/9910 /9890/9908/7890/7908 : “NARROW” is selected. : “WIDE” is selected.
- Page 53 Epson Stylus Pro 7700/7710/7700M/7710M/7900/7910/9700/9710/9900/9910/WT7900/WT7910/9890/9908/7890/7908 Revision I Epson Stylus Pro 7700/7710/7700M/7710M/9700/9710 Item Description Message Printer status, operating status, or an error message is displayed. Displays the setting of “Platen Gap”. : “NARROW” is selected. : “WIDE” is selected. Platen Gap : “WIDER” is selected.
- Page 54 Epson Stylus Pro 7700/7710/7700M/7710M/7900/7910/9700/9710/9900/9910/WT7900/WT7910/9890/9908/7890/7908 Revision I Epson Stylus Pro WT7900/WT7910 Item Description Message Printer status, operating status, or an error message is displayed. Displays the setting of “Platen Gap”. : “NARROW” is selected. 2 11 : “WIDE” is selected. Platen Gap : “WIDER”...
- Page 55 Epson Stylus Pro 7700/7710/7700M/7710M/7900/7910/9700/9710/9900/9910/WT7900/WT7910/9890/9908/7890/7908 Revision I Error indication LCD (Error indication with an image) BORDERLESS ERROR NOT ENOUGH EMPTY SPACE LOAD A SUPPORTED PAPER REPLACE THE SIZE OR LOAD PAPER RIGHT SIDE CORRECTLY MAINTENANCE TANK Figure 1-10. LCD (Error indication) Figure 1-11.
- Page 56 Epson Stylus Pro 7700/7710/7700M/7710M/7900/7910/9700/9710/9900/9910/WT7900/WT7910/9890/9908/7890/7908 Revision I Copy mode screen (Epson Stylus Pro 7700M/7710M only) Item Description Number of copies Indicates the number of copies (selectable from 1 through 10). Color / B&W Indicates whether the copy is made in color or B&W.
- Page 57 Cartridge error or no cartridge has occurred. (flashing) Photo Black (PK) Cleaning Liquid (CL1) Vivid Magenta (VM) Vivid Magenta (VM) Note: The figure is for Epson Stylus Pro 7900/7910/9900/9910. Light Black (LK) Cleaning Liquid (CL2) Green (G) Green (G) Free space of the maintenance tank...
-
Page 58: Menu Mode Settings
Epson Stylus Pro 7700/7710/7700M/7710M/7900/7910/9700/9710/9900/9910/WT7900/WT7910/9890/9908/7890/7908 Revision I 1.5.1 Menu Mode Settings Table 1-8. Menu Mode Settings List Applied model Settings Top Menu Menu Item Explanation (shaded one is the default) NARROW STANDARD Sets the platen gap (gap between the printhead and the platen). - Page 59 Epson Stylus Pro 7700/7710/7700M/7710M/7900/7910/9700/9710/9900/9910/WT7900/WT7910/9890/9908/7890/7908 Revision I Table 1-8. Menu Mode Settings List Applied model Settings Top Menu Menu Item Explanation (shaded one is the default) DEFAULT Epson Stylus Pro 7900/7910/9900/9910/9890/9908/7890/7908 TOP/BOTTOM 15mm Sets the margins for roll paper. √ TOP 35/BOTTOM 15mm When the Default is selected, the top margin becomes 20mm and the bottom margin becomes 15mm for the following paper types;...
- Page 60 Epson Stylus Pro 7700/7710/7700M/7710M/7900/7910/9700/9710/9900/9910/WT7900/WT7910/9890/9908/7890/7908 Revision I Table 1-8. Menu Mode Settings List Applied model Settings Top Menu Menu Item Explanation (shaded one is the default) Sets whether to detect the paper skew or not. Setting to OFF does not carry out the detection and printing is continued even if the paper is skewed. When this √...
- Page 61 Epson Stylus Pro 7700/7710/7700M/7710M/7900/7910/9700/9710/9900/9910/WT7900/WT7910/9890/9908/7890/7908 Revision I Table 1-8. Menu Mode Settings List Applied model Settings Top Menu Menu Item Explanation (shaded one is the default) Epson Stylus Pro 7900/7910/9900/9910/7900/7910/7700/7710/7700M/7710M/9890/9908/7890/7908 Prints a nozzle check pattern, the firmware version, paper/ink consumption, and waste ink level in the √...
- Page 62 Epson Stylus Pro 7700/7710/7700M/7710M/7900/7910/9700/9710/9900/9910/WT7900/WT7910/9890/9908/7890/7908 Revision I Table 1-8. Menu Mode Settings List Applied model Settings Top Menu Menu Item Explanation (shaded one is the default) CL->WT Changes ink in the nozzle. CL->WT: Changes cleaning liquid with the white Ink √...
- Page 63 Epson Stylus Pro 7700/7710/7700M/7710M/7900/7910/9700/9710/9900/9910/WT7900/WT7910/9890/9908/7890/7908 Revision I Table 1-8. Menu Mode Settings List Applied model Settings Top Menu Menu Item Explanation (shaded one is the default) C/VM PK(MK)/LK Epson Stylus Pro 7900/7910/9900/9910/9890/9908/7890/7908 √ O/G* Runs a cleaning for the specified nozzle columns.
- Page 64 Epson Stylus Pro 7700/7710/7700M/7710M/7900/7910/9700/9710/9900/9910/WT7900/WT7910/9890/9908/7890/7908 Revision H Table 1-8. Menu Mode Settings List Applied model Settings Top Menu Menu Item Explanation (shaded one is the default) HW0xxxx-xx.xx.IBCC or √ √ VERSION Displays the firmware version. Refer to "Firmware version information" on page HN0xxxx-xx.xx.IBCC...
- Page 65 Epson Stylus Pro 7700/7710/7700M/7710M/7900/7910/9700/9710/9900/9910/WT7900/WT7910/9890/9908/7890/7908 Revision H Table 1-8. Menu Mode Settings List Applied model Settings Top Menu Menu Item Explanation (shaded one is the default) Make settings for the remaining roll paper. OFF: Disables the roll paper remaining amount count function.
- Page 66 Epson Stylus Pro 7700/7710/7700M/7710M/7900/7910/9700/9710/9900/9910/WT7900/WT7910/9890/9908/7890/7908 Revision H Table 1-8. Menu Mode Settings List Applied model Settings Top Menu Menu Item Explanation (shaded one is the default) Photo Paper Proofing Paper Fine Art Paper Matte Paper Epson Stylus Pro 7900/7910/9900/9910/9890/9908/7890/7908 √ Sets the paper type loaded on the printer.
- Page 67 Epson Stylus Pro 7700/7710/7700M/7710M/7900/7910/9700/9710/9900/9910/WT7900/WT7910/9890/9908/7890/7908 Revision H Table 1-8. Menu Mode Settings List Applied model Settings Top Menu Menu Item Explanation (shaded one is the default) You can select a number (between 1 to 10) to register the settings (such as Paper Type, Platen Gap, Thickness √...
- Page 68 PAPER THICKNESS • When Epson paper is used, select the paper type. SELECT THICKNESS • When not Epson paper is selected, enter the thickness of the selected paper. AUTO Sets whether to carry out the head alignment adjustment automatically or manually.
- Page 69 Epson Stylus Pro 7700/7710/7700M/7710M/7900/7910/9700/9710/9900/9910/WT7900/WT7910/9890/9908/7890/7908 Revision H Table 1-8. Menu Mode Settings List Applied model Settings Top Menu Menu Item Explanation (shaded one is the default) DISABLE Enables or disables the network settings. √ √ √ NETWORK SETUP The NETWORK SETUP menu items appear on the LCD only when this is set to ENABLE.
- Page 70 Epson Stylus Pro 7700/7710/7700M/7710M/7900/7910/9700/9710/9900/9910/WT7900/WT7910/9890/9908/7890/7908 Revision H Table 1-8. Menu Mode Settings List Applied model Settings Top Menu Menu Item Explanation (shaded one is the default) Displays the status of each item of SpectroProofer, such as the version of SpectroProofer, the product numbers √...
- Page 71 Epson Stylus Pro 7700/7710/7700M/7710M/7900/7910/9700/9710/9900/9910/WT7900/WT7910/9890/9908/7890/7908 Revision H PG Settings List Table 1-9. PG Settings List The table below shows the actual platen gap amount specified by the printer driver Paper Paper Thickness Media Table or Printer PG Values Thickness Menu Setting or the control panel.
- Page 72 Epson Stylus Pro 7700/7710: Epson Stylus Pro 7700M/7710M: KND Epson Stylus Pro 7700M/7710M: KNDXXXX,xx.xx,IBCC After 2010 April, the same firmware will be used for Epson Stylus Pro 7700/ Epson Stylus Pro 9890/9908: JW0XXXX-xx.xx.IBCC 7710 and Epson Stylus Pro 7700M/7710M. “D” will be assigned to custom versions.
-
Page 73: Maintenance Mode
Stores custom settings. 0 - 255 Note : If this menu is not displayed in Epson Stylus Pro 7900/7910/9900/9910, update the firmware to the latest. This menu is added and the setting becomes available after updating. PRODUCT DESCRIPTION Control Panel... -
Page 74: Serviceman Mode
Epson Stylus Pro 7700/7710/7700M/7710M/7900/7910/9700/9710/9900/9910/WT7900/WT7910/9890/9908/7890/7908 Revision H 1.5.3 Serviceman Mode The Serviceman Mode is intended to be used by a service personnel for servicing the printer. HOW TO START & QUIT Turn the printer on by pressing the [OK], [Paper Feed/Down], and [Menu/Right] buttons. - Page 75 Epson Stylus Pro 7700/7710/7700M/7710M/7900/7910/9700/9710/9900/9910/WT7900/WT7910/9890/9908/7890/7908 Revision H Menu Explanation Mecha Adjustment Mk Nozzle/Alignment Cleaning CL2 Runs the check function of nozzle and alignment. From pattern printing to cleaning can be executed from this menu. Cleaning CL3 only. *Epson Stylus Pro 7900/7910/9900/9910 Init.Fill...
- Page 76 Epson Stylus Pro 7700/7710/7700M/7710M/7900/7910/9700/9710/9900/9910/WT7900/WT7910/9890/9908/7890/7908 Revision H Menu Explanation Mecha Adjustment Pk Nozzle/Alignment Cleaning CL3 Runs the check function of nozzle and alignment. From pattern printing to cleaning can be executed from this menu. Init.Fill only. *Epson Stylus Pro 7900/7910/9900/9910 SSCL...
- Page 77 Epson Stylus Pro 7700/7710/7700M/7710M/7900/7910/9700/9710/9900/9910/WT7900/WT7910/9890/9908/7890/7908 Revision H Menu Explanation Mecha Adjustment PG Adj. Adjusts the platen gap. CR Scale Moves the carriage unit by 10 pass, and displays the measured value. CR Active Damper Executes the CR active dumper adjustment. 240 cps...
- Page 78 Epson Stylus Pro 7700/7710/7700M/7710M/7900/7910/9700/9710/9900/9910/WT7900/WT7910/9890/9908/7890/7908 Revision H Menu Explanation Maintenance Tube Exchange Exchanges an ink tube. Wiper Exchange Exchanges the wiper. Pump Exchange Exchanges the pump. Press Pump Exchange Exchanges the pressurizing pump. Selector Exchange Exchanges the ink selector. I/H Exchange Exchanges the ink holder.
- Page 79 Epson Stylus Pro 7700/7710/7700M/7710M/7900/7910/9700/9710/9900/9910/WT7900/WT7910/9890/9908/7890/7908 Revision H Menu Explanation Cleaning I/J (Lm/Lc) Runs various cleanings for the nozzle row I/J. ServicemanCL Discharges the ink and runs cleaning of the ink path. (p447) Parameter Update InkParateter Sets/resets the ink initial charge flag.
- Page 80 Epson Stylus Pro 7700/7710/7700M/7710M/7900/7910/9700/9710/9900/9910/WT7900/WT7910/9890/9908/7890/7908 Revision H Menu Explanation Life Rotation (mm) Configures the durability settings of the mechanism and the printhead. Speed Release planet Waiting period (sec.) Life Count Tension Switching 1 Switching 2 Waiting period (sec.) Life Count Driven roller Switching Waiting period 1 (sec.)
- Page 81 Epson Stylus Pro 7700/7710/7700M/7710M/7900/7910/9700/9710/9900/9910/WT7900/WT7910/9890/9908/7890/7908 Revision H Menu Explanation Life Take up Take up Reel Rotation (mm) Configures the durability settings of the mechanism and the printhead. Winding Speed Waiting period (sec.) Duration times Colorimetric Carrier CW Speed CCW Speed Movement Distance (mm) Waiting period (sec.)
- Page 82 Epson Stylus Pro 7700/7710/7700M/7710M/7900/7910/9700/9710/9900/9910/WT7900/WT7910/9890/9908/7890/7908 Revision H Epson Stylus Pro 7700/7710/7700M/7710M/9700/9710 Menu Explanation Test Version Displays the F/W version. Paper (Duty) Checks the operation of each fan. Paper 1 Paper 2 Paper 3 Error History Displays the history of errors in the reverse chronological order.
- Page 83 Epson Stylus Pro 7700/7710/7700M/7710M/7900/7910/9700/9710/9900/9910/WT7900/WT7910/9890/9908/7890/7908 Revision H Menu Explanation Mecha Adjustment Nozzle/Alignment Output Pattern Runs the check function of nozzle and alignment. From pattern printing to cleaning can be executed from this menu. Output Alignment Cleaning CL1 Cleaning CL2 Cleaning CL3 Init.Fill...
- Page 84 Epson Stylus Pro 7700/7710/7700M/7710M/7900/7910/9700/9710/9900/9910/WT7900/WT7910/9890/9908/7890/7908 Revision H Menu Explanation Mecha Adjustment CR Active Damper Executes the CR active dumper adjustment. 240 cps 300 cps Hybrid AID Check Runs the AID check. IM Sensor Adjusts the sensitivity of the Ink Mark Sensor.
- Page 85 Epson Stylus Pro 7700/7710/7700M/7710M/7900/7910/9700/9710/9900/9910/WT7900/WT7910/9890/9908/7890/7908 Revision H Menu Explanation Maintenance Tube Exchange Exchanges an ink tube. Wiper Exchange Exchanges the wiper. Pump Exchange Exchanges the pump. Press Pump Exchange Exchanges the pressurizing pump. I/H Exchange Exchanges the ink holder. Head Exchange Exchanges the Printhead.
- Page 86 Epson Stylus Pro 7700/7710/7700M/7710M/7900/7910/9700/9710/9900/9910/WT7900/WT7910/9890/9908/7890/7908 Revision H Menu Explanation Parameter Update InkParateter Sets/resets the ink initial charge flag. Configures the initializing date for the RTC. Display Displays the NVRAM value of the specified address. Life Configures the durability settings of the mechanism and the printhead.
- Page 87 Epson Stylus Pro 7700/7710/7700M/7710M/7900/7910/9700/9710/9900/9910/WT7900/WT7910/9890/9908/7890/7908 Revision H Menu Explanation Life Cutter Length Configures the durability settings of the mechanism and the printhead. Return Length Speed Return Speed Wait1 Wait2 Fan1 Fan2 Life Count Take up Take up Reel Rotation (mm) Winding Speed Waiting period (sec.)
- Page 88 Epson Stylus Pro 7700/7710/7700M/7710M/7900/7910/9700/9710/9900/9910/WT7900/WT7910/9890/9908/7890/7908 Revision H Epson Stylus Pro WT7900/WT7910 Menu Explanation Test Version Displays the F/W version. Paper (Duty) Checks the operation of each fan. Paper 1 Paper 2 Error History Displays the history of errors in the reverse chronological order.
- Page 89 Epson Stylus Pro 7700/7710/7700M/7710M/7900/7910/9700/9710/9900/9910/WT7900/WT7910/9890/9908/7890/7908 Revision H Menu Explanation Mecha Adjustment Nozzle/Alignment Runs the check function of nozzle and alignment. From pattern printing to cleaning can be executed from this menu. C/D(W/CL) E/F (Or/Gr) G/H (Pk/Y) I/J (Lm/Lc) IM Sensor Gap Adjusts the gap of the Ink Mark Sensor.
- Page 90 Epson Stylus Pro 7700/7710/7700M/7710M/7900/7910/9700/9710/9900/9910/WT7900/WT7910/9890/9908/7890/7908 Revision H Menu Explanation Mecha Adjustment Gap Adj. Auto Uni-D Runs the gap adjustment. Auto Bi-D Feed Adj Runs the band feed adjustment. Cutter Checks the cutter operation. TBS Pos Runs the TBS adjustment. Measurement Mecha Executes a measurement of the mechanism.
- Page 91 Epson Stylus Pro 7700/7710/7700M/7710M/7900/7910/9700/9710/9900/9910/WT7900/WT7910/9890/9908/7890/7908 Revision H Menu Explanation Cleaning Std. CL1 Runs CL1. Std. CL2 Runs CL2. Std. CL3 Runs CL3. Init.Fill Executes the initial ink charge. SSCL Runs SSCL Runs various cleanings for the nozzle row A/B. A/B (C/M) Runs various cleanings for the nozzle row C/D.
- Page 92 Epson Stylus Pro 7700/7710/7700M/7710M/7900/7910/9700/9710/9900/9910/WT7900/WT7910/9890/9908/7890/7908 Revision H Menu Explanation Parameter Update InkParateter Sets/resets the ink initial charge flag. Configures the initializing date for the RTC. Display Displays the NVRAM value of the specified address. Life Configures the durability settings of the mechanism and the printhead.
- Page 93 Epson Stylus Pro 7700/7710/7700M/7710M/7900/7910/9700/9710/9900/9910/WT7900/WT7910/9890/9908/7890/7908 Revision H Menu Explanation Life Configures the durability settings of the mechanism and the printhead. Wait Life Count Cutter Length Return Length Speed Return Speed Wait1 Wait2 Fan1 Fan2 Life Count Colorimetric Carrier CW Speed CCW Speed Movement Distance (mm) Waiting period (sec.)
-
Page 94: Operating Principles
C H A P T E R OPERATING PRINCIPLES Confidential... -
Page 95: Main Body
IC Cover Unlock Unlocks the IC Cover L. Solenoid L * IC Cover Sensor Assy L Detects the Open/Closed status of the IC Cover L. Note : Epson Stylus Pro 7900/7910/9900/9910 only. Figure 2-1. Housing OPERATING PRINCIPLES Main Body Confidential... -
Page 96: Electric Circuit Components
Epson Stylus Pro 7700/7710/7700M/7710M/7900/7910/9700/9710/9900/9910/WT7900/WT7910/9890/9908/7890/7908 Revision I 2.1.2 Electric Circuit Components Diagram Name Description Relays the connection between the Main Board Assy and electric parts/components of every kind. See Ink Holder Board Assy L "Block Wiring Diagram" (p. 466) for specific connections to the concerning parts/components. -
Page 97: Carriage Mechanism
Epson Stylus Pro 7700/7710/7700M/7710M/7900/7910/9700/9710/9900/9910/WT7900/WT7910/9890/9908/7890/7908 Revision I 2.1.3 Carriage Mechanism Diagram Name Description Detects the scale patterns to control the position of the CR Encoder Carriage Unit. CR HP Sensor Detects the home position of the Carriage Unit. Locks the Carriage Unit. It is driven by the Cap Motor. -
Page 98: Apg Mechanism
Epson Stylus Pro 7700/7710/7700M/7710M/7900/7910/9700/9710/9900/9910/WT7900/WT7910/9890/9908/7890/7908 Revision I 2.1.4 APG Mechanism Diagram Name Description PG HP Sensor Detects the origin position of the platen gap. Detects patterns of the scale attached on the motor to APG Encoder Sensor control the rotation of the APG Motor. -
Page 99: Paper Feed Mechanism
Cutter Sensor Detects the origin position of the cutter. Suck paper to the platen so as to stabilize the position of paper when printing. Three fans are mounted for Epson Figure 2-5. Paper Feed Mechanism Suction Fans Stylus Pro 9700/9710/9900/9910/9890/9908, and two fans for Epson Stylus Pro 7700/7710/7700M/7710M/ 7900/7910/WT7900/WT7910/7890/7908. -
Page 100: Ink System
Ink Cartridges *2 The cartridges storing ink. They mount CSIC. Note *1: Epson Stylus Pro 7900/7910/9900/9910/WT7900/WT7910/7890/7908/9890/9908 only. *2: Epson Stylus Pro 7700/7700M/7710M/7710/9700/9710: Only the ink cartridges on the right are used. Figure 2-6. Ink System OPERATING PRINCIPLES Main Body... - Page 101 Epson Stylus Pro 7700/7710/7700M/7710M/7900/7910/9700/9710/9900/9910/WT7900/WT7910/9890/9908/7890/7908 Revision I INK SYSTEM UNIT Diagram Name Description Cap HP Sensor Detects the origin position of the Cap. Cleans the nozzle surface of the Printhead. It is driven Wiper by the Wiper Motor. The box to receive the flushed ink. It is driven by the Flushing Box Wiper Motor.
- Page 102 Epson Stylus Pro 7700/7710/7700M/7710M/7900/7910/9700/9710/9900/9910/WT7900/WT7910/9890/9908/7890/7908 Revision I PRESSURIZING UNIT Diagram Name Description A transmissive photo interrupter to detect the pressurizing status. It detects the status of the actuator Pressure Sensor which operates when the pressure reaches up to the specified amount.
-
Page 103: Auto Take-Up Reel
Epson Stylus Pro 7700/7710/7700M/7710M/7900/7910/9700/9710/9900/9910/WT7900/WT7910/9890/9908/7890/7908 Revision I 2.2 Options Diagram Name Description Generates the DC voltage for the Auto Take-up Reel Power Supply Board from the AC power supply. 2.2.1 Auto Take-up Reel Main Board Controls the Auto Take-up Reel. Detects patterns of the scale attached on the motor to Auto Take-up Encoder control the rotation of the Auto Take-up Motor. -
Page 104: Spectroproofer
Epson Stylus Pro 7700/7710/7700M/7710M/7900/7910/9700/9710/9900/9910/WT7900/WT7910/9890/9908/7890/7908 Revision I 2.2.2 SpectroProofer Diagram Name Description Generates the DC voltage for the SpectroProofer from Power Supply Board the AC power supply. Main Board Controls the SpectroProofer. Detects the temperature and feeds it back to the dry Thermistor control section. -
Page 105: Trouble Shooting
C H A P T E R TROUBLE SHOOTING Confidential... -
Page 106: Overview
Epson Stylus Pro 7700/7710/7700M/7710M/7900/7910/9700/9710/9900/9910/WT7900/WT7910/9890/9908/7890/7908 Revision I 3.1 Overview When handling the lithium battery used for backup of the RTC on W A R N I N G the main board, strictly follow the safety instructions given in This section explains the basic procedure for troubleshooting problems on the printer "4.1.1 Precautions"... -
Page 107: List Of Error Messages
Epson Stylus Pro 7700/7710/7700M/7710M/7900/7910/9700/9710/9900/9910/WT7900/WT7910/9890/9908/7890/7908 Revision I 3.2 List of Error Messages Table 3-1. List of Error Messages Applied model The printer runs the self-testing function on itself according to various conditions detected by the mounted sensors. If an error condition is detected as a result of the self- testing, the printer displays the corresponding error message on the LCD panel. - Page 108 Epson Stylus Pro 7700/7710/7700M/7710M/7900/7910/9700/9710/9900/9910/WT7900/WT7910/9890/9908/7890/7908 Revision I Table 3-1. List of Error Messages Table 3-1. List of Error Messages Applied model Applied model Trouble Trouble Message on LCD Message on LCD Shooting No. Shooting No. CANNOT OPEN INK COVER IS ANYTHING CLOGGED NOZZLES DETECTED √...
- Page 109 Epson Stylus Pro 7700/7710/7700M/7710M/7900/7910/9700/9710/9900/9910/WT7900/WT7910/9890/9908/7890/7908 Revision I Table 3-1. List of Error Messages Table 3-1. List of Error Messages Applied model Applied model Trouble Trouble Message on LCD Message on LCD Shooting No. Shooting No. INK CARTRIDGE MAINTENANCE TANK √ √...
- Page 110 Epson Stylus Pro 7700/7710/7700M/7710M/7900/7910/9700/9710/9900/9910/WT7900/WT7910/9890/9908/7890/7908 Revision I Table 3-1. List of Error Messages Table 3-1. List of Error Messages Applied model Applied model Trouble Trouble Message on LCD Message on LCD Shooting No. Shooting No. NOZZLE CHECK ERROR TAKE-UP ERROR √...
- Page 111 Epson Stylus Pro 7700/7710/7700M/7710M/7900/7910/9700/9710/9900/9910/WT7900/WT7910/9890/9908/7890/7908 Revision I Table 3-1. List of Error Messages Table 3-1. List of Error Messages Applied model Applied model Trouble Trouble Message on LCD Message on LCD Shooting No. Shooting No. ILS20EP DISCONNECTED CALL FOR SERVICE ILS20EP IS DISCONNECTED...
- Page 112 Epson Stylus Pro 7700/7710/7700M/7710M/7900/7910/9700/9710/9900/9910/WT7900/WT7910/9890/9908/7890/7908 Revision I The table below lists the error messages that Epson Stylus Pro 7700M/7710M displays in the copy mode. Table 3-2. List of Error Messages (Copy Mode) Message on LCD Troubleshooting SCANNER ERROR REFER TO MANUAL FOR DETAILS.
-
Page 113: Remedies For Error Messages
Epson Stylus Pro 7700/7710/7700M/7710M/7900/7910/9700/9710/9900/9910/WT7900/WT7910/9890/9908/7890/7908 Revision I 3.3 Remedies for Error Messages The Error messages and their corresponding remedies are explained below. Message on LCD Description Remedy/Points to be checked PAPER OUT No paper is loaded in the printer. Load paper correctly. - Page 114 Epson Stylus Pro 7700/7710/7700M/7710M/7900/7910/9700/9710/9900/9910/WT7900/WT7910/9890/9908/7890/7908 Revision I Message on LCD Description Remedy/Points to be checked PAPER SENSOR ERROR The barcode has not been read correctly. Press the button to clear the error, or press the button to PRESS THE BUTTON release the paper presser to set a different paper.
- Page 115 Epson Stylus Pro 7700/7710/7700M/7710M/7900/7910/9700/9710/9900/9910/WT7900/WT7910/9890/9908/7890/7908 Revision I Message on LCD Description Remedy/Points to be checked INK COVER OPEN The IC Cover (L/R) is/are open. Close the IC Cover (L/R). CLOSE RIGHT AND LEFT INK COVERS The IC Cover (L/R) or the Cartridge Cover Sensor (L/R) is Check the installation status of the IC Cover (L/R).
- Page 116 Epson Stylus Pro 7700/7710/7700M/7710M/7900/7910/9700/9710/9900/9910/WT7900/WT7910/9890/9908/7890/7908 Revision I Message on LCD Description Remedy/Points to be checked PAPER SENSOR ERROR The loaded paper is not proper for the Print Head Load roll paper or a cut sheet of A4 or larger; excluding plain paper,...
- Page 117 Epson Stylus Pro 7700/7710/7700M/7710M/7900/7910/9700/9710/9900/9910/WT7900/WT7910/9890/9908/7890/7908 Revision I Message on LCD Description Remedy/Points to be checked INK CARTRIDGE The ink cartridge is expended. Replace the Ink Cartridge with a new one. INK LOW REPLACE INK CARTRIDGE BLACK INK MISMATCH The setting of the black ink cartridge differs from the printer To continue printing, press the button to change the black ink.
- Page 118 WRONG MAINT. TANK RIGHT SIDE The maintenance tank (C12C890191 / C12C890193) for Replace the tank with the correct type tank (C12C890501 / MAINT. TANK WRONG TYPE Epson Stylus Pro 7900/7910/9900/9910 is installed on C12C890502). INSERT CORRECT TANK Epson Stylus Pro 7700/7710/9700/9710.
- Page 119 Epson Stylus Pro 7700/7710/7700M/7710M/7900/7910/9700/9710/9900/9910/WT7900/WT7910/9890/9908/7890/7908 Revision I Message on LCD Description Remedy/Points to be checked NOZZLE CLOG DETECTED There is not enough ink to perform cleaning. By clicking YES, the message to replace the ink cartridge appears. NOT ENOUGH INK Replace the ink cartridge with a new one to continue cleaning.
- Page 120 Epson Stylus Pro 7700/7710/7700M/7710M/7900/7910/9700/9710/9900/9910/WT7900/WT7910/9890/9908/7890/7908 Revision I Message on LCD Description Remedy/Points to be checked SpectroProofer ERROR See 3.4 “Remedies for Error Messages related to SpectroProofer/Auto Take-up Reel” (See P.123). REFER TO THE MANUAL TO FIND OUT HOW TO SOLVE THE PROBLEM *NN is the error number.
- Page 121 Epson Stylus Pro 7700/7710/7700M/7710M/7900/7910/9700/9710/9900/9910/WT7900/WT7910/9890/9908/7890/7908 Revision I Message on LCD Description Remedy/Points to be checked CALL FOR SERVICE See 3.5 “Remedies for Service Call Error” (See P.131). NNNN CONTACT THE REPAIR CENTER *NNNN is the error number. CALL FOR SERVICE CODE NNNN POWER OFF AND THEN ON.
- Page 122 Epson Stylus Pro 7700/7710/7700M/7710M/7900/7910/9700/9710/9900/9910/WT7900/WT7910/9890/9908/7890/7908 Revision I The following explains how to troubleshoot errors occurred in the copy mode of Epson Stylus Pro 7700M/7710M. Message on LCD Description Remedy/Points to be checked SCANNER ERROR The scanner carriage is locked. Unlock the carriage and restart the printer and the scanner.
-
Page 123: Remedies For Error Messages Related To Spectroproofer/Auto Take-Up Reel
NOTE: SpectroProofer-related errors do not occur on Epson Stylus Pro 7700/7710/7700M/7710M/9700/9710 because it does not support the SpectroProofer. Auto Take-up Reel-related errors do not occur on Epson Stylus Pro 7700/7710/7700M/7710M/7900/7910/WT7900/WT7910//7890/7908 because it does not support the Auto Take-up Reel. Errors related to the SpectroProofer and Auto Take-up Reel do not occur on Epson Stylus Pro 7700M/7710M. - Page 124 Epson Stylus Pro 7700/7710/7700M/7710M/7900/7910/9700/9710/9900/9910/WT7900/WT7910/9890/9908/7890/7908 Revision I Error Section Error Name Status Cause Remedy/Check Point Program Check Backing is not installed correctly. Install the backing correctly. Remove the Auto Colorimeter There is some foreign material between the once, and remove the foreign Due to one of the reasons listed on the Paper Pressing Plate and the backing.
- Page 125 Epson Stylus Pro 7700/7710/7700M/7710M/7900/7910/9700/9710/9900/9910/WT7900/WT7910/9890/9908/7890/7908 Revision I Error Section Error Name Status Cause Remedy/Check Point Program Check Remove the Auto Colorimeter There is some foreign material within the once, and remove the foreign carriage movement range. material around the backing (if any).
- Page 126 Epson Stylus Pro 7700/7710/7700M/7710M/7900/7910/9700/9710/9900/9910/WT7900/WT7910/9890/9908/7890/7908 Revision I Error Section Error Name Status Cause Remedy/Check Point Program Check Auto Take-up Reel Unit is not installed Install the Auto Take-up Reel Unit correctly. correctly. Paper core is not installed correctly. Install the paper core correctly.
- Page 127 Epson Stylus Pro 7700/7710/7700M/7710M/7900/7910/9700/9710/9900/9910/WT7900/WT7910/9890/9908/7890/7908 Revision I Error Section Error Name Status Cause Remedy/Check Point Program Check The polarity of the encoder cable is opposite. Check the connection. Detects that it is being driven in the Paper Reversing error opposite direction to the specified The polarity of the motor cable is opposite.
- Page 128 Epson Stylus Pro 7700/7710/7700M/7710M/7900/7910/9700/9710/9900/9910/WT7900/WT7910/9890/9908/7890/7908 Revision I Error Section Error Name Status Cause Remedy/Check Point Program Check Encoder cable is damaged. Replace the cable. Detects that it is being driven at an Motor cable is damaged. Take-up Lock error irregularly slower speed than the Replace the Auto Take-up Motor.
-
Page 129: Remedies For Maintenance Requests
As “0088” in hexadecimal means “1000 1000” in binary, you can find out the code is assigned to Bit-3 and Bit-7 referring to the above table. In this case, two errors are occurring simultaneously. (Bit-3: battery exhaustion/ Bit-7: the date and time has not been set.) Note *1: This call occurs only to Epson Stylus Pro 7900/7910/9900/9910/WT7900/WT7910/9890/9908/7890/7908. TROUBLE SHOOTING... - Page 130 Epson Stylus Pro 7700/7710/7700M/7710M/7900/7910/9700/9710/9900/9910/WT7900/WT7910/9890/9908/7890/7908 Revision I REMEDY FOR NO. 0010/4000/8000 If the Maintenance Request No. 0010/4000/8000 occurs, take the following measure according to the procedure below. NOTE : There is a priority for occurrence of No. 0010/4000/8000. Because No. 0010 has the priority, when both No. 0010 and No. 4000 (or No. 8000) occur at the same time, No. 4000 (or No.
-
Page 131: Remedies For Service Call Error
Epson Stylus Pro 7700/7710/7700M/7710M/7900/7910/9700/9710/9900/9910/WT7900/WT7910/9890/9908/7890/7908 Revision I 3.6 Remedies for Service Call Error Error Code Error Name Page 141D Driving time-out error p140 The following tables explain the Service Call error messages and remedies. 141E Velocity deviation error p140 141F Lock error... - Page 132 Epson Stylus Pro 7700/7710/7700M/7710M/7900/7910/9700/9710/9900/9910/WT7900/WT7910/9890/9908/7890/7908 Revision I Error Code Error Name Page Error Code Error Name Page 149D Driving time-out error p144 1551 Paper thickness determining error p145 1501 Release motor phase detection error p145 1561 Paper thickness at power-on error...
- Page 133 Epson Stylus Pro 7700/7710/7700M/7710M/7900/7910/9700/9710/9900/9910/WT7900/WT7910/9890/9908/7890/7908 Revision I Remedies for Service Call Error Error Details Error Code Description Remedy Failed Part Error Name The number of Carriage movement cycles reached the specified upper Replace the ink tube (L & R), and clear the counter using the Service limit.
- Page 134 Epson Stylus Pro 7700/7710/7700M/7710M/7900/7910/9700/9710/9900/9910/WT7900/WT7910/9890/9908/7890/7908 Revision I Error Details Error Code Description Remedy Failed Part Error Name Detects that it is being driven at an irregularly faster speed than the Replace the CR Encoder Sensor. (See P.238) specified value. Replace the Main Board Assy.
- Page 135 Epson Stylus Pro 7700/7710/7700M/7710M/7900/7910/9700/9710/9900/9910/WT7900/WT7910/9890/9908/7890/7908 Revision I Error Details Error Code Description Remedy Failed Part Error Name Detects that it is being driven at an irregularly faster speed than the Replace the PF Encoder Sensor. (See P.263) specified value. Replace the Main Board Assy.
- Page 136 Epson Stylus Pro 7700/7710/7700M/7710M/7900/7910/9700/9710/9900/9910/WT7900/WT7910/9890/9908/7890/7908 Revision I Error Details Error Code Description Remedy Failed Part Error Name Detects that it is being driven at an irregularly faster speed than the Replace the APG Motor. (See P.243) specified value. Replace the Main Board Assy.
-
Page 137: Driven Roller Hp Detection Error
Epson Stylus Pro 7700/7710/7700M/7710M/7900/7910/9700/9710/9900/9910/WT7900/WT7910/9890/9908/7890/7908 Revision I Error Details Error Code Description Remedy Failed Part Error Name Detects that it is being driven at an irregularly faster speed than the Replace the Rewind Motor. (See P.255) specified value. Replace the Main Board Assy. -
Page 138: Overload Error
Epson Stylus Pro 7700/7710/7700M/7710M/7900/7910/9700/9710/9900/9910/WT7900/WT7910/9890/9908/7890/7908 Revision I Error Details Error Code Description Remedy Failed Part Error Name Detects that the driving period is irregularly long. Replace the Main Board Assy. (See P.228) Driving time-out 153D Driven Roller Irregular load error Firmware becomes out of control. - Page 139 Epson Stylus Pro 7700/7710/7700M/7710M/7900/7910/9700/9710/9900/9910/WT7900/WT7910/9890/9908/7890/7908 Revision I Error Details Error Code Description Remedy Failed Part Error Name Detects that it is being driven in the opposite direction to the specified Check the connection between the Cutter Unit and the Main Board driving direction.
-
Page 140: Overload Error
Epson Stylus Pro 7700/7710/7700M/7710M/7900/7910/9700/9710/9900/9910/WT7900/WT7910/9890/9908/7890/7908 Revision I Error Details Error Code Description Remedy Failed Part Error Name Pump release operation failed. Check the connection between the Ink System Unit and the Main Board Assy. 1419 Pump Pump release error Replace the Ink System Unit. - Page 141 Epson Stylus Pro 7700/7710/7700M/7710M/7900/7910/9700/9710/9900/9910/WT7900/WT7910/9890/9908/7890/7908 Revision I Error Details Error Code Description Remedy Failed Part Error Name The number of replacement counter of the ink cartridges has reached Check if the waste ink pads attached to the ink cartridge holder are Holder Ink the specified life.
- Page 142 Epson Stylus Pro 7700/7710/7700M/7710M/7900/7910/9700/9710/9900/9910/WT7900/WT7910/9890/9908/7890/7908 Revision I Error Details Error Code Description Remedy Failed Part Error Name Detects that it is being driven at an irregularly faster speed than the Replace the Ink System Unit. (See P.266) specified value. Replace the Main Board Assy.
- Page 143 Epson Stylus Pro 7700/7710/7700M/7710M/7900/7910/9700/9710/9900/9910/WT7900/WT7910/9890/9908/7890/7908 Revision I Error Details Error Code Description Remedy Failed Part Error Name Detects that it is being driven at an irregularly faster speed than the Replace the Pressurizing Unit. (See P.275) specified value. Replace the Main Board Assy.
-
Page 144: Driving Time-Out Error
Epson Stylus Pro 7700/7710/7700M/7710M/7900/7910/9700/9710/9900/9910/WT7900/WT7910/9890/9908/7890/7908 Revision I Error Details Error Code Description Remedy Failed Part Error Name Detects that it is being driven in the opposite direction to the specified Check the connection between the Ink System Unit and the Main Board driving direction. -
Page 145: Paper Thickness Determining Error P145
Epson Stylus Pro 7700/7710/7700M/7710M/7900/7910/9700/9710/9900/9910/WT7900/WT7910/9890/9908/7890/7908 Revision I Error Details Error Code Description Remedy Failed Part Error Name The home position of the carriage unit is not detected. Check the connection of the CR HP Sensor. CR HP detection Replace the CR HP Sensor. -
Page 146: Incorrect Rtc Data Error P146
Serviceman Mode. Ink Holder CSIC 1428 *This service call error does not occur for Epson Stylus Pro 7700/7710 adjustment error 2. Execute “Ink Holder Adjustment” from the Service Program. (See /9700/9710. -
Page 147: Nvram Error
Epson Stylus Pro 7700/7710/7700M/7710M/7900/7910/9700/9710/9900/9910/WT7900/WT7910/9890/9908/7890/7908 Revision I Error Details Error Code Description Remedy Failed Part Error Name I2C communication Communication error. Replace the Main Board Assy. (See P.228) error (Between Hardware 1A50 elements on ASIC and MAIN) I2C communication Communication error. -
Page 148: Cpu-Related Error P148
Epson Stylus Pro 7700/7710/7700M/7710M/7900/7910/9700/9710/9900/9910/WT7900/WT7910/9890/9908/7890/7908 Revision I Error Details Error Code Description Remedy Failed Part Error Name Fxxx The firmware has a defect. Install the correct firmware. *xxx The Main Board Assy is broken. Replace the Main Board Assy. (See P.228) -
Page 149: Remedies For Print Quality Troubles
Epson Stylus Pro 7700/7710/7700M/7710M/7900/7910/9700/9710/9900/9910/WT7900/WT7910/9890/9908/7890/7908 Revision I 3.7 Remedies for Print Quality Troubles 3.7.1 Remedies for Print Quality Troubles This section provides troubleshooting of print quality troubles classifying them by observed symptom. Before performing troubleshooting, refer to “ PRINT IMAGE (p360)”... - Page 150 Epson Stylus Pro 7700/7710/7700M/7710M/7900/7910/9700/9710/9900/9910/WT7900/WT7910/9890/9908/7890/7908 Revision I Symptom Description Remedy/Points to be checked Ink smear (printed area) Paper is curled or creased. Change the paper with a new one. The printed area of paper is contaminated by ink smear in the paper feed path.
- Page 151 Epson Stylus Pro 7700/7710/7700M/7710M/7900/7910/9700/9710/9900/9910/WT7900/WT7910/9890/9908/7890/7908 Revision I Symptom Description Remedy/Points to be checked Horizontal banding Paper setting made in the printer driver is wrong. Correct the paper setting of the printer driver. There is something wrong with paper feeding. Check the PF Scale for scratch, contamination, and correct it if any.
-
Page 152: Remedies For Print Quality Troubles When Using Epson Stylus Pro Wt7900/Wt7910
Revision I 3.7.2 Remedies for Print Quality Troubles when Using Epson Stylus Pro WT7900/WT7910 This section provides troubleshooting of print quality troubles classified according to observed symptoms when using Epson Stylus Pro WT7900/WT7910. 3.7.2.1 Usage Environment for ClearProof Film Usage Environment... - Page 153 Epson Stylus Pro 7700/7710/7700M/7710M/7900/7910/9700/9710/9900/9910/WT7900/WT7910/9890/9908/7890/7908 Revision I 3.7.2.2 Cautions for using white ink When any dot missing occurs, run a cleaning according to the following table. User Menu To maintain good print quality, shake the cartridge quickly about 5 cm width to both sides approximately 100 times (30 seconds) to agitate the white ink inside the cartridge before installing the cartridge to the printer.
- Page 154 Epson Stylus Pro 7700/7710/7700M/7710M/7900/7910/9700/9710/9900/9910/WT7900/WT7910/9890/9908/7890/7908 Revision I 3.7.2.3 Troubleshooting when using Epson Stylus Pro WT7900/WT7910 Troubleshooting specific to Epson Stylus Pro WT7900/WT7910 Remedy/Points to be checked Symptom Occurrence condition Cause Auto cut cannot be made. When cutting it shorter than Minimum cutting length of the CPF by [Auto cut] is 420 mm. When Cut the media manually when cutting 420 mm or shorter.
- Page 155 • Solve any error before turning the power off. Troubleshooting when using cut sheets for Epson Stylus Pro WT7900/WT7910 Remedy/Points to be checked Symptom Occurrence condition...
- Page 156 Epson Stylus Pro 7700/7710/7700M/7710M/7900/7910/9700/9710/9900/9910/WT7900/WT7910/9890/9908/7890/7908 Revision I Troubleshooting for unexpected prints when printing on ClearProof Film (CPF) Remedy/Points to be checked Symptom Occurrence condition Cause The track of the roller appears When the CPF is set to the A pressure mark is left due to the pressure of the roller because the CPF If the CPF is not used for a while, remove the roll from the on the print area.
- Page 157 Epson Stylus Pro 7700/7710/7700M/7710M/7900/7910/9700/9710/9900/9910/WT7900/WT7910/9890/9908/7890/7908 Revision I Remedy/Points to be checked Symptom Occurrence condition Cause Uneven color appears around Blurry uneven color appears at • The CPF's coat layer gets softer and easily deformed if it becomes • Blocking bands may occur at points with high pressure the core of the CPF roll paper.
- Page 158 • When the printed CPF is • Because the ink is undried and soft soon after printing on the CPF, • After printing, take the film out from the basket for Epson during storing stored in a pile, the print scratches or ink transfer occurs if the prints are piled immediately.
- Page 159 • Different from the white ink used for solvent containing oxidized Make sure of the following when storing the CPFs in a pile. when storing the CPF with titanium, the ingredients of the white ink for Epson Stylus Pro • Avoid storing it in a high-humidity environment. Coated side plain paper sheets in WT7900/WT7910 are not actually white.
- Page 160 Epson Stylus Pro 7700/7710/7700M/7710M/7900/7910/9700/9710/9900/9910/WT7900/WT7910/9890/9908/7890/7908 Revision I Remedy/Points to be checked Symptom Occurrence condition Cause Low print quality or stains Before or after printing, when The CPF is made of clear film on which a Release Film is attached with Be careful to not let the adhesive side of the Release Film the adhesive material of the adhesive.
- Page 161 Epson Stylus Pro 7700/7710/7700M/7710M/7900/7910/9700/9710/9900/9910/WT7900/WT7910/9890/9908/7890/7908 Revision I Remedy/Points to be checked Symptom Occurrence condition Cause Water resistance of the CPF • Water drops are attached If water drops are attached on the printed side of the CPF, the coat layer • Do not let water drops attached on the media.
- Page 162 Epson Special Film is from 420 to 914.4 mm. When printing using the The basket for Epson Special Film is designed so that the CPF can • In the case of roll paper with a strong curl, do not use the basket for Epson Special Film, stack it without curling up;...
- Page 163 Epson Stylus Pro 7700/7710/7700M/7710M/7900/7910/9700/9710/9900/9910/WT7900/WT7910/9890/9908/7890/7908 Revision I Remedy/Points to be checked Symptom Occurrence condition Cause Print is blurred. When printing under the If the CPF is left in a high temperature environment and then exposed • If the CPF is not used for a while, remove the roll from...
- Page 164 Epson Stylus Pro 7700/7710/7700M/7710M/7900/7910/9700/9710/9900/9910/WT7900/WT7910/9890/9908/7890/7908 Revision I Remedy/Points to be checked Symptom Occurrence condition Cause Scratches on the bottom edge Scratches occur on the bottom The CPF pops to the left side when cut automatically, and the area Set [ROLL PAPER MARGIN] to [TOP 35/BOTTOM of the print under the around the bottom 25 mm touches the eject roller.
- Page 165 Epson Stylus Pro 7700/7710/7700M/7710M/7900/7910/9700/9710/9900/9910/WT7900/WT7910/9890/9908/7890/7908 Revision I Remedy/Points to be checked Symptom Occurrence condition Cause The outline becomes The outline of the white ink in translucent.* color print becomes translucent. • If there is more water than the capacity of absorption of the CPF, excess water remains in the white ink and the ink becomes translucent.
-
Page 166: Chapter 4 Disassembly & Assembly
C H A P T E R DISASSEMBLY & ASSEMBLY Confidential... -
Page 167: Overview
7700/7710/7700M/7710M/7900/7910/9700/9710/WT7900/WT7910/ 9890/9908/7890/7908 are basically the same unless otherwise specified. However, the quantity of some screws and hooks, or the size of some parts may differ in Epson Stylus Pro 7700/7710/ 7700M/7710M/7900/7910/WT7900/WT7910/7890/7908. DISASSEMBLY & ASSEMBLY Overview Confidential... - Page 168 Epson Stylus Pro 7700/7710/7700M/7710M/7900/7910/9700/9710/9900/9910/WT7900/WT7910/9890/9908/7890/7908 Revision I The power switch for this printer is installed on the secondary Make sufficient work space for servicing. W A R N I N G C A U T I O N side of the power circuit; therefore, the power is always Locate the printer on a stable and flat surface.
-
Page 169: Orientation Definition
Epson Stylus Pro 7700/7710/7700M/7710M/7900/7910/9700/9710/9900/9910/WT7900/WT7910/9890/9908/7890/7908 Revision I 4.1.2 Orientation Definition The cutter blade is razor-sharp. Be especially careful when C A U T I O N handling the cutter. The terms used for indicating the orientation/direction throughout this chapter are as Carbide blade employed for the cutter blade is hard but brittle. -
Page 170: Recommended Tools
Epson Stylus Pro 7700/7710/7700M/7710M/7900/7910/9700/9710/9900/9910/WT7900/WT7910/9890/9908/7890/7908 Revision I 4.1.3 Recommended Tools To protect this product from damage, use the tools indicated in the following table. Table 4-1. Tools Name Epson Part Number Note Phillips screwdriver, No. 1 Commercially available Phillips screwdriver, No. 2 Prepare the drivers in the following length. -
Page 171: Chapter 2 Operating Principles
Epson Stylus Pro 7700/7710/7700M/7710M/7900/7910/9700/9710/9900/9910/WT7900/WT7910/9890/9908/7890/7908 Revision I 4.1.4 Cautions when replacing the Main Board Assy/Power Supply Board Assy For this printer, so as to drive the CR Motor and PF Motor properly, the characteristics of them are stored in the Main Board Assy, and used to optimize the performance in accordance with the Power Supply Board Assy. -
Page 172: Differences Of The Parts/Components Between Models
4.1.5 Differences of the parts/components between models The following explains the differences in parts/components (major items with differences in appearance only) among Epson Stylus Pro 7900/7910/9900/9910, Epson Stylus Pro 7700/7710/9700/9710, Epson Stylus Pro 7700M/7710M, Epson Stylus Pro WT7900/WT7910 and Epson Stylus Pro 7890/7908/9890/9908. Make sure to order/install the parts confirming the part codes because the parts are basically different from each model. - Page 173 4.1.5.1 Compatibility of the parts/components between models This section describes symptoms when the parts combination is different for Epson Stylus Pro 7900/7910/9900/9910, Epson Stylus Pro 7700/7710/9700/9710, Epson Stylus Pro 7700M/7710M, Epson Stylus Pro WT7900/WT7910 and Epson Stylus Pro 7890/7908/9890/9908 from as described in the compatibility of the parts/components between models.
- Page 174 Epson Stylus Pro 7700/7710/7700M/7710M/7900/7910/9700/9710/9900/9910/WT7900/WT7910/9890/9908/7890/7908 Revision I Figure 4-2. Compatibility of the parts/components between models Installation location Epson Stylus Pro 7700/ Epson Stylus Pro 7900/ Epson Stylus Pro WT7900/ Epson Stylus Pro 7890/ Part name Description 7710/7700M/7710M/9700/ Installing part 7910/9900/9910 WT7910...
- Page 175 Epson Stylus Pro 7700/7710/7700M/7710M/7900/7910/9700/9710/9900/9910/WT7900/WT7910/9890/9908/7890/7908 Revision I Figure 4-2. Compatibility of the parts/components between models Installation location Epson Stylus Pro 7700/ Epson Stylus Pro 7900/ Epson Stylus Pro WT7900/ Epson Stylus Pro 7890/ Part name Description 7710/7700M/7710M/9700/ 7910/9900/9910 WT7910 7908/9890/9908 Installing part...
- Page 176 Epson Stylus Pro 7700/7710/7700M/7710M/7900/7910/9700/9710/9900/9910/WT7900/WT7910/9890/9908/7890/7908 Revision I Figure 4-2. Compatibility of the parts/components between models Installation location Epson Stylus Pro 7700/ Epson Stylus Pro 7900/ Epson Stylus Pro WT7900/ Epson Stylus Pro 7890/ Part name Description 7710/7700M/7710M/9700/ Installing part 7910/9900/9910 WT7910...
- Page 177 Epson Stylus Pro 7700/7710/7700M/7710M/7900/7910/9700/9710/9900/9910/WT7900/WT7910/9890/9908/7890/7908 Revision I Figure 4-2. Compatibility of the parts/components between models Installation location Epson Stylus Pro 7700/ Epson Stylus Pro 7900/ Epson Stylus Pro WT7900/ Epson Stylus Pro 7890/ Part name Description 7710/7700M/7710M/9700/ Installing part 7910/9900/9910 WT7910...
- Page 178 Note *: The printhead for each model is installed in the manufacturing process; however, only the printhead for Epson Stylus Pro 7700/7710/7700M/7710M/9700/9710 is established as a service part. Therefore, the printhead for Epson Stylus Pro 7700/7710/7700M/7710M/9700/9710 is also used for Epson Stylus Pro 7900/7910/9900/9910.
- Page 179 Epson Stylus Pro 7700/7710/7700M/7710M/7900/7910/9700/9710/9900/9910/WT7900/WT7910/9890/9908/7890/7908 Revision I Figure 4-3. Compatibility of the parts/components between models (Control Panel) Installation location Epson Stylus Pro 7900/ Epson Stylus Pro 7700/ Epson Stylus Pro Epson Stylus Pro Part name Description 7910/9900/9910/7890/ 7710/9700/9710 WT7900/WT7910 7700M/7710M Installing part...
- Page 180 Epson Stylus Pro 7700/7710/7700M/7710M/7900/7910/9700/9710/9900/9910/WT7900/WT7910/9890/9908/7890/7908 Revision I Figure 4-4. Compatibility of the parts/components between models (BOARD ASSY.,MAIN) Epson Stylus Epson Stylus Epson Stylus Epson Stylus Epson Stylus Epson Stylus Epson Stylus Epson Stylus Installation location Part name Pro 9900/ Pro 7900/...
- Page 181 Epson Stylus Pro 7700/7710/7700M/7710M/7900/7910/9700/9710/9900/9910/WT7900/WT7910/9890/9908/7890/7908 Revision I Figure 4-4. Compatibility of the parts/components between models (BOARD ASSY.,MAIN) Epson Stylus Epson Stylus Epson Stylus Epson Stylus Epson Stylus Epson Stylus Epson Stylus Epson Stylus Installation location Part name Pro 9900/ Pro 7900/...
-
Page 182: Identification Method For The Parts/Components Between Models
4.1.5.2 Identification method for the parts/components between models This section describes differences of components between Epson Stylus Pro 7900/7910/9900/9910, Epson Stylus Pro 7700/7710/9700/9710, Epson Stylus Pro 7700M/7710M, Epson Stylus Pro WT7900/WT7910 and Epson Stylus Pro 7890/7908/9890/9908 (only for main parts in different shapes). - Page 183 HOLDER, ASSY., IC, LEFT, ESL, Black Creamy white Black Color Blocks * The figure is for Epson Stylus Pro 7900/7910/9900/9910. The button on the upper right of the LCD panel Black Ink Cleaning Cleaning Cleaning Black Ink Change Change * The figure is for Epson Stylus Pro 7900/7910/9900/9910.
- Page 184 IC Cover L C, Y, Lc, Mk, Pk right of the LCD panel Label of IC arrangement * The figure is for Epson Stylus Pro 7900/7910/9900/9910. The arrangement of IC VM, Lk, G, Llk, VM, C, PK, Y, VM, C, PK, Y,...
- Page 185 9700/9710 7710M 9908 CN500 CN500: Yes / No Main Board Assy * The figure is for Epson Stylus Pro 7900/7910/9900/9910. Main Board Assy Chip Main Board Assy Chip on the upper right of the board: Yes / No * The figure is for Epson Stylus Pro 7900/7910/9900/9910.
- Page 186 Part name Identification Pro 7900/7910/ Pro 7700/7710/ Pro 7700M/ 7890/7908/9890/ Illustration WT7900/WT7910 9900/9910 9700/9710 7710M 9908 Front Cover L Label Front Cover L Label: Yes / No * The figure is for Epson Stylus Pro WT7900/WT7910. DISASSEMBLY & ASSEMBLY Overview Confidential...
- Page 187 ASSY, B, ESL, ASP Number of tubes Five Five Five Five Four Four Note "*": PUMP, CAP, ASSY, B, ESL, ASP is common to Epson Stylus Pro 7900/7910/9900/9910 and Epson Stylus Pro WT7900/WT7910 as of Dec. ‘09 production. DISASSEMBLY & ASSEMBLY Overview Confidential...
-
Page 188: Parts Diagram
Epson Stylus Pro 7700/7710/7700M/7710M/7900/7910/9700/9710/9900/9910/WT7900/WT7910/9890/9908/7890/7908 Revision I 4.2 Parts Diagram See the pages written under brackets for the disassembly/assembly procedure. Spindle Cover L Rear Left Cover (p216) (p219) Roll Cover Assy Left Cover (p217) Rear Cover (p211) (p220) Spindle Cover R... - Page 189 Epson Stylus Pro 7700/7710/7700M/7710M/7900/7910/9700/9710/9900/9910/WT7900/WT7910/9890/9908/7890/7908 Revision I Sub Board Assy (p231) Sub Board Assy; C (p235) Power Supply Board Assy (p230) Main Board Assy (p228) AID Board (p294) Sub Board Assy; B (p233) Figure 4-6. Electric Circuit Components DISASSEMBLY & ASSEMBLY...
- Page 190 Epson Stylus Pro 7700/7710/7700M/7710M/7900/7910/9700/9710/9900/9910/WT7900/WT7910/9890/9908/7890/7908 Revision I CR Scale (p236) CR Motor (p242) CR Encoder Sensor (p238) CR HP Sensor (p239) APG Motor (p243) APG Unit PG HP Sensor (p244) (p246) Carriage Unit (p248) Driven Pulley Unit (Contain the CR Timing Belt) (p240) Figure 4-7.
- Page 191 Epson Stylus Pro 7700/7710/7700M/7710M/7900/7910/9700/9710/9900/9910/WT7900/WT7910/9890/9908/7890/7908 Revision I Roller Release HP Sensor (p254) Driven Roller Release Motor (p253) PF Encoder Sensor PE Sensor Paper Thickness Sensor (p263) (p250) Rewind Unit (p255) PF Motor (p264) Cutter Unit (p257) Suction Fans (p264) Figure 4-8. Paper Feed Mechanism DISASSEMBLY &...
- Page 192 Epson Stylus Pro 7700/7710/7700M/7710M/7900/7910/9700/9710/9900/9910/WT7900/WT7910/9890/9908/7890/7908 Revision I Pressurizing Unit Ink Tube L (p275) PW Sensor (p310) Ink Mark Sensor (p251) (p298) Ink Selector Ink Holder Board Assy L (p300) (p290) Printhead (p270) AID Board (p294) Ink System Unit (p266) Ink Cartridge Holder L...
- Page 193 Epson Stylus Pro 7700/7710/7700M/7710M/7900/7910/9700/9710/9900/9910/WT7900/WT7910/9890/9908/7890/7908 Revision I Power Supply Board Take-up Reel Cover (p318) (p313) Main Board (p318) Take-up Reel LED (p315) Take-up Reel Switch (p316) Take-up Reel Sensor (p314) Take-up Reel Motor (p320) Figure 4-10. Auto Take-up Reel DISASSEMBLY & ASSEMBLY...
- Page 194 Epson Stylus Pro 7700/7710/7700M/7710M/7900/7910/9700/9710/9900/9910/WT7900/WT7910/9890/9908/7890/7908 Revision I Cooling Fan 1 Paper Pressing Plate Sensor (p342) (p335) Paper Pressing Encoder Left Cover (p340) (p329) Paper Pressing Motor (p346) Power Supply Board (p334) Carriage Motor (p347) IF Cover (p330) Cooling Fan 2 (p343)
-
Page 195: Disassembly Flowchart
“4.4.2.16 Front Cover Sensor R” (p277) (p221) “4.4.2.8 Left Cover” (p211) “4.4.2.18 Cartridge Cover Sensor R” (p225) “4.4.2.10 Top Cover” (p214) NOTE * : Maintenance Tank L is only for Epson Stylus Pro 9700/9710/9900/9910/9890/9908. DISASSEMBLY & ASSEMBLY Disassembly Flowchart Confidential... - Page 196 “4.4.2.8 Left Cover” (p211) “4.4.6.9 AID Board” (p294) “4.4.2.10 Top Cover” (p214) “4.4.1.1 Unlocking the Carriage Unit manually” (p201) “4.4.3.3 Sub Board Assy” (p231) NOTE * : Maintenance Tank L is only for Epson Stylus Pro 9700/9710/9900/9910/9890/9908. DISASSEMBLY & ASSEMBLY Disassembly Flowchart Confidential...
- Page 197 “4.4.4.7 APG Unit” (p244) “4.4.4.4 Driven Pulley Unit” (p240) “4.4.4.7 APG Unit” (p244) “4.4.4.1 CR Scale” (p236) “4.4.4.9 Carriage Unit” (p248) NOTE * : Maintenance Tank L is only for Epson Stylus Pro 9700/9710/9900/9910/9890/9908. DISASSEMBLY & ASSEMBLY Disassembly Flowchart Confidential...
- Page 198 “4.4.5.5 Rewind Unit” (p255) Unit manually” (p201) “4.4.5.1 Paper Thickness Sensor” “4.4.5.3 Driven Roller Release “4.4.5.6 Cutter Unit” (p257) (p250) Motor” (p253) NOTE * : Maintenance Tank L is only for Epson Stylus Pro 9700/9710/9900/9910/9890/9908. DISASSEMBLY & ASSEMBLY Disassembly Flowchart Confidential...
-
Page 199: Ink System Mechanism
“4.4.2.10 Top Cover” (p214) (p292) “4.4.6.12 Ink Tube R” (p306) “4.4.6.13 Ink Tube L” (p310) “4.4.6.11 Ink Selector” (p300) “4.4.6.3 Printhead” (p270) NOTE * : Maintenance Tank L is only for Epson Stylus Pro 9700/9710/9900/9910/9890/9908. DISASSEMBLY & ASSEMBLY Disassembly Flowchart Confidential... - Page 200 Epson Stylus Pro 7700/7710/7700M/7710M/7900/7910/9700/9710/9900/9910/WT7900/WT7910/9890/9908/7890/7908 Revision I SPECTROPROOFER START “4.4.8.1 Color Measurement Device” (p325) “4.4.8.2 Mounter” (p327) “4.4.8.3 Right Cover” (p328) “4.4.8.6 Front Cover” (p331) “4.4.8.3 Right Cover” (p328) “4.4.8.10 CR HP Sensor” “4.4.8.9 Paper Pressing Plate “4.4.8.19 Paper Pressing Unit”...
-
Page 201: Disassembly And Assembly Procedure
Epson Stylus Pro 7700/7710/7700M/7710M/7900/7910/9700/9710/9900/9910/WT7900/WT7910/9890/9908/7890/7908 Revision I 4.4 Disassembly and Assembly Procedure - As seen from the right - This section describes procedures for disassembling the components allowed to be Gear disassembled. Unless otherwise specified, disassembled units or components can be reassembled by reversing the disassembly procedure. - Page 202 Epson Stylus Pro 7700/7710/7700M/7710M/7900/7910/9700/9710/9900/9910/WT7900/WT7910/9890/9908/7890/7908 Revision I 4.4.1.2 Unlocking the IC Cover manually In the case that the IC Cover cannot be opened by the Control C H E C K Panel operation for some reasons, you can open the cover by the...
-
Page 203: Housing
Epson Stylus Pro 7700/7710/7700M/7710M/7900/7910/9700/9710/9900/9910/WT7900/WT7910/9890/9908/7890/7908 Revision I 4.4.2 Housing 4.4.2.1 Control Panel Control Panel Insert a flathead screwdriver or a similar tool into the holes on both sides of the Control Panel to unlock the two hooks, and detach the Control Panel. - Page 204 Epson Stylus Pro 7700/7710/7700M/7710M/7900/7910/9700/9710/9900/9910/WT7900/WT7910/9890/9908/7890/7908 Revision I 4.4.2.2 IC Cover (L/R) Joints Basically you can remove this part on the left and the one on the C H E C K right in the same way. Therefore this section describes the way to P O I N T remove the one on the right only.
- Page 205 Epson Stylus Pro 7700/7710/7700M/7710M/7900/7910/9700/9710/9900/9910/WT7900/WT7910/9890/9908/7890/7908 Revision I 4.4.2.3 IC Shaft Cover (L/R) Basically you can remove this part on the left and the one on the C H E C K right in the same way. Therefore this section describes the way to P O I N T remove the one on the right only.
- Page 206 Epson Stylus Pro 7700/7710/7700M/7710M/7900/7910/9700/9710/9900/9910/WT7900/WT7910/9890/9908/7890/7908 Revision I 4.4.2.4 IC Cover (L/R) & IC Shaft Cover (L/R) Basically you can remove this part on the left and the one on the C H E C K right in the same way. Therefore this section describes the way to P O I N T remove the one on the right only.
- Page 207 Epson Stylus Pro 7700/7710/7700M/7710M/7900/7910/9700/9710/9900/9910/WT7900/WT7910/9890/9908/7890/7908 Revision I 4.4.2.5 Front Cover (L/R) Hooks Basically you can remove this part on the left and the one on the C H E C K right in the same way. Therefore this section describes the way to P O I N T remove the one on the right only.
- Page 208 Epson Stylus Pro WT7900/WT7910: C12C890191 / C12C890193 Pull the handle of the Maintenance Tank R and remove the Maintenance Tank R. NOTE: Epson Stylus Pro 7700/7710/7700M/7710M/7900/7910/WT7900/ Maintenance Tank R WT7910/7890/7908 does not have the Maintenance Tank L. Figure 4-20. Removing the Maintenance Tank (L/R) DISASSEMBLY &...
- Page 209 Epson Stylus Pro 7700/7710/7700M/7710M/7900/7910/9700/9710/9900/9910/WT7900/WT7910/9890/9908/7890/7908 Revision I 4.4.2.7 Right Cover Remove the Control Panel. (p203) Top Cover Support Base R When you do not replace the Right Cover, skip the step 2. C H E C K P O I N T Remove the Front Cover R.
- Page 210 D) Silver, Phillips, Bind machine screw M4x8: two pieces E) Silver, Phillips, Bind P-tite M4x12: two pieces NOTE: Some of Epson Stylus Pro 7900/7910/9900/9910 from a certain lot do not have the screw on the second from the top on the rear right. Therefore, in such a case, the screws to be removed here is eight pieces.
- Page 211 (p207) Remove the Maintenance Tank L. (p208) NOTE: There is no Maintenance Tank (L) mounted for the Epson Stylus Pro 7700/7710/7700M/7710M/7900/7910/WT7900/WT7910/7890/7908. Remove the two screws that secure the Top Cover Support Base L, and remove the Top Cover Support Base L.
- Page 212 Epson Stylus Pro 7700/7710/7700M/7710M/7900/7910/9700/9710/9900/9910/WT7900/WT7910/9890/9908/7890/7908 Revision I Remove the ten screws that secure the Left Cover. - Rear left - C) Silver, Phillips, Bind S-tite with S.W & P.W. M4x8: four pieces D) Silver, Phillips, Bind P-tite with S.W & P.W. M4x12: two pieces...
-
Page 213: Front Cover (Middle)
Epson Stylus Pro 7700/7710/7700M/7710M/7900/7910/9700/9710/9900/9910/WT7900/WT7910/9890/9908/7890/7908 Revision I 4.4.2.9 Front Cover (Middle) Front Cover (Middle) Open the Front Cover (Middle). In the next step, the cover will drop immediately after removing the C A U T I O N last screw. Therefore, make sure to hold the cover when removing the last few screws. - Page 214 Remove the IC Cover (L/R) and the IC Shaft Cover (L/R). (p206) Remove the Maintenance Tank (L/R). (p208) NOTE: There is no Maintenance Tank (L) mounted for the Epson Stylus Pro Front Cover (Middle) 7700/7710/7700M/7710M/7900/7910/WT7900/WT7910/7890/7908. Remove the Control Panel. (p203) Remove the Right Cover.
- Page 215 Epson Stylus Pro 7700/7710/7700M/7710M/7900/7910/9700/9710/9900/9910/WT7900/WT7910/9890/9908/7890/7908 Revision I 4.4.2.11 Spindle Cover R Roll Cover Assy Remove the Control Panel. (p203) Remove the IC Cover R and the IC Shaft Cover R. (p206) Spindle Cover R Remove the Maintenance Tank R. (p208) Open it until Remove the Right Cover.
- Page 216 Remove the IC Cover L and the IC Shaft Cover L. (p206) Remove the Maintenance Tank L. (p208) Spindle Cover L NOTE: There is no Maintenance Tank (L) mounted for the Epson Stylus Pro 7700/7710/7700M/7710M/7900/7910/WT7900/WT7910/7890/7908. Remove the Left Cover. (p209) Remove the three screws that secure the Spindle Cover L.
- Page 217 (p206) Dumper Cover Holder Spacer Remove the Maintenance Tank L. (p208) Roll Cover Assy NOTE: There is no Maintenance Tank (L) mounted for the Epson Stylus Pro 7700/7710/7700M/7710M/7900/7910/WT7900/WT7910/7890/7908. Brake Remove the Left Cover. (p209) Guide pin Remove the Spindle Cover R.
- Page 218 Epson Stylus Pro 7700/7710/7700M/7710M/7900/7910/9700/9710/9900/9910/WT7900/WT7910/9890/9908/7890/7908 Revision I Remove the retaining ring and remove the Roll Paper Guide. - Right side - Retaining ring 10. Pull out the pin from the shaft. Mounting 11. Remove the three screws that secure the Mounting.
- Page 219 Epson Stylus Pro 7700/7710/7700M/7710M/7900/7910/9700/9710/9900/9910/WT7900/WT7910/9890/9908/7890/7908 Revision I 4.4.2.14 Rear Left Cover - Rear left - Remove the four screws that secure the Rear Left Cover. A) Silver, Phillips, Bind P-tite with S.W & P.W. M4x12: two pieces B) Silver, Phillips, Bind S-tite with S.W & P.W. M4x8: two pieces Remove the Rear Left Cover.
- Page 220 Epson Stylus Pro 7700/7710/7700M/7710M/7900/7910/9700/9710/9900/9910/WT7900/WT7910/9890/9908/7890/7908 Revision I 4.4.2.15 Rear Cover - As seen from the rear - Remove the two screws (one each) securing the AC Inlet and the USB I/F. Rear Cover A) Silver, Phillips, Bind machine screw M3x6: two pieces Remove the 12 screws that secure the Rear Cover.
- Page 221 Epson Stylus Pro 7700/7710/7700M/7710M/7900/7910/9700/9710/9900/9910/WT7900/WT7910/9890/9908/7890/7908 Revision I 4.4.2.16 Front Cover Sensor R - As seen from the rear - Remove the Control Panel. (p203) Main Board Assy Remove the IC Cover R and the IC Shaft Cover R. (p206) Saddle Remove the Maintenance Tank R.
- Page 222 Epson Stylus Pro 7700/7710/7700M/7710M/7900/7910/9700/9710/9900/9910/WT7900/WT7910/9890/9908/7890/7908 Revision I 12. Remove the two screws that secure the Front Cover Sensor R. - As seen from the right - Front Cover Sensor R A) Silver, Phillips, Bind machine screw M3x6: two pieces 13. Remove the Front Cover Sensor R.
- Page 223 Remove the IC Cover L and the IC Shaft Cover L. (p206) Remove the Maintenance Tank L. (p208) Power Supply Board Assy NOTE: There is no Maintenance Tank (L) mounted for the Epson Stylus Pro CN301 7700/7710/7700M/7710M/7900/7910/WT7900/WT7910/7890/7908. Remove the Left Cover. (p209) Remove the Rear Cover.
- Page 224 Epson Stylus Pro 7700/7710/7700M/7710M/7900/7910/9700/9710/9900/9910/WT7900/WT7910/9890/9908/7890/7908 Revision I 10. Release the cables from the clamp. See Figure 4-41. 11. Remove the two screws that secure the Front Cover Sensor L. A) Black, Phillips, Bind P-tite M3x10: two pieces Front Cover Sensor L 12.
- Page 225 Epson Stylus Pro 7700/7710/7700M/7710M/7900/7910/9700/9710/9900/9910/WT7900/WT7910/9890/9908/7890/7908 Revision I 4.4.2.18 Cartridge Cover Sensor R - Right side - Cover of Ink Holder Board Assy R Remove the Control Panel. (p203) Remove the IC Cover R and the IC Shaft Cover R. (p206) Remove the Maintenance Tank R.
- Page 226 Remove the IC Cover L and the IC Shaft Cover L. (p206) Cover of Ink Holder Board Assy L Remove the Maintenance Tank L. (p208) NOTE: There is no Maintenance Tank (L) mounted for the Epson Stylus Pro 7700/7710/7700M/7710M/7900/7910/WT7900/WT7910/7890/7908. Remove the Left Cover. (p209) Guide Pull off the Pressure Tube.
- Page 227 Epson Stylus Pro 7700/7710/7700M/7710M/7900/7910/9700/9710/9900/9910/WT7900/WT7910/9890/9908/7890/7908 Revision I Disconnect the two connectors (CN408, CN409) on the Ink Holder Board Assy L. - Left side - Ink Holder Board Assy L Release the harness from the two hooks and the tape. See Figure 4-46.
-
Page 228: Electric Circuit Components
CN5 CN202 CN10 CN301 NOTE: CN500 is only for Epson Stylus Pro 7700/7710/7900/7910/WT7900/ The connector number that corresponds to the FFC is written on its WT7910/WT7900/WT7910. surface as shown. Make sure to connect the FFCs to their correct connectors. - Page 229 Epson Stylus Pro 7700/7710/7700M/7710M/7900/7910/9700/9710/9900/9910/WT7900/WT7910/9890/9908/7890/7908 Revision I Connector assignment: Be sure to refer to Chapter 5 “Adjustment” (see p351) and perform A D J U S T M E N T R E Q U I R E D specified adjustments after replacing the Main Board Assy.
-
Page 230: Power Supply Board Assy
Epson Stylus Pro 7700/7710/7700M/7710M/7900/7910/9700/9710/9900/9910/WT7900/WT7910/9890/9908/7890/7908 Revision I 4.4.3.2 Power Supply Board Assy PS Board Mounting Plate - As seen from the rear - When removing the Power Supply Board Assy, do not start the W A R N I N G work immediately after disconnecting the AC cable. - Page 231 Remove the IC Cover L and the IC Shaft Cover L. (p206) Remove the Maintenance Tank L. (p208) NOTE: There is no Maintenance Tank (L) mounted for the Epson Stylus Pro 7700/7710/7700M/7710M/7900/7910/WT7900/WT7910/7890/7908. Remove the Left Cover. (p209) Remove the Top Cover.
- Page 232 CN118* Yellow Ink Selector Note *: Epson Stylus Pro 7900/7910/9900/9910/WT7900/WT7910/7890/7908/9890/9908 only. Not used for Epson Stylus Pro 7700/7710/7700M/7710M/9700/9710. Be sure to refer to Chapter 5 “Adjustment” (see p351) and perform A D J U S T M E N T R E Q U I R E D specified adjustments after replacing the Sub Board Assy.
- Page 233 Epson Stylus Pro 7700/7710/7700M/7710M/7900/7910/9700/9710/9900/9910/WT7900/WT7910/9890/9908/7890/7908 Revision I 4.4.3.4 Sub Board Assy; B CN219 CN213 CN222 CN206 CN229 Remove the Control Panel. (p203) Remove the IC Cover R and the IC Shaft Cover R. (p206) Remove the Maintenance Tank R. (p208) CN216 Remove the Right Cover.
- Page 234 Epson Stylus Pro 7700/7710/7700M/7710M/7900/7910/9700/9710/9900/9910/WT7900/WT7910/9890/9908/7890/7908 Revision I Connector assignment: Connector No. Color Destination (FFC) Main Board Assy (CN200) CN200 (FFC) Main Board Assy (CN201) CN201 White Main Board Assy (CN202) CN202 Paper Thickness Sensor 2 CN204 Yellow Paper Thickness Sensor 2...
- Page 235 CN301 Remove the IC Cover L and the IC Shaft Cover L. (p206) Remove the Maintenance Tank L. (p208) NOTE: There is no Maintenance Tank (L) mounted for the Epson Stylus Pro 7700/7710/7700M/7710M/7900/7910/WT7900/WT7910/7890/7908. CN310 Remove the Left Cover. (p209) CN309 Disconnect all the cables and FFC on the Sub Board Assy;...
-
Page 236: Carriage Mechanism
Epson Stylus Pro 7700/7710/7700M/7710M/7900/7910/9700/9710/9900/9910/WT7900/WT7910/9890/9908/7890/7908 Revision I 4.4.4 Carriage Mechanism Step 6 CR Scale Spring Step 8 4.4.4.1 CR Scale CR Scale CR Scale Take extreme care to avoid soiling the CR Scale surfaces with ink C A U T I O N or by touching them with bare hands. - Page 237 Epson Stylus Pro 7700/7710/7700M/7710M/7900/7910/9700/9710/9900/9910/WT7900/WT7910/9890/9908/7890/7908 Revision I Attach the CR Scale with the cutout on the top right corner. - Front Right - Cutout CR Scale *Some 44-inch CR Scales do not have the notation of L/R. Make sure to route the CR Scale between the detection part of the CR Encoder Sensor on the rear of the carriage.
-
Page 238: Cr Encoder Sensor
Epson Stylus Pro 7700/7710/7700M/7710M/7900/7910/9700/9710/9900/9910/WT7900/WT7910/9890/9908/7890/7908 Revision I 4.4.4.2 CR Encoder Sensor - Rear of Carriage Unit - When removing the CR Encoder Sensor, take extreme care to C A U T I O N avoid soiling the CR Scale surfaces with ink or by touching them Carriage Unit with bare hands. - Page 239 Epson Stylus Pro 7700/7710/7700M/7710M/7900/7910/9700/9710/9900/9910/WT7900/WT7910/9890/9908/7890/7908 Revision I 4.4.4.3 CR HP Sensor - Right Side - Remove the Control Panel. (p203) Remove the IC Cover R and the IC Shaft Cover R. (p206) Remove the Maintenance Tank R. (p208) Connector Remove the Right Cover.
- Page 240 (p209) Remove the IC Cover L and the IC Shaft Cover L. (p206) Remove the Maintenance Tank L. (p208) NOTE: There is no Maintenance Tank (L) mounted for the Epson Stylus Pro 7700/7710/7700M/7710M/7900/7910/WT7900/WT7910/7890/7908. Remove the Left Cover. (p209) Hook Unlock the Carriage Unit and move it to the center.
- Page 241 Epson Stylus Pro 7700/7710/7700M/7710M/7900/7910/9700/9710/9900/9910/WT7900/WT7910/9890/9908/7890/7908 Revision I 11. Remove the two screws that secure the Driven Pulley Holder, and remove the Driven Pulley Holder. - Left side - B) Silver, Phillips, Bind S-tite with S.W & P.W. M3x8: two pieces CR Belt 12.
-
Page 242: Cr Motor
Remove the IC Cover L and the IC Shaft Cover L. (p206) Remove the Maintenance Tank L. (p208) NOTE: There is no Maintenance Tank (L) mounted for the Epson Stylus Pro 7700/7710/7700M/7710M/7900/7910/WT7900/WT7910/7890/7908. Driven Pulley Holder Remove the Left Cover. (p209) Loosen the two screws that secure the Driven Pulley Holder. - Page 243 Epson Stylus Pro 7700/7710/7700M/7710M/7900/7910/9700/9710/9900/9910/WT7900/WT7910/9890/9908/7890/7908 Revision I 4.4.4.6 APG Motor Remove the Control Panel. (p203) APG Motor Cover Remove the IC Cover R and the IC Shaft Cover R. (p206) APG Motor Remove the Maintenance Tank R. (p208) Remove the Right Cover.
- Page 244 Remove the IC Cover L and the IC Shaft Cover L. (p206) Remove the Maintenance Tank L. (p208) NOTE: There is no Maintenance Tank (L) mounted for the Epson Stylus Pro 7700/7710/7700M/7710M/7900/7910/WT7900/WT7910/7890/7908. Remove the Left Cover. (p209) Remove the Top Cover.
- Page 245 Epson Stylus Pro 7700/7710/7700M/7710M/7900/7910/9700/9710/9900/9910/WT7900/WT7910/9890/9908/7890/7908 Revision I 12. Remove the two screws that secure the APG Unit, and remove the APG Unit. - Front right - C) Silver, Phillips, Bind S-tite with S.W & P.W. M3x6: two pieces 13. Remove the two screws that secure the APG Motor, and remove the APG Motor from the APG Unit.
- Page 246 Epson Stylus Pro 7700/7710/7700M/7710M/7900/7910/9700/9710/9900/9910/WT7900/WT7910/9890/9908/7890/7908 Revision I 4.4.4.8 PG HP Sensor Remove the Control Panel. (p203) Ink Mark Sensor Remove the IC Cover R and the IC Shaft Cover R. (p206) Remove the Maintenance Tank R. (p208) Remove the Right Cover.
- Page 247 Epson Stylus Pro 7700/7710/7700M/7710M/7900/7910/9700/9710/9900/9910/WT7900/WT7910/9890/9908/7890/7908 Revision I Disengage the hooks that secure the PG HP Sensor, and remove the PG HP Sensor. Disconnect the connector from the PG HP Sensor. Hooks PG HP Sensor Figure 4-77. Removing the PG HP Sensor (1)
- Page 248 Remove the Control Panel.(p203) Remove the IC Cover (L/R) and the IC Shaft Cover (L/R).(p206) Remove the Maintenance Tank (L/R).(p208) NOTE: There is no Maintenance Tank (L) mounted for the Epson Stylus Pro 7700/7710/7700M/7710M/7900/7910/WT7900/WT7910/7890/7908. Remove the Right Cover.(p209) Remove the Left Cover.(p211) Remove the Top Cover.(p214)
- Page 249 Epson Stylus Pro 7700/7710/7700M/7710M/7900/7910/9700/9710/9900/9910/WT7900/WT7910/9890/9908/7890/7908 Revision I 14. Remove the each screw that secure the CR Stopper, and remove the three CR CR Stopper Stoppers. B) Silver, Phillips, Bind S-tite with S.W & P.W. M3x8: each one piece CR Stopper 15. Remove the Carriage Unit by sliding it rightward.
-
Page 250: Paper Feed Mechanism
Remove the IC Cover L and the IC Shaft Cover L. (p206) Remove the Maintenance Tank L. (p208) NOTE: There is no Maintenance Tank (L) mounted for the Epson Stylus Pro 7700/7710/7700M/7710M/7900/7910/WT7900/WT7910/7890/7908. Remove the Left Cover. (p209) Remove the Top Cover. - Page 251 Epson Stylus Pro 7700/7710/7700M/7710M/7900/7910/9700/9710/9900/9910/WT7900/WT7910/9890/9908/7890/7908 Revision I 4.4.5.2 PW Sensor Remove the Control Panel. (p203) Arm Unit Remove the IC Cover R and the IC Shaft Cover R. (p206) Remove the Maintenance Tank R. (p208) Remove the Right Cover. (p209) Unlock the Carriage Unit and move it to the center.
- Page 252 Epson Stylus Pro 7700/7710/7700M/7710M/7900/7910/9700/9710/9900/9910/WT7900/WT7910/9890/9908/7890/7908 Revision I Remove the PW Sensor from the Arm, and disconnect the connector of the PW Sensor. Connector PW Sensor Figure 4-86. Removing the PW Sensor DISASSEMBLY & ASSEMBLY Disassembly and Assembly Procedure Confidential...
- Page 253 Remove the IC Cover L and the IC Shaft Cover L. (p206) Remove the Maintenance Tank L. (p208) NOTE: There is no Maintenance Tank (L) mounted for the Epson Stylus Pro 7700/7710/7700M/7710M/7900/7910/WT7900/WT7910/7890/7908. Remove the Left Cover. (p209) Remove the Rear Cover.
- Page 254 Epson Stylus Pro 7700/7710/7700M/7710M/7900/7910/9700/9710/9900/9910/WT7900/WT7910/9890/9908/7890/7908 Revision I 4.4.5.4 Roller Release HP Sensor - Left (inside) - Open the Front Cover (Middle). Roller Release HP Sensor Disengage the hooks the secure the Roller Release HP Sensor, and remove the Roller Release HP Sensor.
- Page 255 Epson Stylus Pro 7700/7710/7700M/7710M/7900/7910/9700/9710/9900/9910/WT7900/WT7910/9890/9908/7890/7908 Revision I 4.4.5.5 Rewind Unit - Right side - The Rewind Unit is established as an ASP including the mounting C A U T I O N plate. When replacing this part, transfer the necessary items or Rewind Unit replace the whole unit.
- Page 256 Epson Stylus Pro 7700/7710/7700M/7710M/7900/7910/9700/9710/9900/9910/WT7900/WT7910/9890/9908/7890/7908 Revision I Remove the two screws that secure the Rewind Unit, and remove the Rewind Unit. B) Silver, Phillips, Pan S-tite with S.W & P.W. M3x6: two pieces Rewind Unit Figure 4-92. Removing the Rewind Unit DISASSEMBLY &...
-
Page 257: Cutter Unit
Remove the IC Cover (L/R) and the IC Shaft Cover (L/R). (p206) Remove the Maintenance Tank (L/R). (p208) NOTE: There is no Maintenance Tank (L) mounted for the Epson Stylus Pro 7700/7710/7700M/7710M/7900/7910/WT7900/WT7910/7890/7908. Remove the Control Panel. (p203) Front Cover (Middle) Remove the Right Cover. - Page 258 Epson Stylus Pro 7700/7710/7700M/7710M/7900/7910/9700/9710/9900/9910/WT7900/WT7910/9890/9908/7890/7908 Revision I 11. Remove the two screws that secure the Cutter Cover Support, and remove the Cutter Cover Support. - Top - B) Silver, Phillips, Bind machine screw M3x6: two pieces 12. Remove the seven screws that secure the Mid-Front Cover, and remove the Mid- Front Cover.
- Page 259 Epson Stylus Pro 7700/7710/7700M/7710M/7900/7910/9700/9710/9900/9910/WT7900/WT7910/9890/9908/7890/7908 Revision I 14. Disconnect the connector (CN307) on the Sub Board Assy; C. - Left side - 15. Release the harness from the clamp 1. 16. Release all the harnesses from the clamp 2. CN307 Sub Board Assy; C Figure 4-96.
- Page 260 Epson Stylus Pro 7700/7710/7700M/7710M/7900/7910/9700/9710/9900/9910/WT7900/WT7910/9890/9908/7890/7908 Revision I 17. Move the carriage over the platen. 18. Remove the five screws that secure the Cutter Unit. Cutter Unit D) Silver, Phillips, Round Washer Head S-tite M3x6: five pieces 19. Slide the Cutter Unit to the right to detach the left side of it from the main body, then disconnect the connector of the Cutter Motor.
- Page 261 Epson Stylus Pro 7700/7710/7700M/7710M/7900/7910/9700/9710/9900/9910/WT7900/WT7910/9890/9908/7890/7908 Revision I 4.4.5.7 Suction Fan Push down the handle of the cover and remove the cover. Handle Remove the five screws that secure the Front Cover (Lower), and remove the Front Cover (Lower). A) Silver, Phillips, Truss machine screw M4x6: five pieces Cover Figure 4-99.
- Page 262 Epson Stylus Pro 7700/7710/7700M/7710M/7900/7910/9700/9710/9900/9910/WT7900/WT7910/9890/9908/7890/7908 Revision I Since the hooks of the EJ Roller are fragile, do not apply excessive EJ Rollers C A U T I O N force to them in the next step. Release the two each hooks that secure the EJ Rollers, and remove the EJ Rollers.
-
Page 263: Pf Encoder Sensor
(p206) PF Encoder Sensor Holder Remove the Maintenance Tank L. (p208) NOTE: There is no Maintenance Tank (L) mounted for the Epson Stylus Pro 7700/7710/7700M/7710M/7900/7910/WT7900/WT7910/7890/7908. Remove the Left Cover. (p209) Remove the two screw that secures the PF Encoder Sensor Holder, and remove the PF Encoder Sensor PF Encoder Sensor Holder. -
Page 264: Pf Motor
(p206) Cable Retainer Remove the Maintenance Tank L. (p208) CN303 NOTE: There is no Maintenance Tank (L) mounted for the Epson Stylus Pro Tape 7700/7710/7700M/7710M/7900/7910/WT7900/WT7910/7890/7908. Remove the Left Cover. (p209) Disconnect the connector (CN303) on the Sub Board Assy; C. - Page 265 Epson Stylus Pro 7700/7710/7700M/7710M/7900/7910/9700/9710/9900/9910/WT7900/WT7910/9890/9908/7890/7908 Revision I Remove the two screws that secure the PF Motor, and remove the PF Motor from - Left side - PF Motor Mounting Plate the PF Motor Mounting Plate. B) Silver, Phillips, Pan S-tite with S.W & P.W. M3x6: two pieces Be sure to refer to Chapter 5 “Adjustment”...
-
Page 266: Ink System Mechanism
Epson Stylus Pro 7700/7710/7700M/7710M/7900/7910/9700/9710/9900/9910/WT7900/WT7910/9890/9908/7890/7908 Revision I 4.4.6 Ink System Mechanism - Rear right - 4.4.6.1 Ink System Unit Tube Retainer When powering this product, high-voltage current may be applied W A R N I N G Waste Ink Tube on the Ink System Unit (Flushing Box). To prevent ELECTRIC SHOCK, do not touch the Ink System Unit (Flushing Box) when the power is ON. - Page 267 Epson Stylus Pro 7700/7710/7700M/7710M/7900/7910/9700/9710/9900/9910/WT7900/WT7910/9890/9908/7890/7908 Revision I Remove the two screws that secure the AID Board Cover, and remove the AID - Top right - Board Cover. A) Silver, Phillips, Bind machine screw M3x8: two pieces 10. Disconnect the connector (CN2) on the AID Board.
- Page 268 Epson Stylus Pro 7700/7710/7700M/7710M/7900/7910/9700/9710/9900/9910/WT7900/WT7910/9890/9908/7890/7908 Revision I 11. Remove the three screws that secure the plate, and remove the plate. - Rear right - B) Silver, Phillips, Bind machine screw M3x6: three pieces Plate Ink System Unit 12. Remove the screw that secures the Ink System Unit.
- Page 269 Epson Stylus Pro 7700/7710/7700M/7710M/7900/7910/9700/9710/9900/9910/WT7900/WT7910/9890/9908/7890/7908 Revision I 4.4.6.2 Wiper Cleaner Assy AFTER REPLACEMENT PREPARATION FOR REPLACEMENT Press the [OK] button while [Enter] Finish is displayed. The Carriage Unit moves to the home position. Remove the Control Panel. (p203) Turn the printer OFF.
- Page 270 Remove the Control Panel. (p203) Remove the IC Cover (L/R) and the IC Shaft Cover (L/R). (p206) Remove the Maintenance Tank (L/R). (p208) NOTE: There is no Maintenance Tank (L) mounted for the Epson Stylus Pro CN118 7700/7710/7700M/7710M/7900/7910/WT7900/WT7910/7890/7908. FFCs CN116 Sub Board Assy Remove the Right Cover.
- Page 271 Epson Stylus Pro 7700/7710/7700M/7710M/7900/7910/9700/9710/9900/9910/WT7900/WT7910/9890/9908/7890/7908 Revision I 10. Remove the three screws that secure the Ink Tube Holder. A) Silver, Phillips, Bind P-tite with S.W & P.W. M3x8: three pieces Hook 11. Disengage the two hooks that secure the Ink Tube Holder, and remove the Ink Tube Holder.
- Page 272 P O I N T there is no need to disconnect them. 13. Remove the screws that secure the Ink Selector. NOTE: The number of screws differs between Epson Stylus Pro 7900/7910/9900/9910/ WT7900/WT7910/7890/7908/9890/9908 and Epson Stylus Pro 7700/7710/ 7700M/7710M/9700/9710. B) Silver, Phillips, Bind S-tite M3x8:...
- Page 273 Epson Stylus Pro 7700/7710/7700M/7710M/7900/7910/9700/9710/9900/9910/WT7900/WT7910/9890/9908/7890/7908 Revision I 14. Remove the Ink Selector. 15. Attach the hook on the rear of the Ink Selector onto the Main Frame to secure the Hooks Ink Selector. See Figure 4-120. After secure the Ink Selector, make sure to place a sheet of paper C A U T I O N below it to catch the spilling remaining ink.
- Page 274 Epson Stylus Pro 7700/7710/7700M/7710M/7900/7910/9700/9710/9900/9910/WT7900/WT7910/9890/9908/7890/7908 Revision I 16. Disconnect four FFCs from the Printhead. See Figure 4-122. FFCs In the next step, to make it easier to remove the screw of the C H E C K P O I N T Printhead it is recommended to use the long shaft screwdriver.
- Page 275 Disconnect the two Pressure Tubes from the Pressurizing Unit. Remove the Rear Cover. (p220) NOTE: In Epson Stylus Pro 7700/7710/7700M/7710M/9700/9710’s case, Figure 4-123 disconnect only the Pressure Tube shown in In the next step, confirm the destination of the Pressure Tubes so as to restore the original routing when reassembling.
- Page 276 Epson Stylus Pro 7700/7710/7700M/7710M/7900/7910/9700/9710/9900/9910/WT7900/WT7910/9890/9908/7890/7908 Revision I Hold up the Pressurizing Unit, and release the harness from the clamp and the cable retainer. Disconnect the two connectors, and remove the Pressurizing Unit. Pressurizing Unit Be sure to refer to Chapter 5 “Adjustment”...
- Page 277 Epson Stylus Pro 7700/7710/7700M/7710M/7900/7910/9700/9710/9900/9910/WT7900/WT7910/9890/9908/7890/7908 Revision I 4.4.6.5 Ink Cartridge Holder R This part is not compatible between Epson Stylus Pro 7900/ C A U T I O N 7910/9900/9910/7890/7908/9890/9908 and Epson Stylus Pro 7700/7710/7700M/7710M/9700/9710. If replaced with a new part, see " 4.1.5 Differences of the parts/components between (Page 172) models "...
- Page 278 Epson Stylus Pro 7700/7710/7700M/7710M/7900/7910/9700/9710/9900/9910/WT7900/WT7910/9890/9908/7890/7908 Revision I DISASSEMBLING PROCEDURE - Rear right - Remove the Control Panel. (p203) Remove the IC Cover R and the IC Shaft Cover R. (p206) Hole Remove the Maintenance Tank R. (p208) Guide Remove the Right Cover.
- Page 279 Epson Stylus Pro 7700/7710/7700M/7710M/7900/7910/9700/9710/9900/9910/WT7900/WT7910/9890/9908/7890/7908 Revision I Release the Ink Tubes from the two hooks on the Ink Cartridge Holder R. - Rear right - Pull the Ink Tube backward to give it some slack. Pull the Ink Tube forward to remove the slack. Route the Ink Tube so as not to apply load to the bend of the tube at the front of the printer.
- Page 280 Epson Stylus Pro 7700/7710/7700M/7710M/7900/7910/9700/9710/9900/9910/WT7900/WT7910/9890/9908/7890/7908 Revision I 11. Disengage the two hooks that secure the Ink Tube Guide, and remove the Ink Tube Guide from the main body. - Rear right - Ink Tube Guide Hooks Figure 4-128. Removing the Ink Tube Guide Figure 4-129.
- Page 281 Epson Stylus Pro 7700/7710/7700M/7710M/7900/7910/9700/9710/9900/9910/WT7900/WT7910/9890/9908/7890/7908 Revision I 12. Release the two hooks securing the cover of the Ink Holder Board Assy R, and remove the cover. 13. Release the FFC from the clamp. Cover of Ink Holder Board Assy R 14. Disconnect the FFC from the Ink Holder Board Assy R.
- Page 282 Epson Stylus Pro 7700/7710/7700M/7710M/7900/7910/9700/9710/9900/9910/WT7900/WT7910/9890/9908/7890/7908 Revision I 15. Remove the two screws, and detach the Ink Tubes. - Right side - A) Silver, Phillips, Bind machine screw M2x16 (bit: No.1): two pieces Use a torque driver with the torque given below when tightening the screws securing the Ink Tube.
- Page 283 Epson Stylus Pro 7700/7710/7700M/7710M/7900/7910/9700/9710/9900/9910/WT7900/WT7910/9890/9908/7890/7908 Revision I 17. Remove the four screws that secure the Ink Cartridge Holder R. - Right side - D) Silver, Phillips, Round Washer Head S-tite M4x6: four pieces 18. Remove the Ink Cartridge Holder R. When installing the Ink Cartridge Holder R, first align the three FFCs referring to the figure below, then attach them.
- Page 284 Epson Stylus Pro 7700/7710/7700M/7710M/7900/7910/9700/9710/9900/9910/WT7900/WT7910/9890/9908/7890/7908 Revision I 4.4.6.6 Ink Cartridge Holder L NOTE: This part is installed on Epson Stylus Pro 7900/7910/9900/9910/ WT7900/WT7910/7890/7908/9890/9908 only. When replacing this part with a new one, refer to " 4.1.5 C A U T I O N (Page Differences of the parts/components between models "...
- Page 285 Remove the IC Cover L and the IC Shaft Cover L. (p206) Remove the Maintenance Tank L. (p208) Tape NOTE: There is no Maintenance Tank (L) mounted for the Epson Stylus Pro Guide 7700/7710/7700M/7710M/7900/7910/WT7900/WT7910/7890/7908. Remove the Left Cover. (p209) Peel off the tape shown in the figure, and release the harness.
- Page 286 Epson Stylus Pro 7700/7710/7700M/7710M/7900/7910/9700/9710/9900/9910/WT7900/WT7910/9890/9908/7890/7908 Revision I Disengage the two hooks that secure the Ink Tube Guide, and remove the Ink Tube Guide from the main body. - Rear left - Ink Tube Guide Hooks Figure 4-136. Removing the Ink Tube Guide Figure 4-137.
- Page 287 Epson Stylus Pro 7700/7710/7700M/7710M/7900/7910/9700/9710/9900/9910/WT7900/WT7910/9890/9908/7890/7908 Revision I 10. Release the two hooks securing the cover of the Ink Holder Board Assy L, and remove the cover. 11. Disconnect the FFC from the Ink Holder Board Assy L. Hooks Cover of Ink Holder Board Assy L Figure 4-138.
- Page 288 Epson Stylus Pro 7700/7710/7700M/7710M/7900/7910/9700/9710/9900/9910/WT7900/WT7910/9890/9908/7890/7908 Revision I 12. Remove the two screws, and detach the Ink Tubes. - Rear left - A) Silver, Phillips, Bind machine screw M2x16 (bit: No.1): two pieces Use a torque driver with the torque given below when tightening the screws securing the Ink Tube.
- Page 289 Epson Stylus Pro 7700/7710/7700M/7710M/7900/7910/9700/9710/9900/9910/WT7900/WT7910/9890/9908/7890/7908 Revision I 13. Remove the six screws that secure the Ink Cartridge Holder Mounting Plate, and - Left side - remove the Ink Cartridge Holder Mounting Plate. Screw B) Silver, Phillips, Round Washer Head S-tite M4x8: four pieces...
-
Page 290: Ink Holder Board Assy L
Remove the IC Cover L and the IC Shaft Cover L. (p206) Remove the Maintenance Tank L. (p208) Hole NOTE: There is no Maintenance Tank (L) mounted for the Epson Stylus Pro 7700/7710/7700M/7710M/7900/7910/WT7900/WT7910/7890/7908. Guide Remove the Left Cover. (p211) Pull off the Pressure Tube from the main body. - Page 291 Epson Stylus Pro 7700/7710/7700M/7710M/7900/7910/9700/9710/9900/9910/WT7900/WT7910/9890/9908/7890/7908 Revision I Disconnect the connectors (CN408, CN409) and FFC (CN400) from the Ink CN400 Holder Board Assy L. Use a stubby driver or a ratchet driver for the following procedure. C H E C K P O I N T If you do not have such a driver, remove the Ink Cartridge Holder L before disassembly.
-
Page 292: Ink Holder Board Assy R
Epson Stylus Pro 7700/7710/7700M/7710M/7900/7910/9700/9710/9900/9910/WT7900/WT7910/9890/9908/7890/7908 Revision I 4.4.6.8 Ink Holder Board Assy R Hooks Board Cover Remove the Control Panel. (p203) Remove the IC Cover R and the IC Shaft Cover R. (p206) Remove the Maintenance Tank R. (p208) Remove the Right Cover. - Page 293 Epson Stylus Pro 7700/7710/7700M/7710M/7900/7910/9700/9710/9900/9910/WT7900/WT7910/9890/9908/7890/7908 Revision I 11. Disconnect the FFC (CN400) from the Ink Holder Board Assy and release the FFC from the clamp. Clamp 12. Disconnect the connectors (CN408, CN409) from the Ink Holder Board Assy R. 13. Remove the five screws that secure the plate.
- Page 294 Epson Stylus Pro 7700/7710/7700M/7710M/7900/7910/9700/9710/9900/9910/WT7900/WT7910/9890/9908/7890/7908 Revision I 4.4.6.9 AID Board Disassembling procedure for the previous type before design change When powering this product, high-voltage current may be applied W A R N I N G Remove the Control Panel. (p203) on the AID Board. To prevent ELECTRIC SHOCK, do not touch Remove the IC Cover R and the IC Shaft Cover R.
- Page 295 Epson Stylus Pro 7700/7710/7700M/7710M/7900/7910/9700/9710/9900/9910/WT7900/WT7910/9890/9908/7890/7908 Revision I Remove the AID Board. When installing the AID Board before design change, it can be C H E C K reassembled by reversing the disassembly procedure in P O I N T Disconnect the connector (CN2), and the FFC (CN1) on the AID Board.
- Page 296 Epson Stylus Pro 7700/7710/7700M/7710M/7900/7910/9700/9710/9900/9910/WT7900/WT7910/9890/9908/7890/7908 Revision I Disassembling procedure for the new type after design change Secure the new AID Board Cover with the three screws. C H E C K P O I N T The old AID Board cannot be installed to a new main body. Make...
- Page 297 Epson Stylus Pro 7700/7710/7700M/7710M/7900/7910/9700/9710/9900/9910/WT7900/WT7910/9890/9908/7890/7908 Revision I Remove the three screws that secure the AID Board. The AID Board comes with the AID Board mounting plate and AID Board Cover as a set. When installing the new AID Board to the...
- Page 298 Epson Stylus Pro 7700/7710/7700M/7710M/7900/7910/9700/9710/9900/9910/WT7900/WT7910/9890/9908/7890/7908 Revision I 4.4.6.10 Ink Mark Sensor Remove the Control Panel. (p203) Arm Unit Remove the IC Cover R and the IC Shaft Cover R. (p206) Remove the Maintenance Tank R. (p208) Remove the Right Cover. (p209) Unlock the Carriage Unit and move it to the center.
- Page 299 Epson Stylus Pro 7700/7710/7700M/7710M/7900/7910/9700/9710/9900/9910/WT7900/WT7910/9890/9908/7890/7908 Revision I Disconnect the FFC, and remove the Ink Mark Sensor. Be sure to refer to Chapter 5 “Adjustment” (see p351) and perform A D J U S T M E N T R E Q U I R E D specified adjustments after replacing or removing the Ink Mark Sensor.
-
Page 300: Ink Selector
], and [OK]. → Maintenance→ Select SELF TESTING Selector Exchange→Sequence. Because Epson Stylus Pro 7700/7710/9700/9710 does not have the C H E C K Selector Exchange menu, select the Tube Exchange menu instead. P O I N T Press the [OK] button. - Page 301 Remove the IC Cover (L/R) and the IC Shaft Cover (L/R). (p206) Remove the Maintenance Tank (L/R). (p208) NOTE: There is no Maintenance Tank (L) mounted for the Epson Stylus Pro 7700/7710/7700M/7710M/7900/7910/WT7900/WT7910/7890/7908. Remove the Right Cover. (p209) Remove the Left Cover.
- Page 302 Epson Stylus Pro 7700/7710/7700M/7710M/7900/7910/9700/9710/9900/9910/WT7900/WT7910/9890/9908/7890/7908 Revision I 10. Remove the three screws that secure the Ink Tube Holder. A) Silver, Phillips, Bind P-tite with S.W & P.W. M3x8: three pieces Hook 11. Disengage the two hooks that secure the Ink Tube Holder, and remove the Ink Tube Holder.
- Page 303 Epson Stylus Pro 7700/7710/7700M/7710M/7900/7910/9700/9710/9900/9910/WT7900/WT7910/9890/9908/7890/7908 Revision I 13. Slide the two Ink Tube Stoppers in the directions of the arrow to remove them. 14. Remove the two screws that secure the Ink Tube L, and remove the Ink Tube L from the Ink Selector.
- Page 304 Epson Stylus Pro 7700/7710/7700M/7710M/7900/7910/9700/9710/9900/9910/WT7900/WT7910/9890/9908/7890/7908 Revision I 16. Remove the screws that secure the Ink Selector. NOTE: The number of screws differs between Epson Stylus Pro 7900/7910/9900/ 9910/WT7900/WT7910/7890/7908/9890/9908 and Epson Stylus Pro 7700/7710/7700M/7710M/9700/9710. C) Silver, Phillips, Bind S-tite M3x8: Epson Stylus Pro 7900/7910/9900/9910/WT7900/WT7910/7890/7908/9890/...
- Page 305 Epson Stylus Pro 7700/7710/7700M/7710M/7900/7910/9700/9710/9900/9910/WT7900/WT7910/9890/9908/7890/7908 Revision I 17. Remove the Ink Selector. Be sure to refer to Chapter 5 “Adjustment” (see p351) and perform A D J U S T M E N T R E Q U I R E D specified adjustments after replacing or removing the Ink Selector.
- Page 306 Epson Stylus Pro 7700/7710/7700M/7710M/7900/7910/9700/9710/9900/9910/WT7900/WT7910/9890/9908/7890/7908 Revision I 4.4.6.12 Ink Tube R When disassembling this part, be sure to discharge ink in advance C A U T I O N following the procedure below. INK DISCHARGE Turn the printer ON in the Serviceman Mode.
- Page 307 Remove the IC Cover (L/R) and the IC Shaft Cover (L/R). (p206) Remove the Maintenance Tank (L/R). (p208) NOTE: There is no Maintenance Tank (L) mounted for the Epson Stylus Pro Ink Tube R 7700/7710/7700M/7710M/7900/7910/WT7900/WT7910/7890/7908. Remove the Right Cover. (p209) Remove the Left Cover.
- Page 308 Epson Stylus Pro 7700/7710/7700M/7710M/7900/7910/9700/9710/9900/9910/WT7900/WT7910/9890/9908/7890/7908 Revision I 15. Remove the three screws that secure the Ink Tube Holder. See Figure 4-164. Hooks B) Silver, Phillips, Bind P-tite with S.W & P.W. M3x8: three pieces 16. Disengage the two hooks that secure the Ink Tube Holder, and remove the Ink Tube Holder.
- Page 309 Epson Stylus Pro 7700/7710/7700M/7710M/7900/7910/9700/9710/9900/9910/WT7900/WT7910/9890/9908/7890/7908 Revision I 18. Remove the two screws that secure the Ink Tube R, and remove the Ink Tube R. Be sure to refer to Chapter 5 “Adjustment” (see p351) and perform A D J U S T M E N T See Figure 4-166.
- Page 310 Epson Stylus Pro 7700/7710/7700M/7710M/7900/7910/9700/9710/9900/9910/WT7900/WT7910/9890/9908/7890/7908 Revision I 4.4.6.13 Ink Tube L NOTE: The Ink Tube L is for Epson Stylus Pro 7900/7910/9900/9910/WT7900/ WT7910/7890/7908/9890/9908 only. When disassembling this part, be sure to discharge ink in advance C A U T I O N following the procedure below.
- Page 311 Remove the IC Cover (L/R) and the IC Shaft Cover (L/R). (p206) Remove the Maintenance Tank (L/R). (p208) NOTE: There is no Maintenance Tank (L) mounted for the Epson Stylus Pro Ink Tube L 7700/7710/7700M/7710M/7900/7910/WT7900/WT7910/7890/7908. Remove the Right Cover. (p209) Remove the Left Cover.
- Page 312 Epson Stylus Pro 7700/7710/7700M/7710M/7900/7910/9700/9710/9900/9910/WT7900/WT7910/9890/9908/7890/7908 Revision I 13. Remove the Ink Tube Holder. When replacing the Ink Tube L with a new one, make sure to C A U T I O N (Step 15 in “4.4.6.12 Ink Tube R” 306)) replace the Ink Tube R together.
-
Page 313: Auto Take-Up Reel
Epson Stylus Pro 7700/7710/7700M/7710M/7900/7910/9700/9710/9900/9910/WT7900/WT7910/9890/9908/7890/7908 Revision I 4.4.7 Auto Take-up Reel Auto Take-up Reel Hook Take-up Reel Cover 4.4.7.1 Take-up Reel Cover Remove the two screws that secure the Auto Take-up Reel. A) Silver, Phillips, Pan S-tite with S.W & P.W. M4x10: two pieces Hold up the Auto Take-up Reel to disengage the hook, and remove the Auto Take- up Reel. - Page 314 Epson Stylus Pro 7700/7710/7700M/7710M/7900/7910/9700/9710/9900/9910/WT7900/WT7910/9890/9908/7890/7908 Revision I 4.4.7.2 Take-up Reel Sensor Remove the screw that secures the Take-up Reel Sensor. A) Black, Phillips, Bind P-tite M3x10: one piece Remove the Take-up Reel Sensor from the Auto Take-up Reel. Disconnect the connector from the Take-up Reel Sensor.
- Page 315 Epson Stylus Pro 7700/7710/7700M/7710M/7900/7910/9700/9710/9900/9910/WT7900/WT7910/9890/9908/7890/7908 Revision I 4.4.7.3 Take-up Reel LED Remove the Flange from the Auto Take-up Reel. Remove the Take-up Reel Cover. (p313) Disconnect the connector (CN1) on the Main Board. Power Supply Unit Remove the four screws that secure the Power Supply Unit, and remove the Power Main Board Supply Unit.
- Page 316 Epson Stylus Pro 7700/7710/7700M/7710M/7900/7910/9700/9710/9900/9910/WT7900/WT7910/9890/9908/7890/7908 Revision I 4.4.7.4 Take-up Reel Switch Remove the Flange from the Auto Take-up Reel. Auto Take-up Reel Flange Remove the Take-up Reel Cover. (p313) Disconnect the connector (CN1) on the Main Board. Remove the four screws that secure the Power Supply Unit, and remove the Power Supply Unit.
- Page 317 Epson Stylus Pro 7700/7710/7700M/7710M/7900/7910/9700/9710/9900/9910/WT7900/WT7910/9890/9908/7890/7908 Revision I Disconnect the connector (CN17) on the Main Board. Panel Cover Remove the four screws that secure the Take-up Reel Switch, and remove the Take-up Reel Switch from the Panel Cover. Take-up Reel Switch B) Black, Phillips, Bind P-tite screw M2x7 (bit: No.1): four pieces Main Board Install the Take-up Reel Switch with the “ON/OFF/ON”...
- Page 318 Epson Stylus Pro 7700/7710/7700M/7710M/7900/7910/9700/9710/9900/9910/WT7900/WT7910/9890/9908/7890/7908 Revision I 4.4.7.5 Power Supply Board Remove the Flange from the Auto Take-up Reel. Auto Take-up Reel Flange Remove the Take-up Reel Cover. (p313) Remove the two screws that secure the Plate A, and remove the Plate A.
- Page 319 Epson Stylus Pro 7700/7710/7700M/7710M/7900/7910/9700/9710/9900/9910/WT7900/WT7910/9890/9908/7890/7908 Revision I Remove the six screws that secure the Power Supply Board, and remove the Power Supply Board. D) Black, Phillips, Bind S-tite M3x6: six pieces Power Supply Board Disconnect the connectors (CN1, CN2) on the Power Supply Board.
- Page 320 Epson Stylus Pro 7700/7710/7700M/7710M/7900/7910/9700/9710/9900/9910/WT7900/WT7910/9890/9908/7890/7908 Revision I 4.4.7.6 Take-up Reel Motor Auto Take-up Reel Remove the Flange from the Auto Take-up Reel. Flange Remove the Take-up Reel Cover. (p313) Disconnect the connector (CN1) on the Main Board. Remove the four screws that secure the Power Supply Unit, and remove the Power Supply Unit.
- Page 321 Epson Stylus Pro 7700/7710/7700M/7710M/7900/7910/9700/9710/9900/9910/WT7900/WT7910/9890/9908/7890/7908 Revision I Remove the two screws that secure the Main Board Unit. B) Black, Phillips, Bind S-tite M3x6: two pieces Disconnect the connector from the Take-up Reel Motor, and remove the Main Board Unit. Remove the C-Ring.
- Page 322 Epson Stylus Pro 7700/7710/7700M/7710M/7900/7910/9700/9710/9900/9910/WT7900/WT7910/9890/9908/7890/7908 Revision I 4.4.7.7 Main Board Assy Remove the Flange from the Auto Take-up Reel. Auto Take-up Reel Remove the Take-up Reel Cover. (p313) Flange Disconnect the connector (CN1) on the Main Board. Remove the four screws that secure the Power Supply Unit, and remove the Power Supply Unit.
- Page 323 Epson Stylus Pro 7700/7710/7700M/7710M/7900/7910/9700/9710/9900/9910/WT7900/WT7910/9890/9908/7890/7908 Revision I Remove the four screws that secure the Shield Plate, and remove the three clamps CN24* CN23 CN17 CN19* CN18 and the Shield Plate. CN14* B) Black, Phillips, Bind S-tite M3x6: four pieces Disconnect all the connectors on the Main Board.
- Page 324 Epson Stylus Pro 7700/7710/7700M/7710M/7900/7910/9700/9710/9900/9910/WT7900/WT7910/9890/9908/7890/7908 Revision I Connector assignment: Connector No. Color Destination Power Supply Board (CN2) White Unused CN2* White USB-A Unused CN4* Unused CN7* Black Unused CN8* Blue Unused CN10* Yellow Unused CN11* Black Unused CN14* Blue Unused CN15*...
-
Page 325: Spectroproofer
Epson Stylus Pro 7700/7710/7700M/7710M/7900/7910/9700/9710/9900/9910/WT7900/WT7910/9890/9908/7890/7908 Revision I 4.4.8 SpectroProofer 4.4.8.1 Color Measurement Device Do not touch the lens of the Color Measurement Device. C A U T I O N When removing the Color Measurement Device, be careful not to drop it. - Page 326 Epson Stylus Pro 7700/7710/7700M/7710M/7900/7910/9700/9710/9900/9910/WT7900/WT7910/9890/9908/7890/7908 Revision I Disconnect the mini USB interface cable and the DC cable connected to the Color Measurement Device. Hold the rear of the Color Measurement Device, and lift it forward slightly, then remove it. DC cable Mini USB interface cable Figure 4-194.
- Page 327 Epson Stylus Pro 7700/7710/7700M/7710M/7900/7910/9700/9710/9900/9910/WT7900/WT7910/9890/9908/7890/7908 Revision I 4.4.8.2 Mounter When removing the Mounter, make sure to hold it up supporting C A U T I O N the locations shown in the figure by two or more people. Remove the Color Measurement Device.
- Page 328 Epson Stylus Pro 7700/7710/7700M/7710M/7900/7910/9700/9710/9900/9910/WT7900/WT7910/9890/9908/7890/7908 Revision I 4.4.8.3 Right Cover Remove the Color Measurement Device. (p325) Remove the Mounter. (p327) Right Cover In the next procedure, one of the screws is different from the C H E C K P O I N T others;...
- Page 329 Epson Stylus Pro 7700/7710/7700M/7710M/7900/7910/9700/9710/9900/9910/WT7900/WT7910/9890/9908/7890/7908 Revision I 4.4.8.4 Left Cover Remove the Color Measurement Device. (p325) Left Cover Remove the Mounter. (p327) Remove the five screws that secure the Left Cover. A) Black, Phillips, Bind machine screw M3x6: five pieces Remove the Left Cover.
- Page 330 Epson Stylus Pro 7700/7710/7700M/7710M/7900/7910/9700/9710/9900/9910/WT7900/WT7910/9890/9908/7890/7908 Revision I 4.4.8.5 I/F Cover I/F Cover Remove the Color Measurement Device. (p325) Remove the Mounter. (p327) Open the I/F Cover. Disengage the two dowels, and remove the I/F Cover. Dowels Figure 4-199. Removing the I/F Cover DISASSEMBLY &...
- Page 331 Epson Stylus Pro 7700/7710/7700M/7710M/7900/7910/9700/9710/9900/9910/WT7900/WT7910/9890/9908/7890/7908 Revision I 4.4.8.6 Front Cover This part is not an ASP. Front Cover Remove the Color Measurement Device. (p325) Remove the Mounter. (p327) In the next step, make sure to confirm which screw is attached to...
- Page 332 Epson Stylus Pro 7700/7710/7700M/7710M/7900/7910/9700/9710/9900/9910/WT7900/WT7910/9890/9908/7890/7908 Revision I 4.4.8.7 Main Board Remove the Color Measurement Device. (p325) Remove the Mounter. (p327) Unused Remove the Front Cover. (p331) Unused Disconnect all the connectors and FFC on the Main Board. Those connectors which are shown in the figure are not used.
- Page 333 Epson Stylus Pro 7700/7710/7700M/7710M/7900/7910/9700/9710/9900/9910/WT7900/WT7910/9890/9908/7890/7908 Revision I Connector assignment: Connector No. Color Destination Power Supply Board (CN2) White Color Measurement Device White USB-A USB-B Cooling Fan 1 Black Paper Pressing HP Sensor Blue CR HP Sensor CN10 Yellow Thermistor CN11 Black...
- Page 334 Epson Stylus Pro 7700/7710/7700M/7710M/7900/7910/9700/9710/9900/9910/WT7900/WT7910/9890/9908/7890/7908 Revision I 4.4.8.8 Power Supply Board Remove the Color Measurement Device. (p325) Power Supply Board Remove the Mounter. (p327) Remove the Front Cover. (p331) Disconnect all the connectors (CN1, CN2) on the Power Supply Board. Remove the six screws that secure the Power Supply Board, and remove the Power Supply Board.
- Page 335 Epson Stylus Pro 7700/7710/7700M/7710M/7900/7910/9700/9710/9900/9910/WT7900/WT7910/9890/9908/7890/7908 Revision I 4.4.8.9 Paper Pressing Plate Sensor Remove the Color Measurement Device. (p325) Remove the Mounter. (p327) Remove the three screws that secure the shield plate, and remove the shield plate. A) Silver, Phillips, Bind machine screw M3x6: three pieces...
- Page 336 Epson Stylus Pro 7700/7710/7700M/7710M/7900/7910/9700/9710/9900/9910/WT7900/WT7910/9890/9908/7890/7908 Revision I 4.4.8.10 CR HP Sensor Remove the Color Measurement Device. (p325) Remove the Mounter. (p327) Carriage Move the carriage to the center. Disengage the hooks that secure the CR HP Sensor, and detach the CR HP Sensor.
- Page 337 Epson Stylus Pro 7700/7710/7700M/7710M/7900/7910/9700/9710/9900/9910/WT7900/WT7910/9890/9908/7890/7908 Revision I 4.4.8.11 Thermistor Remove the Color Measurement Device. (p325) Remove the Mounter. (p327) Remove the Front Cover. (p331) Remove the Right Cover. (p328) Disconnect the connector (CN11) on the Main Board. CN11 Remove the two screws that secure the USB Housing, and remove the USB Housing.
- Page 338 Epson Stylus Pro 7700/7710/7700M/7710M/7900/7910/9700/9710/9900/9910/WT7900/WT7910/9890/9908/7890/7908 Revision I 4.4.8.12 Mount Sensor Mount Sensor Holder Remove the Color Measurement Device. (p325) Remove the Mounter. (p327) Connector Remove the Front Cover. (p331) Remove the Right Cover. (p328) Remove the two screws that secure the Mount Sensor Holder, and remove the Mount Sensor Holder.
- Page 339 Epson Stylus Pro 7700/7710/7700M/7710M/7900/7910/9700/9710/9900/9910/WT7900/WT7910/9890/9908/7890/7908 Revision I 4.4.8.13 LED Remove the Color Measurement Device. (p325) Remove the Mounter. (p327) Main Board Remove the Front Cover. (p331) Remove the Right Cover. (p328) Disconnect the connector (CN23) on the Main Board. CN23 Remove the two screws that secure the USB Housing, and remove the USB Housing.
- Page 340 Epson Stylus Pro 7700/7710/7700M/7710M/7900/7910/9700/9710/9900/9910/WT7900/WT7910/9890/9908/7890/7908 Revision I 4.4.8.14 Paper Pressing Encoder Remove the Color Measurement Device. (p325) Remove the Mounter. (p327) In the next steps, take care not to damage the scale of the Paper C A U T I O N Pressing Encoder.
- Page 341 Epson Stylus Pro 7700/7710/7700M/7710M/7900/7910/9700/9710/9900/9910/WT7900/WT7910/9890/9908/7890/7908 Revision I Disconnect the connector from the Paper Pressing Encoder and remove the Paper Pressing Encoder. Scale Connector Paper Pressing Encoder Figure 4-216. Removing the Paper Pressing Encoder DISASSEMBLY & ASSEMBLY Disassembly and Assembly Procedure Confidential...
- Page 342 Epson Stylus Pro 7700/7710/7700M/7710M/7900/7910/9700/9710/9900/9910/WT7900/WT7910/9890/9908/7890/7908 Revision I 4.4.8.15 Cooling Fan 1 Relay connector Remove the Color Measurement Device. (p325) Clamps Remove the Mounter. (p327) Remove the Front Cover. (p331) Remove the Left Cover. (p329) Remove the four screws that secure the Cooling Fan 1 mounting plate, and remove the Cooling Fan 1 mounting plate.
- Page 343 Epson Stylus Pro 7700/7710/7700M/7710M/7900/7910/9700/9710/9900/9910/WT7900/WT7910/9890/9908/7890/7908 Revision I 4.4.8.16 Cooling Fan 2 Remove the Color Measurement Device. (p325) Remove the Mounter. (p327) Remove the Front Cover. (p331) Remove the Right Cover. (p328) Remove the Left Cover. (p329) Remove the two screws that secure the USB Housing, and remove the USB Housing.
- Page 344 Epson Stylus Pro 7700/7710/7700M/7710M/7900/7910/9700/9710/9900/9910/WT7900/WT7910/9890/9908/7890/7908 Revision I Remove the four screws that secure the USB Housing Duct, and remove the USB Housing Duct. USB Housing Duct C) Silver, Phillips, Round Washer Head S-tite M3x10: four pieces 10. Remove the four screws that secure the plate.
- Page 345 Epson Stylus Pro 7700/7710/7700M/7710M/7900/7910/9700/9710/9900/9910/WT7900/WT7910/9890/9908/7890/7908 Revision I 13. Remove the four screws that secure the Cooling Fan2, and remove the Cooling Fan2. G) Silver, Phillips, Bind S-tite with S.W & P.W. M3x12 & nut: four pairs Be sure to refer to Chapter 5 “Adjustment”...
- Page 346 Epson Stylus Pro 7700/7710/7700M/7710M/7900/7910/9700/9710/9900/9910/WT7900/WT7910/9890/9908/7890/7908 Revision I 4.4.8.17 Paper Pressing Motor Remove the Color Measurement Device. (p325) Carriage Motor mounting plate Remove the Mounter. (p327) Remove the Paper Pressing Encoder. (p340) In the next steps, take care not to damage the scale of the Paper C A U T I O N Pressing Encoder.
- Page 347 Epson Stylus Pro 7700/7710/7700M/7710M/7900/7910/9700/9710/9900/9910/WT7900/WT7910/9890/9908/7890/7908 Revision I 4.4.8.18 Carriage Motor Remove the Color Measurement Device. (p325) Remove the Mounter. (p327) Remove the Front Cover. (p331) Remove the three screws that secure the shield plate, and remove the shield plate. Shield Plate...
- Page 348 Epson Stylus Pro 7700/7710/7700M/7710M/7900/7910/9700/9710/9900/9910/WT7900/WT7910/9890/9908/7890/7908 Revision I Remove the screw that secures the Carriage Motor mounting plate, and remove the Carriage Motor mounting plate. B) Silver, Phillips, Bind machine screw M4x8: one piece Remove the two screws that secure the Carriage Motor, and remove the Carriage Motor.
- Page 349 Epson Stylus Pro 7700/7710/7700M/7710M/7900/7910/9700/9710/9900/9910/WT7900/WT7910/9890/9908/7890/7908 Revision I 4.4.8.19 Paper Pressing Unit Remove the Color Measurement Device. (p325) Remove the Mounter. (p327) Remove the three screws that secure the shield plate, and remove the shield plate. Shield Plate A) Silver, Phillips, Bind machine screw M3x6: three pieces Figure 4-230.
- Page 350 Epson Stylus Pro 7700/7710/7700M/7710M/7900/7910/9700/9710/9900/9910/WT7900/WT7910/9890/9908/7890/7908 Revision I Remove the E-ring. Pull out the shaft. Remove the O-ring, and remove the Paper Pressing Unit. First align the markings on the gears on the left and the right side of the Paper Pressing Unit with the markings on the gears on the main body, then install the Paper Pressing Unit.
- Page 351 C H A P T E R ADJUSTMENT Confidential...
-
Page 352: Overview
Epson Stylus Pro 7700/7710/7700M/7710M/7900/7910/9700/9710/9900/9910/WT7900/WT7910/9890/9908/7890/7908 Revision I 5.1 Overview This chapter describes the Service Program software utility and the adjustment procedures required after repairing or replacing certain parts. 5.1.1 Precautions Always observe the following cautions whenever making an adjustment on the printer. -
Page 353: Adjustment Items And The Order By Repaired Part
Epson Stylus Pro 7700/7710/7700M/7710M/7900/7910/9700/9710/9900/9910/WT7900/WT7910/9890/9908/7890/7908 Revision I 5.1.2 Adjustment Items and the Order by Repaired Part The following table shows the required adjustments by repaired or replaced part and the order in which the adjustments must be performed. Find the part(s) you repaired or replaced in the table, and carry out the adjustments in the indicated order. - Page 354 Epson Stylus Pro 7700/7710/7700M/7710M/7900/7910/9700/9710/9900/9910/WT7900/WT7910/9890/9908/7890/7908 Revision I Adjustments Tests CR Related Head Related Adjustments PF Related Adjustments Other Adjustments Adjustments Class Parts Ink System Mechanism INK SYSTEM UNIT PRINTHEAD 10 11 12 PRESSURIZING UNIT INK CARTRIDGE HOLDER (R&L) INK HOLDER BOARD ASSY (R&L)
-
Page 355: Description Of Adjustments
Epson Stylus Pro 7700/7710/7700M/7710M/7900/7910/9700/9710/9900/9910/WT7900/WT7910/9890/9908/7890/7908 Revision I 5.1.3 Description of Adjustments The following table describes the general outline of the adjustments. Note : The meanings of abbreviations in the “tool” column are as follows. SP = Service Program SM = Serviceman Mode MECH = Mechanical Adjustment can be performed. - Page 356 Epson Stylus Pro 7700/7710/7700M/7710M/7900/7910/9700/9710/9900/9910/WT7900/WT7910/9890/9908/7890/7908 Revision I Tool Class Adjustment General Overview Page MECH Checks air leak status in the ink path when replacing ink tube, ink cartridge holder, √ √ – p.401 Air Leak Check for Ink Supply Sys. damper or when adjusting ink cartridge holder and damper joint section.
-
Page 357: Tools For Adjustments
Epson Stylus Pro 7700/7710/7700M/7710M/7900/7910/9700/9710/9900/9910/WT7900/WT7910/9890/9908/7890/7908 Revision I 5.1.4 Tools for Adjustments The table below shows the tools required for adjusting this printer. Table 5-1. Tools for Adjustments Type Name Part Number Remarks Use the tool for 1424364 P-Thick Sensor Position Jig Epson Stylus Pro7880/9880. -
Page 358: Service Program Basic Operations
Save the Service Program on the desktop or directly under the C drive. If the storage location is deep in the hierarchy, some program tools may not work correctly. Adjustment items differ between Epson Stylus Pro 7900/7910/9900/ C H E C K P O I N T... - Page 359 Epson Stylus Pro 7700/7710/7700M/7710M/7900/7910/9700/9710/9900/9910/WT7900/WT7910/9890/9908/7890/7908 Revision I NV-RAM BACKUP UTILITY ADJUSTMENTS INDIVIDUAL The utility for backing up or restoring NV-RAM parameters is started up. It also has This mode allows you to select and perform an adjustment individually. the function to check the read parameter.
- Page 360 Figure 5-4. Firmware Update Tool PRINT IMAGE Image data can be printed for quality check. NOTE: In the case of Epson Stylus Pro WT7900/WT7910, only the dedicated Prn file can be printed. When printing an image Turn the printer ON in the Serviceman Mode. Turn the power on while pressing...
- Page 361 Epson Stylus Pro 7700/7710/7700M/7710M/7900/7910/9700/9710/9900/9910/WT7900/WT7910/9890/9908/7890/7908 Revision I FLAG CHANGE & COUNTER RESET PANEL MENU SUMMARY You can set various kinds of flags and reset various kinds of counters. This allows you to see a list of panel menu settings. Select “User Mode” or “Serviceman Mode” to open the corresponding pdf file (you NOTE: The items of counter and flag differ between models.
- Page 362 Life Count (TBD) Figure 5-8. Panel Menu Summary for User Mode Figure 5-9. Panel Menu Summary for Serviceman Mode NOTE: The figure is for Epson Stylus Pro 7900/7910/9900/9910. NOTE: The figure is for Epson Stylus Pro 7900/7910/9900/9910. ADJUSTMENT Overview Confidential...
-
Page 363: Nv-Ram Backup Utility
Epson Stylus Pro 7700/7710/7700M/7710M/7900/7910/9700/9710/9900/9910/WT7900/WT7910/9890/9908/7890/7908 Revision I 5.2 NV-RAM BACKUP UTILITY RESTORE PROCEDURE Turn the printer ON in the Serviceman Mode. Turn the power on while pressing Whenever the Main Board is replaced, parameters stored in the NVRAM on the [Menu ], [Paper Feed ] and [OK] button. -
Page 364: Cr Related Adjustment
Epson Stylus Pro 7700/7710/7700M/7710M/7900/7910/9700/9710/9900/9910/WT7900/WT7910/9890/9908/7890/7908 Revision I 5.3 CR Related Adjustment 5.3.1 CR Timing Belt Tension Adjustment Open/close Switch This allows you to adjust the tension of the CR Timing Belt to a specified level. This is to execute after the CR Timing Belt has been loosened such as when removing the CR Motor. - Page 365 Epson Stylus Pro 7700/7710/7700M/7710M/7900/7910/9700/9710/9900/9910/WT7900/WT7910/9890/9908/7890/7908 Revision I → Turn the printer ON in the Serviceman Mode. Select Mecha Adjustment Temporary Turn the power ON while pressing [Menu ] + [Paper Feed ] + [OK] Press [OK] while [Enter] Un Cap is displayed.
- Page 366 001.2 g/m The carriage unit will be unlocked. WIDTH: 008.0 mm/R This step is not necessary for Epson Stylus Pro 7900/7910/WT7900/WT7910. SPAN: 1170 mm 14. Open the Front Cover (Middle). 17. Bring the microphone of the Sonic Tension Meter U-507 closer to the center of the 15.
- Page 367 Epson Stylus Pro 7700/7710/7700M/7710M/7900/7910/9700/9710/9900/9910/WT7900/WT7910/9890/9908/7890/7908 Revision I 19. Loosen the screws (x2) that secure the Driven Pulley Holder. 20. Adjust the belt tension with the tension adjusting screw. After adjusting the tension, tighten the screws loosened in Step 19, and then back Step If larger than standard value: Turn the screw in a clockwise.
-
Page 368: Cr Encoder Sensor Adjustment
Epson Stylus Pro 7700/7710/7700M/7710M/7900/7910/9700/9710/9900/9910/WT7900/WT7910/9890/9908/7890/7908 Revision I 5.3.2 CR Encoder Sensor Adjustment This allows you to adjust the position of the CR Encoder Sensor to the CR Scale. PROCEDURE Turn the printer ON in the Serviceman Mode. Securing Screw Turn the power ON while holding down [Menu... -
Page 369: Head
Epson Stylus Pro 7700/7710/7700M/7710M/7900/7910/9700/9710/9900/9910/WT7900/WT7910/9890/9908/7890/7908 Revision I 5.3.3 Head PG Adjustment This adjustment should be done as follows. C H E C K P O I N T Right end (Home side): This is to adjust the gap between the Printhead and the platen. - Page 370 Epson Stylus Pro 7700/7710/7700M/7710M/7900/7910/9700/9710/9900/9910/WT7900/WT7910/9890/9908/7890/7908 Revision I At the right end of the Platen, confirm and adjust the height of the C H E C K P O I N T Printhead on the right and left sides by changing the position of the Carriage and the thickness gauges.
- Page 371 Epson Stylus Pro 7700/7710/7700M/7710M/7900/7910/9700/9710/9900/9910/WT7900/WT7910/9890/9908/7890/7908 Revision I 10. Loosen the adjustment screw and carry out the PG adjustment with the adjustment 14. Press [OK] while [Enter] Cap is displayed to cap the Printhead. Then turn the lever. printer OFF to complete the adjustment.
-
Page 372: Cleaning
Epson Stylus Pro 7700/7710/7700M/7710M/7900/7910/9700/9710/9900/9910/WT7900/WT7910/9890/9908/7890/7908 Revision I 5.3.4 Cleaning PG Adjustment Turn the printer ON in the Serviceman Mode. Turn the power ON while pressing [Menu ] + [Paper Feed ] + [OK] This allows you to adjust the gap between the Printhead and the wiper for cleaning with simultaneously. - Page 373 Epson Stylus Pro 7700/7710/7700M/7710M/7900/7910/9700/9710/9900/9910/WT7900/WT7910/9890/9908/7890/7908 Revision I 10. Move the Carriage Unit over the jig manually, and whether if the Printhead can 23. Press [Pause/Reset] while is displayed. touches or pass over the 2.2mm jig. Perform the following remedy if is displayed.
-
Page 374: Head Related Adjustments
C A U T I O N Use the first 45 digits for the Head Rank ID. (the last five digits are not used.) The Head Rank ID (label) differs between Epson Stylus Pro Figure 5-23. Head Rank ID screen 7900/7910/9900/9910/WT7900/WT7910/9890/9908/7890/7908 and Epson Stylus Pro 7700/7710/7700M/7710M/9700/9710. - Page 375 Epson Stylus Pro 7700/7710/7700M/7710M/7900/7910/9700/9710/9900/9910/WT7900/WT7910/9890/9908/7890/7908 Revision I Click [Write]. Click [Finish]. Turn off the printer. Make sure to turn off the printer after clicking the [Finish] button. C A U T I O N The setting of Head Rank ID becomes valid after the printer is restarted.
-
Page 376: Head Cleaning
Revision I 5.4.2 Head Cleaning This is to clean the Printhead. Epson Stylus Pro WT7900/WT7910 has a refresh cleaning function to prevent the white ink in the ink tube, printhead, damper from becoming solidified. PROCEDURE FOR CLEANING Turn the printer ON in the Serviceman Mode. Turn the power on while pressing... -
Page 377: Nozzle Check
Any types can be used PROCEDURE <VM> <C> <PK> <Y> <VM> Turn the printer ON. Figure 5-27. Nozzle Check Pattern (Epson Stylus Pro 7700/7710/7700M/7710M/9700/9710) Press [Menu ] to enter the panel setting mode. → Select TEST PRINT NOZZLE CHECK and press [OK]. -
Page 378: Printhead Slant Adjustment (Cr)
Check if lines of magenta and cyan are in line. If they are in line, finish the Figure 5-30. Adjustment Pattern adjustment. If not, follow steps below to carry out the adjustment. NOTE: The pattern is for Epson Stylus Pro 7900/7910/9900/9910. The one for Epson Stylus Pro 7700/7710/7700M/7710M/9700/9710, Epson Stylus Pro 9890/9908/7890/7908 differs in color. - Page 379 Epson Stylus Pro 7700/7710/7700M/7710M/7900/7910/9700/9710/9900/9910/WT7900/WT7910/9890/9908/7890/7908 Revision I → → Select SELF TESTING Mecha Adjustment Temporary Press [OK] while [Enter] Un Cap is displayed. The carriage unit will be unlocked. Open the Front Cover (Middle). Print Print Print head head head Loosen the screws (x6) shown in Figure 5-32.
- Page 380 Epson Stylus Pro 7700/7710/7700M/7710M/7900/7910/9700/9710/9900/9910/WT7900/WT7910/9890/9908/7890/7908 Revision I Turn the adjustment dial to adjust the slant of the Printhead. 10. Tighten the screws (x6) loosened in Step 11. Close the Front Cover (Middle). See the following for the direction of rotation. C H E C K P O I N T 12.
-
Page 381: Printhead Slant Adjustment (Pf)
C ≠ D Figure 5-35. Judgment Visual Check Blocks Paper feed direction NOTE: The pattern is for Epson Stylus Pro 7900/7910/9900/9910/WT7900/ WT7910. The one for Epson Stylus Pro 7700/7710/7700M/7710M/9700/ CR scan direction 9710, Epson Stylus Pro 9890/9908/7890/7908 differs in color. - Page 382 Epson Stylus Pro 7700/7710/7700M/7710M/7900/7910/9700/9710/9900/9910/WT7900/WT7910/9890/9908/7890/7908 Revision I → → Select SELF TESTING Mecha Adjustment Temporary Press [OK] while [Enter] Un Cap is displayed. The carriage unit will be unlocked. Open the Front Cover (Middle). Head tilt lever securing screw Loosen the head tilt lever securing screw shown in Figure 5-36.
-
Page 383: Auto Uni-D Adjustment
Use this to perform an automatic Uni-D adjustment using the Ink Mark Sensor. After adjustment pattern was printed, the printer will automatically scan the pattern and correct it. PAPER USED Size: Epson Stylus Pro 9700/9710/9900/9910/9890/9908: 44 inches Epson Stylus Pro 7700/7710/7700M/7710M/7900/7910/WT7900/WT7910/ 7890/7908: 24 inches Type:... -
Page 384: Auto Bi-D Adjustment
Use this to perform an automatic Bi-D adjustment using the Ink Mark Sensor. After adjustment pattern is printed, the printer will automatically scan the pattern and correct misalignment. PAPER USED Epson Stylus Pro 9700/9710/9900/9910/9890/9908: 44 inches Epson Stylus Pro 7700/7710/7700M/7710M/7900/7910/WT7900/WT7910/ 7890/7908: 24 inches... -
Page 385: Colorimetric Calibration (Color Id)
Revision I 5.4.8 Colorimetric Calibration (Color ID) with SpectroProofer NOTE: This adjustment is for Epson Stylus Pro 7900/7910/9900/9910 only. This adjustment is described in the same manner as other models. C A U T I O N Therefore, the procedure is basically the same, but some actual steps or patterns may differ. - Page 386 Epson Stylus Pro 7700/7710/7700M/7710M/7900/7910/9700/9710/9900/9910/WT7900/WT7910/9890/9908/7890/7908 Revision I 5.4.8.2 Adjusting Method ADJUSTMENT WORKFLOW REQUIRED TOOLS The workflow of the adjustment is explained in this section. Table 5-2. Tools Required START Tool Application/Specification Plain Paper (A4) For nozzle check Cleaning EPSON Enhanced (Archival) Matte...
- Page 387 Epson Stylus Pro 7700/7710/7700M/7710M/7900/7910/9700/9710/9900/9910/WT7900/WT7910/9890/9908/7890/7908 Revision I ADJUSTMENT PROCEDURE Turn the printer power on. Start the Service Program, and select [Colorimetric Calibration Tool]. Click [Run] to start the “Colorimetric Calibration Tool”. Select the printer model. When several drivers are installed for one printer, check that the...
- Page 388 Epson Stylus Pro 7700/7710/7700M/7710M/7900/7910/9700/9710/9900/9910/WT7900/WT7910/9890/9908/7890/7908 Revision I Load an A4-sized paper vertically on the paper tray, click [Next] to start the nozzle check. Check the nozzle pattern. If there is any defect, execute the cleaning using the Control Panel of the printer.
- Page 389 Epson Stylus Pro 7700/7710/7700M/7710M/7900/7910/9700/9710/9900/9910/WT7900/WT7910/9890/9908/7890/7908 Revision I Make sure there is no missing dots in the nozzle check pattern at the bottom of the Do not contaminate the white plate of the calibration base plate. If C A U T I O N calibration chart.
- Page 390 Product name 2010-08-29 09:35 (GMT 2005-08-29 00:35) S/N : 0000000000 OS : Win BlackInk:Matte 2010-09-05 09:30 (GMT 2005-09-05 00:30) Printer : Epson Stylus Pro XXXXX Calibration patch Set the scanning ruler with its guide gap matched with the patch. Nozzle check Figure 5-45.
- Page 391 Epson Stylus Pro 7700/7710/7700M/7710M/7900/7910/9700/9710/9900/9910/WT7900/WT7910/9890/9908/7890/7908 Revision I 16. Click [OK] and follow the instructions (following procedure) displayed on the When measuring colors, pay attention to the instructions below. C A U T I O N screen to perform color measuring. Scan one line between five to ten seconds.
- Page 392 Epson Stylus Pro 7700/7710/7700M/7710M/7900/7910/9700/9710/9900/9910/WT7900/WT7910/9890/9908/7890/7908 Revision I If measuring color fails, you should turn the chart 90 degrees (so C H E C K P O I N T that the nozzle check pattern comes on the right) and move the calibrator from front to rear.
- Page 393 Epson Stylus Pro 7700/7710/7700M/7710M/7900/7910/9700/9710/9900/9910/WT7900/WT7910/9890/9908/7890/7908 Revision I 18. Make sure that the “READY” message is displayed on the printer LCD panel, and click [Next] to turn OFF and reboot the printer automatically and write the “Color ID” to the printer main unit.
- Page 394 Epson Stylus Pro 7700/7710/7700M/7710M/7900/7910/9700/9710/9900/9910/WT7900/WT7910/9890/9908/7890/7908 Revision I 20. Load an A4-sized Enhanced (Archival) Matte Paper vertically on the paper tray, and click [Next] to print the first page of the verify chart. Make sure to leave the adjustment chart for 5 minutes to dry it out.
- Page 395 Epson Stylus Pro 7700/7710/7700M/7710M/7900/7910/9700/9710/9900/9910/WT7900/WT7910/9890/9908/7890/7908 Revision I 26. Make sure that the date and time printed in the second line on the upper left of the chart (measurable time and date) is within the range displayed under the heading Main unit serial number S/N : 0000000000 “GMT”...
- Page 396 Epson Stylus Pro 7700/7710/7700M/7710M/7900/7910/9700/9710/9900/9910/WT7900/WT7910/9890/9908/7890/7908 Revision I 28. Click [OK] and follow the instructions (following procedure) displayed on the screen to perform color measuring. Set the calibrator with its measuring part matched with measuring start position (gray part) as shown in Figure 5-47.
- Page 397 Epson Stylus Pro 7700/7710/7700M/7710M/7900/7910/9700/9710/9900/9910/WT7900/WT7910/9890/9908/7890/7908 Revision I 31. Click [Save] to save the result under a new file name (txt file). 32. Click [End]. Figure 5-57. Entire Process Screen ADJUSTMENT Head Related Adjustments Confidential...
-
Page 398: Absorber Position Check
(This is a check only) Epson Stylus Pro 7700/7710/7700M/7710M/7900/7910/7890/7908:8 points NOTE: This adjustment is not applied to Epson Stylus Pro WT7900/WT7910. This adjustment is performed on the factory. It cannot be adjusted C A U T I O N PAPER USED on the field. -
Page 399: Ink Mark Sensor Height Adjustment
Epson Stylus Pro 7700/7710/7700M/7710M/7900/7910/9700/9710/9900/9910/WT7900/WT7910/9890/9908/7890/7908 Revision I 5.4.10 Ink Mark Sensor Height Adjustment Use the thickness gauge of 2.6 and 2.7 and check if the height of the Ink Mark Sensor is within the standard value. This allows you to adjust the position of the Ink Mark Sensor to make proper position... -
Page 400: Ink Mark Sensor Adjustment
Epson Stylus Pro 7700/7710/7700M/7710M/7900/7910/9700/9710/9900/9910/WT7900/WT7910/9890/9908/7890/7908 Revision I 5.4.11 Ink Mark Sensor Adjustment This allows you to adjust the sensitivity and the detecting position of the Ink Mark Sensor by printing the specified patterns and scanning it with the Ink Mark Sensor. -
Page 401: Air Leak Check For Ink Supply System
Epson Stylus Pro 7700/7710/7700M/7710M/7900/7910/9700/9710/9900/9910/WT7900/WT7910/9890/9908/7890/7908 Revision I 5.4.12 Air Leak Check for Ink Supply System Step 6 The ink supply path should be checked for air leaks whenever the Ink Tube, Ink Cartridge Holder or Dampers are replaced, or the joint of the Ink Cartridge Holder and the Damper is once loosened and retightened. - Page 402 Epson Stylus Pro 7700/7710/7700M/7710M/7900/7910/9700/9710/9900/9910/WT7900/WT7910/9890/9908/7890/7908 Revision I Turn each valve of the Ink Leak Measurement Jig as follows: <Part Names> Valve No.1: Closed Pressure Gauge (GC66) The battery can be replaced Valve No.2: Open from the hole on the rear. Power button Valve No.3: Open...
-
Page 403: Initial Ink Charge Flag On/Off
Epson Stylus Pro 7700/7710/7700M/7710M/7900/7910/9700/9710/9900/9910/WT7900/WT7910/9890/9908/7890/7908 Revision I 5.4.13 Initial Ink Charge Flag ON/OFF 5.4.14 Initial Ink Charge This allows you to set whether initial ink charging is executed or not when turning the This is to execute the initial ink charge. -
Page 404: Pf Related Adjustment
Microphone Remove the following parts in advance. IC Cover L and Shaft Cover L Maintenance Tank L (Epson Stylus Pro 9900/9910/9890/9908 only) Left Cover Install the following part after removing the Left Cover. Maintenance Tank L (Epson Stylus Pro 9900/9910/9890/9908 only) Screws Switch the open/close detection switch on the Left Cover to make cover closed. - Page 405 Epson Stylus Pro 7700/7710/7700M/7710M/7900/7910/9700/9710/9900/9910/WT7900/WT7910/9890/9908/7890/7908 Revision I Press [MEASURE] on the Sonic Tension Meter U-507 and flip the Timing Belt with tweezers in the direction of the arrow in Figure 5-65. Flip the Timing Belt as weak as the Sonic Tension Meter U-507 C A U T I O N can measure it.
-
Page 406: Skew Check
Epson Stylus Pro 7700/7710/7700M/7710M/7900/7910/9700/9710/9900/9910/WT7900/WT7910/9890/9908/7890/7908 Revision I 5.5.2 Skew Check This allows you to check the skew level of the paper and confirm if the paper feed is executed within the standard value. PAPER USED Size: 24 inches or more Paper feeding direction... -
Page 407: Band Feed
There are two methods in this adjustment. Select either of them C H E C K Epson Stylus Pro 7700/7710/7700M/7710M/7900/7910/9700/9710/9900/9910/ P O I N T according to the user's needs. (excluding Epson StylusPro WT7900/ 9890/9908/7890/7908 WT7910) High precision adjustment: Turn the printer ON in the Serviceman Mode. - Page 408 Epson Stylus Pro 7700/7710/7700M/7710M/7900/7910/9700/9710/9900/9910/WT7900/WT7910/9890/9908/7890/7908 Revision I Enter the following parameters that measured in Step 4 and press [OK]. Return to Step Epson Stylus Pro WT7900/WT7910 Turn the printer ON in the Serviceman Mode. Turn the power ON while pressing [Menu...
-
Page 409: T&B&S Adjustment
Epson Stylus Pro 7700/7710/7700M/7710M/7900/7910/9700/9710/9900/9910/WT7900/WT7910/9890/9908/7890/7908 Revision I 5.5.4 T&B&S Adjustment Press [OK] while [Enter] Print is displayed. The adjustment pattern will be printed. This allows you to adjust the top, bottom and side margins for the paper. Press [Pause/Reset] while [Pause] End is displayed. - Page 410 Epson Stylus Pro 7700/7710/7700M/7710M/7900/7910/9700/9710/9900/9910/WT7900/WT7910/9890/9908/7890/7908 Revision I Bottom margin (14 ± 0.5 mm) Paper feeding direction Side margin (15 ± 0.4 mm) Top margin (15 ± 0.4 mm) Top margin (15 ± 0.4 mm) Figure 5-68. Adjustment Pattern ADJUSTMENT PF Related Adjustment...
-
Page 411: Paper Thickness Sensor Position Adjustment
13. Check that “10” is displayed on the Control Panel. IC Cover (L/R) and IC Shaft Cover (L/R) Carry out the adjustment if the displayed value is other than “10”. → Maintenance Tank (L/R) (Maintenance Tank L is for Epson Stylus Pro 9900/ Go to adjustment procedure 9910/9890/9908 only) 14. - Page 412 Epson Stylus Pro 7700/7710/7700M/7710M/7900/7910/9700/9710/9900/9910/WT7900/WT7910/9890/9908/7890/7908 Revision I 19. Check that “11” is displayed on the Control Panel. Carry out the adjustment if the displayed value is other than “11”. Setting direction → Go to adjustment procedure 20. Press [Paper Set] to release the paper presser.
- Page 413 Epson Stylus Pro 7700/7710/7700M/7710M/7900/7910/9700/9710/9900/9910/WT7900/WT7910/9890/9908/7890/7908 Revision I ADJUSTMENT PROCEDURE Paper Thickness Sensor Holder Adjust sensor (1) when using the paper thickness position tool 0.4/0.5, or when the paper pressure rollers are locked and no adjustment jigs are available. Adjust sensor (2) when using the paper thickness position tool 0.8/0.9, or when the paper pressure rollers...
-
Page 414: Pf Encoder Sensor Adjustment
PROCEDURE Remove the following parts in advance. IC Cover L and IC Shaft Cover L Maintenance Tank L (Epson Stylus Pro 9900/9910/9890/9908 only) Screws Left Cover Check the positional relation of the detector for the PF Encoder Sensor and PF Scale. -
Page 415: Rear Sensor Ad Adjustment
Epson Stylus Pro 7700/7710/7700M/7710M/7900/7910/9700/9710/9900/9910/WT7900/WT7910/9890/9908/7890/7908 Revision I 5.5.7 Rear Sensor AD Adjustment When executing procedure below, do not remove the external parts C A U T I O N to acquire proper AD value. This allows you to acquire AD values of the newly attached Rear Sensor to store them onto the Main Board as a standard for reading operation of the sensor. -
Page 416: Aid Related Adjustment
NG after cleaning, replace the Ink Epson Stylus Pro 9700/9710/9900/9910/9890/9908: 44 inches System Unit with a new one. Carry out a nozzle check. If dot missing Epson Stylus Pro 7700/7710/7700M/7710M/7900/7910/7890/7908:24 inches occurs to a particular nozzle, replace the Printhead. Type: AID Board failure Replace the AID Board with a new one. - Page 417 Epson Stylus Pro 7700/7710/7700M/7710M/7900/7910/9700/9710/9900/9910/WT7900/WT7910/9890/9908/7890/7908 Revision I Fig. Display Cause Remedy No error or abnormality. Dot missing occurs. Carry out a head cleaning. If the result is still NG after cleaning, replace the Ink System Unit with a new one. Carry out a nozzle check. If dot missing...
-
Page 418: Other Adjustment
Epson Stylus Pro 7700/7710/7700M/7710M/7900/7910/9700/9710/9900/9910/WT7900/WT7910/9890/9908/7890/7908 Revision I 5.7 Other Adjustment 5.7.1 Setting Destination Step 3 Save the destination to the Main Board. Step 4 PROCEDURE Turn the printer ON in the Serviceman Mode. Turn the power ON while pressing [Menu ] + [Paper Feed ] + [OK] simultaneously. -
Page 419: Input Cr/Pf Motor Current
Epson Stylus Pro 7700/7710/7700M/7710M/7900/7910/9700/9710/9900/9910/WT7900/WT7910/9890/9908/7890/7908 Revision I 5.7.2 Input CR/PF Motor Current Turn the printer ON. Start the Service Program, and select Input CR Motor Current Input PF Use this to write characteristics of the CR and PF motor to the Main Board. The... -
Page 420: Rtc And Usb Id
Epson Stylus Pro 7700/7710/7700M/7710M/7900/7910/9700/9710/9900/9910/WT7900/WT7910/9890/9908/7890/7908 Revision I 5.7.3 RTC and USB ID If the printer is turned OFF and back ON after changing the USB C A U T I O N This allows you to reset the date and time of the RTC backup battery and to set the ID, the computer (Windows) detects the USB port used to connect USB ID. -
Page 421: Installing Firmware
Epson Stylus Pro 7700/7710/7700M/7710M/7900/7910/9700/9710/9900/9910/WT7900/WT7910/9890/9908/7890/7908 Revision I 5.7.4 Installing Firmware PROCEDURE This section explains how to update the firmware. The firmware of this printer is Turn the power OFF of the printer and computer, and connect the printer to the written in the Flash ROM on the Main Board. If the main board is replaced or the computer with a USB or network cable. - Page 422 Epson Stylus Pro 7700/7710/7700M/7710M/7900/7910/9700/9710/9900/9910/WT7900/WT7910/9890/9908/7890/7908 Revision I Start the Service Program and select Firmware Update Tool. Figure 5-79. [Firmware Update Tool] Screen Click [Browse], and select a firmware data. Click [Update] to transfer the firmware data. When updating starts, a progress bar is displayed on the Control C A U T I O N Panel of the printer.
-
Page 423: Input Serial Number
Epson Stylus Pro 7700/7710/7700M/7710M/7900/7910/9700/9710/9900/9910/WT7900/WT7910/9890/9908/7890/7908 Revision I 5.7.5 Input Serial Number Use this to write the printer serial number to the NVRAM, or to check the serial number written in the NVRAM. PROCEDURE Turn the printer ON. Start the Service Program, and select... -
Page 424: Input Mac Address
Epson Stylus Pro 7700/7710/7700M/7710M/7900/7910/9700/9710/9900/9910/WT7900/WT7910/9890/9908/7890/7908 Revision I 5.7.6 Input MAC Address Open the front cover and enter the MAC address written on the MAC address label attached inside the printer, then click the [Run] button. The MAC address of this printer is recorded on the NVRAM of the Main Board. When replacing the board, make sure to write the MAC address to the new board as follows. -
Page 425: Cut Position Adjustment
PAPER USED Paper feeding Size direction Epson Stylus Pro 9700/9710/9900/9910/9890/9908: 44 inches Epson Stylus Pro 7700/7710/7700M/7710M/7900/7910/7890/7908:24 inches Type: Premium Glossy Photo Paper (250) STANDARD VALUE Figure 5-83. Adjustment Pattern 15 ± 0.3 mm PROCEDURE Turn the printer ON in the Serviceman Mode. -
Page 426: Ink Holder Adjustment
Epson Stylus Pro 7700/7710/7700M/7710M/7900/7910/9700/9710/9900/9910/WT7900/WT7910/9890/9908/7890/7908 Revision I 5.7.8 Ink Holder Adjustment Adjusts the necessary adjustment when replacing the Ink Cartridge Holder or the Ink Holder Board Assy. PROCEDURE After replacing the Ink Cartridge Holder, do not insert the ink C A U T I O N cartridges before doing the adjustment. -
Page 427: Clear Counters
Epson Stylus Pro 7700/7710/7700M/7710M/7900/7910/9700/9710/9900/9910/WT7900/WT7910/9890/9908/7890/7908 Revision I 5.8 Clear Counters Table 5-3. Clear Counter Menu List 7900/ 7700/ Whenever the parts/units which have life counter are replaced, the corresponding life Replaced Part/Unit Menu Name 7910/ 7710/ WT7900/ counter must be reset. This is important to replace those parts/units at the correct... -
Page 428: Tests
Epson Stylus Pro 7700/7710/7700M/7710M/7900/7910/9700/9710/9900/9910/WT7900/WT7910/9890/9908/7890/7908 Revision I 5.9 Tests 5.9.2 Suction Fan Operation Check This allows you to check if Suction Fan is operated correctly. 5.9.1 Network Communication Check PROCEDURE Use this to check if the printer can communicate with the computer via a network. -
Page 429: Color Lcd Display Check
Panel displayed. To select the next color, press [Pause/Reset] or [Paper Source Epson Stylus Pro 7900/7910/9900/9910/ 7890/7908/9890/9908: BK Change Auto R Epson Stylus Pro 7700/7710/9700/9710/WT7900/WT7910: CL LCD RGB Check Green Blue Pause Ink Cover Cutter Figure 5-87. -
Page 430: Inspection Of The Spectroproofer
Epson Stylus Pro 7700/7710/7700M/7710M/7900/7910/9700/9710/9900/9910/WT7900/WT7910/9890/9908/7890/7908 Revision I 5.9.5 Inspection of the SpectroProofer ROCEDURE TO START THE INSPECTION PROGRAM This inspection checks each part and function of the SpectroProofer operates normally. Start the Service Program. Select ADJUSTMENTS (Individual). INSPECTION CONTEXT Select Checking SpectroProofer. - Page 431 Epson Stylus Pro 7700/7710/7700M/7710M/7900/7910/9700/9710/9900/9910/WT7900/WT7910/9890/9908/7890/7908 Revision I Sensors check MOUNTER ONLY TEST’S PROCEDURE Select Sensors check from the inspection program. Preparation When the following screen appears, remove the mounter from the printer. Start the inspection program. (It is OK to detach the right side of the mounter from the printer slightly.) Connect the mounter to the computer with a USB cable.
- Page 432 Epson Stylus Pro 7700/7710/7700M/7710M/7900/7910/9700/9710/9900/9910/WT7900/WT7910/9890/9908/7890/7908 Revision I Install the mounter on the printer. Enter the temperature around the printer and click on the [OK] button. Click on the [OK] button. Figure 5-94. Temperature Input Screen Take a measure according to the color of displayed screen.
- Page 433 Epson Stylus Pro 7700/7710/7700M/7710M/7900/7910/9700/9710/9900/9910/WT7900/WT7910/9890/9908/7890/7908 Revision I Fan Check Confirm that the air blows normally by inserting your hand from the bottom of the mounter. The fans will operate for 30 seconds. Select check. If the air does not blow, follow the instruction below.
- Page 434 Epson Stylus Pro 7700/7710/7700M/7710M/7900/7910/9700/9710/9900/9910/WT7900/WT7910/9890/9908/7890/7908 Revision I CR move Confirm that the carriage operates normally. If not, follow the instruction below. Perform this check while the mounter is installed on the printer, or C A U T I O N placed on a flat location.
- Page 435 Epson Stylus Pro 7700/7710/7700M/7710M/7900/7910/9700/9710/9900/9910/WT7900/WT7910/9890/9908/7890/7908 Revision I MOUNTER + ILS TEST PROCEDURE Preparation Start the inspection program. Install the Color Measurement Device, the holder, and the white calibration tile black backing. Connect the Color Measurement Device to the printer with a USB cable.
- Page 436 Epson Stylus Pro 7700/7710/7700M/7710M/7900/7910/9700/9710/9900/9910/WT7900/WT7910/9890/9908/7890/7908 Revision I Calibration check After taking the above measure, make sure to restart the printer C A U T I O N Select Calibration check. before re-checking. If the following screen appears, click on the [OK] button.
- Page 437 Epson Stylus Pro 7700/7710/7700M/7710M/7900/7910/9700/9710/9900/9910/WT7900/WT7910/9890/9908/7890/7908 Revision I Paper holder check Select Paper holder check. If the following screen appears, click on the [OK] button. Figure 5-106. Confirmation Screen Figure 5-105. [Paper holder check] Screen While the following screen is displayed, check the status of Paper Pressing Plate.
- Page 438 Epson Stylus Pro 7700/7710/7700M/7710M/7900/7910/9700/9710/9900/9910/WT7900/WT7910/9890/9908/7890/7908 Revision I Confirm the blue screen appears, click on the [OK] button. Figure 5-108. Confirmation Screen ADJUSTMENT Tests Confidential...
- Page 439 Epson Stylus Pro 7700/7710/7700M/7710M/7900/7910/9700/9710/9900/9910/WT7900/WT7910/9890/9908/7890/7908 Revision I Tile position check Take a measure according to the color of displayed screen. Select Tile position check. Screen Description Remedy If the following screen appears, click on the [OK] button to start the check.
- Page 440 Epson Stylus Pro 7700/7710/7700M/7710M/7900/7910/9700/9710/9900/9910/WT7900/WT7910/9890/9908/7890/7908 Revision I Colorimetry CR Inspection Take a measure according to the color of displayed screen. Use the black backing for this inspection. If the white backing is Screen C A U T I O N Description...
- Page 441 Epson Stylus Pro 7700/7710/7700M/7710M/7900/7910/9700/9710/9900/9910/WT7900/WT7910/9890/9908/7890/7908 Revision I Colorimetry PF Inspection Take a measure according to the color of displayed screen. Use the black backing for this inspection. If the white backing is Screen C A U T I O N Description...
- Page 442 Epson Stylus Pro 7700/7710/7700M/7710M/7900/7910/9700/9710/9900/9910/WT7900/WT7910/9890/9908/7890/7908 Revision I Take-up Reel USB host check Select Take-up Reel USB host check. If the following screen appears, click on the [OK] button. Figure 5-114. [Colorimetry CR Inspection] Screen Take a measure according to the color of displayed screen.
-
Page 443: Check Adjustments Results
Epson Stylus Pro 7700/7710/7700M/7710M/7900/7910/9700/9710/9900/9910/WT7900/WT7910/9890/9908/7890/7908 Revision I 5.10 Check Adjustments Results This allows you to print all the adjustment values. PAPER USED Size: Type: Plain Paper PROCEDURE Turn the printer ON in the Serviceman Mode. Turn the power ON while pressing [Menu... - Page 444 C H A P T E R MAINTENANCE Confidential...
-
Page 445: Overview
Epson Stylus Pro 9900/9910/9890/9908 weighs approx. 135kg, operating condition. Epson Stylus Pro 7900/7910/7890/7908 weighs approx. 101kg, Epson Stylus Pro 9700/9710 weights approx. 120kg and Epson Basically, servicing on the printer should be performed on-site. Be sure to strictly Stylus Pro 7700/7710/7700M/7710M weights approx. 90kg and observe the following precautions when servicing to avoid an accident or injury Epson Stylus Pro WT7900/WT7910 weights approx. - Page 446 Epson Stylus Pro 7700/7710/7700M/7710M/7900/7910/9700/9710/9900/9910/WT7900/WT7910/9890/9908/7890/7908 Revision I Be sure to spread a sheet of paper or cloth on the work space C A U T I O N before removing any ink-path-related parts or components to keep the space from being soiled with leaked ink.
-
Page 447: Chapter 6 Maintenance
Print regularly to prevent clogging of the nozzles. Turn on the printer at least once a month, and leave it on for a few minutes. When installing the Epson Film Basket to Epson Stylus Pro C A U T I O N WT7900/WT7910, more space is needed in front of the printer. - Page 448 Cleaning of the ink path is made in the following procedure. For the C H E C K P O I N T time required for each process, see the following (The required time below is for Epson Stylus Pro 7900/7910/9900/9910): → Charging cleaning fluid discharging it (approx. 20min.) →...
-
Page 449: Transportation
Epson Stylus Pro 7700/7710/7700M/7710M/7900/7910/9700/9710/9900/9910/WT7900/WT7910/9890/9908/7890/7908 Revision I 6.3 Transportation SETTING UP THE PRINTER AFTER TRANSPORTATION Make sure that the installation site is proper. Make sure to keep the ink cartridge installed so as to prevent C A U T I O N ink from leaking or the printhead from drying. -
Page 450: Cleaning
Turn on the printer, and set the roll paper. (Set the roll paper of 44-inch width for If there is a serious problem of dirt, clean it using a soft, clean cloth dampened Epson Stylus Pro 9700/9710/9900/9910/9890/9908, and 24-inch width for Epson with a mild detergent. Then, wipe the platen with a dry, soft cloth. - Page 451 Epson Stylus Pro 7700/7710/7700M/7710M/7900/7910/9700/9710/9900/9910/WT7900/WT7910/9890/9908/7890/7908 Revision I CLEANING THE PLATEN’S SUCKING HOLES If the paper feeding is unstable (if some floating or skewing of the paper can be seen), check the sucking holes on the platen for paper dust clogging there. If there are some clogging, clean the holes as follows.
-
Page 452: Lubrication
Epson Stylus Pro 7700/7710/7700M/7710M/7900/7910/9700/9710/9900/9910/WT7900/WT7910/9890/9908/7890/7908 Revision I 6.5 Lubrication Lubrication Corresponding Part Name of Lubricant Reference Part name: G-84 LUBRICATION CR Guide Shaft (Full) p.457 1516265 Part code: Part name: G-74 This section describes necessary lubrication to maintain the functions and performance Roll Paper Guide Rail p.458... - Page 453 Epson Stylus Pro 7700/7710/7700M/7710M/7900/7910/9700/9710/9900/9910/WT7900/WT7910/9890/9908/7890/7908 Revision I [Lubrication 1] [Lubrication 2] Part Name Roll Cover Assy (home side) Part Name Roll Cover Assy (full side) Lubrication Point On the sliding parts of the guide pin of the Roll Cover Assy Lubrication Point...
- Page 454 Epson Stylus Pro 7700/7710/7700M/7710M/7900/7910/9700/9710/9900/9910/WT7900/WT7910/9890/9908/7890/7908 Revision I [Lubrication 3] [Lubrication 4] Part Name Roll Cover Assy (home side) Part Name Sub Frame L Lubrication Point On the contact points of the mounting plate with the Roll Cover Assy Lubrication Point On the contact point of the Sub Frame L with the Roll Cover Assy...
- Page 455 Epson Stylus Pro 7700/7710/7700M/7710M/7900/7910/9700/9710/9900/9910/WT7900/WT7910/9890/9908/7890/7908 Revision I [Lubrication 5] [Lubrication 6] Part Name Roll Cover Assy (full side) Part Name Carriage Unit Lubrication Point On the contact point of the Roll Cover Assy with the mounting plate Lubrication Point On the contact point of the PG Cam with the Shield plate...
- Page 456 Epson Stylus Pro 7700/7710/7700M/7710M/7900/7910/9700/9710/9900/9910/WT7900/WT7910/9890/9908/7890/7908 Revision I [Lubrication 7] [Lubrication 8] Part Name Carriage Unit Part Name Carriage Unit Lubrication Point On the contact point of the CR Slider with the CR Guide Shaft Lubrication Point The holes (4 places) at both ends of the CR Unit rear side...
- Page 457 Epson Stylus Pro 7700/7710/7700M/7710M/7900/7910/9700/9710/9900/9910/WT7900/WT7910/9890/9908/7890/7908 Revision I [Lubrication 9] [Lubrication 10] Part Name CR Guide Shaft Part Name CR Guide Shaft On the contact point of the CR Guide Shaft (home side) with the CR Lubrication Point On the contact point of the CR Guide Shaft (full side) with the CR Unit...
- Page 458 Epson Stylus Pro 7700/7710/7700M/7710M/7900/7910/9700/9710/9900/9910/WT7900/WT7910/9890/9908/7890/7908 Revision I [Lubrication 11] Part Name Roll Paper Guide Rail On the contact point of the Roll Paper Guide Rail with the Roll Paper Lubrication Point Guide Lubricants G-74 Amount Apply the grease all over the rail.
-
Page 459: Chapter 7 Epson Stylus Pro 7700M/7710M (Copy Mode)
C H A P T E R Epson Stylus Pro 7700M/7710M (Copy Mode) Confidential... -
Page 460: Overview
7.1 Overview Epson Stylus Pro 7700M/7710M offers the copy function with the scanner (GT-2500) connected. This chapter provides information on the copy function of Epson Stylus Pro 7700M/7710M. For the details about the GT-2500, refer to its service manual. Print specification of Epson Stylus Pro 7700M/7710M Refer to “PRODUCT DESCRIPTION... -
Page 461: Basic Specifications
A2-width one by one, and sticking the two sheets together. *2 : Selection is limited when using the ADF. *3 : Borderless printing is not available on plain paper. Epson Stylus Pro 7700M/7710M (Copy Mode) Basic Specifications Confidential... -
Page 462: Copy Mode
Copy paper type: Photo paper When Do not remove the document from the document glass until the last scanning is complete. Figure 7-1. Mode Switch Screen Figure 7-2. The Number of Copies Setting Screen Epson Stylus Pro 7700M/7710M (Copy Mode) Copy Mode Confidential... - Page 463 When any size other than the above is loaded, the original is enlarged to fit in the any one of the above size closest to the detected size of loaded paper. Therefore, margins like shown in Figure 7-4 (the gray portion) will appear. Epson Stylus Pro 7700M/7710M (Copy Mode) Copy Mode Confidential...
- Page 464 Specifies whether to cut or not B5->A0 (2SHEETS) AUTO CUT “WITH BORDER / cut the paper after printing. DISABLE A5->A1 BORDERLESS” setting screen is displayed. A5->B2 A5->A2 A5->A0 (2SHEETS) LTR->A1 LTR->B2 LTR->A2 LTR->A0 (2SHEETS) Epson Stylus Pro 7700M/7710M (Copy Mode) Copy Mode Confidential...
-
Page 465: Chapter 8 Appendix
C H A P T E R APPENDIX Confidential... -
Page 466: Block Wiring Diagram
Revision I 8.1 Block Wiring Diagram NOTE : This Block diagram is for Epson Stylus Pro 7900/7910/9900/9910. Some of the parts differ from Epson Stylus Pro 7700/7710/7700M/7710M/9700/9710, Epson Stylus Pro WT7900/WT7910 and Epson Stylus Pro 9890/9908/7890/7908. 8.1.1 Main Body Ink Selector Sensor... -
Page 467: Auto Take-Up Reel
Epson Stylus Pro 7700/7710/7700M/7710M/7900/7910/9700/9710/9900/9910/WT7900/WT7910/9890/9908/7890/7908 Revision I 8.1.2 Auto Take-up Reel 8.1.3 SpectroProofer NOTE : Not for Epson Stylus Pro 7700/7710/7700M/7710M/9700/9710/ WT7900/WT7910/7890/7908. SpectroProofer DC Board Cooling Fan 1 Cooling Fan 2 Paper Pressing Plate Sensor CN26 CR HP Sensor CN10 CN17... -
Page 468: Panel Menu Map
Epson Stylus Pro 7700/7710/7700M/7710M/7900/7910/9700/9710/9900/9910/WT7900/WT7910/9890/9908/7890/7908 Revision I 8.2 Panel Menu Map This section provides the map of executable menus on the Control Panel. 8.2.1 Epson Stylus Pro 7900/7910/9900/9910/7890/7908/ 9890/9908 APPENDIX Panel Menu Map Confidential... - Page 469 Epson Stylus Pro 7900/7910/9900/9910/7890/7908/9890/9908 User Menu Map PAPER SKEW CHECK PLATEN GAP NARROW : Default setting STANDARD WIDE REFRESH MARGIN WIDER WIDEST PRINTER SETUP PLATEN GAP PAGE LINE PAGE LINE AUTO NOZZLE CHECK ROLL PAPER MARGIN ON: PERIODICALLY PAPER SIZE CHECK...
- Page 470 Speed Return Speed Wait 1 Wait 2 Fan 1 Fan 2 Life Count Take up Life Count (TBD) Colorimetric Carrier Life Count (TBD) Paper Pressing Plate Life Count (TBD) Carrir + Plate Life Count (TBD) *Epson Stylus Pro 7900/7910/9900/9910 only.
-
Page 471: Epson Stylus Pro 7700/7710/7700M/7710M/9700/9710
Epson Stylus Pro 7700/7710/7700M/7710M/7900/7910/9700/9710/9900/9910/WT7900/WT7910/9890/9908/7890/7908 Revision I 8.2.2 Epson Stylus Pro 7700/7710/7700M/7710M/9700/9710 APPENDIX Panel Menu Map Confidential... - Page 472 Epson Stylus Pro 7700/7710/7700M/7710M/9700/9710 User Menu Map PAPER SKEW CHECK PLATEN GAP NARROW STANDARD :Default setting WIDE REFRESH MARGIN WIDER WIDEST PAGE LINE PRINTER SETUP AUTO NOZZLE CHECK PLATEN GAP ON: PERIODICALLY PAGE LINE ON: EVERY JOB ROLL PAPER MARGIN...
- Page 473 Epson Stylus Pro 7700/7710/7700M/7710M/9700/9710 Serviceman Mode Map Test Version Version xxxxxx.xx.xx.xxxx Error History Paper (Duty) Paper1 Paper2 Paper3 Variable Mode PF Ageing 15 deg Variable Mode Ageing 400 45 deg 90 deg Ageing 12 Adjustment Mecha Adjustment Cleaning PG 2.2 stop...
-
Page 474: Epson Stylus Pro Wt7900/Wt7910
Epson Stylus Pro 7700/7710/7700M/7710M/7900/7910/9700/9710/9900/9910/WT7900/WT7910/9890/9908/7890/7908 Revision I 8.2.3 Epson Stylus Pro WT7900/WT7910 APPENDIX Panel Menu Map Confidential... - Page 475 Epson Stylus Pro WT7900/WT7910 User Menu Map PAPER SKEW CHECK PLATEN GAP NARROW STANDARD :Default setting WIDE AUTO NOZZLE CHECK WIDER ON: PERIODICALLY WIDEST ON: EVERY JOB PAGE LINE PRINTER SETUP PLATEN GAP PRINT NOZZLE PATTERN PAGE LINE ROLL PAPER MARGIN...
- Page 476 Epson Stylus Pro WT7900/WT7910 Serviceman Mode Map Test Version Version xxxxxx.xx.xx.xxxx Error History Paper (Duty) Paper1 Paper2 Variable Mode PF Ageing Mecha Adjustment Variable Mode 15 deg Paper Ageing 400 45 deg RearAD 90 deg Ageing 12 Selector Check APG Check...
-
Page 477: Epson Stylus Pro 7700M/7710M (Copy Mode)
Epson Stylus Pro 7700/7710/7700M/7710M/7900/7910/9700/9710/9900/9910/WT7900/WT7910/9890/9908/7890/7908 Revision I 8.2.4 Epson Stylus Pro 7700M/7710M (Copy Mode) NOTE : See “Epson Stylus Pro 7700/7710/7700M/7710M/9700/9710 (p471)” for information on the user interface menus and service mode menus. APPENDIX Panel Menu Map Confidential... - Page 478 • Epson Stylus Pro 7700M/7710M Copy Mode Map : Default setting DENSITY COLOR/B&W -2,-1,0•@ ,•{1,•{2 COLOR B&W PAPER TYPE QUALITY PlainPaper DRAFT Singleweight Matte NORMAL Doubleweight Matte FINE TOP MENU Enhanced Matte CHANGE SETTING CHANGE SETTING COLOR/B&W Premium Glossy 170...
-
Page 479: Part Names Used In This Manual
Epson Stylus Pro 7700/7710/7700M/7710M/7900/7910/9700/9710/9900/9910/WT7900/WT7910/9890/9908/7890/7908 Revision I 8.3 Part names used in this manual Table 8-1. Conversion Table Ref. Part name used in this manual ASP part name (Ch4 sec.No.) To make it easier to locate the target part from its part name, this manual uses the part names different from the ASP part names. - Page 480 Epson Stylus Pro 7700/7710/7700M/7710M/7900/7910/9700/9710/9900/9910/WT7900/WT7910/9890/9908/7890/7908 Revision I Table 8-1. Conversion Table Table 8-1. Conversion Table Ref. Ref. Part name used in this manual ASP part name Part name used in this manual ASP part name (Ch4 sec.No.) (Ch4 sec.No.) Printhead PRINTHEAD 4.4.6.3...
-
Page 481: Parts List
8.4 Parts List Table 8-2. Epson Stylus Pro 9900/9910 Ref No Part Name NOTE : This Parts List is for Epson Stylus Pro 7900/7910/9900/9910. Some SHAFT,COVER,IC,RIGHT,UNIT,ESL,ASP of the items differ from Epson Stylus Pro 7700/7710/7700M/7710M/ STOPPER,COVER,FRONT 9700/9710/WT7900/WT7910/9890/9908/7890/7908, therefore refer GROUNDING PLATE,ROLL to Service Parts Information as necessary. - Page 482 Epson Stylus Pro 7700/7710/7700M/7710M/7900/7910/9700/9710/9900/9910/WT7900/WT7910/9890/9908/7890/7908 Revision I Table 8-2. Epson Stylus Pro 9900/9910 Table 8-2. Epson Stylus Pro 9900/9910 Ref No Part Name Ref No Part Name FAN ASSY.,ASP HARNESS,DRV,RIGHT,UPPER,ASP GUIDE ROLL PAPER,L,UNIT,B,ESL,ASP HARNESS,CR,ASP MOUNTING PLATE COVER ROLL PAPER LEFT,ASP HARNESS,DRV,RIGHT,LOWER,ASP REWIND,UNIT,ESL,ASP TUBE ASSY.,SUPPLY,INK;B,ASP...
- Page 483 Epson Stylus Pro 7700/7710/7700M/7710M/7900/7910/9700/9710/9900/9910/WT7900/WT7910/9890/9908/7890/7908 Revision I Table 8-2. Epson Stylus Pro 9900/9910 Table 8-2. Epson Stylus Pro 9900/9910 Ref No Part Name Ref No Part Name HARNESS,ASP CABLE,FAN,LEFT,ASP HARNESS,RELAY,SUB,C,ASP HARNESS,MAINTENANCE TANK,LEFT,ASP HARNESS,RELAY,AID,ASP P.W.,4.3X0.8X8,F/ZN-3C PUMP,CAP,ASSY,B,ESL,ASP WIPER,ASSY,ASP HARNESS CABLE,SENSOR,RELEASE,ASP COMBINATION GEAR,29,59.2,ASP COMBINATION GEAR,23.2,48.8,ASP COMBINATION GEAR,18.4,37.6,ASP...
- Page 484 Epson Stylus Pro 7700/7710/7700M/7710M/7900/7910/9700/9710/9900/9910/WT7900/WT7910/9890/9908/7890/7908 Revision I Table 8-3. Epson Stylus Pro 7900/7910 Epson Stylus Pro 7900/7910 Ref No Part Name Table 8-3. Epson Stylus Pro 7900/7910 LABEL,ROLL PAPER SET,PAPER GUIDE LOWER Ref No Part Name COVER,FRONT,24,ASP PIPE,BASKET,CENTER,24,ASP LOGO PLATE,86.5X21.6 ARM,BASKET,24,ASP CATCH,STRIKER BASKET ASSY.,24,ASP...
- Page 485 Epson Stylus Pro 7700/7710/7700M/7710M/7900/7910/9700/9710/9900/9910/WT7900/WT7910/9890/9908/7890/7908 Revision I Table 8-3. Epson Stylus Pro 7900/7910 Table 8-3. Epson Stylus Pro 7900/7910 Ref No Part Name Ref No Part Name CABLE,DETECTOR,HP,CR,ASP CATCH DETECTOR,PAPER THICKNESS,UNIT,ESL,ASP PAPER,EJECTION,ROLLER,PE,UNIT,ESL,ASP PANEL,UNIT,ESL,ASP FRAME,RAIL,CUTTER,UNIT,24,ESL,ASP HARNESS,PANEL,ASP CABLE CLAMP GUIDE,ROLL,PAPER,RIGHT,UNIT,ESL,ASP GUIDE,COVER,ROLL PAPER,SUPPORT PULLEY,DRIVEN,UNIT,24,ESL,ASP...
- Page 486 Epson Stylus Pro 7700/7710/7700M/7710M/7900/7910/9700/9710/9900/9910/WT7900/WT7910/9890/9908/7890/7908 Revision I Table 8-3. Epson Stylus Pro 7900/7910 Ref No Part Name COMBINATION GEAR,29,59.2,ASP COMBINATION GEAR,23.2,48.8,ASP COMBINATION GEAR,18.4,37.6,ASP COMBINATION GEAR,26,12.8,ASP SPUR GEAR,43,ASP PROTECTION PLATE FFC,ASP EDGE SADDLE PULLEY PF,ASP MOTOR ASSY.,PF.,ASP CABLE,GROUNDING,PF,ASP BOARD ASSY.,ENCODER,PF HARNESS,ENCODER,PF,ASP SCALE,PF,UNIT,ESL,ASP...
- Page 487 Epson Stylus Pro 7700/7710/7700M/7710M/7900/7910/9700/9710/9900/9910/WT7900/WT7910/9890/9908/7890/7908 Revision I AUTO TAKE-UP REEL Table 8-4. Auto Take-up Reel Ref No. Part Name 1001 WINDER FLANGE L,UNIT,ESL,ASP 1002 WINDER FLANGE R,UNIT,ESL,ASP 1003 SPUR GEAR,72 1004 COMBINATION GEAR,19,60.8 1005 COMBINATION GEAR,21.6,37.5 1006 COVER,WINDER,DRIVE 1007 PANEL,SW 1008...
- Page 488 Epson Stylus Pro 7700/7710/7700M/7710M/7900/7910/9700/9710/9900/9910/WT7900/WT7910/9890/9908/7890/7908 Revision I Table 8-5. SpectroProofer for Epson Stylus Pro 9900/9910 SpectroProofer for Epson Stylus Pro 9900/9910 Ref No Part Name Table 8-5. SpectroProofer for Epson Stylus Pro 9900/9910 CABLE CLAMP Ref No Part Name FLAT CLAMP,FCR-15 V0...
- Page 489 Epson Stylus Pro 7700/7710/7700M/7710M/7900/7910/9700/9710/9900/9910/WT7900/WT7910/9890/9908/7890/7908 Revision I Table 8-6. SpectroProofer for Epson Stylus Pro 7900/7910 SpectroProofer for Epson Stylus Pro 7900/7910 Ref No Part Name Table 8-6. SpectroProofer for Epson Stylus Pro 7900/7910 CABLE CLAMP Ref No Part Name FLAT CLAMP,FCR-15 V0...
-
Page 490: Exploded Diagram
8.5 Exploded Diagram NOTE : This Exploded Diagram is for Epson Stylus Pro 7900/7910/9900/ 9910. Some of the items differ from Epson Stylus Pro 7700/7710/ 7700M/7710M/9700/9710, Epson Stylus Pro WT7900/WT7910, Epson Stylus Pro 7890/7908/9890/9908 therefore refer to Service Parts Information as necessary. - Page 491 Only numbered Service Parts are available. PX-H10000 No.1 Rev.05 CA11-ACCE-015EHC...
- Page 492 Only numbered Service Parts are available. (539) (539) (539) No.2 PX-H10000 Rev.05 CA11-CASE-015EHC...
- Page 493 Only numbered Service Parts are available. Stylus Pro 9900/ Stylus Pro 9910/ PX-H10000 No.3 Rev.01 CA11-ELEC-011...
- Page 494 Only numbered Service Parts are available. MECH-02x MECH-03x MECH-05x MECH-04x MECH-06x Stylus Pro 9900/ Stylus Pro 9910/ PX-H10000 No.4 Rev.01 CA11-MECH-011...
- Page 495 Only numbered Service Parts are available. Stylus Pro 9900/ Stylus Pro 9910/ PX-H10000 No.5 Rev.01 CA11-MECH-021...
- Page 496 Only numbered Service Parts are available. 527 527 Stylus Pro 9900/ Stylus Pro 9910/ PX-H10000 No.6 Rev.06 CA11-MECH-036...
- Page 497 Only numbered Service Parts are available. No.7 Stylus Pro 9900/ Stylus Pro 9910/ PX-H10000 Rev.03 CA11-MECH-043...
- Page 498 Only numbered Service Parts are available. Stylus Pro 9900/ Stylus Pro 9910/ PX-H10000 No.8 Rev.02 CA11-MECH-052...
- Page 499 Only numbered Service Parts are available. No.9 Stylus Pro 9900/ Stylus Pro 9910/ PX-H10000 Rev.02 CA11-MECH-062...
- Page 500 Only numbered Service Parts are available. No.1 PX-H8000 Rev.05 CA12-ACCE-025...
- Page 501 Only numbered Service Parts are available. (539) (539) PX-H8000 No.2 Rev.05 CA12-CASE-025...
- Page 502 Only numbered Service Parts are available. Stylus Pro 7900/ Stylus Pro 7910/ PX-H8000 No.3 Rev.01 CA12-ELEC-011...
- Page 503 Only numbered Service Parts are available. MECH-02x MECH-03x MECH-04x MECH-05x MECH-06x Stylus Pro 7900/ Stylus Pro 7910/ PX-H8000 No.4 Rev.01 CA12-MECH-011...
- Page 504 Only numbered Service Parts are available. Stylus Pro 7900/ Stylus Pro 7910/ PX-H8000 No.5 Rev.01 CA12-MECH-021...
- Page 505 Only numbered Service Parts are available. 527 527 Stylus Pro 7900/ Stylus Pro 7910/ PX-H8000 No.6 Rev.06 CA12-MECH-036...
- Page 506 Only numbered Service Parts are available. Stylus Pro 7900/ Stylus Pro 7910/ PX-H8000 No.7 Rev.02 CA12-MECH-042...
- Page 507 Only numbered Service Parts are available. Stylus Pro 7900/ Stylus Pro 7910/ PX-H8000 No.8 Rev.02 CA12-MECH-052...
- Page 508 Only numbered Service Parts are available. Stylus Pro 7900/ Stylus Pro 7910/ PX-H8000 No.9 Rev.02 CA12-MECH-062...
- Page 509 Only numbered Service Parts are available. 1016 1001 1015 1003 1025 1014 1023 1004 1005 1020 1024 1019 1011 1012 1006 1018 1010 1022 1002 1007 1013 1017 1027 1008 1009 No.1 Ž©“®ŠªŽæ‚胆ƒjƒbƒg Rev.01 C815-CASE-021...
- Page 510 Only numbered Service Parts are available. (white) (white) (black) (black) PXHACM44 No.1 Rev.01 C890-ACCE-021SPM44...
- Page 511 Only numbered Service Parts are available. SpectroProofer Mounter 44"/PXHACM44 No.2 C890-CASE-011SPM44...
- Page 512 Only numbered Service Parts are available. SpectroProofer Mounter 44"/PXHACM44 No.3 C890-ELEC-011SPM44...
- Page 513 Only numbered Service Parts are available. SpectroProofer Mounter 44"/PXHACM44 No.4 C890-MECH-011SPM44...
- Page 514 Only numbered Service Parts are available. SpectroProofer Mounter 44"/PXHACM44 No.5 C890-MECH-021SPM44...
- Page 515 Only numbered Service Parts are available. (white) (black) SpectroProofer Mounter 24" No.1 Rev.01 C890-ACCE-011SPM24...
- Page 516 Only numbered Service Parts are available. (China Only) SpectroProofer Mounter 24"/PXHACM24 No.2 Rev.02 C890-CASE-012SPM24...
- Page 517 Only numbered Service Parts are available. SpectroProofer Mounter 24"/PXHACM24 No.3 Rev.01 C890-ELEC-011SPM24...
- Page 518 Only numbered Service Parts are available. SpectroProofer Mounter 24"/PXHACM24 No.4 REV.01 C890-MECH-011SPM24...
- Page 519 Only numbered Service Parts are available. SpectroProofer Mounter 24"/PXHACM24 No.5 Rev.01 C890-MECH-021SPM24...