Table of Contents
Advertisement
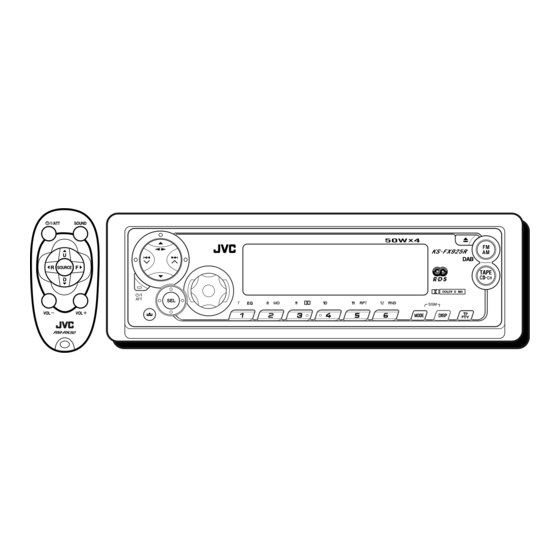
CASSETTE RECEIVER
РЕСИВЕР С КАССЕТНЫМ ПРОИГРЫВАТЕЛЕМ
KS-FX925R
For installation and
connections, refer to the
separate manual.
Указания по установке
и выполнению
соединений приводятся
в отдельной
инструкции.
ATT
SOUND
U
R
SOURCE
F
D
VOL
VOL
В соответствии с Законом Российской Федерации "О защите прав
потребителей" срок службы (г одности) данного товара "по истечении
которого он может представлять опасность для жизни, здоровья
потребителя, причинять вре д его имуществу или окружающей сре де"
составляет семь (7) лет со дня произво дства. Этот срок является
временем, в течение которого потребитель данног о товара может
безопасно им пользова ться при у словии соблю дения инструкции по
эк сплуатации данного товара, проводя необходимое обслуживание,
включающее замену р асходных ма териалов и/или соответствующее
ремонтное обеспечение в специализированном сервисном центре.
Дополнительные к осметические материалы к данному товар у,
поставляемые вместе с ним, могут хр аниться в течение дв ух (2) лет со
дня его производства.
Срок службы (г одности), кроме срока хранения дополнительных
косметических материалов, упомянутых в пре дыдущих дв ух пунктах, не
затрагивает никаких других прав потребителя, в частности, гарантийного
свидетельства JV C, которое он может получить в соответствии с зак оном
о правах потребителя или других законов, связанных с ним.
INSTRUCTIONS
ИНСТРУКЦИИ ПО ЭКСПЛУАТАЦИИ
EQ
DAB
TAPE
GET0070-001A
[EE]
Advertisement
Table of Contents

Related Manuals for JVC 0302KKSMDTJEIN


Summary of Contents for JVC 0302KKSMDTJEIN
- Page 1 CASSETTE RECEIVER РЕСИВЕР С КАССЕТНЫМ ПРОИГРЫВАТЕЛЕМ KS-FX925R For installation and connections, refer to the separate manual. Указания по установке и выполнению соединений приводятся в отдельной инструкции. INSTRUCTIONS ИНСТРУКЦИИ ПО ЭКСПЛУАТАЦИИ SOUND SOURCE В соответствии с Законом Российской Федерации “О защите прав потребителей”...
-
Page 2: How To Reset Your Unit
How to reset your unit After detaching the control panel, press the reset button on the panel holder using a ball-point pen or a similar tool. This will reset the built-in microcomputer. Note: Your preset adjustments — such as preset channels or sound adjustments — will also be erased. How to use the MODE button: If you press MODE, the unit goes into functions mode and the number buttons work as different function buttons. -
Page 3: Table Of Contents
Thank you for purchasing a JVC product. Please read all instructions carefully before operation, to ensure your complete understanding and to obtain the best possible performance from the unit. CONTENTS How to reset your unit ... How to use the MODE button ... -
Page 4: Location Of The Buttons
LOCATION OF THE BUTTONS Control panel Display window /¢ buttons 2 5 (up) button 23 (tape direction) button 3 ∞ (down) button 4 Remote sensor 5 Display window 6 0 (eject) button 7 FM AM DAB button 8 TAPE CD-CH button (standby/on/attenuator) button (control panel release) button q SEL (select) button... -
Page 5: Preparing The Remote Controller
Preparing the remote controller Before using the remote controller: • Aim the remote controller directly at the remote sensor on the main unit. Make sure there is no obstacle in between. Remote sensor • Do not expose the remote sensor to strong light (direct sunlight or artificial lighting). -
Page 6: Remote Controller
Remote controller RM–RK50 SOURCE 1 • Turns on the unit if pressed when the unit is turned off. • Turns off the unit if pressed and held until “SEE YOU” appears on the display. • Drops the volume level in a moment if pressed briefly. -
Page 7: Basic Operations
Turning on the power Turn on the power. “HELLO” appears on the display. Note on One-Touch Operation: When you select a source in step 2 below, the power automatically comes on. You do not have to press this button to turn on the power. Select the source. -
Page 8: Radio Operations
RADIO OPERATIONS Listening to the radio You can use either automatic searching or manual searching to tune in to a particular station. Searching a station automatically: Auto search Select the band (FM1 – 3, AM). (F1) (F2) Selected band appears (then changes to the clock time if “CLOCK”... -
Page 9: Manual Search
Searching a station manually: Manual search Select the band (FM1 – 3, AM). (F1) (F2) Note: This receiver has three FM bands (FM1, FM2, FM3). You can use any one of them to listen to an FM broadcast. Press and hold ¢ “MANU (manual)”... -
Page 10: Storing Stations In Memory
Storing stations in memory You can use one of the following two methods to store broadcasting stations in memory. • Automatic preset of FM stations: SSM (Strong- station Sequential Memory) • Manual preset of both FM and AM stations FM station automatic preset: SSM You can preset 6 local FM stations in each FM band (FM1, FM2 and FM3). -
Page 11: Tuning In To A Preset Station
Press and hold the number button (in this example, 1) for more than 2 seconds. Selected band/preset number and “MEMO” (memory) appear alternately for a while. Repeat the above procedure to store other stations into other preset numbers. Notes: • A previously preset station is erased when a new station is stored in the same preset number. -
Page 12: Rds Operations
RDS OPERATIONS What you can do with RDS RDS (Radio Data System) allows FM stations to send an additional signal along with their regular programme signals. For example, the stations send their station names, as well as information about what type of programme they broadcast, such as sports or music, etc. -
Page 13: Using Ta Standby Reception
Press and hold SEL (select) for more than 2 seconds so that one of the PSM items appears on the display. (PSM: see page 26.) Select “AF-REG (alternative frequency/regionalization reception)” if not shown on the display. Select the desired mode – “AF,” “AF REG”... - Page 14 Using PTY Standby Reception PTY Standby Reception allows the unit to switch temporarily to your favourite programme (PTY: Programme Type) from the current source (another FM station, tape or other connected components). • PTY Standby Reception will not work if you are listening to an AM station.
- Page 15 Searching your favourite programme You can search any one of the PTY codes. In addition, you can store your 6 favourite programme types in the number buttons. When shipped from the factory, the following 6 programme types have been stored in the number buttons (1 to 6).
-
Page 16: Other Convenient Rds Functions And Adjustments
To search your favourite programme type Press and hold TP PTY for more than 2 seconds while listening to an FM station. The last selected PTY code appears. Select one of the PTY codes. Ex.: When “ROCK M” is selected Press ¢... -
Page 17: Automatic Clock Adjustment
Changing the display mode while listening to an FM station You can change the initial indication on the display to station name (PS NAME) or station frequency (FREQ) while listening to an FM RDS station. • See also “Changing the general settings (PSM)” on page 25. - Page 18 PTY codes NEWS: News AFFAIRS: Topical programmes expanding on current news or affairs INFO: Programmes which impart advice on a wide variety of topics SPORT: Sport events EDUCATE: Educational programmes DRAMA: Radio plays CULTURE: Programmes on national or regional culture SCIENCE: Programmes on natural science and technology...
-
Page 19: Tape Operations
Listening to a cassette You can play back type 1 (normal) tapes. Open the control panel. Insert a cassette into the cassette compartment. The unit turns on and tape play starts automatically. Close the control panel by hand. Tape–in indicator appears. Select the tape direction. -
Page 20: Finding The Beginning Of A Tune
To play back tapes recorded with the Dolby B NR* Press MODE to enter the functions mode while listening to a tape. “MODE” flashes on the lower part of the display, and the number buttons work as different function buttons. Press (Dolby B), while “MODE”... -
Page 21: Other Convenient Tape Functions
Other convenient tape functions Skipping the blank portions on the tape You can skip blank portions between the tunes (Blank Skip). When this function is on, the unit skips blank portions of 15 seconds or more, fast-forwards to the next tune, then starts playing it. •... -
Page 22: Sound Adjustments
SOUND ADJUSTMENTS Adjusting the sound You can adjust the sound characteristics to your preference. Select the item you want to adjust. Each time you press the button, the adjustable items change as follows: (bass) (treble) LOUD (volume) (loudness) Indication To do: Adjust the bass. -
Page 23: Selecting Preset Sound Modes (C-Eq: Custom Equalizer)
Selecting preset sound modes (C-EQ: custom equalizer) You can select a preset sound mode (C-EQ: custom equalizer) suitable to the music genre. • There is a time limit in doing the following procedure. If the setting is canceled before you finish, start from step 1 again. -
Page 24: Storing Your Own Sound Adjustments
• When “CEQ LINK” is set to “LINK ON” The selected sound mode can be stored in memory for the current source. Each time you change to the same source, the same sound mode is also recalled and shown on the display. The C-EQ indicator also flashes. •... -
Page 25: Other Main Functions
Setting the clock You can also set the clock system to either 24 hours or 12 hours. Press and hold SEL (select) for more than 2 seconds so that one of the PSM items appears on the display. (See page 26.) Set the hour. - Page 26 Preferred Setting Mode (PSM) items Hold. CLOCK H Hour adjustment CLOCK M Minute adjustment CEQ LINK Custom equalizer link 24H/12H 24/12-hour time display AUTO ADJ Automatic clock setting CLOCK Clock display TU DISP Tuner display AF-REG Alternative frequency/ Regionalization PTY STBY PTY standby TA VOL Traffic announcement...
- Page 27 To set the Custom Equalizer Link– A different sound mode can be stored in memory for each source so that you can change the sound modes simply by changing the sources. When shipped from the factory, this mode is deactivated. •...
-
Page 28: Detaching The Control Panel
Detaching the control panel You can detach the control panel when leaving the car. When detaching or attaching the control panel, be careful not to damage the connectors on the back of the control panel and on the panel holder. Detaching the control panel Before detaching the control panel, be sure to turn off the power. -
Page 29: Cd Changer Operations
We recommend that you use one of the CH-X series with your unit. If you have another CD automatic changer, consult your JVC IN-CAR ENTERTAINMENT dealer for connections. • For example, if your CD automatic changer is one of the KD-MK series, you need a cord (KS-U15K) for connecting it to this unit. -
Page 30: Selecting Cd Playback Modes
To go to the next or previous discs Press 5, while playing a disc, to go to the next disc. Each time you press the button consecutively, the first track of the next disc is located and played back. Press ∞, while playing a disc, to go to the previous disc. -
Page 31: External Component Operations
EXTERNAL COMPONENT OPERATIONS Playing an external component You can connect the external component to the CD changer jack on the rear using the Line Input Adaptor KS-U57 (not supplied). Preparations: • For connecting the Line Input Adaptor KS-U57 and the external component, refer to the Installation/ Connection Manual (separate volume). -
Page 32: Dab Tuner Operations
DAB TUNER OPERATIONS We recommend that you use DAB (Digital Audio Broadcasting) tuner KT-DB1500 with your unit. If you have another DAB tuner, consult your JVC IN-CAR ENTERTAINMENT dealer. • Refer also to the Instructions supplied with your DAB tuner. - Page 33 Start searching an ensemble. Press ¢ search ensembles of higher frequencies. Press 4 search ensembles of lower frequencies. When an ensemble is received, searching stops. To stop searching before an ensemble is received, press the same button you have pressed for searching. Select a service you want to listen to.
-
Page 34: Storing Dab Services In Memory
Storing DAB services in memory You can preset up to 6 DAB services in each DAB band (DAB1, DAB2 and DAB3) manually. Select the DAB tuner. Each time you press and hold the button, the DAB tuner and the FM/AM tuner are alternately selected. -
Page 35: Tuning In To A Preset Dab Service
Tuning in to a preset DAB service You can easily tune in to a preset DAB service. Remember that you must store services first. If you have not stored them yet, see page 34. Select the DAB tuner. Each time you press and hold the button, the DAB tuner and the FM/AM tuner are alternately selected. -
Page 36: Troubleshooting
TROUBLESHOOTING What appears to be trouble is not always serious. Check the following points before calling a service center. Symptoms • A cassette tape cannot be inserted. • A cassette tape cannot be ejected. • Cassette tapes become hot. • Tape sound is at very low level and sound quality is degraded. - Page 37 When connecting to the CD changer: Symptoms • “NO DISC” appears on the display. • “NO MAG” appears on the display. • “RESET 8” appears on the display. • “RESET 1” - “RESET 7” appears on the display. • The CD changer does not work at all.
-
Page 38: Maintenance
MAINTENANCE This unit requires very little attention, but you will be able to extend the life of the unit if you follow the instructions below. To clean the head • Clean the head after every 10 hours of use using a wet-type head cleaning tape (available at an audio store). -
Page 39: Specifications
AUDIO AMPLIFIER SECTION Maximum Power Output: Front: 50 W per channel Rear: 50 W per channel Continuous Power Output (RMS): Front: 19 W per channel into 4 , 40 Hz to 20 000 Hz at no more than 0.8% total harmonic distortion. Rear: 19 W per channel into 4 , 40 Hz to 20 000 Hz at no more than... - Page 40 Please reset your unit Refer to page of How to reset your unit Затруднения при эксплуатации? Пожалуйста, перезагрузите Ваше устройство Для получения информации о перезагрузке Вашего устройства обратитесь на соответств ующую страницу VICTOR COMPANY OF JAPAN, LIMITED EN, RU 0302KKSMDTJEIN...