Table of Contents
Advertisement
DKE 995 F
Internet: http://www.bosch-hausgeraete.de
Bosch Info-Team: de Tel. 01 80/5 30 40 50 (E 0,14/Min. DTAG)
de Gebrauchsanleitung
en Instructions for Use
fr Mode d´emploi
nl Gebruiksaanwijzing
it Instruzioni sull´uso
es Instrucciones de manejo
pt Instruções de Serviçio
sv Bruksanvisning
no Bruksanvisning
fi Käyttöohje
da Brugsanvisning
Advertisement
Table of Contents

Summary of Contents for Bosch DKE 995 F
- Page 1 Instructions for Use fr Mode d´emploi nl Gebruiksaanwijzing it Instruzioni sull´uso es Instrucciones de manejo pt Instruções de Serviçio sv Bruksanvisning no Bruksanvisning fi Käyttöohje da Brugsanvisning Internet: http://www.bosch-hausgeraete.de Bosch Info-Team: de Tel. 01 80/5 30 40 50 (E 0,14/Min. DTAG)
-
Page 2: Appliance Description
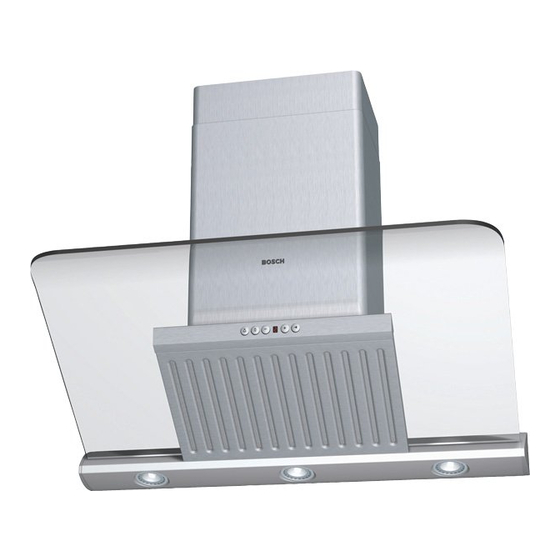
Appliance description Operating mode Glass panel Chimney panelling This low air pressure can be obtained, provided combustion air can escape through non-lockable openings, e.g. in doors, windows, air-intake/exhaust-air wall Light / fan boxes or by other technical procedures, switches such as reciprocal interlocking, etc. An air-intake/exhaust-air wall box by itself is no guarantee that the limiting value will not be exceeded. -
Page 3: Operating Procedure
Before using for the first time Operating procedure Never operate the extractor hood The most effective method of removing vapours produced during cooking is to: without a grease filter. Switch the ventilator ON Overheated fat or oil can easily catch as soon as you begin cooking. -
Page 4: Filters And Maintenance
Operating procedure Filters and maintenance Intensive setting: Grease filter: Maximum power is obtained at the two metal grease filters are inserted to intensive setting. It is only required for short soak up the fatty remains of the kitchen intervals. steam. ç... - Page 5 Filters and maintenance Removing the grease filter: Inserting the grease filter: 1. Pull the bottom of the most outer filter 1. Insert the inner filter at the back and fold until it comes away from the magnets. the filter upwards. 2.
-
Page 6: Cleaning And Care
Cleaning and care Disconnect the extractor hood from the Stainless steel surfaces: electricity supply by pulling out the mains Use a mild non-abrasive stainless steel plug or switching it off at the fuse box. cleaner. At the same time as you clean the Clean the surface in the same direction grease filters, clean off any grease from as it has been ground and polished. -
Page 7: Replacing The Light Bulbs
Replacing the light bulbs 1. Switch off the extractor hood and pull out the mains plug or switch off the electricity supply at the fuse box. When switched on, the halogen bulbs become very hot. Even for some time after the bulbs have been switched off there is still a risk of burns. - Page 8 Montageanleitung Wandesse Installation instructions Wall-mounted chimney extractor Notice de montage d'une hotte-cheminée murale Montagevoorschrift Wandafvoer Istruzioni per il montaggio Camino a muro Instrucciones de montaje Campana extractora para fijar a la pared Instruções de Montagem Exaustor tipo Chaminé Monteringsanvisning Spisfläkt för väggmontage Monteringsanvisning Damphette (vifte) for vegg Asennusohje...
- Page 9 Important information Old appliances are not worthless During installation observe a minimum rubbish. If they are disposed of in an distance of 650 mm above the gas environment-friendly manner, valuable raw hotplates. materials can be recovered for use again. Gas hotplates may only be used when Before you dispose of an old appliance, cooking utensils have been placed on make sure that it has been rendered...
-
Page 10: Prior To Installation
Prior to installation Exhaust-air mode The exhaust air is discharged upwards through a ventilation shaft or directly through the outside wall into the open. Exhaust air should neither be directed into a smoke or exhaust flue that is currently used for other purposes, nor into a shaft that is used for ventilating rooms in which stoves or fireplaces are also located. -
Page 11: Electrical Connection
Prior to installation Electrical connection Round pipes: WARNING: THIS APPLIANCE MUST BE EARTHED We recommend Internal diameter: 150 mm (at least IMPORTANT: Fitting a Different Plug: 120 mm). The wires in the mains lead are coloured in Flat ducts must have an internal cross- accordance with the following code: section that equates to that of round Green and Yellow... -
Page 12: Installation
Installation This extractor hood is intended to be 05. Screw on the upper and the two lower mounted onto the kitchen wall. fixing brackets. 01. Remove the grease filter (refer to Operating Instructions). 02. Draw a line on the wall from the ceiling to the lower edge of the hood at the centre of the location where the hood is going to be mounted. - Page 13 Installation 07. Screw in the lower bolt (hex bolt). 13. Carefully pull the upper flue duct upwards and screw the sides to the fixing bracket with 2 screws. 08. Connect up the air outlet pipe. 09. Connect the hood to the electricity 14.
- Page 14 Aushängen Aushängen Remove Desmontar Retrait Ta ut Verwijderen Uttaking Smontaggio Irrotus Desmontar Udbygning Einhängen Aushängen Insert Montagem Mise en place Sätt in nytt Aanbrengen Innsetting Montaggio Kiinnitys Montar Indbygning 5750 201 966...


