
Related Manuals for Sony 700TVL


Summary of Contents for Sony 700TVL
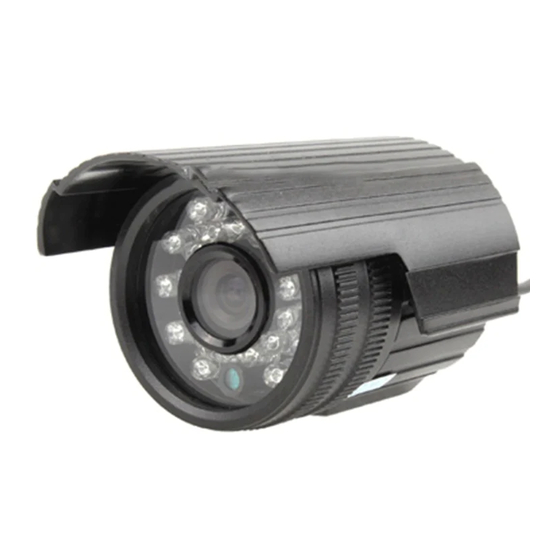
- Page 1 High-definition Day & Night Camera (Built-in OSD) (Built-in (Built-in (Built-in OSD) OSD) OSD) USER’S MANUAL Applicable for: Sony 700TVL Cameras Thank you for purchasing our products. Please read the manual carefully before operating...
-
Page 2: Safety Precaution
Safety Safety Precaution Precaution Safety Safety Precaution Precaution This symbol means that there might exist uninsulated dangerous voltage inside the case, be careful of electric shock. This symbol reminds you to pay attention to important operation maintenance instructions accompanied information. Warning Warning Warning... - Page 3 Notes Notes Notes Notes � Do not make the products under great impact or stay away from strong electromagnetic interference and vibration. � There are some sophisticated parts inside the camera, therefore, during transportation and installation, please avoid the damage cause by stress or severe vibration.
-
Page 4: Table Of Contents
Contents I、OSD..................5 1.1 Lens type..............6 1.2 Shutter / AGC............6 1.3 White Balance............8 1.4 Backlight compensation...........8 1.5 Picture adjustment........... 8 1.6 WDR................ 9 1.7 Motion detection............10 1.8 Privacy..............12 1.9 Day/Night.............. 13 1.10 DNR..............15 1.11 Camera ID............16 1.12 Synchronous Mode..........17 1.13 Languages............ -
Page 5: I、Osd
Ⅰ、OSD Press the "OK" button for 2 seconds, the camera will pop up the main menu system (Figure 1) SETUP MENU LENS MANUAL SHUTTER/AGC AUTO WHITE BAL BACKLIGHT PICT ADJUST MOTION DET NEXT EXIT SAVE ALL SETUP MENU PRIVACY DAY/NIGHT AUTO CAMERA ID SYNC... - Page 6 Lens type Lens type 1.1 Lens Lens type type There are 2 types of lenses, respectively: DC lens (DC drive lens), video camera (manual lens). Users can select the lens type according to the using the camera. Press the "left" or "right" button on to choose the lens.
- Page 7 AOTU SETUP HIGHT LUMINANCE MODE AUTO IRIS BRIGHTNESS 0---------------255 LOW LUMINANCE MODE BRIGHTNESS x0.50 RETURN High brightness mode has the two choices: "shut + auto iris, auto iris". User can select according to the lens equipped correspondingly. When using a fixed lens, user must select "shut + auto iris" mode. When using auto iris lens, user must select the "Auto Iris"...
- Page 8 White Balance White Balance 1.3 White White Balance Balance White Balance is used to restore the authenticity of the scene; it is affected by scene color temperature change. Users can choose the corresponding white balance mode, according to the actual needs of the scene.
- Page 9 horizontal mirror, off time: the image is normal. Brightness, contrast, sharpness value can choose between 0-255. The color tone is also the real color of the image color. Users can choose the real colors between 0-255. Gain is of the screen color depth, 0-255 optional. The smaller the value, the color is lighter;...
- Page 10 click "OK" button to enter the " Motion Zone Test" setting sub-menu, to set the detect range and sensitivity settings. MOTION DET DETECT SENSE 0-127 BLOCK DISP MONITOR AREA AREA SEL 0-288 BOTTOM 0-288 LEFT 0-468 RIGHT 0-468 RETURN Detection Detection sensitivity sensitivity...
-
Page 11: Motion Detection
Monitoring Monitoring Zone Zone Monitoring Monitoring Zone Zone Check whether the relevant region in motion detection, which is a function switch. When it is closed, this zone does not participate in motion detection. down, down, left left right right Up, down, down, left left and and right... -
Page 12: Privacy
PRIVACY AREA SEL 0-288 DOWN 0-288 LEFT 0-468 RIGHT 0-468 COLOR TRANSP 1.00 MOSAIC RETURN Region Region Selection Selection Region Region Selection Selection Select the privacy zone region, and set the related zone, there are four available setting zones. down, down, left left... -
Page 13: Day/Night
Transparency: Transparency: Transparency: 0-1 optional. Transparency: Mosaic: Mosaic: Mosaic: On / Off optional. Mosaic: Back Back Back Back When the setup is complete, press the "up" and "down" key to move the cursor to the "Back". Then, click "OK" button to return to the implementation for the appropriate functions. - Page 14 Delay Control Delay Delay Delay Control Control Control With this setting the camera achieves the delay time of the transferring: color to black/white or black/white to color. Conversion between the colors is through controlling of the camera’s brightness sensor of the scene. When the light is at critical time, the camera may switch the modes back and forth between color and black/white.
-
Page 15: Dnr
intensity changing. 1.10 1.10 1.10 D D D D NR 1.10 In the "noise reduction" menu click "OK" button to enter the "noise reduction" sub-menu, you can set the corresponding parameters. Noise reduction is in the case of very low light reduction caused by low-light point of the picture noise to enhance the signal to noise ratio (S / N) and image clarity, and the camera in low light conditions catches clearly sharpness image, the quality can be guaranteed. -
Page 16: Camera Id
Back Back Back Back When the setup complete, click "OK" button to return to the implementation for the appropriate functions. 1.11 1.11 Camera Camera 1.11 1.11 Camera Camera ID In the "functional camera code" menu, press the "left" "right" to select "On"... -
Page 17: Languages
1.12 Synchronous Mode 1.12 1.12 1.12 Synchronous Synchronous Synchronous Mode Mode Mode Synchronized pattern default for internal synchronization 1.13 1.13 Languages Languages 1.13 1.13 Languages Languages Chinese, Japanese, English, French, the dutch, German, Spanish, Portuguese eight language selections. 1.14 1.14 Camera Camera Reset... -
Page 18: Technical Specification
Ⅱ、Technical Technical Specification Technical Specification Technical Specification Specification Imaging Sensor 1/3" Sony CCD Signal System Horizontal resolution 700TVL Pixel 976(H)×582(V) Shutter speed 1/50~1/100000s S/N Ratio More than 52dB(AGC OFF) Video Output 1.0Vp-p, 75 ohms Minimum Illumination 0Lux(ON) Syn. System Internal... -
Page 19: Iii、Faq
III、FAQ 1 . Q: No image after installation? a. Check to connect the power supply correctly, whether the indicating led is always on or not; b. Check the video cable, make sure it is workable. c. Check if the monitor has been open. 2. - Page 20 b. Please verify the camera rear panel, if the regulator potentiometer is adjusted too large. c. Check if the brightness of the monitor is too large. 8. Q: When installation, image is not clear or exist dark corners? a. Please adjust focus and zoom of the lens. Make sure the focus should be adjusted in a proper way.