Table of Contents
Advertisement
Quick Links
Drum set : Assembly Instructions
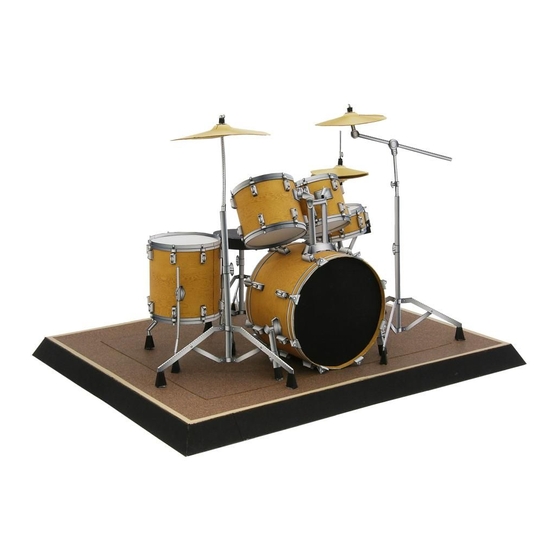
View of completed model
A drum set is a collection of various types of drums, cymbals and other percussion instruments that are
lined up in a formation that makes them easily played by one person. The number and type of
instruments included can be arranged according to the performer's preference or characteristics of the
music. The performer usually plays seated on a stool. The idea for the drum set is said to have
originated in military bands, when a cymbal was placed on top of the bass drum to make it easier for
the performer holding it. This was followed by the idea to use a pedal to play the bass drum with the
foot, and the invention of the hi-hat, two cymbals on top of each other that are clashed together. These
adaptations have resulted in the drum set up and beat style we know today.
Assembly Instructions
Mountain fold (dotted line)
Make a mountain fold.
Valley fold (dashed and dotted line)
Make a valley fold.
Scissors line (solid line)
Cut along the line.
Cut In line (orange solid line)
Cut a slot.
Cut out (orange shaded)
Cut out the area marked.
PAGE01
The glue spot(colored dot)
shows where to apply the glue.
Glue spot (Red dot)
Glue parts with the same number together.
Glue spot (Green dot)
Glue within the same part.
Glue spot (Blue dot)
Glue to the rear of the other part.
Glue spot (Yellow dot)
Apply glue to the back, and attach to the back of the other parts.
Front
Back
Parts sheet (Pattern) : Twenty-two A4 sheets (No.1~No.22)
No. of Parts : 384
Assembly Instructions : Ten A4 sheets (No.1~No.10)
*Build the model by carefully reading the Assembly Instructions, in the parts sheet page order.
*Assembly will be easier if you write the part's number on the back of each part.
Trace along the folds with a ruler and a used pen (no ink) to
Handy Hint
get a sharper, easier fold.
Tools and materials
Assembly tip
Scissors, set square, glue (We
Before gluing, crease the paper
recommend stick glue),pencil,
along mountain fold and
used ballpoint pen, toothpicks,
valley fold lines and make sure
tweezers,
rounded sections are nice and
(useful for handling small parts)
stiff.
Right side
Left side
Caution
Glue, scissors and other tools
may be dangerous to young
children so be sure to keep them
out of the reach of young
children.
Advertisement
Table of Contents

Related Manuals for Canon creative park


Summary of Contents for Canon creative park
- Page 1 Drum set : Assembly Instructions Front Right side View of completed model Back Left side Parts sheet (Pattern) : Twenty-two A4 sheets (No.1~No.22) No. of Parts : 384 A drum set is a collection of various types of drums, cymbals and other percussion instruments that are Assembly Instructions : Ten A4 sheets (No.1~No.10) lined up in a formation that makes them easily played by one person.
-
Page 2: Before Starting
Drum set : Assembly Instructions Before starting. Each page of the "Parts sheet" has a sheet number in the top left-hand corner (Sheet PAGE03 No.1~No.22). Work in order of these sheet numbers. (The parts for assembly are on pages 2 ~ 22.) Align the marker lines on 3A Bass drum and 3B with the glue spots on... -
Page 3: Upper Part
Drum set : Assembly Instructions PAGE04 PAGE05 Bass drum Bass drum *Roll up and attach. Seam line Inside Align the seam lines and Wrapping the piece around insert the pieces inside a thin cylindrical object will each other, and attach to result in a neater finish. - Page 4 Drum set : Assembly Instructions Upper part *Be sure to align the thick black marker lines on the top and bottom (circled here in blue) PAGE06 PAGE07 when attaching. Tom-tom 13" x 10" Tom-tom 12" x 9" *Take note of where *Align the reverse sides and attach.
- Page 5 Drum set : Assembly Instructions PAGE02 03 04 05 06 07 PAGE08 Bass drum / Tom-tom 13" x 10" / Tom-tom 12" x 9" Floor tom *Begin from the opposite side to the seam. Upper part Shell Tom holder Head Seam Lower part Bass drum bar...
-
Page 6: Snare Drum
Drum set : Assembly Instructions Upper part *Be sure to align the thick black marker lines PAGE09 Align the marker lines on 10A on the top and bottom (circled here in blue) and 10B with the glue spots on when attaching. Floor tom 10C ~ 10H, and attach. -
Page 7: Ride Cymbal
Drum set : Assembly Instructions *Align the reverse sides and attach. PAGE12 PAGE13 *Align the reverse sides and attach. Ride cymbal Crash cymbal *Align the reverse sides *Align the reverse and attach. sides and attach. Cymbal stand nut Felt for clutch *Align the seams *Align the seams and attach. - Page 8 Drum set : Assembly Instructions PAGE14 PAGE14 15 Hi-hat cymbal Hi-hat cymbal *Align the seams and attach. *Back side of 14C Extension rod Hi-hat clutch *Align the seams *Align the seams and attach. and attach. Hi-hat cymbal *Align the reverse *Align the seams sides and attach.
- Page 9 Drum set : Assembly Instructions PAGE15 PAGE16 Drum pedal Drum stool *Align the reverse sides and attach. *Back side of 16B *Align the reverse sides and attach. *Roll up and attach. *Bend the pieces left and right to open a gap. Seat Do not apply glue.
-
Page 10: Display Stand
Drum set : Assembly Instructions PAGE17 18 19 PAGE21 22 Display stand Display stand PAGE20 21 Display stand Ride cymbal Crash cymbal Tom-tom 13" x 10" Tom-tom 12" x 9" Hi-hat cymbal *Fold inside and attach. Snare drum Floor tom Drum stool Bass drum Drum pedal...