Table of Contents
Advertisement
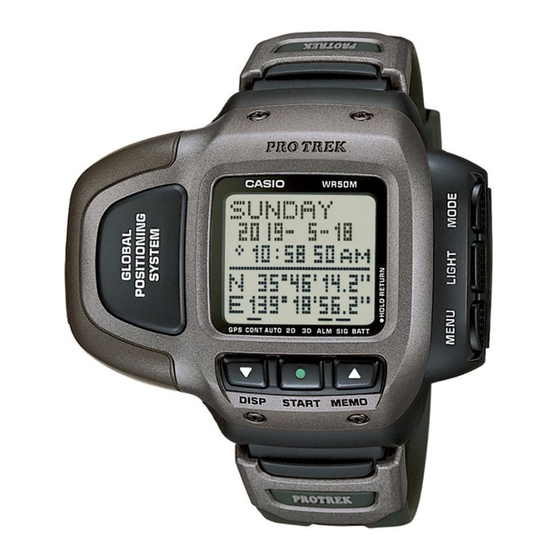
Module No. 2240
GETTING ACQUAINTED
Congratulations upon your selection of this CASIO watch. To get the most out
of your purchase, be sure to carefully read this manual and keep it on hand
for later reference when necessary.
About This Manual
• Each section of this manual provides basic information you need to perform
operations in each mode. Further details and technical information can also
be found in the "REFERENCE".
• The term "watch" in this manual refers to the CASIO SATELLITE NAVI
Watch (Module No. 2240).
• The term "Watch Application" in this manual refers to the CASIO
SATELLITE NAVI LINK Software Application.
Upper display area
Lower display area
On-screen indicators
SAFETY PRECAUTIONS
Use only the AC Adaptor and the Interface/Charger Unit that come with
your watch to charge its battery. Use of another device for charging
creates the risk of battery leakage, overheating, explosion, fire, and
personal injury.
AC Adaptor and Interface/Charger Unit
Note the following important precautions whenever using the AC Adaptor
or Interface/Charger Unit that comes with your watch.
• Should you notice smoke or strange odor coming from the AC Adaptor
and Interface/Charger Unit, immediately unplug the power cord from
the wall outlet and request servicing from your original dealer.
Continued use under these conditions creates the risk of electric
shock.
• Make sure that the AC Adaptor and Interface/Charger Unit are not
exposed to water, dirt, or any other foreign matter. Should the AC
Adaptor or Interface/Charger Unit ever get wet, immediately unplug
the power cord from the wall outlet and request servicing from your
original dealer.
• Never use the AC Adaptor or Interface/Charger Unit while it is covered
with a blanket or any other object.
• Never touch the AC Adaptor or Interface/Charger Unit when your
hands are wet. Doing so creates the risk of electric shock.
• Never try to take the AC Adaptor or Interface/Charger Unit apart or
allow the contacts inside the Interface/Charger Unit to become
shorted.
• Never expose the AC Adaptor or Interface/Charger Unit to direct heat
or dispose of them by incineration.
• Do not drop the AC Adaptor or Interface/Charger Unit or otherwise
subject them to strong impact.
• During the thunderstorms, unplug the AC Adaptor and Interface/
Charger Unit from the wall outlet.
• Avoid prolonged contact between your skin and the AC Adaptor and
Interface/Charger Unit while power is being supplied to them, and
between your skin and the watch while its battery is being charged.
Prolonged contact creates the risk of low temperature burn injury.
• Keep the AC Adaptor and Interface/Charger Unit out of the reach of
small children.
• Use only a power source whose output matches the rating marked on
the plate of the AC Adaptor.
• Do not locate the power cord near stoves or other sources of intense
heat. Heat can melt power cord insulation and create the risk of fire
and electric shock.
• When unplugging the power cord from the wall outlet, grasp the AC
Adaptor. Never pull on the cord itself. Doing so can damage the power
cord and create the risk of fire and electric shock.
MODE
LIGHT
MENU
L G K
Warning
Precautions
• The measurement functions built into this watch are not intended for
use in taking measurements that require professional or industrial
precision. Values produced by this watch should be considered as
reasonably accurate representations only.
• Though a useful navigational tool, a GPS receiver should never be used
as a replacement for conventional map and compass techniques.
Remember that magnetic compasses can work at temperatures well
below zero, have no batteries, and are mechanically simple. They are
easy to operate and understand, and will operate almost anywhere. For
these reasons, the magnetic compass should still be your main
navigation tool.
• CASIO COMPUTER CO., LTD. assumes no responsibility for any loss,
or any claims by third parties that may arise through the use of this
watch.
• Whenever leaving the AC Adaptor and Interface/Charger Unit
unattended for long periods, be sure to unplug the AC Adaptor from
the wall outlet.
• Avoid leaving the AC Adaptor and Interface/Charger Unit in areas
subjected to high humidity and large amounts of dust. Such conditions
create the risk of fire and electric shock.
Rechargeable battery handling
Never try to remove the rechargeable battery from the watch yourself.
Leave all battery replacement procedures up to your original dealer or
CASIO distributor.
Precautions during use
Never operate the watch while walking, while operating an automobile,
motorcycle, or other motor vehicle, or while riding a bicycle, etc. Doing
so can interfere with you being alerted to dangerous situations around
you and creates the risk of accident.
Data backup
• Be sure to back up all important data on your computer hard disk or
some other medium.
• Data stored in memory can be unexpectedly lost during malfunction,
repair, etc.
2240-1
Caution
Advertisement
Table of Contents

Related Manuals for Casio 2240


Summary of Contents for Casio 2240
-
Page 1: Getting Acquainted
Precautions • The measurement functions built into this watch are not intended for Congratulations upon your selection of this CASIO watch. To get the most out use in taking measurements that require professional or industrial of your purchase, be sure to carefully read this manual and keep it on hand precision. -
Page 2: Charging The Battery
Unit tray so the tab in the tray enters the hole in the side of the watch. • Never touch the terminals of the watch or the Interface/Charger Unit. Module No. 2240 • The terminals of the Interface/Charger Unit are gold and silver. This is normal and does not indicate a defective product. -
Page 3: General Guide
• Contact your original dealer or CASIO distributor about having the rechargeable battery replaced. Note that you will be charged for battery replacement. -
Page 4: Adjusting Display Contrast
2240-4 TIMEKEEPING MODE Using the FUNCTION and MENU Screens Many of the operations of this watch are performed using FUNCTION screens • Use the Timekeeping Mode to view the current time and date. and a MENU screen. The following describes the general procedures for •... - Page 5 2240-5 Important! Note • The GPS Mode of this watch uses the time and date setting to determine • Date and time data sent from GPS satellites normally does not include the current positions of satellites. Make sure that your time and date setting adjustments for leap seconds.
- Page 6 2240-6 5. Use MODE to move the flashing around the display in the sequence Taking a GPS Measurement shown below. The following are the basic steps for taking a position measurement in the GPS Mode. Daily alarm HOUR SIG Hour...
- Page 7 2240-7 GPS Mode Screens GPS Mode Position Screen Lower Display Area (Split-screen Format) Position Screen Altitude Graph Screen Each press of L while the GPS Mode Position Screen is on the display cycles the contents of the lower display area in the sequence shown below.
- Page 8 2240-8 To specify AREA data by selecting a built-in area city Graphical Navigation Screen • After you set up the watch by defining your destination and landmarks 1. In the Timekeeping or GPS Mode, press MENU twice to display the MENU along the way, the Graphical Navigation Screen shows the direction and Screen.
- Page 9 2240-9 To input your current latitude and longitude Note • Parameters you input for dA and dF here are also used as ellipsoid values 1. On the AREA Screen, use K and L to when converting latitude and longitude to UTM coordinates.
- Page 10 2240-10 To display the Landmark List To add a landmark by manually inputting its record data 1. In the Timekeeping or GPS Mode, press Note • There are a number of waypoint database Websites on the Internet that MENU twice to display the MENU Screen.
- Page 11 2240-11 To create a new route plan on a blank Route Plan Screen Displaying a Landmark on a Map The following procedure lets you select a landmark on the Landmark List and 1. On the Route Plan Screen, the cursor display it on an on-screen map.
- Page 12 2240-12 To insert a waypoint into an existing route plan Displaying a Waypoint on a Map The following procedure lets you select a waypoint on the Route Plan Screen Note • If your route plan already contains nine waypoints, you will have to delete and display it on an on-screen map.
- Page 13 2240-13 Track Point Recording Interval Clearing Track Log Memory Contents The track point recording interval determines how often a track point record is Use the following procedure to delete all of the records currently stored in created and stored into the Track Log Memory while you are performing GPS track log memory.
- Page 14 2240-14 Specifying the Position Display Format Clearing the Maximum Speed Record Normally, the watch displays a position obtained by a GPS measurement as The watch keeps a record of the maximum speed you attain when speed latitude and longitude values showing degrees, minutes, and seconds. You measurements are being performed.
- Page 15 2240-15 Turning a Track Point’s Display Status On and Off Note • The initial default for this setting is NORTH UP. You can use the following procedure to turn display of track points on (display) 4. After the setting is the way you want, press G to save it and return to the and off (not displayed).
- Page 16 2240-16 2. Use K and L to cycle through the available input characters in the EXCHANGING DATA WITH A COMPUTER sequence shown below. To exchange GPS and watch setup data between the watch and your Press K. Press L. computer, you must connect the watch’s Interface/Charger Unit to the computer and mount the watch on the Interface/Charger Unit.
-
Page 17: Gps Mode
2240-17 Satellite Information Display UTM Grid Coordinates The following shows the meaning of the satellite marks that appear on the The letters “UTM” stand for “Universal Transverse Mercator,” which is a grid display. system developed in an attempt to set up a universal world wide system for mapping. - Page 18 2240-18 Almanac and Ephemeris Data Bearing and Direction Values The data message sent from a GPS satellite consists of an almanac that Bearing and direction are indicated on the screens as values that represent gives the approximate positions of all the other satellites in the system, and degrees.
- Page 19 2240-19 Antenna Preset Data City Code City Name Latitude Longitude Datum Name Never attach any metallic stickers to the Differential S/N Deg Min E/W Deg Min antenna of this watch. Doing so can interfere MANILA LUZON-1 with proper signal reception.
- Page 20 2240-20 Datum Parameter Datum Name Display Applicable Area NORTH AMERICAN 1983 NAD83–1 Alaska 0.000 0.000000000016 NAD83–2 Canada 0.000 0.000000000016 NAD83–3 CONUS 0.000 0.000000000016 NAD83–4 Mexico, Central America 0.000 0.000000000016 NAHRWAN NAHRWAN–1 Masirah Island (Oman) –369 112.145 0.000054750714 NAHRWAN–2 United Arab Emirates –381...
- Page 21 2240-21 PRE-PROGRAMMED LANDMARK LIST The Landmark List comes pre-programmed with the names and locations of the major mountains of the world. You can use these as they are or you can change them to other landmarks using the procedure under “To edit a landmark” and “To delete a landmark”.
- Page 22 2240-22 Preset Data Mountain Name Display Latitude Longitude Elevation Deg Min Deg Min Sec North Mt. McKinley MCKINLEY 34.5 44.7 6194 America Mt. Logan LOGAN 33.8 38.4 5950 Pico de Orizaba ORIZABA 35.3 54.5 5610 Volcan Tajumulco TAJUMULCO 13.6 17.4...