Table of Contents
Advertisement
Available languages
Available languages
Quick Links
Advertisement
Table of Contents

Related Manuals for GE Sport Headset 86711

Summary of Contents for GE Sport Headset 86711
- Page 1 GE Bluetooth Sport Headset Model 86711...
- Page 2 Introduction Thank you for choosing the GE Bluetooth Sport Headset, model 86711. This innovative design allows you the freedom to talk on your phone, and its unique stylish design makes the headset barely noticeable. The Sport Headset also comes with a power bank for On-the-Go charging for your convenience.
- Page 3 Product Reference & Function Power Bank: • Charger Port (Port to connect the charging adapter) • Charging contacts (Pairs with the contacts of the headset for charging headset) • Indicator light (Allows you to see the charging status) • Clips (To hold headset to the power bank) Retaining Clips Charging Contacts...
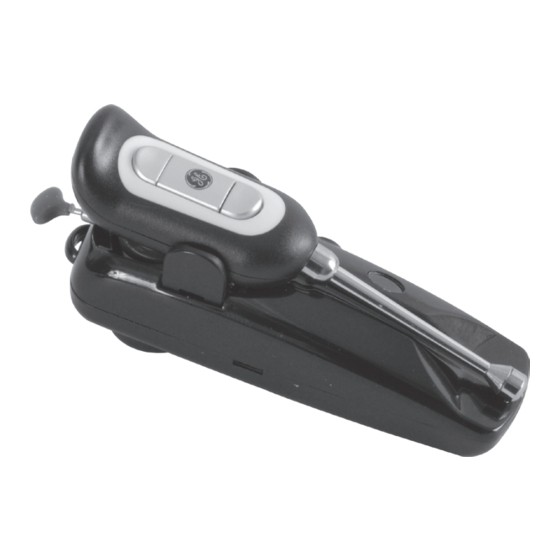
- Page 4 Headset (Front) • 1 Volume Up (Adjust volume up) • 2 Volume Down (Adjust volume down) • 3 Function Button & Indicator Light (For pairing and answering calls) Function Button Volume UP Volume Down...
- Page 5 Headset (Back) • Earbud • Charging contacts (Pairs with the contacts of the power bank) • Microphone Earbud Charging Contacts Microphone...
- Page 6 Charging the Headset & Power Bank Note: There may be some charge on the headset and the power bank; you will still need to charge the batteries before using the headset or the power bank. Headset and Power Bank for at least 16 hours. The power bank can be charged by its self.
-
Page 7: Pairing The Headset
Pairing the Headset 1. Before pairing the headset, make sure the headset is fully charged. 2. Enable the Bluetooth function on your phone according to the phone’s manufac- turer’s instructions. 3. Turn on the headset by pressing and holding the Function Button, for approxi- mately 10 seconds. -
Page 8: Turning On/Off Headset
Turning On/Off Headset Turning On • Press and hold the Function Button until you hear a short low beep. • The blue LED will begin to flash indicating the headset is turned on. Turning Off • Press and hold the Function Button until you hear a short high beep followed by a low beep. -
Page 9: Placing Calls
Placing Calls • Press and release the Function Button on the headset. • Dial the number on the phone; once the number has been dialed, you should be able to hear the ringing of the number dialed. • If your phone has voice dialing feature, you can use this headset with the voice dialing feature. -
Page 10: Adjusting The Volume
Adjusting the Volume • You can adjust the volume anytime during the conversation by pressing and releas- ing the top button for volume up. • To adjust the volume down, press and release the bottom button. • It is recommended that you do not turn the volume all the way up for your safety and to prevent hearing loss. - Page 11 Using the SecuEar Clip The optional SecuEar clip is included for those who want additional security or stability of the headset within the ear. Many users may find it necessary. To attach the SecuEar clip carefully place it around the base of the ear phone portion of the headset.
- Page 12 GE Bluetooth Audífono Deportivo Bluetooth Modelo 86711...
- Page 13 Introducción Gracias por escoger el Audífono Deportivo Bluetooth de GE, modelo 86711. Su innovador diseño le brinda la libertad que necesita para hablar por teléfono, mientras que su exclusivo y elegante diseño hace que el audífono pase prácticamente carga le brinda hasta 15 horas de tiempo de conversación y 250 horas de tiempo de espera.
- Page 14 Referencia y funciones del producto Cargador portátil: • 1 Entrada para recargar (el adaptador para recargar se conecta a la entrada) • 2 Contactos para recargar (se une a los contactos del audífono para recargarlo) • 3 Luces indicadoras (le permite ver el estado de la recarga) •...
- Page 15 Audífono (Frente) • 1 Subir el volumen (Para subir el volumen) • 2 Bajar el volumen (Para bajar el volumen) • 3 Botón de función y Luz indicadora (Para sincronizar y contestar llamadas) Botón de función SUBIR Volumen BAJAR volumen...
- Page 16 Audífono (Espalda) • Auricular • Contactos para recargar (se unen a los contactos del cargador portátil) • Micrófono Auricular Contactos para recargar Micrófono...
- Page 17 Recarga del audífono y del Cargador portátil Nota: Aún si el audífono o el cargador portátil estén parcialmente cargados, igual deberá cargar las baterías antes de usar el audífono o el cargador portátil. La primera vez que los recargue, cargue el Audífono y el cargador portátil por 16 horas como mínimo.
- Page 18 Sincronización del Audífono 1. Antes de sincronizar el audífono, asegúrese de que esté completamente cargado. 2. Active la función Bluetooth de su teléfono, de acuerdo a las instrucciones del fabricante del teléfono. 3. Para prender el audífono, presione y man- tenga, por unos 10 segundos, el (Botón de Función), es el botón que está...
- Page 19 Encendido/Apagado del Audífono Encendido • Presione y mantenga el (botón de fun- ción) hasta que escuche un pitido corto. • La luz azul indicadora empezará a par- padear para indicarle que el audífono está prendido. Apagado • Presione y mantenga el (botón de fun- ción) hasta que escuche un pitido agudo corto y luego uno grave.
-
Page 20: Hacer Llamadas
Hacer llamadas • Presione y suelte el (Botón de Función) del audífono. • Marque el número con el teléfono; una vez que haya marcado, escuchará que el número marcado está timbrando. • Si su teléfono tiene la función de mar- cación por voz, podrá... -
Page 21: Ajuste Del Volumen
Ajuste del volumen • En cualquier momento puede ajustar el volumen mientras esté conversando; para subir el volumen, presione y suelte el botón superior. • Para bajar el volumen, presione y suelte el botón inferior. • Por su seguridad y para evitar daño al oído, se recomienda que no suba el volu- men al máximo. - Page 22 Uso del Clip SecuEar Se ha incluido el clip opcional SecuEar para los que quieran que el audífono tenga mayor seguridad y estabilidad dentro del oído. Muy útil para muchos usuarios. Para asegurar el clip SecuEar, colóquelo con cuidado alrededor de la base del auricular del audífono.