
Related Manuals for GE UltraCamTM HQ98073

Summary of Contents for GE UltraCamTM HQ98073
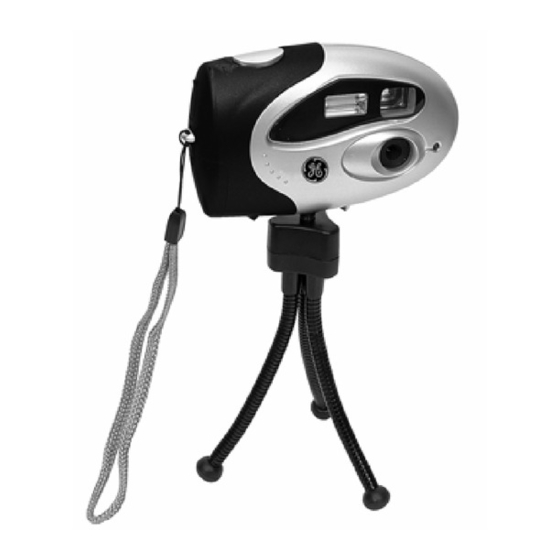
- Page 1 UltraCam™ User’s Manual HO98073 www.jascoproducts.com For technical support call 1-800-654-8483 (Option 4)
-
Page 2: Table Of Contents
Table of Contents CAUTIONS ----------------------------------------------------- 3 SYSTEM REQUIREMENTS -------------------------------- 4 PACKAGE CONTENTS ------------------------------------- 4 MAINTENANCE AND STORAGE ------------------------ 4 GETTING TO KNOW YOUR ULTRACAM™ ---------- 5 SOFTWARE INSTALLATION ----------------------------- 6 GETTING STARTED ----------------------------------------- 7 TAKING PICTURES------------------------------------------ 8 VIEWING PICTURES ---------------------------------------- 9 CAMERA DISPLAY PANEL ----------------------------- 10 PHOTOIMPRESSION™----------------------------------- 16 VIDEOIMPRESSION™... -
Page 3: Cautions
Cautions Read Before Using Your UltraCam™ You must install the camera driver BEFORE connecting the camera to your computer. Be sure to insert the batteries properly according to polarity. When inserting the batteries, make sure the positive (+) and negative (–) ends of the batteries match the markings on the edge of the battery compartment. -
Page 4: System Requirements
System Requirements 1. Microsoft® Windows® 98, ME, 2000, or XP 2. USB Port and CD-ROM drive 3. 266 MHz processor, 350 MHz recommended 4. At least 32 Mb RAM, 64 Mb recommended 5. 100 Mb free hard drive space 6. 16 bit video display or higher 7. -
Page 5: Getting To Know Your Ultracam
Getting to Know Your UltraCam™ Note: You must install the camera driver BEFORE connecting the camera to your computer. -
Page 6: Software Installation
Software Installation Please note that you must install the software BEFORE you connect the camera to the USB port of your computer. 1. Insert the included CD into the CD-ROM Drive of your computer. (The CD should auto load). 2. If the CD does not auto load, follow these steps: Double click on My Computer Double click on the icon of your CD drive (usually D) Double click on setup.exe... -
Page 7: Getting Started
Getting Started 1. Install the software as described in “Software Installation”. The software MUST be installed BEFORE the camera is connected to your computer. 2. Install the batteries in your camera. Remove the battery compartment cover as shown in the illustration. -
Page 8: Taking Pictures
Taking Pictures 1. Press the Mode button to turn on the camera. 2. Press the mode button twice to get to the flash On/Off screen. (FA) 3. Press the shutter release button to turn on the flash. (The flash is needed for most indoor pictures. -
Page 9: Viewing Pictures
Viewing Pictures Open the rubber cover on the camera’s mini USB port. Plug the mini USB plug into the mini USB port on the camera and plug the other end of the USB cable into your computer. Double click on the GE UltraCam icon on the desktop of your computer. -
Page 10: Camera Display Panel
Camera Display Panel Number of images available Power on or power off FA/Fo Flash strobe ON/OFF Adds a voice recording to the previous image Voice recording. This functions as a voice recorder for a maximum of 12 minutes. Auto play. After making a voice recording, the recording can be played back in this mode. - Page 11 Using the Optional Features 1. OF a) This will turn the camera off. b) Press the mode button until OF appears in the LCD screen. c) Press the shutter release button. 2. FA / Fo a) This will turn the flash on (FA) and off (Fo). b) Press the mode button until FA or Fo appears in the LCD screen.
- Page 12 4. Ar a) This allows you to use your camera as a voice recorder. Maximum recording time is 12 minutes. b) Press the mode button until Ar appears in the LCD screen; then press and hold the shutter release button. c) Begin talking into the microphone.
- Page 13 7. AI a) This allows you to take up to 60 second video clips. b) Press the mode button until AI appears in the LCD screen; then press and hold the shutter release button to begin the video. c) When finished video recording, release the shutter release button.
- Page 14 11. CA a) This will delete all pictures and recorded audio from the camera. b) Press the mode button until CA appears in the LCD screen. c) Press the shutter release button. d) CA will begin to flash. Press the shutter release button again. 12.
- Page 15 15. uP a) This will switch the camera to uncompressed mode. This option is only available when the camera is currently in Compressed Mode. b) Press the mode button until uP appears in the LCD screen. c) Press the shutter release button. d) Uncompressed mode allows 26 High Resolution photos or 104 Low Resolution photos to be taken.
-
Page 16: Photoimpression
PhotoImpression™ Welcome to PhotoImpression™ ArcSoft PhotoImpression™ is an easy-to-use image-editing program specifically designed for general consumers. The program enables you to edit, retouch, enhance or add special effects to digital images with point-and-click simplicity. It also offers a great variety of project templates for creating greeting cards and calendars, plus the functionalities of the popular Arcsoft PhotoPrinter®... -
Page 17: Using Photoimpression
To Open ArcSoft PhotoImpression™ 1. Double click on the ArcSoft PhotoImpression™ icon on the desktop. 2. You may also go to ArcSoft PhotoImpression™ under Programs in the Start Menu, and click on PhotoImpression™. Using PhotoImpression™ 1. Click on “Camera/Scanner”. See Diagram. 2. - Page 18 Edit Downloaded Pictures 5. After you have downloaded your pictures, you’re ready to edit them. To get started select a picture from the ones you captured. See Diagram. 6. Select “OK”. Your picture will open in the main window. See Diagram.
-
Page 19: Videoimpression
VideoImpression™ Welcome to PhotoImpression™ ArcSoft VideoImpression™ is a powerful, easy-to-use video editing and presentation program designed for consumers. ArcSoft VideoImpression™ enables you to edit video clips and still images, and to combine them to create multimedia desktop video presentations for home, business, and the Internet. - Page 20 ArcSoft VideoImpression™ - Getting Started 1. Open ArcSoft VideoImpression™ A) Double click on the VideoImpression™ icon on your desktop. B) You may also go to ArcSoft under Programs in the Start Menu, and click on VideoImpression™ 2. Click on the film reel icon to the right of “New”. 3.
-
Page 21: Windows® Netmeeting
Windows® NetMeeting Opening NetMeeting A. Windows® 98/ME/NT • Click Start → Programs → Accessories → Internet Tools → NetMeeting. B. Windows® 2000/XP • Click Start → Programs → Accessories → Communications → NetMeeting. • If NetMeeting is not there or on your desktop, go to Run in the Start Menu. - Page 22 Using NetMeeting with your camera 1. Make sure the UltraCam™ driver has been installed. 2. Plug the camera into any USB port on your computer. 3. Open NetMeeting using the instructions above. 4. Set-up NetMeeting using the instructions above if necessary. 5.
-
Page 23: Msn® Messenger
MSN® Messenger Installing/Opening MSN® Messenger A. Windows® 98/ME/2000 • Log on to • After it has downloaded, you can open MSN® Messenger by going to Start → Programs → Windows Messenger. B. Windows® XP • MSN® Messenger is already installed •... -
Page 24: Trouble Shooting
Trouble Shooting 1. Camera will not turn on • Check to make sure the batteries are properly installed. • Make sure the batteries are good. 2. Flash will not work • Check to see if the flash was turned on. See the “Taking and Viewing Pictures”... - Page 25 • Make sure your USB port is functioning properly. You may need to install updates, service packs, or patches for your operating system from Microsoft’s® website, www.microsoft.com. Go to “Windows Update” under Resources. • Close and reopen the application. 7. Uninstall the UltraCam™ driver Close all open applications.
-
Page 26: Two Year Limited Warranty
TWO YEAR LIMITED WARRANTY Jasco Products Company warrants this product to be free from manufacturing defects for a period of two years from the original date of consumer purchase. This warranty is limited to the repair or replacement of this product only and does not extend to consequential or incidental damage to other products that may be used with this unit. -
Page 27: Fcc Statement
FCC Statement Notice: Federal Communications Commission (FCC) requirements, Part 15 This equipment has been tested and found to comply with the limits for a class B digital device, pursuant to part 15 of the FCC Rules. These limits are designed to provide reasonable protection against harmful interference in a residential installation.