Table of Contents
Advertisement
Advertisement
Table of Contents

Related Manuals for Teac HDB849


Summary of Contents for Teac HDB849
- Page 2 Keep your purchase receipt to enable you to proceed quickly in the event of a Warranty Service. If you require Warranty Service, please contact the TEAC Customer Support Hotline at 1300 553 315 for assistance. Please ensure that you have the model number, serial number and purchase receipt ready when you call.
- Page 3 Authorised Service Centre for repair. In this event, proof of purchase is required to support a warranty claim. After the repair, the product will be available for collection by or return to the purchaser at a fee upon request. TEAC in- home service can be made available at a fee upon request.
- Page 4 Important Safety Instructions Read the following items carefully before operating this unit. Keep this manual for future reference. 1. Heed all warnings to prevent accidents or unwanted incidents from occurring. 2. Follow procedures as instructed. 3. Do not use this apparatus near water. The apparatus shall not be exposed to dripping or splashing of water.
-
Page 6: Table Of Contents
Contents 1. Before using the unit ......................1 Accessories ..........................1 Front and Rear Panel ......................1 1.2.1 Front Panel ........................1 1.2.2 Rear Panel ........................2 Remote Control Unit (RCU) ....................3 1.3.1 Inserting Batteries ......................4 1.3.2 Using the Remote Control ................... - Page 7 3.1.3.2 Country selection ...................... 13 3.1.3.3 Antenna Power ......................13 3.1.4 Time Setting ........................ 13 3.1.5 Option .......................... 14 3.1.6 System Settings ......................14 3.1.7 ..........................15 3.1.7.1 Multimedia ........................15 3.1.7.2 Photo configure......................16 3.1.7.3 Movie configure ......................16 3.1.7.4 Personal Video Recording (PVR) configure ..............
-
Page 8: Before Using The Unit
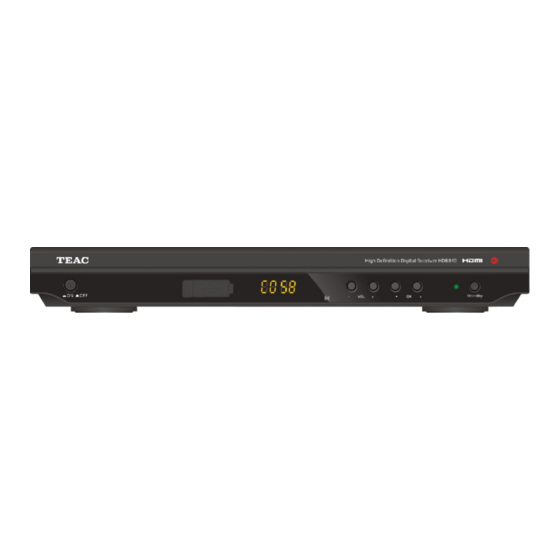
1. Before using the unit 1.1 Accessories Before installing the unit, please check the contents of the package. The package should contain the following items: 1.2 Front and Rear Panel 1.2.1 Front Panel Name Function 1. POWER BUTTON Push to turn on/off the main power supply. 2. -
Page 9: Rear Panel
1.2.2 Rear Panel Name Function 1. RF IN Connect the coaxial cable from the Arial to this socket. 2. RF LOOP THROUGH Connect to your TV or another video system. (Optional) 3. COAXIAL Optional connection to a digital surround sound system. 4. -
Page 10: Remote Control Unit (Rcu)
1.3 Remote Control Unit (RCU) 1. MUTE: Mute or restore audio output. 2. INFO: Displays additional channel information, also reveals information banner during Time Shift and Recording. 3. TTX: Displays Teletex Information. 4. SUBTITLE: Displays subtitle language options. 5. EXIT: Exits the current Menu or returns to the previous Menu 6. -
Page 11: Inserting Batteries
1.3.1 Inserting Batteries Remove the battery cover from the rear of the Remote Control and place two AAA size batteries inside the compartment. Please make sure that the battery polarities match the polarity markings as stated in the compartment. NOTE: o Batteries, including those which contain no heavy metals, may not be disposed off with household waste. -
Page 12: Setup
2. Setup There are several ways to connect your Set Top Box to your television set and other equipment. This section explains basic setup plans for your system. If you have any problems with setting up, please contact your dealer for assistance. 2.1 Connecting to a television To connect the Set Top Box unit to your television, please use any one of these suggested methods:-... -
Page 13: Connecting To An Audio System
2.2 Connecting to an Audio System To enjoy Dolby digital audio, your TV or audio system must be able to decode Dolby digital audio. Plug one end of an optical SPDIF cable into the coaxial digital audio socket on the unit and plug the other end into the matching socket on your audio system as shown by the schematic diagram below. -
Page 14: Connecting To A Dvd Recorder Or Vcr
2.3 Connecting to a DVD Recorder or VCR This connection is optional, giving the user the option to have a DVD or VCR recorder connected to the unit to record programs. Use the AV cables to connect the external DVD recorder or VCR to the AV output jacks on the rear panel of the unit. -
Page 15: Installation Guide
3. Installation Guide After all connections have been made, switch on your TV unit. Press the POWER button to switch on the Set Top Box. If you are using the unit for the first time or have restored the unit to Factory Default settings, the Installation Guide menu will appear on-screen. OSD Language: Press the LEFT/RIGHT key to make a language selection. -
Page 16: Program Settings
3.1.1 Program Settings The Program Settings menu provides options to edit programs, view the Electronic Program Guide, and sort the channels according to your liking. Use the UP/DOWN, and LEFT /RIGHT keys to navigate through the menu. Press EXIT button once settings are completed to exit the menu. -
Page 17: Delete A Tv Or Radio Program
3.1.1.1b Delete a TV or Radio Program Select the Program and then press the BLUE button. A warning prompt will appear. Press OK to delete the channel. Repeat the previous step to select other channels. 3.1.1.1c Skip TV or Radio Channels 1. -
Page 18: Electronic Program Guide (Epg)
6. To view the locked channels, you will be required to enter either the default password '000000' or your last set password. The master unlock password is '888888' in the event you forgot your password settings. 3.1.1.2 Electronic Program Guide (EPG) The EPG is an on-screen TV guide that shows scheduled programs seven days in advance. -
Page 19: Resolution
3.1.2.2 Resolution You can change this setting if the picture resolution does not appear to be correct. This setting is to match the most common settings if a HDMI cord is used. [576i]: for PAL TV system. [576P]: for PAL TV system. -
Page 20: Country Selection
3.1.3.2 Country selection Select your country of residence 3.1.3.3 Antenna Power Enable Antenna Power if an external active antenna is connected. 3.1.4 Time Setting To access the Menu, press MENU then select [Time] using the RIGHT/LEFT keys. The Menu provides options to adjust the time settings. Press UP/DOWN to select an option and press RIGHT/LEFT to adjust the settings. -
Page 21: Option
3.1.5 Option To access the Menu, press MENU and select [Option] using the RIGHT/LEFT keys. The menu provides options to adjust the OSD Language, Subtitle Language, and Audio Language. Select an option and press RIGHT/LEFT to adjust the settings. Press EXIT to exit the Menu. -
Page 22: Usb
a. Set Password Set or change the password for your System. Enter the default password ‘000000’ or if you have previously set a password, please enter your numerical code. A prompt will appear requesting for a new password input. Press OK button to confirm your new password. -
Page 23: Photo Configure
3.1.7.2 Photo configure Slide Time: adjust the slide show interval to 1-8 seconds. Slide Mode: adjust slide shoe effect as mode 0-59 or random. Aspect Ratio. [Keep]: Play picture in its original aspect. [Discard]: Play picture in full screen mode 3.1.7.3 Movie configure Subtitle Font: [Small]: Displays the subtitle as small mode. -
Page 24: Personal Video Recording (Pvr) Configure
NOTE: o TEAC cannot guarantee compatibility (operation and/or bus power) with all USB mass storage devices and TEAC holds no responsibility for any loss of data that may occur when connected to this unit. o With large amounts of data, it may take longer for the system to read the contents of a USB device. -
Page 25: Scheduled Recording
3.2.2 Scheduled Recording You can book programs for recording when a USB deice is connected to the USB socket on the front panel. Enter EPG by pressing the EPG key. Select the program you wish to record using the LEFT/RIGHT keys and the UP/DOWN keys to highlight the program. Press the OK key to book the highlighted program for recording. - Page 26 Programs booked for recording will be marked. Any recordings that are to occur daily or weekly will not be marked due o the static nature of the EPG, however the booked recordings will appear in your recording schedule in the EPG screen. While still in the EPG window, press the INFO button to view a list of the programs you have booked for recording.
-
Page 27: Time Shift
3.2.3 Time shift If a USB device is connected you can pause live broadcasts. Press the PAUSE key during live broadcast to start Time Shift. A progress banner will appear displaying the length of time the program has been time shifted. The progress bar will disappear after 5 seconds. When you wish to re-start the program, press the PLAY key. -
Page 28: Troubleshooting
4. Troubleshooting Problem Potential Reasons What to do Power is not connected Connect the power No picture The power switch is not on Switch on the power DVB-T cable not connected Plug in the DVB-T cable Screen shows “No Check the aerial cable and signal”... -
Page 29: Technical Specifications
5. Technical Specifications... - Page 30 TEAC CUSTOMER SUPPORT HOTLINE (TCS) 1300 553 315 Between Monday to Friday – AEST 8.30AM to 6PM...