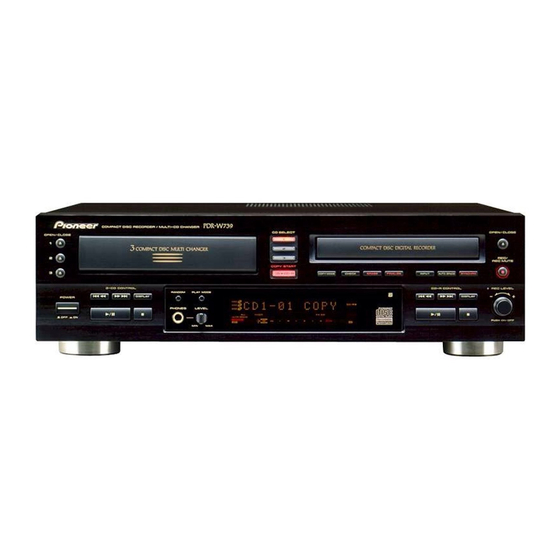
Pioneer PDR-W739 Operating Instructions Manual
Compact disc recorder/multi-cd changer
Hide thumbs
Also See for PDR-W739:
- Service manual (92 pages) ,
- Operating instructions manual (44 pages) ,
- Quick start manual (2 pages)

Related Manuals for Pioneer PDR-W739


Summary of Contents for Pioneer PDR-W739
- Page 1 COMPACT DISC RECORDER/MULTI-CD CHANGER ENREGISTREUR DE COMPACT DISC/CHANGEUR 3 CD PDR-W739 Operating Instructions Mode d'emploi...
- Page 2 However, the method of con- Nous vous remercions pour cet achat d’un produit Pioneer. necting and operating the unit is the same. Nous vous demandons de lire soigneusement ce mode d’emploi;...
-
Page 3: Table Of Contents
Contents 6 Finalizing and Erasing Finalizing a disc ..............29 1 Before You Start Erasing a CD–RW disc ............31 Marking recorded tracks to skip ......... 33 Checking what's in the box ..........5 Using this manual ..............5 7 Playback Functions Putting the batteries in the remote ........ - Page 4 Sommaire 6 Finalisation et effacement Finalisation d’un disque ............ 29 1 Avant le démarrage Effacement d’un CD-RW ............ 31 Marquage des plages enregistrées à sauter ......33 Vérification du contenu de la boîte ........5 Emploi de ce mode d’emploi ..........5 7 Fonctions de lecture Insertion des piles dans la télécommande ......
-
Page 5: Before You Start
Checking what's in the box Vérification du contenu de la boîte Thank you for buying this Pioneer product. Before starting to set up Merci d’avoir porté votre choix sur ce produit Pioneer. Avant de your new CD recorder, please check that you have received the mettre en service votre nouvel enregistreur de CD, vérifiez la... -
Page 6: Hints On Installation
1 Before You Start 1 Avant le démarrage Hints on installation Conseils pour l’installation We want you to enjoy using this unit for years to come, so please Nous vous demandons de conserver à l’esprit les points suivants au bear in mind the following points when choosing a suitable moment de choisir l’emplacement d’installation de cet appareil location for it: pour pouvoir en profiter pendant de longues années. -
Page 7: Maintaining Your Cd Recorder
Check the power cord pas pincer le câble. Ne pas faire de noeud avec le câble ou l’attacher once in a while. If you find it damaged, ask your nearest Pioneer à d’autres câbles. Les câbles d’alimentation doivent être posés de authorized service center or your dealer for a replacement. -
Page 8: About Cd, Cd-R And Cd-Rw Discs
A propos des disques CD, CD-R et CD-RW This unit is compatible with three different types of compact disc: Le PDR-W739 est compatible avec trois différents types de disque Playback-only CDs compact: This unit will playback any ordinary audio CDs... -
Page 9: Recording Copyright Material
1 Before You Start 1 Avant le démarrage Recording copyright material Enregistrement de matériaux sous droits d’auteur The price of a consumer-use disc includes a copyright fee that has been paid to the copyright owner (in countries where the copyright Le prix d’un disque grand public inclut des frais de droits d’auteur fee collection system has been established based on their respective acquittés au détenteur des droits (dans les pays où... -
Page 10: Playing Partially Recorded Discs
1 Before You Start 1 Avant le démarrage fig 1. differences between recordable and rewritable discs. Fig. 1 Différences entre un disque enregistrable et un disque réenregistrable Recordable Recordable Enregistrable Enregistrable Erasable Erasable Effaçable Effaçable Skip ID set/clear Skip ID set/clear Pose/effacement de Pose/effacement de Play in ordinary... -
Page 11: Connecting Up
COAXIAL DIGITAL OPTICAL Connect to the CONTROL Connect to the OPTICAL IN or OUT of a Pioneer amplifer or COAXIAL IN of a CD-R, receiver to be able to use the MiniDisc or DAT recorder, or amp/receiver's remote control other digital recording device to with this unit. -
Page 12: Panneau Arrière
Raccordez à OPTICAL IN ou COAXIAL IN d’un Raccordez à CONTROL OUT d’un amplificateur enregistreur CD-R, MiniDisc ou DAT, ou à un autre Pioneer pour permettre l’emploi de la télécommande équipement d’enregistrement numérique pour d’ampli/ampli-tuner avec cet appareil. permettre l’enregistrement à partir de cet appareil. -
Page 13: Controls And Displays
3 Controls and Displays 3 Commandes et Afficheur Front panel Panneau avant ◊ÛB¿ˆ≥≤/ COMPACT DISC RECORDER / MULTI-CD CHANGER CD SELECT OPEN/CLOSE OPEN/CLOSE COMPACT DISC DIGITAL RECORDER - COMPACT DISC MULTI CHANGER REC/ REC MUTE COPY START ¶ CD=CD-R COPY MODE CHECK ERASE FINALIZE... - Page 14 3 Controls and Displays 3 Commandes et Afficheur 3-CD CONTROL Touche d’enregistrement/assourdissement 4 1 – Press for reverse track skip; press and hold d’enregistrement) REC/REC MUTE ¶ – for fast reverse playback. (p.21) Pressez pour mettre l’enregistreur en mode pause ¡...
-
Page 15: Remote Control
3 Controls and Displays 3 Commandes et Afficheur Î CD-R DISC DISC DISC & DISPLAY ⁄ › RANDOM REPEAT FADER 10/0 >10 PROGRAM CHECK CLEAR SKIP PLAY SKIP SKIP SET CLEAR MODE COMPACT DISC RECORDER/ MULTI-CD CHANGER REMOTE CONTROL UNIT Remote control Télécommande Disc select buttons... -
Page 16: Function Buttons
à proximité • Replace the batteries when you notice a fall off in the pendant le fonctionnement du PDR-W739. operating range of the remote. • Remplacez les piles quand vous notez une diminution de la plage de fonctionnement de la télécommande. -
Page 17: Display
3 Controls and Displays 3 Commandes et Afficheur Display Afficheur DISC TOTAL REMAIN STEP DISC CD-RW DISC MANUAL DISC AUTO TRACK PARTIAL SINGLE ALL RELAY FADER SCAN RDM PGM SKIP ON VOL FIX DIG ANA OPT COAX FINALIZE AUTO SPACE ALC ERASE COPY SYNCHRO... - Page 18 3 Controls and Displays 3 Commandes et Afficheur COPY X1 / X2 – Lights when copying disc(s)/tracks COPY X1 / X2 - S’allume pendant le copiage de from the CD changer, and indicates whether single or disque(s)/plages du changeur CD, et indique la vitesse double speed.
-
Page 19: Getting Started
— OFF _ ON Quick CD copying Copie rapide de CD Bien que le PDR-W739 possède beaucoup de fonctions avancées, le Although the PDR-W739 has many advanced recording features, copiage d’un CD se fait pratiquement tous par simple pression duplicating a CD is pretty much a one-touch operation. Before d’une touche. -
Page 20: Playing A Cd
4 Getting Started 4 Démarrage Press COPY START CD = CD-R. Appuyez sur COPY START CD= CD-R. The recorder automatically copies at double speed, so if L’enregistreur copie automatiquement à double vitesse; si vous you're listening to the recording as it's being made it will écoutez l’enregistrement qui se fait, cela pourra sembler un peu sound a little strange! bizarre! - Page 21 4 Getting Started 4 Démarrage Press DISC 1 (CD SELECT 1 on the front Appuyez sur DISC 1 (CD SELECT 1 sur le panel) to start playback. panneau avant) pour démarrer la lecture. • For CD-R playback, press on the remote control •...
-
Page 22: Playback Modes
4 Getting Started 4 Démarrage Î DISC DISC DISC CD-R ◊ÛB¿ˆ≥≤/ COMPACT DISC RECORDER / MULTI-CD CHANGER CD SELECT OPEN/CLOSE OPEN/CLOSE - COMPACT DISC MULTI CHANGER COMPACT DISC DIGITAL RECORDER 3-CD CONTROL PLAY MODE PLAY MODE COMPACT DISC RECORDER/ MULTI-CD CHANGER REMOTE CONTROL UNIT Playback modes Modes de lecture... -
Page 23: Starting Playback With A Timer
4 Getting Started 4 Démarrage Starting playback with a timer Appuyez sur DISC 1 (CD SELECT 1 sur le panneau avant) pour démarrer la lecture. You can use this unit with a standard audio timer to start playback Si vous êtes en mode , appuyez sur la touche at a set time. -
Page 24: Copying Cds
5 Copying CDs 5 Copiage de CD ◊ÛB¿ˆ≥≤/ COMPACT DISC RECORDER / MULTI-CD CHANGER CD SELECT OPEN/CLOSE OPEN/CLOSE - COMPACT DISC MULTI CHANGER COMPACT DISC DIGITAL RECORDER COPY START CD=CD-R COPY MODE FINALIZE ¡ ¢ Introduction Introduction Recording CDs from the disc changer has several advantages over L’enregistrement de CD à... -
Page 25: Copying Individual Tracks
5 Copying CDs 5 Copiage de CD Press the DISC (CD SELECT on the front Appuyez sur la touche DISC (CD SELECT sur panel) button for the disc you want to le panneau avant) pour le disque que vous record. souhaitez enregistrer. -
Page 26: Copying A Programmed Selection
5 Copying CDs 5 Copiage de CD Î DISC DISC DISC ◊ÛB¿ˆ≥≤/ COMPACT DISC RECORDER / MULTI-CD CHANGER OPEN/CLOSE OPEN/CLOSE COMPACT DISC DIGITAL RECORDER › - COMPACT DISC MULTI CHANGER COPY START CD=CD-R COPY MODE AUTO SPACE 10/0 >10 PROGRAM COMPACT DISC RECORDER/ MULTI-CD CHANGER REMOTE CONTROL UNIT... -
Page 27: Changing The Copying Speed
5 Copying CDs 5 Copiage de CD Appuyez sur AUTO SPACE si vous souhaitez If you want to automatically space the tracks espacer automatiquement les plages de on the recording, press AUTO SPACE. l’enregistrement. Switching on automatic spacing makes sure that there's a few seconds of silence between each recorded track. -
Page 28: Setting The Recording Level
5 Copying CDs 5 Copiage de CD ◊ÛB¿ˆ≥≤/ COMPACT DISC RECORDER / MULTI-CD CHANGER COMPACT DISC DIGITAL RECORDER - COMPACT DISC MULTI CHANGER CHECK ‡ REC LEVEL 3-CD CONTROL CD-R CONTROL ¡ ¢ PUSH ON-OFF Réglage du niveau d’enregistrement Setting the recording level Lors de l’enregistrement d’un CD produit dans le commerce, le When recording commercially produced CDs, the recording niveau d’enregistrement est toujours optimisé... -
Page 29: Finalizing A Disc
6 Finalizing and Erasing 6 Finalisation et effacement ◊ÛB¿ˆ≥≤/ COMPACT DISC RECORDER / MULTI-CD CHANGER OPEN/CLOSE COMPACT DISC DIGITAL RECORDER - COMPACT DISC MULTI CHANGER CHECK FINALIZE CD-R CONTROL Finalizing a disc Finalisation d’un disque Before you can play a CD-R on an ordinary CD player, the disc must Avant de pouvoir lire un CD-R sur un lecteur CD ordinaire, le go through a process called finalization. - Page 30 6 Finalizing and Erasing 6 Finalisation et effacement Load the CD–R or CD–RW you want to finalize. Chargez le CD-R ou CD-RW que vous • Check that the disc is free from dust, dirt and scratches—if souhaitez finaliser. necessary, clean the disc following the guidelines on page 53. •...
-
Page 31: Erasing A Cd-Rw Disc
6 Finalizing and Erasing 6 Finalisation et effacement ◊ÛB¿ˆ≥≤/ COMPACT DISC RECORDER / MULTI-CD CHANGER - COMPACT DISC MULTI CHANGER COMPACT DISC DIGITAL RECORDER ERASE CD-R CONTROL ¡ ¢ Erasing a CD–RW disc Effacement d’un CD-RW Although more expensive than CD-R discs, the great advantage of Bien que plus cher qu’un CD-R, le grand avantage du CD-RW est CD-RW is that the discs can be erased and reused. - Page 32 6 Finalizing and Erasing 6 Finalisation et effacement Quand un disque non-finalisé est chargé: When a non-finalized disc is loaded: Appuyez sur ERASE. Press ERASE. Appuyez sur 4 1 (ou ¡ ¢) pour Press 41 (or ¡ ¢) to change the modifier l’option d’effacement.
-
Page 33: Marking Recorded Tracks To Skip
6 Finalizing and Erasing 6 Finalisation et effacement ◊ÛB¿ˆ≥≤/ COMPACT DISC RECORDER / MULTI-CD CHANGER - COMPACT DISC MULTI CHANGER COMPACT DISC DIGITAL RECORDER ERASE CD-R CONTROL ¡ ¢ Re-initializing a disc Réinitialisation d’un disque Press and hold ERASE for about four Maintenez ERASE pressé... - Page 34 6 Finalizing and Erasing 6 Finalisation et effacement Bien qu’il soit possible d’effacer des plages sur un disque CD-R, Although you can’t erase tracks on a CD-R disc, you can set what vous pouvez poser ce qu’on appelle des ‘codes de saut’, qui are called ‘skip IDs’.
- Page 35 6 Finalizing and Erasing 6 Finalisation et effacement Clearing skip IDs: Jusqu’à l’éjection du disque, l’enregistreur conserve les informations de code de saut en mémoire. A la pression de 0, l’enregistreur écrit les informations de code de saut sur With the recorder stopped, press SKIP. le disque.
-
Page 36: Programming A Playlist (3-Cd Changer)
7 Playback Functions 7 Fonctions de lecture Î DISC DISC DISC & ◊ÛB¿ˆ≥≤/ COMPACT DISC RECORDER / MULTI-CD CHANGER CD SELECT › - COMPACT DISC MULTI CHANGER COMPACT DISC DIGITAL RECORDER CHECK 3-CD CONTROL PLAY MODE ¡ ¢ 10/0 >10 PROGRAM CHECK CLEAR COMPACT DISC RECORDER/ MULTI-CD CHANGER... -
Page 37: Clearing The Playlist
7 Playback Functions 7 Fonctions de lecture Clearing the playlist Suppression de la liste de lecture Clear the playlist by either: Supprimez la liste de lecture de l’une des manières suivantes: • pressing 7 while the disc is stopped. • pression de 7 quand le disque est à l’arrêt. •... -
Page 38: Programming A Playlist (Cd-R)
7 Playback Functions 7 Fonctions de lecture Î CD-R ◊ÛB¿ˆ≥≤/ & COMPACT DISC RECORDER / MULTI-CD CHANGER › - COMPACT DISC MULTI CHANGER COMPACT DISC DIGITAL RECORDER CHECK CD-R CONTROL ¡ ¢ 10/0 >10 PROGRAM CHECK CLEAR COMPACT DISC RECORDER/ MULTI-CD CHANGER REMOTE CONTROL UNIT Programmation d’une liste de lecture... -
Page 39: Using The Repeat Modes
7 Playback Functions 7 Fonctions de lecture Î CD-R & ◊ÛB¿ˆ≥≤/ COMPACT DISC RECORDER / MULTI-CD CHANGER › COMPACT DISC DIGITAL RECORDER - COMPACT DISC MULTI CHANGER RANDOM REPEAT FADER 3-CD CONTROL CD-R CONTROL RANDOM ¡ ¢ ¡ ¢ COMPACT DISC RECORDER/ MULTI-CD CHANGER REMOTE CONTROL UNIT Using the repeat modes... -
Page 40: Using The Random Mode
7 Playback Functions 7 Fonctions de lecture Using the random mode Emploi du mode aléatoire To have the recorder play tracks in a different order each time you Pour que l’enregistreur liste les plages dans un ordre différent à play a disc, use the random play mode. Each track will play just chaque lecture d’un disque, utilisez le mode de lecture aléatoire. -
Page 41: Switching The Display
7 Playback Functions 7 Fonctions de lecture Î ◊ÛB¿ˆ≥≤/ COMPACT DISC RECORDER / MULTI-CD CHANGER DISPLAY - COMPACT DISC MULTI CHANGER COMPACT DISC DIGITAL RECORDER 3-CD CONTROL CD-R CONTROL DISP DISP COMPACT DISC RECORDER/ MULTI-CD CHANGER REMOTE CONTROL UNIT Commutation de l’affichage Switching the display (côté... - Page 42 7 Playback Functions 7 Fonctions de lecture (CD-R side) (côté CD-R) When the CD-R is stopped, press DISPLAY to Quand le CD-R est arrêté, appuyez sur DISPLAY switch the display mode. pour commuter le mode d’affichage. There are four different displays. Press repeatedly to Il y a quatre modes d’affichage.
-
Page 43: Introduction
8 Recording Other Sources 8 Enregistrement d’autres sources ◊ÛB¿ˆ≥≤/ COMPACT DISC RECORDER / MULTI-CD CHANGER - COMPACT DISC MULTI CHANGER COMPACT DISC DIGITAL RECORDER INPUT CD-R CONTROL Introduction Introduction Use the various recording modes described here when you're Utilisez les différents modes d’enregistrement décrits ici quand vous recording from a component connected to the recorder either enregistrez à... -
Page 44: Digital Synchro Recording
8 Recording Other Sources 8 Enregistrement d’autres sources ◊ÛB¿ˆ≥≤/ COMPACT DISC RECORDER / MULTI-CD CHANGER OPEN/CLOSE - COMPACT DISC MULTI CHANGER COMPACT DISC DIGITAL RECORDER INPUT SYNCHRO ‡ REC LEVEL CD-R CONTROL DISP PUSH ON-OFF Digital synchro recording Enregistrement synchro numérique If you have a CD, MD, DAT or DCC player connected to either of the Si vous avez raccordé... - Page 45 8 Recording Other Sources 8 Enregistrement d’autres sources Make sure that the source is not playing, Vérifiez que la source n’est pas lue, et then press SYNCHRO. appuyez sur SYNCHRO. Digital synchro recording will not work if the source is L’enregistrement synchro numérique ne fonctionnera pas si already playing! la source est déjà...
-
Page 46: Analog Synchro Recording
8 Recording Other Sources 8 Enregistrement d’autres sources ◊ÛB¿ˆ≥≤/ COMPACT DISC RECORDER / MULTI-CD CHANGER OPEN/CLOSE - COMPACT DISC MULTI CHANGER COMPACT DISC DIGITAL RECORDER INPUT SYNCHRO ‡ REC LEVEL CD-R CONTROL DISP PUSH ON-OFF Analog synchro recording Enregistrement synchro analogique Use the analog line inputs when recording from your turntable, Utilisez les entrées de ligne analogiques pour enregistrer à... - Page 47 8 Recording Other Sources 8 Enregistrement d’autres sources Make sure that the source is not playing, Vérifiez que la source n’est pas lue, et then press SYNCHRO. appuyez sur SYNCHRO. Analog synchro recording will not work if the source is L’enregistrment synchro numérique ne fonctionnera pas si already playing! la source est déjà...
-
Page 48: Manual Recording (Analog Or Digital)
8 Recording Other Sources 8 Enregistrement d’autres sources ◊ÛB¿ˆ≥≤/ COMPACT DISC RECORDER / MULTI-CD CHANGER OPEN/CLOSE COMPACT DISC DIGITAL RECORDER - COMPACT DISC MULTI CHANGER REC/ REC MUTE ¶ INPUT ‡ REC LEVEL CD-R CONTROL ¡ ¢ DISP PUSH ON-OFF Enregistrement manuel Manual recording (analog or digital) (analogique ou numérique) - Page 49 8 Recording Other Sources 8 Enregistrement d’autres sources Adjust the recording level, if necessary: Ajustez le niveau d’enregistrement, si • To adjust the recording level when using a digital input, see nécessaire: step 4 of Digital synchro recording on page 44. •...
-
Page 50: Monitoring A Source For Recording
8 Recording Other Sources 8 Enregistrement d’autres sources Monitoring a source for recording Contrôle d’une source pour l’enregistrement Using the monitor facility you can listen to a source connected to the analog or digital inputs. This is especially useful for setting the L’emploi d’un dispositif de contrôle peut vous permettre d’écouter recording level and/or checking the compatibility of a digital une source raccordée aux entrées analogiques ou numériques. -
Page 51: Recording Blank Sections
8 Recording Other Sources 8 Enregistrement d’autres sources ◊ÛB¿ˆ≥≤/ COMPACT DISC RECORDER / MULTI-CD CHANGER - COMPACT DISC MULTI CHANGER COMPACT DISC DIGITAL RECORDER REC/ REC MUTE ¶ CD-R CONTROL Recording blank sections Enregistrement sur des sections vierges Recording blank sections Enregistrement de sections vierges This feature is useful when you want to put some space at the end Cette fonction est pratique quand vous souhaitez placer un espace à... -
Page 52: Recording Fades
8 Recording Other Sources 8 Enregistrement d’autres sources Recording fades Î Enregistrement de fondus & FADER COMPACT DISC RECORDER/ MULTI-CD CHANGER REMOTE CONTROL UNIT Recording fades Enregistrement de fondus When recording a radio or satellite broadcast, or just an excerpt A l’enregistrement d’une émission de radio ou de satellite, ou from a recorded piece of music, you may want to fade in the simplement d’un extrait d’un morceau de musique enregistré, vous... -
Page 53: Handling Discs
CDs only. Use of shaped CDs is not recommended for this product. pas le risque de l’utiliser sur votre enregistreur ou lecteur CD — Pioneer disclaims all liability arising in connection with the use of cela pourrait endommager l’appareil. shaped CDs. -
Page 54: Recording Cds
9 Additional Information 9 Informations complémentaires Recording CDs Enregistrement de CD Cet enregistreur est conçu pour vous permettre des enregistrements This recorder is designed to let you make extremely high quality numériques de très haute qualité sur des disques compacts digital recordings onto recordable compact discs. -
Page 55: Digital Recording From Dat
9 Additional Information 9 Informations complémentaires Digital recording from DAT Enregistrement numérique à partir d’une cassette DAT If you’re recording a DAT tape that was recorded using the DAT machine's auto ID function, the IDs on the tape are slightly after Si vous enregistrez une cassette DAT enregistrée avec la fonction de the beginning of the actual recording. -
Page 56: Understanding Display Messages
9 Additional Information Understanding display messages Below is a list of messages you’ll see during normal operation with a brief explanation of what they mean. If you need more information, turn to the page indicated. Message Description Page OPEN The disc tray is open. CLOSE The disc tray is closing. -
Page 57: Compréhension Des Messages Affichés
9 Informations complémentaires Compréhension des messages affichés Voici la liste des messages qui apparaîtront pendant le fonctionnement normal avec une brève explication de leur signification. Consultez la page indiquée si vous souhaitez plus d’informations. Affichage Significations Référence OPEN Le tiroir est ouvert. Le tiroir se ferme. -
Page 58: Error Messages
CHECK (blinking noise or static electricity. If the same message is displayed again, display) please contact a Pioneer authorized service center. Power to the unit was interrupted The recorder is trying to repair the disc. Wait RESUME during recording. When power is until the message disappears. -
Page 59: Messages D'erreur
Si les mêmes messages réapparaissent après le rechargement du disque, débranchez le cordon d’alimentation et rebranchez-le. Si les mêmes messages persistent, contactez un centre de service agréé Pioneer. CHECK Une erreur de système s’est produite, Débranchez le cordon d’alimentation, puis peut-être due au bruit ou à... -
Page 60: Messages Relating To Recording
It’s often easy to mistake incorrect operation for trouble and malfunction of the unit. If you think there is something wrong with the component, check the points below first. If the problem persists, contact you nearest Pioneer-authorized service center and have them... -
Page 61: Messages Affichés En Relation Avec L'enregistrement
Une opération incorrecte est souvent confondue avec un mauvais fonctionnement de l’appareil. Si vous pensez qu’il y a un problème avec le composant, vérifiez d’abord les points ci-dessous. Si le problème persiste, demandez au centre de service agréé Pioneer le proche... -
Page 62: Troubleshooting
9 Additional Information 9 Informations complémentaires Troubleshooting Dépannage Power does not come on L’appareil ne se met pas sous tension. • Check that the unit is plugged into a standard AC power outlet. • Vérifiez qu’il est branché sur une prise d’alimentation secteur •... -
Page 63: Specifications
Les caractéristiques techniques et la présentation de ce produit peuvent être modifiées sans préavis pour amélioration. Published by Pioneer Corporation. Publication de Pioneer Corporation. Copyright © 1999 Pioneer Corporation. © 1999 Pioneer Corporation. All rights reserved. Tous droits de reproduction et de traduction réservés. - Page 64 PIONEER ELECTRONICS AUSTRALIA PTY. LTD..178-184 Boundary Road, Braeside, Victoria 3195, Australia, TEL: [03] 9586-6300 PIONEER ELECTRONICS DE MEXICO S.A. DE C.V..San Lorenzo Num 1009 3er piso Desp. 302 Col. Del Valle, Mexico D.F. C.P. 03100 TEL: 5-688-52-90 <99L00ZF0N00>...