Samsung SDP-860 User Manual
Hide thumbs
Also See for SDP-860:
- User manual (56 pages) ,
- Quick start manual (4 pages) ,
- Basic operations (2 pages)

Related Manuals for Samsung SDP-860


Summary of Contents for Samsung SDP-860
- Page 1 ENGLISH DIGITAL PRESENTER USER’S MANUAL Before attempting to operate this product, Please read the instructions carefully. www.samsungpresenter.com...
- Page 2 This high-resolution presentation system generates images on display devices such as PC monitors and projectors. This user manual is for the SDP-860 product. Please read this manual and any supplementary document(s) thoroughly before attempting to install and/or operate the product.
- Page 3 Product Warranty and Limitations The manufacturer of this product is not responsible for the sale of the product, nor does the manufacturer delegate such responsibility to a third party. The product warranty does not cover accidents, negligence, abuse, or improper use of the item in whole or in any part.
-
Page 4: Product Features
When equipped with an adapter lens, it also delivers super-close-up images. Convenient Multimedia Options The SDP-860 not only saves and plays still images and videos (VGA/30 fps) but also supports audio mixing for more versatile multimedia capabilities. -
Page 5: Table Of Contents
Table of Contents Safety Precautions Warning Caution Product Information Package Contents Part Names & Functions (Main Frame) Front Back (Rear Connection Terminals) Side (Side Connection Terminals) Part Names & Functions (Main Frame Control Board/Remote Controller) Preparing Set Settings Menus & Default Values Installation Connecting In/Output Devices Connecting Output Devices... -
Page 6: Safety Precautions
Safety Precautions To prevent possible user injury or damage to property, please read and follow all information below. Warning/Caution/Special Mark Messages This warning symbol indicates death, grave personal injury, and/or damage to property as consequences for failure to comply. This caution symbol indicates damage to the equipment, installed programs, and/or contained data as consequences for failure to comply. -
Page 7: Fcc Compliance Statement
Product Features FCC Compliance Statement This equipment has been tested and found to comply with the limits for a class A digital device, pursuant to part 15 of the FCC Rules. These limits are designed to provide reasonable protection against harmful interference when the equipment is operated in a commercial environment. -
Page 8: Package Contents
Package Contents The picture of the contents may differ from actual products, and certain contents may change if deemed necessary. Default Contents User’s Manual Remote Controller Power Cable Power Adapter DVI Cable VGA Cable USB Program Diffuser Sheet USB Cable CD &... - Page 9 RS232C cables and adapter lenses from other brands may not be compatible with this product. Samsung Techwin cares for the environment at all product manufacturing stages to preserve the environment, and is taking a number of steps to provide customers with more environmentally friendly products.
-
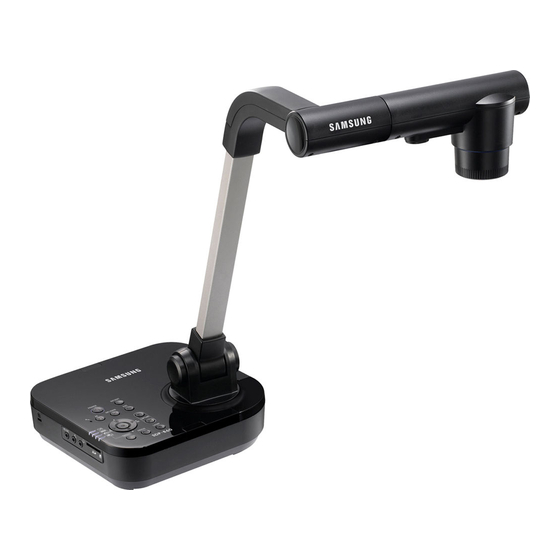
Page 10: Part Names & Functions (Main Frame)
Part Names & Functions (Main Frame) Front Name Camera LED Light Main Support Column Main Frame Control Board Status LED Remote Control Signal Receiver Rear Connection Terminal Side Connection Terminal... -
Page 11: Back (Rear Connection Terminals)
Part Names & Functions (Main Frame) Back (Rear Connection Terminals) Terminal Function Connect the power adapter cable. Connect the video output terminal of a VGA output device. When External Input is selected, video is displayed via this VGA video output terminal. Connect the RGB video output terminal of a PC monitor or a projector. -
Page 12: Side (Side Connection Terminals)
Part Names & Functions (Main Frame) Side (Side Connection Terminals) RS-232C Terminal Function Connect Kensington Security Slot. RS-232C Connect an RS-232C cable. Connect an audio mixing mic for saving videos. Connect a speaker or earphones for audio output signals. Insert an SD/SDHC card for saving or importing videos and pictures. -
Page 13: Part Names & Functions (Main Frame Control Board/Remote Controller)
Part Names & Functions (Main Frame Control Board/Remote Controller) Button Function Turn On/Off Power Select Internal/External Video Built-in Microphone Mode) Auto Focus LIST Mode) Page DOWN (While Playing Video) Play Previous File Mode) MF/Auto Color Adjustment LIST Mode) Page UP (While Playing Video) Play Next File Cancel Command... - Page 14 Part Names & Functions (Main Frame Control Board/Remote Controller) Button Function Mode) Brighten/Darken Screen LIST Mode) Move Up/Down (While Playing Video) Adjust Volume Mode) Enlarge/Minimize Screen LIST Mode) Move Left/Right (While Playing Video) Rewind/Fast Forward Mode) Open Menu LIST Mode) Execute Selected Menu (While Playing Video) Play/Stop Mode) Capture Screen as Picture( ) / Video(...
-
Page 15: Preparing Set
Preparing Set 1. Face the lens straight down. 2. Adjust the main support to face the lens toward a document. - Page 16 Preparing Set 3. Connect a VGA OUT, DVI, or USB cable and the power cord. 4. To turn on the power of the digital presenter, press the Power button on the digital presenter’s control board or remote controller.
- Page 17 Preparing Set Pressing the Power button turns on the power LED light around the button and set status LED in blue. Initial Screen Displays the current digital presenter settings. Displays the current screen-capture settings. Displays the operational status of an SD card and the system. - SD (SDHC) CARD DETECTED: The SD card is inserted.
-
Page 18: Settings Menus & Default Values
Settings Menus & Default Values Setup Menu Default Value /State SXGA 1280x1024 4:3 UXGA 1600x1200 4:3 Up-Scaled XGA 1024x768 4:3 Down-Scaled DVI/VGA OUTPUT 720p 1280x720 16:9 Window Cut-out SXGA MODE 1080p 1920x1080 16:9 Window Cut-out 720p 1280x720 16:9 Stretched 1080p 1920x1080 16:9 Stretched ATW(Tracking)/AWB WB Mode (One Push)/MANUAL... - Page 19 Settings Menus & Default Values Setup Menu Default Value /State JPEG/BMP JPEG Format NORMAL BEST/FINE/NORMAL Quality STANDARD/BEST STANDARD Quality CAPTURE SETTING Mic Mute ON/OFF Time OFF/5MIN/10MIN/15MIN/20MIN/30MIN/ ELAPSE 45MIN/1HOUR Reset File Number Preset- PRESET1/PRESET2/PRESET3/PRESET4 Preset- PRESET SETTING PRESET1/PRESET2/PRESET3/PRESET4 Boot OFF/PRESET1/PRESET2/PRESET3/PRESET4 Preset DVI/VGA FREEZE DVI,VGA ONLY / ALL DISPLAY...
-
Page 20: Connecting In/Output Devices
Monitor or Projector Digital Presenter DVI Cable Connect to DVI Input Terminal DVI Monitor or Projector Digital Presenter Depending on the specifications of the SDP-860 D/A converter and the monitor A/D converter, the color of RGB and DVI outputs may vary. - Page 21 A RS-232C cable is not included in the product package. Please purchase it separately. RS-232C cables from other brands may not be compatible with this product. When connecting via USB, install the included USB drivers and SDP-860 Viewer program in your computer. For instructions on installing the software, please read the manuals.
-
Page 22: Connecting Peripheral Devices
Connecting In/Output Devices Connecting Peripheral Devices Connecting SD/SDHC Storage Device You can connect an SD/SDHC card for data storage. 1. Hold an SD card with the metal tip (golden finger) facing upward, and then insert to the projector. RS-232C 2. The “SD Card Detected” message displays on the screen. Once the card is ready to use, the Picture and Video Capture menus become available. -
Page 23: Connecting Computer For External Input
Connecting In/Output Devices Connecting Kensington Security Slot Kensington Security Slot is an anti-theft system that is integrated to the projector. Wind Kensington Security Cable around a fixture apparatus such as a rack, and then insert the end of the cable to the Kensington Security Slot in the projector. RS-232C Caution Kensington Security Cable is not included in the product package. -
Page 24: Watching Video From External Devices
Connecting In/Output Devices Watching Video from External Devices 1. Install the digital presenter as instructed in this manual. 2. Select an Input option. Press on the digital presenter control board or remote controller to select an input. External input or digital presenter video switches back and forth each time the button is pressed. -
Page 25: Basic Operation (Functions)
Basic Operation (Functions) Output Resolution Setup (DVI/VGA Output Mode) Various output resolutions are available depending on the output. Available resolutions are as listed below. - SXGA (1280x1024) 4:3 - UXGA (1600x1200) 4:3 Up-Scaled - XGA (1024x768) 4:3 Down-Scaled - 720p (1280x720) 16:9 Window Cut-out - 1080p (1920x1080) 16:9 Window Cut-out - 720p (1280x720) 16:9 Stretched - 1080p (1920x1080) 16:9 Stretched... -
Page 26: Enlarging/Minimizing
Basic Operation (Functions) Enlarging/Minimizing You can zoom in and out on screen objects. To enlarge or shrink, press the (Enlarge) or (Minimize) button on the control board or remote controller (6x Optical Zoom & 8x Digital Zoom). When using the Enlarge and Minimize buttons, the blue gauge indicates the optical zoom portion while the red indicates digital. -
Page 27: Adjusting Focus
Basic Operation (Functions) Maximizing Digital Zoom (D-Zoom Max) You can select a maximum digital zoom power. In the Menu, select ZOOM/FOCUS D-ZOOM MAX. Pressing the button changes the maximum zoom power to OFF After selecting a D-ZOOM MAX value, press the main unit key in Live mode to verify if the zoom value has been applied. -
Page 28: Adjusting Brightness
Basic Operation (Functions) Adjusting Brightness You can use the lens iris to adjust the brightness of an object. If the object is too dark, brighten it, and if it is too bright, darken it. To brighten: Press on the control board or remote controller. To darken: Press on the control board or remote controller. - Page 29 Basic Operation (Functions) Select AWB between MF and AWB. Press to adjust the color automatically. Save the settings and then exit to the Live screen. Auto Color Adjustment Method 2: ATW (Auto Tracking) Automatically adjusts WB mode when the color temperature of a light source changes.
- Page 30 Basic Operation (Functions) Rotating Image You can rotate images on the screen. In the Menu, select IMAGE ADJUSTMENT Rotation. Pressing the button brings up a screen that rotates an image from 0 to 180 . Image Outline Adjustment (IMG Mode) This mode optimizes visual quality according to display types.
-
Page 31: Preset Setting
Basic Operation (Functions) When selecting CUSTOM Mode, the following sub menus appear. TONE: Changes the gamma value of luminance. Pressing the button changes to Very LOW NORMAL HIGH Very HIGH. COLOR: Change the gain. Pressing the button changes to LOW MIDDLE HIGH. -
Page 32: Basic Operation (Operation)
Basic Operation (Operation) Capturing Images & Videos Capture For screen captures, the image format and resolution can be configured. In the Menu, select CAPTURE SETTING. Selecting Capturing Image Format (PIC Format) Press the button to select a format. Still image formats switch between JPEG BMP. -
Page 33: Capturing Images
Basic Operation (Operation) Capturing Images 1. Install the digital presenter as instructed in this manual. 2. Insert an SD card. 3. To capture an image, press the button on the control board or remote controller. 4. To check the captured image, press the button to enter Picture List mode. - Page 34 Basic Operation (Operation) 5. Picture List Mode: - Screen Description Indicates remaining free space of the current SD memory card. Indicates the current folder name. Indicates the number of images in the current folder. Indicates the current page and total pages in the current folder. 6.
- Page 35 Basic Operation (Operation) 7. Press to check the captured image. Full Screen - While in full screen mode, use the Left and Right keys to move between images. - The button moves to the first file in the folder. The button moves to the last file in the folder.
- Page 36 Basic Operation (Operation) Capturing Video 1. Install the digital presenter as instructed in this manual. To record audio, connect a external microphone or use an built-in microphone. If the external mic is connected, the internal mic does not support. 2. When the control board or remote controller is turned on, the projector activates LIVE mode ( 3.
- Page 37 Basic Operation (Operation) 5. To finish capturing, press the button. 6. To check the captured video, press the button and enter Movie List mode. 7. Movie List Mode Indicates remaining free space of the current SD memory card. Indicates the current folder name. Indicates the number of videos in the current folder.
- Page 38 Basic Operation (Operation) 9. Press to play the captured video. Playback Screen - Video is played at the original 640x480 size. - The Left and Right keys play video 10 seconds forward or backward. - To stop playing and go back to the Movie List, press the button.
- Page 39 Basic Operation (Operation) Freeze Mode Settings & Operation In the Menu, MISCELLANEOUS SETTING FREEZE Select DVI/VGA or ALL(USB/SD/DVI/VGA) mode. DVI/VGA Mode: - The Freeze button pauses only video that is connected to a DVI/VGA output. It also plays external video, connected via USB, on the Live screen. Caution ALL(USB/SD/DVI/VGA) Mode: - The Freeze button pauses videos that are connected both from a DVI/VGA output and...
- Page 40 Basic Operation (Operation) PC CTRL Mode Settings & Operation In the Menu, MISCELLANEOUS SETTING PC CTRL Select USB(HYBRID) mode or RS232C ONLY mode. USB(HYBRID) Mode: - You can control the PC using USB Viewer program by connecting the PC to the digital presenter via USB cable.
-
Page 41: Osd Info. Mode Setting
Basic Operation (Operation) OSD INFO. Mode Setting In the Menu, select MISCELLANEOUS SETTING OSD INFO. Select SHOW ANYTIME or HIDE WHEN MOVIE REC. SHOW ANYTIME Mode: - The OSD Menu display on the screen. HIDE WHEN MOVIE REC Mode: - While capturing video, the OSD Menu does not display on the screen. ANTI FLK. -
Page 42: Page Detection Setting
Basic Operation (Operation) Page Detection Setting This is the motion detecting function of the book or paper for auto-saving pictures to SD card. 1. Display the book or paper on the screen. 2. In the Menu, select MISC.SETTING PAGE DETECTION. 3. - Page 43 Basic Operation (Operation) Bring the microscope adapter lens to the ocular part of the microscope that is properly focused, as close as possible. Adjust the position of the digital presenter to bring the circular image of an object in the center of the monitor. In the Menu, select ZOOM/FOCUS MICROSCOPE Mode.
-
Page 44: System Reset
Basic Operation (Operation) System Reset Resets all current settings. In the Menu, select MISCELLANEOUS FUNCTION SYSTEM RESET. Caution Press the button to reset the system. Checking System Version Information (VER. INFO) Displays the current system version of the product. In the Menu, select MISCELLANEOUS FUNCTION VER.INFO. -
Page 45: Troubleshooting
Check if the screen is properly adjusted for brightness and focus. Check if the display device is switched on. Check if the PC is installed with the SDP-860 program properly. The projector doesn’t Check if the PC operating system is Windows XP communicate with a PC or higher. -
Page 46: Replacing Remote Controller Batteries
Replacing Remote Controller Batteries 1. Remove the battery lid on the back of the remote controller. 2. Insert batteries matching the + and - signals. (Battery Type: CR-2025) 3. Close the lid. Caution... -
Page 47: Product Specifications
Product Specifications The following specifications are subject to change and upgrade without prior notice. S D P - 8 6 0 OPTICAL SYSTEM Lens F = 2.5(Wide) ~ 3.12(Tele), f = 4.1~ 24.6 , 6X Zoom Lens Shooting Area Max: 420 x 336 Zoom 48X Zoom(Optical 6X / Digital 8X) Focus... - Page 48 FAX: +82-31-8018-3745 SAMSUNG TECHWIN AMERICA Inc. SAMSUNG TECHWIN EUROPE LTD. New Jersey office Samsung House, 1000 Hillswood Drive, Hillswood Business 100 Challenger Road, Suite 700, Ridgefield Park, NJ 07660, Park Chertsey, Surrey, UNITED KINGDOM KT16 OPS UNITED STATES TEL: +44-1932-45-5301...