Advertisement
Quick Links
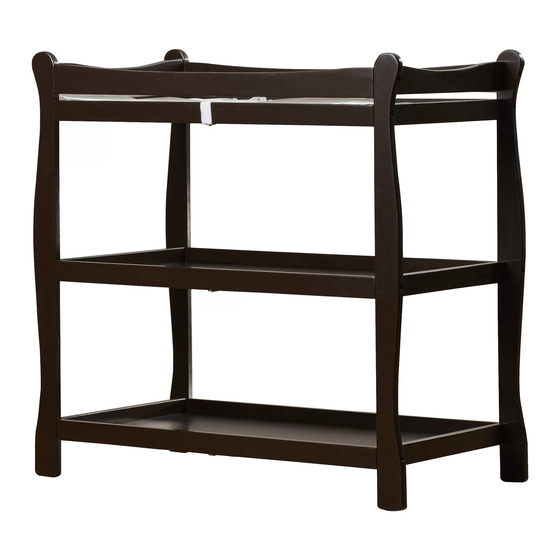
BABY CHANGING TABLE
Toll-Free Customer Service: 1-800-236-1310 (Monday through Thursday 7:30 AM to 4:30 PM CST)
Web: http://www.badgerbasket.com/parts • E-mail: parts1@badgerbasket.com
Mail: PO Box 227, Edgar, WI 54426-0227 • Phone: 715-352-2311 • Fax: 715-352-3163
Page 1 of 6
SLEIGH STYLE
MODEL NUMBERS:
02211 White
02230 Pecan
02232 Cherry
02234 Black
Visit us online at www.badgerbasket.com
02212 Natural
02231 Walnut
02233 Honey
Assembly
Instructions.
Adult Assembly
Required.
Save these
instructions for
future use.
2.0/0908/TG
Advertisement

Summary of Contents for Badger Basket 02211 White
- Page 1 SLEIGH STYLE BABY CHANGING TABLE MODEL NUMBERS: 02211 White 02212 Natural 02230 Pecan 02231 Walnut 02232 Cherry 02233 Honey 02234 Black Assembly Instructions. Adult Assembly Required. Save these instructions for future use. Visit us online at www.badgerbasket.com Toll-Free Customer Service: 1-800-236-1310 (Monday through Thursday 7:30 AM to 4:30 PM CST) Web: http://www.badgerbasket.com/parts •...
-
Page 2: Before You Begin Assembly
READ ALL INSTRUCTIONS before use of this changing table. Keep instructions for future use. Choking Hazard! Keep unassembled parts out of the reach of small children. Use only the parts, hardware, and changing pad provided by Badger Basket. Do not use the changing table if it is damaged or broken. -
Page 3: Parts And Hardware
PARTS AND HARDWARE: TOOLS NEEDED: Phillips Screwdriver (not included) Power driver is helpful but be careful not to damage the product. PARTS INCLUDED: 16 - Black Pegs* (one shown) ASSEMBLY NOTES: 2 - Top Rails Parts & Hardware diagrams not to scale. (C1) 2 - Top Shelf Rails** * Style of PEGS may vary from shown (C2) 4 - Middle/Lower Shelf Rails... - Page 4 STEP 1: See PICTURE 1. Insert the SIXTEEN BLACK PEGS (A) into the 16 peg holes on the ends C1,C2 of the TWO TOP RAILS (B) and the SIX SHELF RAILS (C1, C2). Push the thinner end of the peg (as shown by Part B) into the hole until the wider end is flush with the wood (as shown on Part C).
- Page 5 STEP 4: See PICTURE 4. Position the table so that it’s resting on the END PANEL (D). Insert the TOP SHELF PANEL (F1) into the shelf grooves on the TOP SHELF RAILS (C1). Insert the TWO MIDDLE/LOWER SHELF PANELS (F2) into the shelf grooves on the MIDDLE/LOWER SHELF RAILS (C2). The white or the colored sides of the shelves face up (depending on your model) and are seated into the grooves on all three sides.
- Page 6 STEP 7: See PICTURE 7. Put the table into its correct, upright position. Place the MATTRESS PAD (J) onto the TOP SHELF (F1) underneath the SAFETY BELT (G). YOUR CHANGING TABLE IS NOW ASSEMBLED! DO NOT USE THIS PRODUCT UNTIL YOU HAVE REVIEWED THE SAFETY INSTRUCTIONS ON PAGE 2! PICTURE 7 Accessorize this table with our Nursery...


