Samsung Gear 2 User Manual
Smartwatch
Hide thumbs
Also See for Gear 2:
- User manual (73 pages) ,
- User manual (98 pages) ,
- User manual (142 pages)

Related Manuals for Samsung Gear 2


Summary of Contents for Samsung Gear 2
-
Page 1: User Manual
User Manual Please read this manual before operating your device and keep it for future reference GEN_SM-R380_SamsungGear2_UM_English_BN66_040914_CH_F2... - Page 2 Intellectual Property All Intellectual Property, as defined below, owned by or which is otherwise the property of Samsung or its respective suppliers relating to the SAMSUNG Phone, including but not limited to, accessories, parts, or software relating there to (the “Phone System”), is proprietary to Samsung and protected under federal laws, state laws, and international treaty provisions.
- Page 3 BE CONSTRUED TO CREATE AN EXPRESS OR IMPLIED WARRANTY OF ANY KIND WHATSOEVER WITH RESPECT TO THE PRODUCT. IN ADDITION, SAMSUNG SHALL NOT BE LIABLE FOR ANY DAMAGES OF ANY KIND RESULTING FROM THE PURCHASE OR USE OF THE PRODUCT OR ARISING FROM THE BREACH OF THE EXPRESS WARRANTY, INCLUDING INCIDENTAL, SPECIAL OR CONSEQUENTIAL DAMAGES, OR LOSS OF ANTICIPATED PROFITS OR BENEFITS.
-
Page 4: Samsung Telecommunications America (Sta), Llc
Internet Address: www.samsung.com ©2014 Samsung Telecommunications America, LLC. Samsung, and Gear 2 are all trademarks of Samsung Electronics Co., Ltd. Bluetooth is a registered trademark of Bluetooth SIG. Other company and product names mentioned herein may be trademarks of their respective owners. Screen images simulated. -
Page 5: Legal Information
Legal Information The online version of the Health/Safety and Warranty guide for your device can be found at: www.samsung.com. The online version of the End User Licensing Agreement for your device can be found at: www.samsung.com/us/Legal/EULA. -
Page 6: Table Of Contents
Section 3: Gear Manager ......44 Replacing the strap ...........16 Launching Gear Manager ........44 Turning the Gear on and off ........19 Connecting a new Gear 2 ........44 Notices for using Bluetooth ........20 Configuring the Gear settings .........44 Locking and unlocking the Gear ......24 Home screen styler ...........45... -
Page 7: Intellectual Property
Notifications ..............46 Voice Memo ..............76 My apps ................47 Email................79 Samsung Apps ............48 Schedule ..............79 Find my Gear...............48 Controls ................80 Settings ................49 Logs ................80 Help ................52 Camera .................80 Timer ................84 Section 4: Applications .........53 Section 5: Settings ........85 S Voice .................53 WatchON Remote ............54... -
Page 8: Disclaimer Of Warranties; Exclusion Of Liability
About Gear 2 When you connect the Samsung Gear 2™ (also referred to as Gear) to your mobile device, you can use the Gear 2™ to view call logs or set alarms. You can use mobile devices more conveniently by connecting to various applications with the Gear. -
Page 9: Device Layout
Device layout Gear 2 Infrared LED/Camera Power button Section 1: Getting Started... - Page 10 Speaker Charging terminals Heart rate sensor Microphone ● Ensure that the strap is kept clean. Contact with contaminants, such as dust and dye, can cause stains on the strap that may not come out. ● Do not use a screen protector which causes touch screen sensor malfunctions. ●...
-
Page 11: Charging Dock
Charging terminals USB port Power Button The Power Button turns the Gear 2™ on or off, displays the Clock screen, locks the device on the Clock screen, and resets the device. 1. Press and hold the Power button to turn the Gear 2™ on or off. -
Page 12: Maintaining Water And Dust Resistance
Maintaining water and dust resistance The device may be damaged if water or dust enters the device. Follow these tips carefully to prevent damage to the device and to maintain the water- and dust-resistant performance of the device. ● Do not immerse the device in water deeper than 1 m and keep it submerged for more than 30 minutes. ●... -
Page 13: Charging The Battery
Charge the battery before using the Gear for the first time. A computer can be also used to charge the Gear™ 2 by connecting them via the USB cable. Important! Use only Samsung-approved chargers, batteries, and cables. Unapproved chargers or cables can cause the battery to explode or damage the Gear™ 2. - Page 14 1. Locate the location of the charging terminals on the Gear 2™ and the charging dock. Charging terminals Charging dock...
- Page 15 2. Place the Gear on the charging dock with the charging terminals facing each other. Section 1: Getting Started...
- Page 16 3. Plug the small end of the charger cable into the USB port of the charging dock. Then, plug the large end of the charger into an electric socket.
- Page 17 Gear 2™. ● While charging, the Gear 2™ may be warm. This is normal and should not affect the Gear’s lifespan or performance. If the battery gets hotter than usual, the charger may stop charging.
-
Page 18: About Using Batteries
● Unplug the charger when not in use to save energy. The charger does not have a power switch, so you must unplug the charger from the electric socket. About using batteries ● Battery operating time is affected by device usage patterns and the condition of the battery. ●... - Page 19 Caution! Excessively bending the strap may damage the device. 2. Open the clasp and fit the strap to your wrist using the pin as a guide to size the band. Section 1: Getting Started...
- Page 20 3. Press the button to close the clasp. Tip: To measure your heart rate more accurately with the Gear, wear the Gear comfortably around your lower arm just above the wrist. Refer to ‘Wearing the Gear’ for details.
-
Page 21: Replacing The Strap
Replacing the strap The strap is held in place by small spring-loaded pins (called presto pins). Detach the strap from the Gear to replace it with a new one. 1. Press in on the pin to release it from the case. Section 1: Getting Started... - Page 22 2. Lift the strap out to detach it from the Gear 2™. 3. On the new strap, insert one side of the pin into the Gear 2™ case.
- Page 23 5. Press in on the pin. Slip the band into the case and then release the pin to secure the band in place. Note: If you replace the strap on your Gear 2™ with another strap not manufactured by Samsung, please use a strap with a standard 22mm spring bar pin, and refer to the manufacturer’s instructions to properly attach...
-
Page 24: Turning The Gear On And Off
Turning the Gear on and off When you turn on the Gear 2™ for the first time, follow the displayed instructions. The instructions describe how to connect the Gear 2™ to a mobile device and to set up the device. -
Page 25: Notices For Using Bluetooth
Gear 2™. Connecting the Gear to a mobile device Install the Gear Manager on the mobile device and connect the Gear 2 to the device using a Bluetooth connection. Note: You cannot install Gear Manager on mobile devices that do not support Gear 2 syncronizing. Ensure that your mobile device is compatible with a Gear 2™. - Page 26 6. From the Mobile device, when the Bluetooth pairing request displays, tap OK.
- Page 27 8. The Install window displays on the Mobile device. 9. From the Mobile device, read and agree to the terms and conditions. When the devices connect, the Gear Manager displays on the mobile device and the clock screen displays on the Gear 2™. Section 1: Getting Started...
- Page 28 ● When connecting the Gear to another mobile device If you want to connect the Gear 2™ to a newly purchased mobile device or to another mobile device for the first time, reset the Gear 2™ device. Resetting the Gear 2™ removes the data from the...
-
Page 29: Locking And Unlocking The Gear
When not in use, lock the Gear 2™ to prevent unwanted operation. Pressing the Power button on the Clock screen turns off the screen and locks the Gear 2™. The Gear automatically locks if it is inactive for a specified period. -
Page 30: Section 2: Basics
Section 2: Basics Viewing mobile device connection status and battery status Scroll left or right on the Home screen and tap Settings. The following icons provide information about the status of the Gear™ 2 These icons display at the top of the screen. Icon Description Mobile device connected... -
Page 31: Using The Touch Screen
Using the touch screen Use only fingers to use the touch screen. Important! Do not allow the touch screen to come into contact with other electrical devices. Electrostatic discharges can cause the touch screen to malfunction. To avoid damaging the touch screen, do not tap it with anything sharp or apply excessive pressure to it with your fingertips. - Page 32 Double-tapping Double-tap on an image to zoom in a part. Double-tap again to return. To check the current status of the Gear™ 2 and view the remaining battery power, double-tap anywhere on the screen with two fingers. You can also adjust the volume and the brightness of the display. Flicking Flick left or right on the Home screen or the Apps screen to see another panel.
- Page 33 Flick you finger down from the top of the screen while using apps to returns to the previous page. Section 2: Basics...
- Page 34 Pinching Spread two fingers apart on an image to zoom in a part. Pinch to zoom out.
-
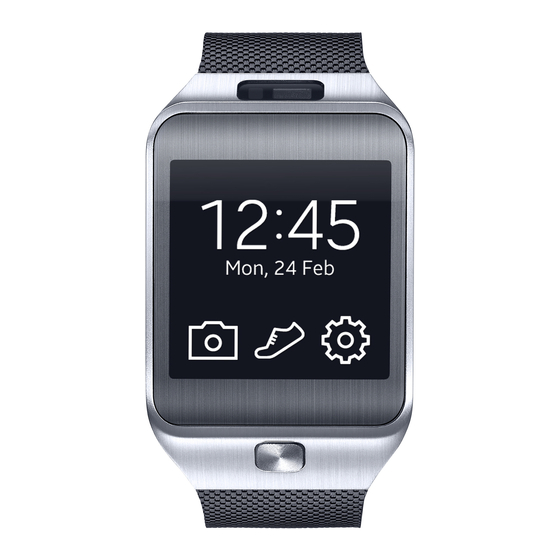
Page 35: Viewing The Home Screen
Viewing the Home screen When you connect your Gear™ 2 to the mobile device you can view the device’s Home screen. The Home screen displays the clock, shortcuts to applications, and other information. The Home screen has multiple panels. Scroll left or right to display additional panels. Home screen panels Note: Available applications and the arrangement of applications may vary depending on the software version. - Page 36 WatchON Remote: Use the Gear™ 2 as a remote control for a TV or set-top box. S Voice: Command the Gear™ 2 by voice to perform various features. Panel 1 Music Player: Listen to music saved on the Gear™ 2. Voice Memo: Record and manage voice memos saved on the Gear™...
- Page 37 Notifications: Stay up-to-date with a variety of events, such as missed calls or new messages, received on the connected mobile device. Logs: View recent calls and message logs of the connected mobile device. Panel 4 Dialer: Enter a phone number using the keypad to make a call.
- Page 38 Using the Clock screen ► Press the Power button to display the Clock screen. Editing Home screen icons From the Home screen: ● Tap and hold an icon and drag it to the desired location to rearrange the location of icons. ●...
-
Page 39: Apps Screen
Changing the background image You can change the background color or set the background image to the default or a saved image. ► From the Home screen, tap Settings → Wallpapers. Apps screen The Apps screen displays icons for all applications. 1. -
Page 40: Securing The Gear 2
► Tap and hold the screen with two fingers and then tap Close all. Tip: You can also drag the application screen left or right to close it. Securing the Gear 2 Prevent others from using or accessing personal data and information stored to the Gear™ 2 when it is disconnected from the mobile device. -
Page 41: Using Calling Features
Using calling features Making a call ► On the Home screen, tap Dialer, enter a number using the keypad, and then tap to make a call. – or – From the Home screen, tap Contacts → a contact → a phone number, or tap Logs → a contact → During a call You can select from the following actions: Adjusts the volume by tapping... - Page 42 Answering a call 1. Drag to the right to answer a call. If the call waiting service is active, another call can be made. 2. Press End or place the first call on hold to answer a second call. Rejecting a call Reject an incoming call and send a rejection message to the caller.
-
Page 43: Using Notifications
Using notifications Stay up-to-date with a variety of events, such as missed calls or new messages, received on the connected mobile device. Note: If a message includes long text or attachments, check the message details on your connected mobile device. Checking notifications Checking notifications immediately When you receive a notification, information about the notification, such as type and the time it was received,... - Page 44 Checking notifications at a later time 1. Tap Notifications on the Home screen. 2. Select a notification type.
- Page 45 3. Select a notification to view the details. Notification details screen 4. In the notification’s detailed view, tap to use additional features: ● Reply: Reply to the message using message templates, S Voice, or emoticons. ● Show on device: View the message on the connected mobile device. ●...
-
Page 46: Transferring Files
1. Connect the Gear™ 2 to the computer using the USB cable. 2. On the computer, open the Computer folder and double-click Gear 2 (XXXX) → Gear. 3. Select a file on the computer and copy it to the desired storage location on the Gear™ 2. -
Page 47: Upgrading The Gear 2
Upgrading the Gear 2 The Gear can be upgraded to the latest software. Visit the Samsung website to upgrade the Gear™ 2 software. Upgrading with Gear Manager The Gear can be directly upgraded to the latest software by the firmware over-the-air (FOTA) service. - Page 48 Then, try again. Firmware upgrades will proceed only when your Gear™ 2 is connected with the computer properly. When the Gear™ 2 is connected properly, and the model name displays on the left of the Samsung Kies screen.
-
Page 49: Section 3: Gear Manager
► From the connected mobile device’s Apps screen, tap Gear Manager. Note: Some features may not be available depending on the type of connected mobile device. Connecting a new Gear 2 ► At the top of the Gear Manager screen, tap →... -
Page 50: Home Screen Styler
Home screen styler Changes the Gear™ 2 Home screen settings. ► From the Gear Manager screen, tap Home screen styler. Wallpapers Change the color of the Gear™ 2 Home screen, or set an image or photo stored in the mobile device as wallpaper for the Gear™... -
Page 51: Notifications
Notifications Stay up-to-date with a variety of events, such as missed calls, or new messages received on the connected mobile device. You can also configure settings for the notification feature. 1. From the Gear Manager screen, tap Notifications, drag the Notifications switch to the right, and then select from these options: ●... -
Page 52: My Apps
Configuring applications settings ► Tap next to an application and configure the settings. Transferring music files from the mobile device to the Gear 2 You can transfer music files saved on the mobile device to the Gear™ 2. 1. Tap next to Music Player. -
Page 53: Samsung Apps
Samsung Apps You can download applications from Samsung Apps. 1. From the Gear Manager screen, tap Samsung Apps. 2. Search for an application and select it to download. Note: From the Gear Manager screen, tap Settings → Unknown sources → OK to install applications that are downloaded from sources other than Samsung Apps. -
Page 54: Settings
Settings Use this application to configure the Gear™ 2 and set various options. ► From the Gear Manager screen, tap Settings. Backup and restore Back up the stored data on the Gear™ 2 or restore backup date. ► From the Settings screen, tap Backup and restore. Setting the Power button Set actions to perform when you press the Gear™... - Page 55 Using a wake-up gesture Set the Gear™ 2 to recognize your gesture to wake up the Gear™ 2 and display the clock or the last page you accessed when the screen turns off. 1. From the Settings screen, tap Wake-up gesture, and then drag the Wake-up gesture switch to the right. 2.
- Page 56 Note: Some mobile devices do not support this feature. Setting security Set to allow or block the installation of applications from app markets other than Samsung Apps. ► From the Settings screen, tap Unknown sources. Viewing the open source license You can view open source license information.
-
Page 57: Help
Viewing the Gear Manager version ► View the Gear Manager version information from the Gear Manager version field. Help You can access information about using the Gear™ 2 and other useful applications. ► Tap Help on the Gear Manager screen. Section 3: Gear Manager... -
Page 58: Section 4: Applications
Section 4: Applications S Voice Use this application to command the Gear™ 2 by voice to perform various features. 1. Read and agree to the terms and conditions for S Voice on the mobile device. 2. From the Gear™ 2 Home screen, tap S Voice. Use the following examples of spoken commands: ●... -
Page 59: Watchon Remote
WatchON Remote Use this application to operate the Gear™ 2 as a remote control for other devices with an infrared receiver. You can use this feature with various devices, such as TVs and set-top boxes. 1. From the Home screen, tap WatchON Remote. Note: The remote-control screen may vary depending on the device being controlled. -
Page 60: Gallery
Note: Ensure that the device’s infrared port is facing the device. 3. Scroll left on the remote-control screen to access the numeric keypad. Gallery Use this application to view images and videos. ► From the Apps screen, tap Gallery. Viewing images ►... -
Page 61: Weather
Deleting files 1. While viewing a file, tap → Delete → OK. 2. To delete multiple files at once, tap and hold the file to delete on the file list screen, and then tap other files to select them for deletion and tap 3. -
Page 62: Find My Device
Find My Device Use this application to find the connected mobile device. 1. From the Apps screen, tap Find My Device. 2. Tap Start, the mobile device emits sounds, vibrates, and turns on the screen. Note: This application is available only when the Gear™ 2 and the mobile device are connected. Health Management Applications Use the pedometer, sleep, exercise, and heart rate applications for leisure, well-being and fitness purposes. - Page 63 Wearing the Gear 2 Device When measuring your heart rate, wear the Gear™ 2 comfortably on your arm above your wrist as shown. <Rear> Heart rate sensor Important! Remove the protective plastic from the heart rate measurement sensor before taking measurements.
- Page 64 ● The heart rate figures may not be accurate depending on measurement conditions and surroundings. ● Take heart rate measurements when you are seated and relaxed. ● If heart rate measurements are taken at low temperatures, the result may be inaccurate. ●...
-
Page 65: Pedometer
● If the heart rate measurement is not working properly, adjust the position of the Gear™ 2 on your wrist. For example, move the Gear™ 2 right, left, up, or down on your wrist to adjust the position of the heart measurement sensor. Or, wear the Gear™ 2 with the heart rate sensor firmly against the inside of your wrist. -
Page 66: Using Additional Features
Using additional features ► From the pedometer screen, tap to use these additional features: ● Tap History to view previous records. ● Tap Goal to set your goal. ● Tap Reset steps to reset the step count. ● Tap Share via to share your records with others. ●... -
Page 67: Sleep
Sleep Use this application to monitor your sleep patterns and record how much sleep you get by detecting body movements while you sleep. You can transfer the records to the connected mobile device. Before using this application: ● If you have just purchased or have reset the Gear™ 2, read the displayed information about the application and tap OK. - Page 68 3. Tap Stop → OK to stop recording. Using additional features ► From the Sleep screen, tap to use additional features. ● Tap History to view previous records. ● Tap Blocking mode to block all notifications except alarm, timer, and downloaded application notifications, then tap Enable.
-
Page 69: Heart Rate
Heart Rate Use this application to measure and record your current heart rate. ► If you have just purchased or reset the Gear™ 2, read the displayed information about the application and tap OK. Note: Do not use the device’s heart rate measurement feature for clinical or medical diagnosis. Use the exercise feature to measure your heart rate during exercise.. - Page 70 Using additional features ► Tap on the heart rate measurement screen, to use these additional features: ● Tap History to view your heart rate records. ● Tap Help to view help information. Note: Only records from the past thirty days are saved. You can view previous data on the mobile device where the S Helath application is installed.
-
Page 71: Exercise
Exercise Use this application to set diet and calorie goals and plan your exercise program. View the completed exercise and compare it with your exercise goal. You can also record your exercise achievements in a log. ► If you have just purchased or have reset the Gear™ 2, read the on-screen information about the application and tap OK. - Page 72 Monitoring exercise information 1. From the Home screen, tap Exercise. 2. Select a type of exercise to monitor. Select Running, Walking, Cycling, or Hiking. 3. Tap Start to start monitoring. You can view information, such as exercise time and distance on the screen. Scroll left on the screen to view more information, such as burned calories and speed.
- Page 73 Using additional features ► From the exercise screen, tap to use additional features: ● Tap History to view the exercise records. ● Tap Help to view help information. While monitoring your exercise information, tap to use additional features. Some features may not be available depending on the selected exercise type: ●...
- Page 74 About Coaching The coaching feature includes Firstbeat technology to provide personalized exercise guidance. Firstbeat uses Training Effect (TE) analysis that measures the accumulated physical load during a workout and assesses the impact on your fitness. TE levels are based on your physical profile and the heart rate information recorded while you workout.
- Page 75 Setting training levels 1. From the running screen, tap → Coaching → Training effect to set the exercise intensity. Follow the displayed instructions and complete the exercises. Stop exercising when you achieve the required intensity. ● Use the training levels to check the intensity of your workout. When you set a training level, you can monitor your exercise rate and the number of calories you burned.
- Page 76 5. Flick your finger down from the top of the screen to return to the running screen. The setup completes. 6. Tap Start. The heart rate measurement starts. Start running when the measurement is completed. You can view information, such as burned calories and speed, on the screen. 7.
-
Page 77: Messages
Messages Use this application to view the messages received on the connected mobile device, call or reply to the sender using the Gear. ► Tap Messages on the Apps screen. Making a call To make a call the sender: ► Scroll right on the message in the list, or tap →... -
Page 78: Music Player
Deleting messages 1. From the message navigation screen, tap → Delete. Note: You can also tap , select multiple messages to delete, and then tap Delete to delete multiple messages at once. 2. Tap to select all files at once. Music Player Use this application to listen to music saved on the Gear™... -
Page 79: Listening To Music
Listening to music ► Tap to play music. Display the list of files. Set Adjust the volume or listen to random play and repeat options. music on a Bluetooth headset. Restart the currently-playing file Skip to the next file. Tap and or skip to the previous file. -
Page 80: Media Controller
Media Controller Use this application to play and control media files. You can launch the music player on the connected mobile device and control playback with the Gear™ 2. For other media files, start playback on the mobile device first. You can control playback of the currently-playing file from the Gear. -
Page 81: Stopwatch
Stopwatch Use this application to measure the amount of elapsed time. 1. From the Apps screen, tap Stopwatch. 2. Tap Start to time an event. 3. Tap Lap to record lap times. 4. Tap Stop to end timing. 5. Tap Reset to clear lap time records. Contacts Use this application to view the connected mobile device’s contacts list on the Gear™... - Page 82 Recording voice memos 1. Tap to start recording. 2. Speak into the microphone at the bottom right of the Gear 2. 3. Tap to pause recording. 4. Tap to finish recording. 5. Tap to cancel the recording. Display the list of voice memos.
- Page 83 Playing voice memos ► Tap , and select a voice memo to play. If spoken content is recorded and then converted to a data file, displays next to the filename. Note: The Gear™ 2 displays the content as text on the screen during playback. ●...
-
Page 84: Email
Email Use this application to check emails received on the connected mobile device. ► From the Apps screen, tap Email. To open an email: ► Select and tap an email from the list. The email navigation screen displays. Checking emails on the connected mobile device ►... -
Page 85: Controls
Controls View the connection status and remaining battery life. Adjust the volume and display brightness. ► From the Home screen, tap Controls. Logs Use this application to view the connected mobile device’s call and message logs on the Gear™ 2. 1. - Page 86 ● If your Gear™ 2 saved 50 photos or 9 videos, you cannot take more photos or videos. Access Gallery and delete files or transfer files to the connected mobile device. After you transferred files to the mobile device and take more photos or videos, your Gear™ 2 deletes some files that are transferred to free memory.
- Page 87 Taking a photo with sound Use this mode to capture the ambient sound with a photo. 1. Tap → Sound & shot → On. 2. Scroll down from the top of the screen to return to the camera screen and then tap the screen to take a photo.
- Page 88 Configuring Camera settings ► Tap to configure the camera’s settings. Note: Not all of the following options are available with both the camera and video modes. ● Focus mode: Select a focus mode. Auto is camera-controlled. Macro is used for very close objects. ●...
-
Page 89: Timer
Timer Use this application to use the Gear™ 2 as a countdown timer. 1. From the Apps screen, tap Timer. 2. Set the duration, and tap Start. 3. Drag outside the large circle when the timer goes off. Section 4: Applications... -
Page 90: Section 5: Settings
Section 5: Settings Clock Change the clock type that displays on the Clock screen. 1. On the Home screen, tap Settings → Clock. 2. Scroll left or right on the screen to select a clock type. Wallpapers Change the color of the Home screen, or set an image or photo stored in the Gear™ 2 as wallpaper for the Home screen. -
Page 91: Sound
Sound Change the settings for various sounds on the Gear™ 2. ► On the Home screen, tap Settings → Sound. and selection from these options: ● Volume: Adjust the volume level for various sounds, such as multimedia, ringtone, notifications, and system sounds. -
Page 92: Bluetooth
Note: When the Gear™ 2 is connected to a mobile device, the language settings applied on the mobile device are applied to the Gear™ 2. The language settings can only be changed on the connected mobile device. ● Wake-up gesture: Set the Gear™ 2 to turn on and show a specified screen by using a gesture. Raise the hand that is wearing the Gear™... -
Page 93: Privacy Lock
Privacy lock ► From the Home screen, tap Settings → Privacy lock. ● Privacy lock: Activate or deactivate the privacy lock feature by setting a PIN of at least four numbers. You can unlock the device’s screen by entering the PIN when the mobile device and the Gear™ 2 are disconnected. -
Page 94: Gear Info
Gear info ► From the Home screen, tap Settings → Gear info. ● About Gear: Access information about the Gear™ 2. ● USB debugg...: Activate or deactivate the USB debugging mode. You can use this mode when developing apps by connecting the Gear™ 2 to a computer using a USB cable. Important! Some content may differ from your Gear™... -
Page 95: Section 6: Index
Playing videos 55 device 20 Sharing files 56 Call features Viewing images 55 Editing Home screen icons 33 Making a call 36 Gear 2 device 4 Email Call options checking on the connected During a call 36 mobile device 79 Heart rate... - Page 96 Configuring applications Setting a method to enter text settings 47 Transferring music from mobile Setting a method to enter text Recently-used applications device to Gear 2 47 and managing opening 34 Transferring photos, videos, and templates 50 voice memos 47...
- Page 97 Setting up emergency Wearing the Gear 2 Device 57 contacts 51 Unlocking the Gear 2 35 Setting up emergency Upgrading the Gear 2 messages 51 Upgrading with Gear Using a wake-up gesture 50 Manager 42 Viewing the Gear Manager Upgrading with Samsung...