Table of Contents
Advertisement
Quick Links
Download this manual
See also:
Installation Manual
Advertisement
Table of Contents

Summary of Contents for Philips Divar
- Page 1 DIVAR DIGITAL VERSATILE RECORDER Operation Manual...
- Page 2 10. Protect the power cord from being walked on or pinched particularly at IMPORTANT SAFETY INSTRUCTIONS plugs, convenience receptacles, and the point where they exit from the apparatus. 1. Read these instructions - All the safety, operating and installation instructions 11.
-
Page 3: Table Of Contents
Triggers and alarms ..........16 Philips Communication, Security & Imaging... -
Page 4: Safety Precautions
The power cord is the main power disconnect Fast forward Zoom Network for all units. Error Fast reverse Sequence The socket outlet shall be installed near the equipment and shall be easily accessible. Philips Communication, Security & Imaging... -
Page 5: Introduction
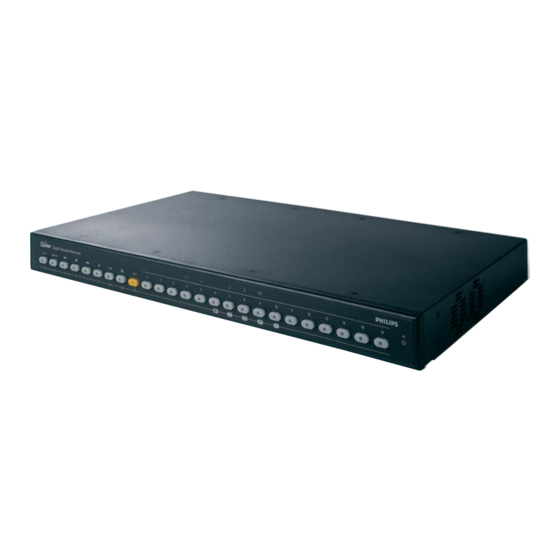
Digital versatile recorder for security applications Versions The Divar is a video recording system that can record multiple camera signals There are three Divar models; 6-channel, 9-channel and 16-channel, each with while simultaneously providing live multiscreen viewing and playback. It various storage capacities. -
Page 6: Front Panel Controls
When in a menu, the keys operate according to their alternate function. Motion - flashes when motion is detected in a camera signal. Video loss - flashes when a video loss condition is detected for a camera input. Philips Communication, Security & Imaging... -
Page 7: Primary Functions
- in live mode, press to start playback from one minute earlier. - in playback mode, press to speed up the playback rate. - in pause mode, press to step forward one frame. * can be 6, 9 or16 depending on model Philips Communication, Security & Imaging... -
Page 8: Alternate Functions
- selects a submenu or menu item, or saves selections made in menus. ESC key - press to return to previous level or to exit menu system without saving. - press to leave help system. Philips Communication, Security & Imaging... -
Page 9: Viewing Pictures
A key To control the display on monitor B: 1. Check that the light on the front panel is lit. is not lit, press the ALT key and then press the monitor B key Philips Communication, Security & Imaging... - Page 10 > A sequence of camera pictures appears, each for a pre-programmed amount of time. 2. Press the ALT key and then the sequence key to stop sequencing. > Zooming, pressing the multiscreen key or selecting a single camera also stops sequencing. Philips Communication, Security & Imaging...
- Page 11 > The zoom indicator no longer lights. 7. Press the ALT key to return the keys to normal operation. > The ALT indicator no longer lights. Philips Communication, Security & Imaging...
-
Page 12: Live, Playback And Search Modes
In both cases, playback stops. position. Press the live key to switch back to live viewing. An alarm also switches the unit back to live viewing. Philips Communication, Security & Imaging... -
Page 13: Search Mode
START TIME 2002-03-14 13:00 PLAYBACK SEARCH SEARCH RESULTS > SEARCH RESULTS CAMERA 1 MOTION 2002-03-14 15:00:17 DISK CONTENTS EARLIEST TIME 2002-03-14 14:00 LATEST TIME 2002-06-19 20:23 9 10 11 12 13 14 15 16 FILTER Philips Communication, Security & Imaging... -
Page 14: Using The Menu
• Use the arrow keys to move through a menu or list. Protected recordings • Use the select key to select a submenu or item. • Use the escape key to go back. Check authenticity Time / Date Philips Communication, Security & Imaging... - Page 15 HISTORY VIEW HISTORY LIST VIEW HISTORY LIST > TIME EVENT BEGIN TIME 2002-03-14 13:00 2002-03-15 13:00:17 VIDEOLOSS END TIME 2002-06-19 20:23 SHOW ALARMS MOTIONS NETWORK CONNECTIVITY ERRORS EARLIEST TIME 2002-03-14 13:00 LATEST TIME 2002-06-19 20:23 Philips Communication, Security & Imaging...
- Page 16 MAIN MENU DISK MANAGER STATUS OVERVIEW EARLIEST RECORDING 2002-03-14 13:00:17 LATEST RECORDING 2002-06-19 20:23:45 DISK CAPACITY 50 GB USED SPACE 30 GB PROTECT REC USAGE RECORDING TIME LEFT 3 DAYS Philips Communication, Security & Imaging...
- Page 17 Synchronize AUTHENTICITY CHECK the network. (Synchronize only works if the Divar time is within 7½ BEGIN TIME 2002-03-14 13:00:17 minutes of the server time.) Fill in the IP address of the network time...
-
Page 18: Triggers And Alarms
Alarms and Triggers • The view modes on the monitors change • A controllable camera is moved to a pre-defined position. • Recording speed changes • The unit changes the way it operates via pre-defined profiles. Philips Communication, Security & Imaging... -
Page 19: Alarm Inputs
If auto-acknowledge is enabled, the beeper, and the alarm indicators switch off after the dwell time. If auto-acknowledge is enabled, the beeper, and the motion indicators switch off after the dwell time. Philips Communication, Security & Imaging... -
Page 20: Video Loss Alarm
If an alarm is not acknowledged, the beeper switches off after the dwell time but the alarm still needs to be acknowledged. If auto-acknowledge is enabled, the beeper, and the video loss indicators switch off after the dwell time. Philips Communication, Security & Imaging...


