D-Link Air DWL-520 Manual
11mbps wireless lan pci adapter
Hide thumbs
Also See for Air DWL-520:
- Manual (57 pages) ,
- Quick installation manual (12 pages) ,
- Quick install manual (8 pages)

Related Manuals for D-Link Air DWL-520


Summary of Contents for D-Link Air DWL-520
- Page 1 D-LinkAir DWL DWL- - 520 11Mbps Wireless LAN PCI Adapter Manual Please see the Quick Install Guide, included separately, for installation instructions. Building Networks for People...
-
Page 2: Table Of Contents
Contents Contents of Package .................3 Introduction ....................4 Wireless Basics ..................5 Configuration Utility ................8 Troubleshooting ...................15 Networking Basics ................17 Technical Specifications ..............42 D-Link locations ...................45 Contacting Technical Support ...........46 Limited Warranty .................47 Registration ....................51... -
Page 3: Contents Of Package
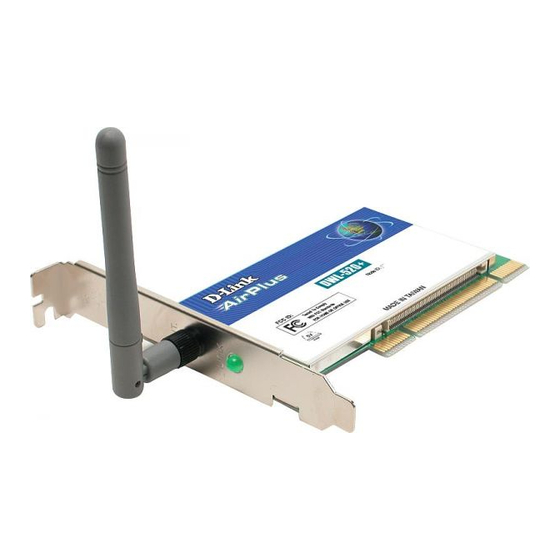
Contents of Package Contents of Package: • DWL-520 Wireless PCI Adapter • Manual • Quick Installation Guides • Driver CD If any of the above items are missing, please contact your reseller. -
Page 4: Introduction
Introduction The D-Link Air DWL-520 11Mbps Wireless PCI Adapter is an ideal way to connect your computer to a wireless network or as part of a wired LAN (Local Area Network) with a wireless segment. After completing the steps outlined... -
Page 5: Wireless Basics
Wireless Basics D-Link Air wireless products are based on industry standards to provide easy to use and compatible high-speed wireless connectivity within your home or business. Strictly adhering to IEEE 802.11b, the D-Link Air wireless family of products will allow you to access the data you want, when and where you want it. - Page 6 Wireless Basics (continued) 1. Keep the number of walls and ceilings between the access point and your receiving device to a minimum - Each wall or ceiling can reduce your D- Link Air Wireless product’s range from 3-90 feet. For some business or large residential home deployment, I may be more beneficial to have more than one access point with overlapping coverage.
- Page 7 Wireless Basics (continued) Using radio frequency (RF) technology, WLANs transmit and receive data over the air, minimizing the need for wired connections. Thus, WLANs combine data connectivity with user mobility, and, through simplified configuration, enable movable LANs. • Installation Speed and Simplicity - Installing a wireless LAN system can be fast and easy and can eliminate the need to pull cable through walls and ceilings.
-
Page 8: Configuration Utility
Configuration Utility D-Link Air DWL-520 uses the “Configuration Utility” as the management software. The utility provides the user an easy interface to change any settings related to the wireless adapter. When the computer is started, the “Configuration Utility” starts automatically and the system tray icon is loaded in the toolbar. - Page 9 Link Info Tab The Link Info Tab displays the current state of your wireless adapter. The fields in this menu provide the following information: • State: shows the association state of your computer with the wireless LAN. When operating in Infrastructure mode, this field shows the MAC address of the Access Point with which you are communicating.
-
Page 10: Configuration Tab
Link Info Tab continued • “Poor” • “Weak” • “Fair” • “Good” • “Excellent” • Signal Strength: is active only when in Infrastructure Mode. The graph displays normalized signal strength averaged over all frames over 100 bytes long that are received by the Access Point. Configuration Tab Select the Configuration tab to access the Configuration menu, as shown below. - Page 11 (continued) Mode The D-Link Air DWL-520 Wireless PCI Adapter can operate in one of two modes, which are specified in the Mode field of the Configuration menu. Clicking the down arrow at the right of the Mode field displays the available modes.
-
Page 12: Encryption Tab
Encryption Tab The Encryption menu allows you to enable encryption and to set the encryption keys. To see the available encryption methods, click the down arrow at the right of the Encryption (WEP) field. There are two encryption methods available. The IEEE 802.11 specification defines Wired Equivalent Privacy (WEP) using a 64-bit key. - Page 13 Encryption Tab (continued) Enabling Encryption To enable encryption, click the down arrow at the right of the Encryption field, select either 64 bit or 128 bit, and click the Apply button. After enabling an encryption method, you must then specify encryption keys, as described in the following sections.
-
Page 14: About Tab
About Tab The About tab provides information on the version of the Network Driver, the Configuration Utility, and the firmware in the D-Link Air DWL-520 Wireless PCI Adapter. You will need the firmware version number when reporting problems to tech support. -
Page 15: Troubleshooting
Select the Device Manager and click on the Network Adapter. You will find the D-Link DWL-520 PCI Adapter if it is installed successfully. If you see the Yellow sign, the resources are conflicting. Click on the PCI Card and then on the PCI Card Service; you can see the status of the PCI card. - Page 16 I/O Address needs 40h byte length. Go to the Control panel. Double click on the PCI Card, you will see D-Link DWL-520 PCI Adapter. Double clicking on that will show you the Card Information, driver name and the driver file.
-
Page 17: Networking Basics
D-Link is one of the largest manufacturers of Ethernet productsin the world. D-Link’s technological expertise and dedication to providing quality products at a low price makes D-Link a good place to watch for the newest in networking innovations. Or, you can get the newest drivers available for your... - Page 18 Networking Basics Computer Identification If you had previously given your Windows 98 computers names or if you are using Windows 98, you may need to verify that each computer has a unique name and common workgroup name. A. On your Desktop, right-click the icon Network Places and select Properties from the context menu.
- Page 19 Networking Basics Computer Identification (continued) C. Type a unique, identifying name for this particular computer in the Computer name: box. This will be the name that other computers on your network will use to communicate with this computer. Each computer’s name must be unique on a particular network or confusion will result.
- Page 20 Networking Basics Sharing Files With your computers connected together on a network, you may now open and save files on another computer. You will be able to specify particular folders or disk drives to "share" and even password protect them. The steps below will enable you to share specific files and folders with other computers on your network.
- Page 21 Networking Basics Sharing Files (continued) D. Click to place a check mark next to I want to be able to give others access to my files. E. Click OK on the File and Print Sharing dialog box. F. Click OK on the Network dialog box. G.
- Page 22 Networking Basics Sharing Files (continued) I. Find the disk drive or folder you want to share using Windows Explorer or the My Computer icon on your desktop. J. Right-click on the disk drive or folder icon and select Sharing.
- Page 23 Networking Basics Sharing Files (continued) K. Select Shared As: to set the parameters for sharing this particular disk drive or folder. L. The Share Name: box is used to identify the disk drive or folder you are sharing to other computers on the network. You can give it any name you wish.
- Page 24 Networking Basics Sharing Files (continued) O. Passwords: allow you to apply a level of security to your shared disk drives and folders. Another computer (user) will be required to enter the password you designate here before accessing the disk drive or folder.
- Page 25 Networking Basics Sharing Printers Sharing a printer connected to one computer with other computers on your network can be very convenient - allowing you to print from any computer on the network. The steps below will enable you to print with other computers on your network.
- Page 26 Networking Basics Sharing Printers (continued) B. Click the File and Print Sharing button. C. Click to place a check mark next to I want to be able to allow others to print to my printer(s). D. Click OK on the File and Print Sharing dialog box. E.
- Page 27 Networking Basics Sharing Printers (continued) Go to START>SETTINGS>PRINTERS Right click on the printer you want to share with others on the network and select Sharing. G. Click Share As: and provide a Share Name: to identify the printer to other computers on the network. Comment: and Password: are optional.
- Page 28 If you find this inconvenient, devices known as Network Print Servers are available from D-Link including the DP-301 and DP-101P+. A Network Print Server would allow you to directly connect your printer to your network without worrying about which...
- Page 29 Networking Basics How to Install TCP/IP Go to START > SETTINGS> CONTROL PANEL Double click on Network.
- Page 30 Networking Basics How to Install TCP/IP (continued) Select the line that refers to the DWL-520 Wireless PCI card Click on Add. Select Protocol. Click Add.
- Page 31 Networking Basics How to Install TCP/IP (continued) Select Microsoft under Manufacturers. Scroll down and select TCP/IP under Network Protocols. Click OK. Now the TCP/IP for the D-LinkAir DWL-520 is available. The TCP/IP Installation is complete.
- Page 32 Networking Basics Configuring a Dynamic IP Address When the drivers are installed, the default setting is set to obtain an IP dynamically through a DHCP server. If you need to check or change the settings, then do the following: Go to START > SETTINGS > CONTROL PANEL Double Click on Network.
- Page 33 Networking Basics Configuring a Dynamic IP Address (continued) Highlight TCP/IP. Click on Properties. NOTE: If TCP/IP is not present, see the previous section: How to Install TCP/IP.
- Page 34 Networking Basics Configuring a Dynamic IP Address (continued) When the TCP/IP window opens, choose the IP Address tab. Select Obtain an IP Address Automatically. Click OK. When the network properties window comes back up, Click OK. Windows will ask you to reboot. Click Yes. You have completed the configuration of the Dynamic IP Address.
- Page 35 Networking Basics Configuring a Static IP Address Go to START > SETTINGS > CONTROL PANEL Double Click on Network.
- Page 36 Networking Basics Configuring a Static IP Address (continued) Highlight TCP/IP. Scroll down if you cannot see it. Click on Properties. NOTE: If TCP/IP is not present, please see: How to Install TCP/IP.
- Page 37 Networking Basics Configuring a Static IP Address (continued) When the TCP/IP Properties window opens, choose the IP Address tab. Select Specify an IP address. Enter an IP address into the empty field. (Suggested IP Range is 192.168.0.2 to 192.168.0.254) NOTE: IP Addresses must be signed sequentially to each computer.
- Page 38 Networking Basics Checking the TCP/IP Address Go to START > RUN Type winipcfg in the Open box. Click OK.
- Page 39 Networking Basics Checking the TCP/IP Address (continued) The IP Configuration screen will be displayed. The IP address will be displayed in the IP Address box. Click on More Info to display additional IP information.
- Page 40 Networking Basics Checking the Connection by Pinging Go to START > RUN Type command in the Open box. Click OK to get to a DOS prompt.
- Page 41 Networking Basics Checking the Connection by Pinging (continued) Type ping 192.168.0.1, which is the IP address of the Gateway in this case, and hit the Enter key. A successful ping will show four replies. Type “Exit” at the prompt to close the screen.
-
Page 42: Technical Specifications
Technical Specifications Chipset • Intersil Prism 2.5 Standards • IEE 802.11b • Wi-Fi compliant • PCI power bus management interface specification - 1.0 compliant • ACPI 1.0 compliant Local Bus Architecture • PCI 2.2 compliant Management Utility • Diagnostics • Link Configuration for joining wireless networks Protocols •... - Page 43 • Windows XP Data Security • 64/128-bit WEP (Wired Equivalent Privacy) Encryption Data Rate & Modulation • 11 Mbps: CCK • 5.5 Mbps: CCK • 2 Mbps: DQPSK • 1 Mbps: DBPSK Range • Indoors – per cell, up to 230 feet •...
- Page 44 Antenna • Reverse SMA connector with a detachable antenna Frequency Range • 2.400-2.4835 GHz, Direct Sequence Spread Spectrum (DSSS) Operating Channels • 1-11 United States (FCC) • 1-11 Canada (DOC) • 1-14 Japan (MKK) • 1-13 Europe (Except Spain and France) (ETSI) Physical Dimensions •...
-
Page 45: D-Link Locations
TEL: 86-10-88097777 Japan Irvine, CA 92618 FAX: 86-10-88096789 TEL: 81-3-5434-9678 U.S.A. FAX: 81-3-5434-9868 TEL: 1-949-788-0805 D-Link South America URL: www.d-link.co.jp FAX: 1-949-753-7033 Isidora Goyeechea 2934 of 702, URL: www.dlink.com Las Condes D-Link Norway Santiago ¡V Chile S.A. Waldemar Thranesgt. 77,... -
Page 46: Contacting Technical Support
Contacting Technical Support You can find the most recent software and user documentation on the D-Link website. D-Link provides free technical support for customers within the United States for the duration of the warranty period on this product. U.S. customers can contact D-Link technical support through our web site, by e-mail, or by phone. -
Page 47: Limited Warranty
Period shall extend for an additional ninety (90) days after any repaired or replaced Hardware is delivered. If a material defect is incapable of correction, or if D-Link determines in its sole discretion that it is not practical to repair or replace the defective Hardware, the price paid by the original purchaser for the defective Hardware will be refunded by D-Link upon return to D-Link of the defective Hardware. - Page 48 (90) days after any replacement Software is delivered. If a material non-conformance is incapable of correction, or if D-Link determines in its sole discretion that it is not practical to replace the non-conforming Software, the price paid by the original licensee for the non- conforming Software will be refunded by D-Link;...
- Page 49 Products should be fully insured by the customer and shipped to D-Link Systems Inc., 53 Discovery Drive, Irvine CA 92618. D-Link may reject or return any product that is not packaged and shipped in strict compliance with the foregoing requirements, or for which an RMA number is not visible from the outside of the package.
- Page 50 No part of this publication may be reproduced in any form or by any means or used to make any derivative such as translation, transformation, or adaptation without permission from D- Link Corporation/D-Link Systems Inc., as stipulated by the United States Copyright Act of 1976.
-
Page 51: Registration
Registration Register your D-Link Air DWL-520 online at http://www.dlink.com/sales/reg...