Table of Contents
Advertisement
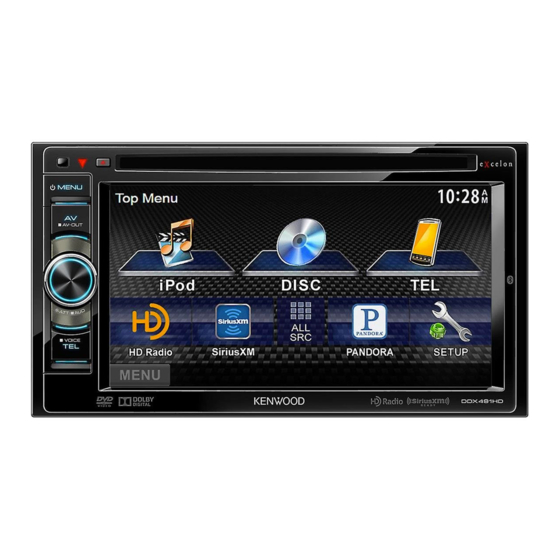
DDX771
DDX491HD
DDX471HD
DDX371
MONITOR WITH DVD RECEIVER
INSTRUCTION MANUAL
Take the time to read through this instruction manual.
Familiarity with installation and operation procedures will help you obtain the best performance from your new DVD-receiver.
For your records
Record the serial number, found on the back of the unit, in the spaces designated on the warranty card, and in the space provided below. Refer to the model and serial
numbers whenever you call upon your Kenwood dealer for information or service on the product.
Model DDX771/DDX491HD/DDX471HD/DDX371/DDX310BT/DDX3071BT/DDX271/DDX2071 Serial number
US Residents Only
Register your Kenwood product at www.Kenwoodusa.com
© 2013 JVC KENWOOD Corporation
DDX310BT
DDX3071BT
DDX271
DDX2071
Register Online
This HD Radio receiver enables:
LVT2506-001A (KN/RN)
Advertisement
Table of Contents

Related Manuals for Kenwood DDX771


Summary of Contents for Kenwood DDX771
- Page 1 Record the serial number, found on the back of the unit, in the spaces designated on the warranty card, and in the space provided below. Refer to the model and serial numbers whenever you call upon your Kenwood dealer for information or service on the product.
-
Page 2: Table Of Contents
How to read this manual: • Illustrations of DDX771 are mainly used for explanation. The displays and panels shown in this manual are examples used to provide clear explanations of the operations. For this reason, they may be different from the actual displays or panels. -
Page 3: How To Reset Your Unit
BEFORE USE BEFORE USE For DDX771/DDX491HD/DDX471HD/DDX371/ This equipment may cause harmful interference to For safety... DDX310BT/DDX271: radio communications, if it is not installed and used • Do not raise the volume level too much, as this V CAUTION in accordance with the instructions. However, there... -
Page 4: Initial Settings
<R-CAM Select [On] when connecting Interrupt> the rear view camera. (Page 47) <Panel Select the color of the buttons Color> on the monitor panel. (Page 43) Finish the procedure. DDX271 The <Top Menu> screen is displayed. Only for DDX771. Only for DDX271. -
Page 5: Clock Settings
INITIAL SETTINGS INITIAL SETTINGS Set the clock time. Clock settings Display the <Top Menu> screen. On the source control screen: Display the <Setup> screen. <Radio Data Synchronizes the clock time with System> FM RBDS. <OFF> Sets the clock manually. (See The security indicator on the monitor panel below.) flashes when the vehicle ignition is off. -
Page 6: Basics
9 M (Eject) button 7 For DDX491HD/DDX471HD/DDX371/ Component names and functions Ejects the disc (Tilts the monitor panel fully). Volume/ATT/AUD DDX771 Opens/closes the monitor panel. knob Attenuates the sound. (Press) (Page 7) Adjusts the audio volume. (Turn) (Page 7) DDX491HD/DDX471HD/DDX371/DDX310BT/ Displays the <Tone>... -
Page 7: Common Operations
Select an angle (0 – 6). Common operations DDX471HD/DDX371/DDX310BT/DDX3071BT/ Turning on the power DDX271/DDX2071) DDX491HD/DDX471HD/ DDX771 DDX371/DDX310BT/ DDX3071BT/DDX271/DDX2071 • To set the current position as the power off The ATT indicator lights up. position, select [Memory]. To cancel the attenuation: Press the same button again. -
Page 8: Common Screen Operations
Source control screen Common operating buttons: 1 Changes the playback source. (Page 9) Performs source playback operations. DDX771* • The operation buttons vary depending on the • Press [ALL SRC] to display all <Top Menu> selected source. items. (Page 9) (Hold) •... -
Page 9: Selecting The Playback Source
BASICS BASICS Only for DDX491HD/DDX471HD. Touch screen operations Selecting the playback source Only for DDX771/DDX371/DDX310BT/DDX3071BT/DDX271/ DDX2071BT. Only for DDX771/DDX491HD/DDX471HD/DDX371/DDX310BT/ DDX271 . Only for DDX771/DDX491HD/DDX471HD/DDX371/DDX310BT/ DDX3071BT . Select an appropriate input setting in <AV Input>. (Page 47) Only for DDX271: select an appropriate input setting in <External BUS>. -
Page 10: Discs
• If the ejected disc is not removed within 15 seconds, the disc is automatically inserted again into the loading slot to protect it from dust. Closing the monitor panel (only for DDX771) Playback information After removing the disc, press M on the monitor 1 Media type panel. - Page 11 DISCS DISCS [ ] [ ]* Selects a folder. Operation buttons For CD/MP3/WMA/WAV/AAC [ MODE]* Changes the settings for disc [O] [N] • Reverse/forward search during playback on the <DISC Mode> playback.* screen. (Page 13) • Plays back in slow-motion during pause. [MENU] Displays the <Top Menu>...
- Page 12 DISCS DISCS [ MENU] Displays the disc menu. [CUR]* Displays the menu /scene selecting Video menu operations screen. [Direct] Displays/hides the direct selecting You can display the video menu screen during video • [J] [K] [H] [I]: Selects an item. buttons.
-
Page 13: Settings For Disc Playback
(Initial) mode changes. (The corresponding indicator Language> turn subtitles off (Off). (Page 61) lights up.) • Initial for DDX771/DDX491HD/ – Available items differ depending on the types of DDX471HD/DDX371/DDX310BT/ loaded disc and playback file. DDX271: Off, for DDX3071BT/ <File Type>* Select the playback file type when a C-REP Repeats current chapter. -
Page 14: Usb
Operation buttons Indications and buttons on the source Connecting a USB device Reverse/forward search.* [O] [N] control screen You can connect a USB mass storage class device Displays the folder/track list. such as a USB memory, Digital Audio Player etc. to (Page 15) the unit. -
Page 15: Ipod/Iphone
iPod/iPhone iPod/iPhone <USB Mode> settings Selecting a folder/track on the list Preparation Setting <File Type> Connecting iPod/iPhone [Audio] Plays back audio files. [Still Image] Plays back JPEG files. • For details about connecting iPod/iPhone, see [Video] Plays back DivX*/MPEG1/MPEG2 page 56 . Select the folder (1), then the item in the files. - Page 16 iPod/iPhone iPod/iPhone Setting <AV Input> for iPod/iPhone Playback operations playback Select an appropriate input setting for <AV Input> • When the operation buttons according to the connection method of the iPod/ are not displayed on the screen, iPhone. touch the area shown on the •...
- Page 17 iPod/iPhone iPod/iPhone Operation buttons Video menu: Selecting an audio/video file from the Reverse/forward search. [O] [N] menu [APP] Select to control playback from iPod/ iPhone.* Displays the audio/video file list. (See the right column.) Selects repeat playback mode. • REP: Functions the same as “Repeat One.”...
- Page 18 iPod/iPhone iPod/iPhone Garmin App: Controlling playback from the iPod/ iPhone You can play back the audio/video files or use App by operating iPod/iPhone itself instead of the unit. • The current position of your vehicle appears on the map. When the vehicle moves, the map scrolls. •...
-
Page 19: Pandora
Pandora® Pandora® (Only for (Only for DDX771/DDX491HD/DDX471HD/DDX371/DDX310BT/DDX271 DDX771/DDX491HD/DDX471HD/DDX371/DDX310BT/DDX271 ) ) When the connection is established, the Playback information You can stream Pandora from iPod touch/ 1 Picture data (Shown if available from current Pandora application is started and “Pandora” iPhone via a wired connection or from Android or source control screen is displayed. - Page 20 Pandora® Pandora® On the Genre List NOTE Selecting a station from the list Select a genre (1), then a station (2). • Ensure you are logged in to your smartphone Display the list selecting screen. application. If you do not have a Pandora account, you can create one for free from your smartphone or at www.pandora.com.
-
Page 21: Tuner (Only For Ddx771/Ddx371/Ddx310Bt/ Ddx3071Bt/Ddx271/Ddx2071)
TUNER TUNER (Only for DDX771/DDX371/DDX310BT/DDX3071BT/DDX271/DDX2071) (Only for DDX771/DDX371/DDX310BT/DDX3071BT/DDX271/DDX2071) Operation buttons Changing the display information Listening to the radio [P1] – [P6] • Selects a stored station. (Press) Indications and buttons on the source • Stores the current station. (Hold) control screen... - Page 22 TUNER TUNER Manual presetting Activating/deactivating TI Standby FM RBDS features Reception Tune in to a station you want to preset. Searching for FM RBDS programs—PTY (Page 21) Search Select a preset number. You can search for your favorite programs being broadcast by selecting the PTY code.
-
Page 23: Hd Radio™ Tuner
HD Radio™ tuner HD Radio™ tuner (Only for DDX491HD/DDX471HD) (Only for DDX491HD/DDX471HD) • When receiving analog signals, ANALOG About HD Radio™ Technology Listening to the HD Radio™ indicator lights up. broadcast Operation buttons Indications and buttons on the source [P1] – [P6] • Selects a stored station. (Press) control screen •... - Page 24 HD Radio™ tuner HD Radio™ tuner Changing the display information Selecting a station/channel directly Select frequency ([FREQ]) or channel [Auto] Switch between digital and analog ([CH]) to select (1), enter the frequency or audio automatically. the channel number (2), then confirm the [Digital] Select this to tune to digital audio only.
- Page 25 HD Radio™ tuner HD Radio™ tuner Searching for FM HD Radio programs— Selecting a preset station from the list Presetting stations PTY Search Storing stations in the memory You can search for your favorite programs being You can preset 6 stations for each band. broadcast by selecting the PTY code.
-
Page 26: Siriusxm® Radio
SiriusXM® RADIO SiriusXM® RADIO (Only for DDX771/DDX491HD/DDX471HD/DDX371/DDX310BT/DDX271) (Only for DDX771/DDX491HD/DDX471HD/DDX371/DDX310BT/DDX271) Everything worth listening to is on SiriusXM, getting Operation buttons Listening to the SiriusXM® Radio over 130 channels, including the most commercial- [P1] – [P6] • Selects a stored channel. (Press) free music, plus the best sports, news, talk and •... - Page 27 SiriusXM SiriusXM® ® RADIO RADIO Changing the display information Presetting channels Selecting a channel Storing channels in the memory Selecting a channel directly You can preset 6 channels for each band. Tune in to a channel you want to preset. (Page 26) Select a preset number.
- Page 28 SiriusXM SiriusXM® ® RADIO RADIO Channel List Selecting a channel on the list SiriusXM Replay™ Select a category (1), and then select a channel You can obtain information on channels or select a (2). You can pause, rewind and replay content from the category and then a channel.
- Page 29 SiriusXM® RADIO SiriusXM® RADIO Operation buttons Enter a new four-digit code (1), and then Setting the reception restrictions [LIVE] Returns to the live position. The time confirm (2). Setting the parental lock code returns to –0:00. • Returns to the previous track if You can set the parental lock in order to, for pressed within 2 seconds from the example, restrict children from receiving adult...
- Page 30 SiriusXM SiriusXM® ® RADIO RADIO Activating the parental lock Deactivating the parental lock for all locked Select a category (1), and then select a This parental control option allows you to pick channels channel (2) the channels to be locked by the parental control feature.
-
Page 31: Other External Components
• No preparation is required for “AV-IN1”. To display the picture from the rear view camera Display the <Input> setting screen. manually On the <Top Menu> screen: Indications and buttons on the source DDX771* control screen (Hold) AV-IN name DDX491HD/DDX471HD/DDX371/ DDX271/... -
Page 32: Bluetooth
When you connect a Bluetooth device to the unit for available device. the first time, pair the unit and the device. Pairing allows Bluetooth devices to communicate with each Search “KENWOOD BT MM-8U2” from other. your Bluetooth device. Bluetooth is a short-range wireless radio •... - Page 33 BLUETOOTH BLUETOOTH Pairing a Bluetooth device using a PIN code (for Change the PIN code. Select the “KENWOOD BT MM-8U2” for Bluetooth 2.0) • If you skip changing the PIN code, go to step your Bluetooth device. Display the <Bluetooth Setup> screen.
-
Page 34: Using The Bluetooth Mobile Phone
When <Auto Response> is set to [On] (Page 39) A confirmation message appears. Press [Yes]. The unit answers the incoming call automatically. [TEL (HFP)]: for mobile phone * [PANDORA (SPP)] appears only for DDX771/DDX491HD/ Ending a call [Audio (A2DP)]: for Bluetooth audio player DDX471HD/DDX371/DDX310BT . - Page 35 BLUETOOTH BLUETOOTH Adjusting the volume of calls/earpiece/ Notifying SMS reception Making a call microphone If the mobile phone is compatible with SMS (Short Display the <Handsfree> screen. Message Service), the unit tells you a message has While talking... On the < Top Menu> screen: been received.
- Page 36 BLUETOOTH BLUETOOTH From the phone book/call lists • To use the A to Z search on phone book: • To display the details of an entry: When the <Phonebook> screen is displayed, you When the <Phonebook> is displayed, you can can search by initial.
- Page 37 On the <Handsfree> screen: Select an item from the phone book/call lists. (Page 36) Select a phone number. On the monitor panel: DX491HD/DDX471HD/ DDX771 (Hold) DDX371/DDX310BT/ DDX3071BT* Select a preset number to store into. (Hold) The PIN code (initial: 0000) necessary for...
- Page 38 BLUETOOTH BLUETOOTH Deleting the phone number entries in Settings for Bluetooth mobile About mobile phones compatible with Phone the unit Book Access Profile (PBAP) phones If your mobile phone supports PBAP, you can Display the phone book/call list you want Display the <Handsfree>...
- Page 39 BLUETOOTH BLUETOOTH Operation buttons Setting items Using the Bluetooth audio player Pauses playback. <Phone Shows the connected phone device • To register a new device, see page 32. Starts playback. Device> name. • To connect/disconnect a device, see page 34. • Selects a track. (Press) [S] [T] <Auto •...
-
Page 40: Settings
Adjust the level. • You can also display the <Tone> screen by <Q Factor> Adjusts the width of the Select a sound mode pressing AUD (for DDX771/DDX271/DDX2071 ) frequency. or by pressing and holding the Volume/ATT/ <Bass EXT> Activates/deactivates bass. -
Page 41: Adjustment For Video Playback
SETTINGS SETTINGS Adjusting the crossover frequency Select [DIM ON ] (dimmer on) or [ DIM OFF] Adjustment for video playback (dimmer off). Display the < X’over> screen. Adjusting the picture On the <Top Menu> screen: You can adjust the picture quality. Display the adjustment menu. - Page 42 SETTINGS SETTINGS Changing the aspect ratio Select the aspect ratio. Zooming the picture You can change the aspect ratio for video playback. You can zoom the picture (< FULL>, <Zoom1> to <Zoom3>). Display the adjustment menu. • When <Aspect> is set to < JUST> or <Auto> (see the left column), the picture is zoomed with the aspect ratio of the <...
-
Page 43: Changing Display Design
SETTINGS SETTINGS To select a panel color Storing your own scene for the Changing display design background image You can change the background and panel color. While playing a video or JPEG, you can capture an Display the < User Customize> screen. image and use the captured image as a background. -
Page 44: Customizing The
SETTINGS SETTINGS Capture the image displayed on the Select the position to place the icon (1), screen. then select the item you want to display on the selected position (2). A confirmation message appears. Press [Yes] to store the newly captured image. (The existing image is replaced with the new one.) •...Screen - Page 45 • To reset the touch position, press [Reset]. update, you can restart the update after the power • To cancel the current operation, press is turned on. The update will be performed from [Cancel]. the beginning. * Only for DDX771/491HD/DDX471HD/DDX371/DDX310BT/ DDX3071BT . ENGLISH...
-
Page 46: Setting Menu Items
SETTINGS <Loudness> <Audio> setting screen You can activate/deactivate loudness. <Fader/Balance> Displaying the <Setup> menu screen O (Initial): Boost low and high frequencies to produce a well-balanced sound at a low volume level. The LOUD indicator lights up. : Cancels. < o ’... - Page 47 • ON (initial): Attenuates the sound coming out of the power, then turn on to enable the change. speakers other than the front speakers during Only for DDX771. navigation guidance. • OFF: Cancels the attenuation. * Only for DDX271. “Please Power Off” appears when the setting is changed.
- Page 48 • English (initial )/Spanish/French/German/Italian/ • Device Address: Shows the device address of the screen. (Page 8) Dutch/Russian /Portuguese/Chinese-Simplified/ unit. • R-CAM (initial for DDX771): Displays the picture Chinese-Traditional/Thai/Turkish/Arabic/ • Auto Connect: from the rear view camera. (Page 31) Persian/Hebrew/Greek/Indonesia/Korean – ON (Initial): The connection is automatically <DivX®...
-
Page 49: Remote Controller
Insert the batteries with the + and – poles aligned This unit can be operated using the Remote properly, following the illustration inside the case. Controller (RC-DV340) supplied with this unit. DDX771/DDX491HD/DDX471HD/DDX371/ DDX310BT/DDX271: Optional Remote Controller KNA-RCDV331 is designed for controlling this unit. Refer to the instruction manual that comes with the remote controller. - Page 50 Aspect ratio changes each time directly. you press this key. Volume attenuating • DVD-VIDEO OPEN (Only for DDX771) – Chapter number Press the key once to lower the Adjusts the panel angle. – Title number volume. Press again to restore The panel angle changes each –...
- Page 51 REMOTE CONTROLLER REMOTE CONTROLLER Numeric keypad Picture Angle Direct search • Specify the number to search Switches the picture angle each Pressing this key switches the for in direct search. time you press this key. features that can be searched for •...
- Page 52 REMOTE CONTROLLER REMOTE CONTROLLER Direct tuning Radio/HD Radio/SiriusXM (AUD mode) iPod (AUD mode) Band switching After pressing this key, use the Music/Video search keypad to specify the broadcast Switches to bands received by Selects the music/video to be station you wish to receive. the unit.
-
Page 53: Connection/Installation
Always connect those wires to the • Only for DDX771: power source running through the fuse box. If the console has a lid, make sure to install the Supplied accessories for installation •... - Page 54 CONNECTION/INSTALLATION CONNECTION/INSTALLATION Installation procedure Installing the trim plate Installing the unit To prevent a short circuit, remove the key Attach the trim plate ( Installing the unit · from the ignition and disconnect the battery. Make the proper input and output wire connections for each unit.
-
Page 55: Connecting Wires To Terminals
When using the optional power amplifier, connect to its power control terminal. Blue with white stripe (Power control wire) To the terminal that is grounded when either the telephone rings or during conversation. (To connect the Kenwood navigation system, consult your Brown (Mute control wire) navigation manual.) - Page 56 (commercially available)* When connecting the component to play on “AV-IN1” or “AV- USB 2.0 cable IN2”, use the Audio and Video cable CA-C3AV (optional accessory). (accessory of the Only for DDX771/DDX491HD/DDX471HD/DDX371/DDX310BT/ iPod/iPhone) DDX271. Only for DDX271. USB device* 1 AV-OUT/Video output (Yellow)
- Page 57 CONNECTION/INSTALLATION CONNECTION/INSTALLATION Connecting microphone for Bluetooth Removing the unit Removing the unit (only for DDX771/DDX491HD/ Remove the trim plate. (See the left Removing the trim plate DDX471HD/DDX371/DDX310BT/ column.) DDX3071BT) Engage the catch pins on the extraction Insert the two extraction keys (4), then key (4) and remove the two locks on the Connect the microphone (7) to the MIC terminal.
-
Page 58: References
REFERENCES To keep discs clean Maintenance More information A dirty disc may not play correctly. Caution on cleaning the unit File playback If a disc does become dirty, wipe it with a soft cloth Do not use any solvent (for example, thinner, in a straight line from center to edge. - Page 59 • 3 inch disc. Attempting to insert using an adapter • Audio CD/ – WMA files encoded with lossless, professional, may cause malfunction. CD Text (CD-DA) and voice format. * Only for DDX771/DDX491HD/DDX471HD/DDX371/DDX310BT/ CD Recordable/Rewritable • VCD (Video CD) – WMA files which are not based upon Windows DDX271. (CD-R/-RW) •...
- Page 60 In • This unit can play JPEG/DivX*/MPEG1/MPEG2 / case, disconnect the USB device then reset this this case, visit the following KENWOOD web site: MP3/WMA/WAV/AAC files stored in a USB mass unit and the USB device.
- Page 61 REFERENCES REFERENCES Language codes (for DVD language selection) Afar Galician Maori Somali Abkhazian Guarani Macedonian Albanian Afrikaans Gujarati Malayalam Serbian Ameharic Hausa Mongolian Siswati Arabic Hindi Moldavian Sesotho Assamese Croatian Marathi Sundanese Aymara Hungarian Malay (MAY) Swahili Azerbaijani Armenian Maltese Tamil Bashkir Interlingua...
-
Page 62: Error Message List
REFERENCES REFERENCES “Connection Error”: “Pandora upgrade required”: Error message list • The device is registered but the connection has • The Pandora application on your iPod touch/ failed. Connect the registered device. (Page 34) iPhone/Android/BlackBerry is not the latest If an error occurs while using the unit, a message version. -
Page 63: Troubleshooting
“SXM Subscription Updated – Press Enter to • Record the tracks using a compliant application on Continue”: the appropriate discs. (Page 59) * For DDX771/DDX491HD/DDX471HD/DDX371/DDX310BT/DDX271 : • Your subscription is updated. Press the • Add appropriate extension codes to the file Purchase KNA-RCDV331 separately. - Page 64 REFERENCES REFERENCES Videos cannot be played. Pandora (Only for DDX771/DDX491HD/ • Connect with USB Audio and Video cable DDX471HD/DDX371/DDX310BT/ “ Reading...” does not disappear from the screen. KCA-iP202. Other cables cannot be used. • Turn the power off and on again.
-
Page 65: Notice/Caution On Using Bluetooth Device
(1) This device may not cause interference, and (2) Picture Size (W x H) CD-DA this device must accept any interference, including DDX771: 6.95 inches (diagonal) wide Sampling Frequency interference that may cause undesired operation of 156.6 mm x 81.6 mm (6-3/16" x 44.1 kHz/48 kHz/96 kHz... - Page 66 9.3 dBf (0.8 μV/75 Ω) * Only for DDX3071BT/DDX2071. Audio Output Level (mini jack) Quieting Sensitivity (S/N: 46 dB Dev 22.5 kHz) Bluetooth section ( DDX771/ 1.2 V/10 kΩ 15.2 dBf (1.6 μV/75 Ω) DDX491HD/DDX471HD/DDX371/ Frequency Response (± 3.0 dB)
- Page 67 Bluetooth SIG, Corporation in the United States and/or other • THIS PRODUCT IS LICENSED UNDER THE MPEG- Inc. and any use of such marks by JVC KENWOOD countries. 4 VISUAL PATENT PORTFOLIO LICENSE FOR Corporation is under license. Other trademarks •...