Table of Contents
Advertisement
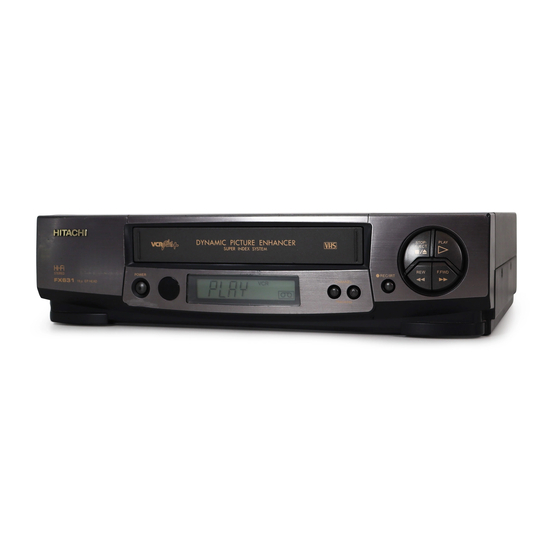
HITACHI
VIDEO CASSETTE RECORDER
VT-FX631A-VT-FX632A
Owner's manual
This instruction manual includes instructions on the use of both VT-FX631A and VT-FX632A.
Using these quality features:
• Common for VT-FX631A and VT-FX632A
• The VCR Plus+* programming system allows you to program the VCR for timer recording by simply
entering a PlusCode* number.
* VCR Plus+ and Pluscode are trademarks of Gemstar Development Corporation.
VCR Plus+ system is manufactured under license from Gemstar Development Corporation.
• Super index allows you to quickly search for a program you want to view or the point from which
you want to start recording on the tape.
• Super rewind and fast forward
• Multi-channel TV sound (MTS).
• 8-program/1-year preset recording.
• Auto tracking system automatically adjusts the tracking so the picture is optimized.
• Frequency synthesized tuner provides easy, preset tuning of up to 68 broadcast TV channels
and 125 cable channels.
• VHS Hi-Fidelity sound in playback.
• On-screen programming guide.
• With display, VCR Plus+ can be programmed to record without turning power on.
• VT-FX632A only
• Auto clock set feature allows you to automatically set the present time using a time signal.
Hitachi Home Electronics (America), Inc.
3890 Steve Reynolds Blvd., Norcross, GA 30093
Tel. 770-279-5600
HITACHI SALES CORPORATION OF HAWAII, INC
3219 Koapaka Street, Honolulu, Hawaii 96819
Tel. 808-836-3621
HITACHI (HSC) CANADA INC
3300 Trans Canada Highway, Pointe Claire,
Quebec, H9R 1B1, CANADA
Tel. 514-697-9150
1
Advertisement
Table of Contents

Related Manuals for Hitachi FX632A


Summary of Contents for Hitachi FX632A
- Page 1 VIDEO CASSETTE RECORDER VT-FX631A-VT-FX632A Owner's manual This instruction manual includes instructions on the use of both VT-FX631A and VT-FX632A. Using these quality features: • Common for VT-FX631A and VT-FX632A • The VCR Plus+* programming system allows you to program the VCR for timer recording by simply entering a PlusCode* number.
-
Page 2: Table Of Contents
Setting the clock automatically...17 SETTING THE CLOCK-AUTOMATIC MODE (VT-FX632A only) ...18 If your VCR is hooked up to a cable box (Hookups [E], [F] or [G]) ...18 TIME ZONE SETTING/DAYLIGHT SAVING TIME SETTING (VT-FX632A only)...19 What to do if the displayed time drifts from the current time by more than an hour ...19 SETTING THE CLOCK -MANUALLY ...21... -
Page 3: For Your Safety
POWER SUPPLY: AC 120V, 60 Hz ONLY. The POWER button turns the VCR on and off, leaving the clock/timer unaffected. If the unit is to be left unattended for a long period, it is recommended that the unit be completely switched off and unplugged. -
Page 4: Important Safeguards
INSERT. Caution to the user: Changes or modifications not expressly approved by the party responsible for compliance could void the user's authority to operate the equipment. "Note to CATV system installer: This reminder is provided to call the CATV system installer's attention to Article 820-40 of the NEC that provides guidelines for proper grounding and, in particular, specifies that the cable ground shall be connected to the grounding system of the building, as close to the point of cable entry as practical". - Page 5 pinched by items placed upon or against them, paying particular attention to cords at plugs, convenience receptacles, and the point where they exit from the appliance. 8 Ventilation -- Slots and openings in the cabinet are provided for ventilation to ensure reliable operation of the video product and to protect it from overheating.
- Page 6 16 Lightning -- For added protection for this video product during a lightning storm, or when it is left unattended and unused for long periods of time, unplug it from the wall outlet and disconnect the antenna or cable-system. This will prevent damage to the video product due to lightning and power-line surges. SERVICE 17 Servicing -- Do not attempt to service this video product yourself as opening or removing covers may expose you to dangerous voltage or other hazards.
-
Page 7: Customer Controls
CUSTOMER CONTROLS VCR Customer Controls VCR Front Panel Controls VCR Display Panel Item No. POWER button Infrared receiver Cassette compartment STOP/EJECT button PLAY button F.FWD button REW button REC/IRT button CHANNEL (channel up/down)/ TRACKING buttons VCR Display AM/PM indicators Time,... -
Page 8: Vcr Customer Controls
CLEAR - clears time counter REC - record button Check and indentify the accessories supplied. If any are missing or appear damaged, consult your dealer. Cable for connecting this VCR to a TV Function VIDEO IN jack Function POWER button... -
Page 9: Remote Operation
VCR, TV, CATV - Device buttons let you set the remote to control one of the three devices. VCR/TV mode select button CH (channel up/down) button F.FWD button - fast forward or search PLAY button - playback SUPER INDEX - to use the... -
Page 10: Operating In The Remote Control
1 Make sure there is no obstacle between the remote control and VCR's infrared receiver. Infrared Receiver Note: You cannot operate the VCR if there is an obstacle (for example, coffee table, sofa, etc) between the VCR and remote control. -
Page 11: Basic Antenna Hookup [A]
• To get the best quality picture record at standard recording speed (SP) • This VCR does not record at the LP speed, but it can play cassette that were recorded at the LP speed. • Safety tabs prevent erasure The VCR automatically enters the playback mode when a cassette without its safety tab is inserted. -
Page 12: With This Hookup
Hook-up A Illustration Switch the RF Channel When the VCR is on, its video signal can come into your TV on either channel 3 or channel 4. You need to select the appropriate channel. • When the power is turned on, press the POWER button to turn it off. Press the PLAY button on front of the VCR. -
Page 13: Basic Cable Hookup [C]
Hookup C Illustration Switch the RF Channel When the VCR is on, its video signal can come into your TV on either channel 3 or channel 4. You need to select the appropriate channel. • When the power is turned on, press the POWER button to turn it off. Press the PLAY button on front of the VCR. -
Page 14: Advanced Cable Hookup -Av Hookup [D]
(channel 4) in the VCR's display. Display the channel which is not used by a commercial channel in your area. ADVANCED CABLE HOOKUP -AV HOOKUP [D] WITH THIS HOOKUP YOU CAN... • WATCH AVAILABLE CABLE CHANNELS • RECORD AND WATCH THE SAME CHANNEL •... -
Page 15: Advanced Cable Hookup -With Cable Box [F]
Switch the RF Channel When the VCR is on, its video signal can come into your TV on either channel 3 or channel 4. You need to select the appropriate channel. • When the power is turned on, press the POWER button to turn it off. Press the PLAY button on front of the VCR. -
Page 16: With Cable Box And Splitter
Hookup G Illustration SETTING THE CLOCK -AUTOMATIC MODE Note: An antenna or cable must be connected to the VCR before you begin this operation. Tips You'll need to set the clock when first hooking up your VCR, and any time the power... -
Page 17: Setting The Clock Automatically
1 hour. When you first plug in the VCR or after a power outage, the clock display will read "--:--". Methods for setting the clock installed with these VCR's For VT-FX632A, use method A or B. -
Page 18: Setting The Clock-Automatic Mode (Vt-Fx632A Only)
(automatic or manual) must be repeated. • If the time displayed on the VCR drifts from the current time by more than one hour, select your correct time zone and set the DST (Daylight Savings Time)(see page 19). -
Page 19: Time Zone Setting/Daylight Saving Time Setting (Vt-Fx632A Only)
• Since the VCR is searching for a broadcast station that transmits a time signal, the channel indication on the cable box changes automatically. When the clock is set, the screen changes to a TV picture and the correct time appears in the VCR's display. Notes: •... - Page 20 1 Press the GUIDE button. The main on-screen menu will appear on the TV screen. Remote Control Illustration 2 Press the (3) button to bring up the "CLOCK SET" menu. Make sure that item 1 is highlighted "CLOCK SET <AUTO>". 3 Press the (3) button to select your local time zone.
-
Page 21: Setting The Clock -Manually
You may view all the on-screen instructions in English, French, or Spanish. When you first set up your VCR, it will be set to English. Press the (8) button for French or the (9) button for Spanish. Remote Control Illustration 2 Press the (3) button. - Page 22 4 Press the (2) button to bring up the clock set menu. • The white dash "-" appears for the item to be changed on the screen as you proceed. Common for VT-FX631A and VT-FX632A 5 Press the number buttons to fill the hour and minutes.
-
Page 23: Pre-Tuning The Vcr Tuner
8 Press the GUIDE button. The VCR clock is now set, and should show the correct time of day on the VCR's display. Notes: • The clock uses the 12-hour system. You set it for AM or PM. - Page 24 6 Press the (2) button. The VCR will automatically store channels received in your area. It takes about 2 - 3 minutes. After the channels are stored in memory, the channel with the lowest number appears in the VCR's display.
-
Page 25: Channel Caption (Station Identifier) (Vt-Fx632A Only)
7 Press GUIDE to return to regular viewing. Note: Your VCR is capable of receiving 68 broadcast TV channels (VHF 2-13, UHF 14-69) and cable channels (1-125). In some areas channels cannot be received when CATV1 is selected. In this case, select CATV2 in the receiving setup. - Page 26 1 Press the GUIDE button. The main on-screen menu will appear on the TV screen. 2 Press the (4) button to select the CHANNEL PRESET operation. Remote Control Illustration. 3 Press the (3) button to select "ADD/ERASE CHANNEL". 4 Use the number buttons to select the number of the channel you want to add or erase. 5 Press the STOP button to delete the channel, or press the PLAY button to add it.
-
Page 27: Auto Blue Setting
Remote Control Illustration. 4 Press the (1) button to select AUTO BLUE "ON" or "OFF". The screen becomes blue and mutes sound when a channel without a broadcast signal on the VCR or a channel on which broadcasting has finished. -
Page 28: Cable Box Setup
5 Press the GUIDE button to end the setting. CABLE BOX SETUP The following setup allows the VCR channel to automatically switch to the cable box output channel during delayed recording. Note: This setup should be performed if you receive all channels through a cable box (Hookups [E], [F] or| [G]). - Page 29 6 Press the (1) button to answer "YES" to the question "IS A CABLE BOX BEING USED?" • If you select "YES", you need not operate "VCR PLUS+ SETUP" ( see page 48). During delayed recording, the VCR channel will automatically switch to the cable box output channel.
-
Page 30: Playback
9 Press the GUIDE button to end this setting. The cable box output channel has now been set. However, the VCR does not control your cable box. Turn on the cable box and leave it tuned to the channel you want to record before the recording is scheduled to begin. -
Page 31: Rewinding The Tape
4 Press the STOP button to end playback. Rewinding the tape When the video cassette reaches the end of the tape, the VCR will stop automatically and automatically rewind the tape. • If you press the POWER button while the tape is rewinding, the power will not shut off until the tape has been completely rewound. -
Page 32: To Remove Noise From The Picture
Scratched tapes or poorly recorded tapes may require additional picture adjustment. You can do this with the remote control. Remote Control Illustration. Note: To reactivate auto tracking, simply eject the tape and reinsert it into the VCR. Press the CH ( ) button on the remote control or TRACKING button on the VCR when viewing a cassette. - Page 33 • After 1 minute in the PAUSE mode, the VCR automatically switches to STOP mode to protect the tape. • If noise bars appear on the TV screen during the PAUSE mode, first set the VCR to the SLOW mode by...
- Page 34 • Use the CH ( ) button to minimize any visual noise bands on the screen. • After 1 minute in slow motion playback, the VCR will stop the tape automatically to prevent damage to the tape and VCR. Visual Search This function let you search backward and forward through the videotape while viewing it.
-
Page 35: Choosing A Mode For Audio Playback
Choosing a mode for audio playback The VCR records the same audio on both the Hi-Fi and linear tracks on the tape. The Hi-Fi sound is recorded on separate left and right stereo channels. Monaural sound is recorded on the linear track. -
Page 36: Using The "Super Index" Feature
• A black square in the tape bar shows the current tape position. • When the VCR finds an index mark, it plays 15 seconds of the program that begins at that spot. NOTE: Tape bar will not appear correctly if the tapes which have scratches or are slack are being used. - Page 37 Note: If there are no index marks on the tape, the VCR will just rewind to the beginning or fast forward to the end. • Locating the beginning of a blank section (BLANK SEARCH) This function searches for a non-recorded section of remaining tape, or unused tape, and stops the tape when it locates such a section.
- Page 38 When the beginning of blank is located, the STOP screen will appear for five seconds and the tape will stop • The tape remaining time appears in the VCR display. • Switching rewind or fast forward to visual search (EASY VIEW)
-
Page 39: Viewing The On-Screen Display
Switching between the clock, time counter and time of remaining tape Press DISP while the on-screen display is displayed. The on-screen display switches in the order below together with the VCR's display. Press the DISP button to see the clock. Remote Control Illustration. - Page 40 1 Press the DISP button two or three times. The counter will appear in the VCR's display. Remote Control Illustration. 2 Begin recording or playing back a tape. 3 At the point that you want to go back to, press the CLEAR button.
-
Page 41: Recording A Program
Note: The cassette safety tab must be in place in order to record. The VCR must be hooked up properly for recording. See the Simple Hookups at the beginning of this manual. Most television programs and films are copyrighted. This means that someone has legal rights governing the reproduction and distribution of this material. - Page 42 • Recording will not start unless the cassette has the safety tab in place. When a cassette without a safety tab is inserted, "TAb" will flash in the VCR display for several seconds and the cassette will be ejected automatically.
-
Page 43: Recording A Program - Recording Tips
Remote Control Illustration. Notes: • You can check on the recording by pressing VCR/TV again. This will switch you back to viewing through the VCR, and you'll see the program you are recording. • If you're hooked up with an audio/video cable: Switch the TV from AUX or VIDEO mode back to the TV mode, then select the channels you want to watch, as described in Step 2. - Page 44 3 Press the PAUSE button to continue recording. Automatic Indexing Your VCR will automatically create an invisible "INDEX" mark every time you press the REC button while recording. During playback, the Index Search feature will let you move through a tape that has several recordings on it by searching for the "INDEX"...
-
Page 45: Instant Recording Timer
Stereo vs. mono sound When you select the STEREO option in the initial setup operation, your VCR records in stereo any station that broadcasts stereo sounds. When a TV channel broadcasts in stereo, you'll see a stereo indicator on the TV screen. -
Page 46: Delayed Recording
You can preset as many as 8 timed recordings at once. Recording is even easier when have set up your channels for the VCR Plus+ system. Learn the basics of delayed recording in this section. Then read about the VCR Plus+ system beginning on page 47. - Page 47 • Press the PROGRAM button once, the screen for VCR PLUS+ programming of the timer will appear. Press the PROGRAM button twice, this screen will appear. • If eight programs have already been stored in memory, "FULL" will flash in the VCR's display for about five seconds.
- Page 48 Records a show at the same day and time every week. EXAMPLE: Set the VCR to record "one time", a program on Channel 8 that starts at 6:00 PM and ends at 6:30 PM on 7/10/98, at the EP recording speed.
- Page 49 7 Press the (2) button for PM. 8 Enter the end time by pressing (0), (6), (3) and (0) for 6:30. The VCR automatically selects PM for you. 9 Enter the recording date by pressing (0), (7), (1) and (0) for 7/10/98.
- Page 50 The delayed recording indicator will display on the VCR. This tells you that the VCR will automatically record at the times and dates you have programmed. Note: If a cassette has not been inserted or a cassette without safety tab has been inserted, the delayed recording indictor will flash to warn you.
-
Page 51: Using The Vcr Plus+ System For Recording
Guide showing PlusCode numbers next to each program. Your local channels may be different from the VCR Plus+ channel codes. To get ready to record with the VCR Plus+ system you need to assign your local broadcast and cable channel numbers to the VCR Plus+ channel codes already stored in your VCR's memory. -
Page 52: Easy Delayed Recording With The Vcr Plus+ System
VCR Plus+ setup - Channel setup The following shows the procedure you should perform when you are receiving the Cable News Network (channel 42 with the VCR Plus+ system) on channel Matching Broadcast CH Numbers to VCR Plus+ Channels 1 Turn on the TV and select the Video channel (3 or 4). - Page 53 4 Press the (4) button to select VCR PLUS+ SETUP. A small arrow points to a blank "--" in the CHANNEL column. Note: If your broadcast channel number is the same as the VCR Plus+ Channel in your TV listing do not enter any number.
- Page 54 8 Press the GUIDE button to end the setup procedure. You are ready to begin delayed recording with the VCR pluls+ system. Remote Control Illustration. • Using the VCR Plus+ system to record a program (by using TV screen) 1 Insert a blank or erasable tape.
- Page 55 WEEKLY Records a show at the same day and time every week. Note: If you accidentally enter a nonexistent PlusCode number, the VCR gives you an error message that disappears from the screen in about 10 seconds. 5 Press the number buttons (1), (2) or (3) to select ONE TIME, DAILY or WEEKLY RECORDING Note: Programming does not take effect unless you select one of these options.
- Page 56 The delayed recording indicator will display on the VCR. This tells you that the VCR will automatically record at the times and dates you have programmed. Note: If a cassette has not been inserted or a cassette without safety tab has been inserted, the delayed recording indictor will flash to warn you.
- Page 57 VCR and TV. Notes: • If you use the VCR Plus+ system to program the timer while observing the VCR's display, you can only program a one-time recording. • To stop programming, press the POWER button to turn the VCR power on.
- Page 58 6 Press the PROGRAM button to complete your programming or continue with additional programs. The delayed recording indicator will display on the VCR. This tells you that theVCR will automatically record at the times and dates you have programmed. Note: If a cassette has not been inserted or a cassette without safety tab has been inserted, the delayed recording indictor will flash to warn you.
-
Page 59: Program Review
Important: Your timed recording settings take effect when you turn off the power on the VCR. Caution of VCR Plus+ Recording After entering a PlusCode number, check the information displayed with the "PROGRAM REVIEW". If there is (are) any unnecessary program(s), please cancel or correct it (them). Please refer to Page 53, "Reviewing what you have programmed". -
Page 60: Programming The Vcr Remote To Control Your Tv
4 Press the GUIDE button to end. PROGRAMMING THE VCR REMOTE TO CONTROL YOUR TV The VCR remote control can be programmed to control many TV brands that are remote controlled. 1 Turn on the TV. 2 Point VCR remote control toward TV. -
Page 61: Programming The Vcr Remote To Control Your Cable Box
3 Press buttons corresponding to the functions available on your TV remote control. PROGRAMMING THE VCR REMOTE TO CONTROL YOUR CABLE BOX The VCR remote control can be programmed to control many cable boxes brands that are remote controlled. You can easily change channels 1 Turn on the cable box. -
Page 62: Using The Vcr Remote To Control Your Cable Box
If the cable box channel does not change, you won't be able to program the remote for your cable box. • Using the VCR remote to control your cable box. 1 Press the "CATV" button on the remote control. 2 Point VCR remote control toward cable box. -
Page 63: Integrating Your Stereo System With Your Vcr
• Make sure the VCR is connected to your stereo system, as shown above. • Make sure that "STEREO" audio is selected from the VCR Set-Up Menu, as shown on page 42, of "RECORDING OPERATIONS" section, "Stereo vs. mono sound". -
Page 64: Copying Tapes From A Camcorder
COPYING TAPES FROM A CAMCORDER • Hook-up You may use your VCR to copy tapes from any camcorder onto standard VHS cassette tapes. Note: If your camcorder is not stereo (has only one audio plug), connect it into the AUDIO IN-L input on the back of the VCR. -
Page 65: Copying From One Vcr To Another Vcr (Dubbing)
COPYING FROM ONE VCR TO ANOTHER VCR (DUBBING) • Hookup If you have two VCRs, you may use one VCR to record a tape that is being played back in the other VCR. VCR to VCR Hook-up Illustration Rear Panel •... -
Page 66: Problem Guide / Maintenance
3 Press the PLAY button on VCR-2. You will see the taped program being played on the TV. 4 When you see the part of the program you wish to record, press the PAUSE button on VCR-1 again to release pause and start recording. -
Page 67: Guide Indications In The Vcr Display
Please consult your service dealer for further information. NOTE: Dirt accumulation on the video heads will cause the playback picture to become noisy. The VCR may require the video heads to be professionally cleaned by a qualified service dealer. -
Page 68: Technical Specifications
TECHNICAL SPECIFICATIONS • Technical specifcations Format: Video Signal System: NTSC color EIA standard Record/Playback System: Video: 4 head Audio: VHS Hi-Fi stereo record/playback system Tape Speed: 33.35 mm/sec (SP), 16.67 mm/sec (LP) (playback only), 11.12 mm/sec (EP) RF Input: UHF/VHS 75 ohm Tuner: USA: 181 channel tuning ability* (125 cable channels) Canada: 178 channel tuning ability* (122 cable channels) - Page 69 In Canada The VT-FX632A doesn't have cable box control so the cable box will not change channels automatically. The caller will have to set the cable box to their local PBS station that contains the signal to set the clock.