D-Link DFE-690TXD User Manual
Cardbus pc card
Hide thumbs
Also See for DFE-690TXD:
- User manual (57 pages) ,
- Quick installation manual (41 pages) ,
- Quick install manual (13 pages)
Table of Contents
Advertisement
Quick Links
Advertisement
Table of Contents

Related Manuals for D-Link DFE-690TXD


Summary of Contents for D-Link DFE-690TXD
- Page 1 DFE-690TXD Cardbus PC card User’s Manual Rev. 4.00 (May 2007)
-
Page 2: Table Of Contents
Verify Each Computers Identification..............8 Verify Network Adapter Installation ..............8 Verify Cable Connections ................9 Diagnostics and Checking Communications ...........9 Pinging your DFE-690TXD Card ..............10 Windows 98/Me Network Component Configuration ......11 Using File And Printer Sharing ...............13 Enabling File Sharing..................13 Enabling Printers Sharing ................15 Windows 2000/XP/Vista Network Component Configuration ..16... -
Page 3: Introduction
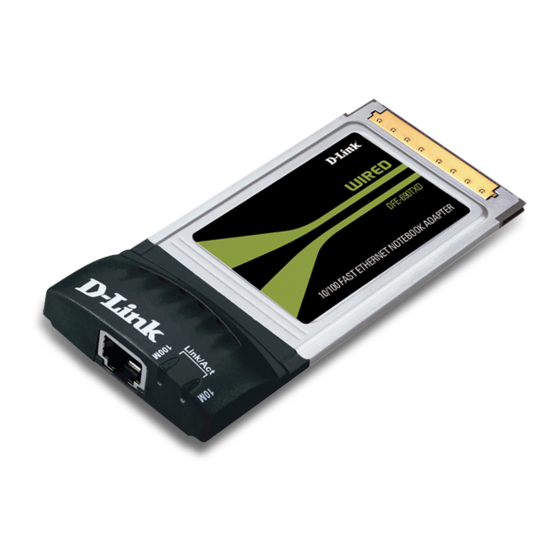
Installation instructions are given in Chapters 2 and 3. General Description The D-Link DFE-690TXD Cardbus PC Card for notebook PCs is a credit-card sized Ethernet / Fast-Ethernet adapter for connecting a notebook PC to an Ethernet network. -
Page 4: About Fast Ethernet
Inside its compact case, the D-Link DFE-690TXD holds an Ethernet controller, network processing interface, a 68-pin PC Card Standard front-end plug, which connects to the notebook PC, and a direct port for connecting RJ-45. The DFE- 690TXD requires no pre- installation setup -- simply insert its front end into the notebook PC's PC-Card slot. -
Page 5: About Auto-Negotiation
Auto-negotiation between devices within an Ethernet LAN is similar in concept, but much briefer. The two devices involved in the auto-negotiation will be your DFE-690TXD and the switch or hub through which it is connected into the LAN. (Switches ordinarily provide for auto-negotiation; traditional hubs do not.) The parameters to be negotiated between the DFE-690TXD and... -
Page 6: Led Indicators
690TXD and its supporting device begins and proceeds automatically. If the supporting switch or hub has auto- negotiation functionality, then it and the DFE-690TXD exchange a series of messages in which each device signals its capabilities and listens for corresponding information about the other. The auto-negotiation process requires only a few milliseconds, and the two devices select the best communication parameters supported by both devices. -
Page 7: Summary Of Features
Summary of Features Features of Model DFE-690TXD Cardbus PC Card: § 100Mbps and 10Mbps data rates in compliance with IEEE 802.3 § Ethernet standards 100Base-TX and 10Base-T § PCMCIA PC Card Standard Ver.2.0 and newer § PCMCIA standard 68-pin front-end connector §... -
Page 8: Troubleshooting
When the notebook computer is powered “ON,” and the DFE-690TXD is inserted into an open slot connector, please check the following items if your LED light is not “ON.” When all items are working, your DFE-690TXD’s direct port LED light should light up green (“linkage” state.) 1. -
Page 9: Verify Each Computers Identification
“Quick Install Guide.” If you see symbols such as yellow exclamation point or red “X” over the icon adjacent to “D-Link DFE-690TXD Cardbus PC Card,” your card is not installed properly or may have a problem. Double-click the “D-Link DFE- 690TXD Cardbus PC Card”... -
Page 10: Verify Cable Connections
Verify Cable Connections Check to see that the computer you are troubleshooting is properly connected. Each computer must be connected from its DFE-690TXD with Category 5 cables. Examine the network cables and ensure that being walked-on, rolled over by chairs, or caught in doors, has not damaged them. Additionally, make note of and alleviate any possible electromagnetic interference that may be affecting your network. -
Page 11: Pinging Your Dfe-690Txd Card
Pinging your DFE-690TXD Card Follow these steps to Ping a device: Ping is the acronym for Packet Internet Groper (PING), a utility to determine if a specific IP address is accessible. It works by sending a packet to the specified address and waiting for a reply. -
Page 12: Windows 98/Me Network Component Configuration
Click Start à Settings à Control Panel à Network and make sure that you have all the following components installed. § Client for Microsoft Networks § D-Link DFE-690TXD § NetBEUI § TCP/IP If any components are missing, click the Add button to add them. Microsoft includes all of these protocols in Windows. - Page 13 Click the Access Control tab. Make sure that Shared-level access control is selected. If connecting to a NetWare server, share level can be set to User-level access control. When finished, remove all disks from your computer and restart your computer to activate the new device and new changes to network configuration.
-
Page 14: Using File And Printer Sharing
When you are at the Windows 98 desktop, double-click the Network Neighborhood icon. You should see the names of the other PCs on the network that have enabled file and printer sharing. Using File And Printer Sharing Click Start à Settings à Control Panel. Double-click Network. Click the Configuration tab, followed by the File and Printer Sharing button. - Page 15 Click Sharing, and then click Share As. In the Share Name box, enter a name for the drive or folder you are sharing, (eg: C-Drive, CD-ROM, John, etc.). Next, decide on the access type that you want to give other users. Read-Only access lets other users view the files on your PC.
-
Page 16: Enabling Printers Sharing
printers with private passwords. When finished, click Apply, followed by OK. Enabling Printers Sharing Click Start à Settings à Printers . A window of available printers will appear. Right-click the printer that you want to share with other users. Click Sharing, and then click Share As. -
Page 17: Windows 2000/Xp/Vista Network Component Configuration
Windows 2000/XP/Vista Network Component Configuration This section includes instructions specific to the Windows 2000 operating system. However, Windows XP and Windows Vista instructions are very similar. For additional information regarding this section, please co nsult your Windows documentation provided my Microsoft. Go to Start à... - Page 18 them in manually. Click Close to exit. Go to Start à Settings à Control Panel à System. Open the Network Identification tab and click the Properties button. Type the name of your computer in the computer name box. Make up a name that is unique among the computers names on your network.
- Page 19 Type the name of your workgroup in the workgroup box. The name you type should be the same workgroup name in use by all of the other PCs on the network. When finished, remove all disks from your computer and restart your computer to activate the new device and with new configuration changes.
-
Page 20: Networking Basics
D-Link is one of the largest manufacturers of Ethernet products in the world. D-Link’s technological expertise and dedication to providing quality products at a low price makes D-Link a good place to watch for the newest in networking innovations. Or, you may want to get the newest drivers available for your Network Adapters. - Page 21 B. Click the "Identification" tab on the top of the dialog box. C. Type a unique, identifying name for this particular computer in the "Computer name:" box. This will be the name that other computers on your network will use to communicate with this computer. Each computer’s name must be unique on a particular network or confusion will result.
-
Page 22: Sharing Files
Sharing Files With your computers connected together on a network, you may now open and save files on another computer. You will be able to specify particular folders or disk drives to "share" and even password protect them. The steps below will enable you to share specific files and folders with other computers on your network. - Page 23 C. Click the "File and Print Sharing·" button. D. Click to place a check mark next to "I want to be able to give others access to my files." E. Click "OK" on the "File and Print Sharing" dialog box. F.
- Page 24 Right-click on the disk drive or folder icon and select "Sharing." K.Select " Share As:" to set the parameters for sharing this particular disk drive or folder. L. The "Share Name:" box is used to identify the disk drive or folder you are - 23 -...
- Page 25 sharing to other computers on the network. You can give it any name you wish. However, a specific identification may help as more resources on your network are shared. M. The "Comment:" box is optional. You can use this box to further describe the disk drive or folder for others on the network.
-
Page 26: Sharing Printers
to map these disk drives and folders to a drive letter on another computer. For example, on a computer where you are accessing a shared folder from another computer, inside Windows Explorer right-click and select "Map Network Drive·” You will then be able to assign an available drive letter. Checking "Reconnect at logon"... - Page 27 C. Click to place a check mark next to "I want to be able to allow others to print to my printer(s)." D. Click "OK" on the "File and Print Sharing" dialog box. E. Click "OK" on the "Network" dialog box. F.
- Page 28 Go to START>SETTINGS>PRINTERS Right click on the printer you want to share with others on the network and select "Sharing." G. Click "Share As:" and provide a "Share Name:" to identify the printer to other computers on the network. "Comment:" and "Password:" are optional.
- Page 29 Note: the computer that the printer is connected to must be “on” to use the printer. If you find this inconvenient, devices known as Network Print Servers are available from D-Link including the DP-301 and DP-101P. A Network Print Server would allow y ou to directly connect your printer to your network without worrying about which computer is “on.”...
-
Page 30: How To Install Tcp/Ip
How to Install TCP/IP Go to START > SETTINGS> CONTROL PANEL Double click on “Network.” - 29 -... - Page 31 Select “D-Link DFE-690TXD Cardbus PC Card.” Click on “Add.” Select “Protocol.” Click “Add.” Select “Microsoft.” - 30 -...
-
Page 32: Configuring A Dynamic Ip Address
Scroll down and select “TCP/IP.” Click “OK.” Now the “TCP/IP for D -Link DFE-690TXD Cardbus PC Card” is available. The TCP/IP Installation is complete. Configuring a Dynamic IP Address When the drivers are installed, the default setting is set to obtain an IP dynamically through a DHCP server. - Page 33 Double Click on “Network” Highlight “TCP/IP.” Click on “Properties.” - 32 -...
- Page 34 NOTE: If TCP/IP is not present, see the previous section: “How to Install TCP/IP” When the TCP/IP window opens, choose the “IP Address” tab. Select “Obtain an IP Address Automatically.” Click “OK.” When the network properties window comes back up, Click “OK.” Windows will ask you to reboot.
-
Page 35: Configuring A Static Ip Address
Configuring a Static IP Address Go to START > SETTINGS > CONTROL PANEL Double Click on “Network.” - 34 -... - Page 36 Highlight “TCP/IP.” Scroll down if you cannot see it. Click on “Properties.” NOTE: If TCP/IP is not present, please see: “How to Install TCP/IP.” When the “TCP/IP Properties” window opens, choose the “IP Address” tab. Select “Specify an IP address.” - 35 -...
- Page 37 Enter an IP address into the empty field. Suggested IP Range 192.168.0.2 to 192.168.0.254 NOTE: IP Addresses must be signed sequentially to each computer. Suggested Subnet Mask of 255.255.255.0 Click “OK.” When the “Network Properties” window comes back up click “OK.” Insert Windows CD if prompted.
-
Page 38: Checking The Tcp/Ip Address
Checking the TCP/IP Address Go to START > RUN Type "winipcfg" in the "Open" box. Click “OK.” Click "OK." The IP Configuration screen will be displayed. The IP address will be displayed in the IP Address box. - 37 -... - Page 39 Click on "More Info" to display additional IP information. - 38 -...
-
Page 40: Checking The Connection By Pinging
Checking the Connection by Pinging Go to START > RUN Type "command" in the "Open" box. Click "OK" to get to a DOS prompt. Type "ping 192.168.0.1," which is the IP address of the Gateway in this case, and hit the "Enter" key. - 39 -... -
Page 41: Specifications
A successful ping will show four replies. Specifications Standards: IEEE 802.3 10Base-T Ethernet IEEE 802.3u 100Base-TX Fast Ethernet ANSI/IEEE 802.3 NWay Auto-Negotiation PCMCIA 2.x 32-bit Cardbus Network Media: Ethernet: UTP Cat3, 4, 5 EIA/TIA-568 100-ohm Fast Ethernet: UTP Cat5, EIA/TIA-568 100-ohm Protocol: CSMA/CD Host Interface:... - Page 42 Network Data Transfer Rate: Ethernet: 10Mbps (Half-duplex) Ethernet: 20 Mbps (Full-duplex) Fast Ethernet: 100Mbps (Half-duplex) Fast Ethernet: 200Mbps (Full-duplex) Temperature: Operating: -10~50% C Storage: -10~70% C Humidity: Operating: 10%~90% RH Storage: 5%~90% RG Driver Support: Microsoft Windows 95, 98, 98SE Microsoft Windows 2000, XP, Vista Microsoft Windows NT v3.51 and NT 4.0 Apple Macintosh OS 8.5 to OS 9.1...
-
Page 43: Technical Support
Technical Support You can find software updates and user documentation on the D-Link website. D-Link provides free technical support for customers within the United States and within Canada for the duration of the warranty period on this product. U.S. and Canadian customers can contact D-Link Technical Support through our website, or by phone. - Page 44 Software (or defective media) with software that substantially conforms to D-Link’s functional specifications for the Software or to refund the portion of the actual purchase price paid that is attributable to the Software. Except as otherwise agreed by D-Link in writing, the replacement Software is provided only to the original licensee, and is subject to the terms and conditions of the license granted by D-Link for the Software.
- Page 45 D-Link Systems, Inc., 17595 Mt. Herrmann, Fountain Valley, CA 92708. D-Link will not be held responsible for any packages that are lost in transit to D-Link. The repaired or replaced packages will be shipped to the customer via UPS Ground or any common carrier selected by D-Link.
- Page 46 This Limited Warranty provides specific legal rights and you may also have other rights which vary from state to state. Trademarks: D-Link is a registered trademark of D-Link Systems, Inc. Other trademarks or registered trademarks are the property of their respective owners.
-
Page 47: Product Registration
Product Registration http://support.dlink.com/register/ Register your D-Link product online at Product registration is entirely voluntary and failure to complete or return this form will not diminish your warranty rights. - Page 48 URL: www.dlinkla.com URL: www.dlink.nl Poland Brazil Belgium URL: www.dlink.pl URL: www.dlinkbrasil.com.br URL: www.dlink.be Hungary South Africa Italy URL: www.dlink.hu URL: www.d-link.co.za URL: www.dlink.it Singapore Russia Sweden URL: www.dlink-intl.com URL: www.dlink.ru URL: www.dlink.se Australia Japan K.K. Denmark URL: www.dlink.com.au URL: www.dlink-jp.com URL: www.dlink.dk...