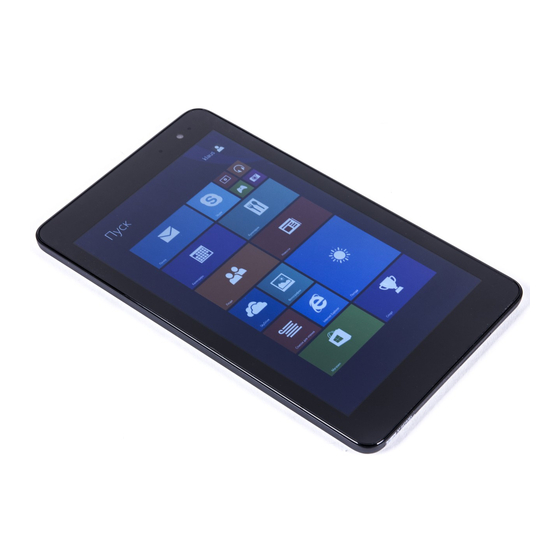
Dell Venue 8 Pro User Manual
Hide thumbs
Also See for Venue 8 Pro:
- User manual (36 pages) ,
- Specifications (2 pages) ,
- Quick start manual (2 pages)
Table of Contents
Advertisement
Quick Links
Advertisement
Table of Contents

Related Manuals for Dell Venue 8 Pro


Summary of Contents for Dell Venue 8 Pro
- Page 1 Venue 8 Pro User’s Manual...
- Page 2 Inc.; Bluetooth® is a registered trademark owned by Bluetooth SIG, Inc. and is used by Dell under license; Apple is a trademark of Apple Inc., registered in the U.S. and other countries. Other trademarks and trade names may be used in this document to refer to either the entities claiming the marks and names or their products.
-
Page 3: Table Of Contents
Gestures ..................21 Screen Orientation ..............24 Windows 8 Start Screen ............24 Synchronizing Your Tablet ............27 Refreshing Your Tablet ............. 28 Resetting Your Tablet ............... 29 Cleaning Your Tablet ..............30 Troubleshooting ............31 Contacting Dell ............35 Contents... - Page 4 Locating Your Service Tag and Express Service Code ..........36 Specifications ............... 37 Glossary ................ 39 Index ................43 Contents...
-
Page 5: Features
Features 3 4 5 Feature Functionality 1 Audio port (3.5 mm) Connect a headset, headphones, microphone, or other audio equipment to listen to stereo sound, record audio, or make calls. 2 Windows button • Press to open the Windows Start screen. - Page 6 Automatically adjusts the brightness of the display’s backlight based on surrounding light levels. 6 Service Tag label Provides the Service Tag/Express Service code needed for contacting Dell for customer service or technical support. 7 Speaker Provides audio output. 8 Micro‑USB port • Connect the supplied power adapter to...
- Page 7 Feature Functionality 13 Micro‑SIM card slot Insert a micro‑SIM card for mobile broadband connectivity. 14 microSD‑card slot Insert a microSD card to expand the tablet’s storage capacity. 15 Rear camera Captures pictures or videos. NOTE: The front camera does not support zoom, face tracking, or the touch‑to‑focus feature.
-
Page 8: Accessories
Accessories Your tablet supports the following accessories: 10 W power adapter and micro-USB cable Provides power to your tablet and charges the battery. Stylus (optional) Allows you to draw shapes, select items and text, turn pages, write or sign documents, as well as use touch gestures on the touchscreen. NOTE: The stylus is sold separately and is not shipped with the tablet. -
Page 9: Setting Up Your Tablet
WARNING: Before you begin any of the procedures in this section, read the safety information that shipped with your tablet. For additional best practices information, see dell.com/regulatory_compliance. Charging the Tablet CAUTION: Charge the battery in an ambient temperature of 0 °C to 35 °C. -
Page 10: Battery Icon Displayed On Screen
3 Connect the power adapter to an electrical outlet and charge the tablet until the battery is fully charged. NOTE: A fully discharged battery takes about 4 hours to fully charge. You can check the tablet battery charge status from: Battery‑charge light located on the right side of the tablet: LED behavior Description... -
Page 11: Turning On Your Tablet
Turning On Your Tablet When you turn on the tablet for the first time, you must finish Windows setup to start using your tablet. For more information, see the Quick Start Guide . 1 Press and hold the power button for 2 seconds to turn on your tablet. -
Page 12: Turning Off Your Tablet
Turning Off Your Tablet Using the power button: 1 Press and hold the power button for at least 4 seconds. 2 Swipe‑down the shutdown confirmation screen to the bottom edge of the display to turn off the tablet. Using Charms: 1 Swipe‑in from the right edge of the display to access Charms. →... -
Page 13: Inserting A Microsd Card
Inserting a microSD Card 1 Open the slot cover. 2 Align the microSD card so that the pins are pointed toward the card slot and are facing toward the rear of the tablet. 3 Push the microSD card into the card slot. 4 Close the slot cover. -
Page 14: Removing The Microsd Card
Removing the microSD Card CAUTION: Removing the microSD card while it is in use may cause data loss or result in application errors. Make sure all save operations to the microSD card are complete before removing the microSD card. 1 Touch the Desktop tile to enter Desktop mode. 2 Touch Safely Remove Hardware in the notification area at the bottom‑right corner of the screen. -
Page 15: Inserting A Micro-Sim Card
Inserting a Micro-SIM Card CAUTION: Inserting an incompatible SIM card, such as a nano‑SIM card, into the micro‑SIM card slot may damage the card or the tablet, and may corrupt data stored on the card. 1 Open the slot cover. 2 Align the micro‑SIM card so that the pins are pointed toward the card slot and are facing toward the rear of the tablet. -
Page 16: Removing The Micro-Sim Card
Removing the Micro-SIM Card CAUTION: Removing the micro‑SIM card when the tablet is turned on may cause data loss or damage the card. Make sure your tablet is turned off or the network connections are disabled. 1 Turn off your tablet. For more information on turning off your tablet, see Turning Off Your Tablet. -
Page 17: Using Headphones
Using Headphones You can connect a headset or headphones to the audio port of your tablet. WARNING: Listening to loud music for an extended period of time can lead to hearing loss. 1 Connect headphones to the audio port (3.5 mm) on the tablet. 2 Insert the earphones in your ears and adjust the volume level to a comfortable level. -
Page 18: Using Your Tablet
Using Your Tablet Wi-Fi Setting Turning On/Off Wi‑Fi: 1 Swipe‑in from the right edge of the display to access Charms. → Network icon 2 Touch Settings 3 Swipe Wi-Fi icon right or left to turn Wi‑Fi on or off. Connecting to a network: 1 Swipe‑in from the right edge of the display to access Charms. - Page 19 4 Touch the icon of your mobile broadband carrier and touch Connect. The estimated data usage is shown once the mobile broadband network is enabled. CAUTION: Depending on the SIM card setting, you may be required to enter the PIN code to unlock the card and connect to the network. If you enter the incorrect PIN code, your mobile broadband connection will be blocked.
-
Page 20: Bluetooth Setting
Bluetooth Setting Turning On/Off Bluetooth: 1 Swipe‑in from the right edge of the display to access Charms. → Change PC settings→ PC and devices→ 2 Touch Settings Bluetooth. 3 Swipe Bluetooth icon right or left to turn Bluetooth on or off. Pairing with Bluetooth‑enabled devices: NOTE: Bluetooth connection between your tablet and Apple devices are not supported. -
Page 21: Gestures
Gestures Your tablet has a multi‑touch display. You can touch the screen to operate the tablet. Finger gestures Allows you to: Touch • Select items on the screen, Tap gently on the display with your including options, entries, fingertip. images, and icons. • Start apps. - Page 22 Finger gestures Allows you to: Drag Move items such as images and 1 Touch and hold your finger on an icons on the screen. item on the screen. 2 Keeping your finger in contact with the display, move your fingertip to the desired location.
- Page 23 Finger gestures Allows you to: Zoom out Reduce the view of an image or Touch the display with two fingers and web page. then move the fingers closer. Rotate Rotate an object by 90 degrees. Touch the display with two or more fingers and then move the fingers in a clockwise or counter‑clockwise arc.
-
Page 24: Screen Orientation
Screen Orientation For optimal viewing experience, the screen orientation changes automatically to portrait or landscape depending on how you hold the tablet. You can disable automatic screen rotation and lock the screen in portrait or landscape mode. NOTE: Some apps may not support automatic screen rotation and are designed to work only in one orientation. -
Page 25: Swipe Left
Accessing the Start screen When you computer boots into Windows, the Start screen appears by default. To access the Start screen from any other window or app, use any of the following methods. • Press the Windows button. • Swipe‑in from the right edge of the display to access Charms, and then touch the Start icon If you are at the Start screen, pressing the Start icon takes you to... -
Page 26: Swipe Right
. Touch Customize to organize the tiles on your Start screen. • Swipe‑in from the top to the bottom of an app to dock or close the app. For more information on using Windows 8 Start screen, see dell.com/windows8. Using Your Tablet... -
Page 27: Synchronizing Your Tablet
Synchronizing Your Tablet Using a Microsoft account If your computer has Microsoft Windows 8/8.1 installed, you can synchronize user settings of your tablet with your computer using a Microsoft account. When you sign in with your Microsoft account on your tablet, your settings, including internet browser history, app settings, and personal files, are synchronized with other Windows 8/8.1 tablets and computers on which you use the same Microsoft account. -
Page 28: Refreshing Your Tablet
Refreshing Your Tablet Refreshing your tablet restores Windows to original factory settings without deleting any of your personal files, apps installed from Windows Store, or personalization settings. To restore your tablet: 1 Swipe‑in from the right edge of the display to access Charms. →... -
Page 29: Resetting Your Tablet
Resetting Your Tablet CAUTION: Resetting your tablet erases all data from your tablet, including your account configuration, apps, music, pictures, files, and so on. Make sure that you back up all the required data before you proceed. Resetting your tablet returns Windows to original factory settings. To reset your tablet: 1 Swipe‑in from the right edge of the display to access Charms. -
Page 30: Cleaning Your Tablet
Cleaning Your Tablet CAUTION: Before you clean your tablet, disconnect all the cables and turn off the tablet. Clean your tablet with a soft cloth dampened with water. Do not use liquid or aerosol cleaners, which may contain flammable substances. CAUTION: To avoid damaging the tablet or display, do not spray cleaning solution directly onto the display. -
Page 31: Troubleshooting
35 °C (95 °F). between 0 °C to 35 °C (32 °F to 95 °F) The battery or power Contact a Dell authorized adapter is damaged. reseller to replace the battery or power adapter. If the tablet is not in • Temporarily turn off... -
Page 32: System Problem
Turning Off Your Tablet Turning On Your Tablet. 2 Refresh the tablet. See Reset your tablet. 3 Contact Dell’s support service. See dell.com/support. Tablet cannot boot into Contact Dell’s support Windows service. See dell.com/support. Software or feature is not... -
Page 33: Network Problem
Network problem Problems Possible causes Possible solutions 1 Check if the wireless No wireless connection radio is on. See Wi‑Fi setting. 2 Try to get closer to the wireless access point. 3 Reset the wireless router if using a private network;... -
Page 34: Touchscreen Problem
Unable to pair with a 1 Make sure Bluetooth Bluetooth device is enabled and follow proper Bluetooth pairing instructions. Bluetooth Setting. 2 Contact Dell’s support service. See dell.com/ support. Touchscreen problem Problems Possible causes Possible solutions Touchscreen responds • The screen is dirty. -
Page 35: Contacting Dell
Availability varies by country and product, and some services may not be available in your area. NOTE: If you do not have an active internet connection, you can find contact information on your purchase invoice, packing slip, bill, or Dell product catalog. Contacting Dell... -
Page 36: Locating Your Service Tag And Express Service Code
Express Service Code You must provide the Service Tag/Express Service Code of your tablet when contacting Dell for customer service or technical support. NOTE: The telephone systems prompts you to enter the Express Service Code that helps in routing your call efficiently. -
Page 37: Specifications
Specifications Dimensions and Weight Height 216.20 mm (8.51 inches) Width 130 mm (5.11 inches) Thickness 9 mm (0.35 inches) Weight 406g +/‑5g (0.90lb +/‑0.01lb) Environmental requirements Temperature range: Operating 0°C to 35 °C (32°F to 95 °F) Non‑operating ‑40°C to 65 °C (‑40°F to 149 °F) Relative humidity (maximum): Operating 10% to 90% (noncondensing) -
Page 38: Power Adapter
Display Type 8” WXGA with multi‑point capacitive touch Resolution (maximum) 1280 x 800 Aspect ratio 16:9 Brightness (maximum) 400 nits Viewing angle Symmetrical 80 degrees Contrast ratio 700:1 Color depth 24 bit/pixel Power Adapter Input voltage 100‑240 VAC Input current (maximum) 0.50 A Input frequency 50‑60 Hz... -
Page 39: Glossary
Glossary This section provides information about the terms used in this document that is for informational purposes only and may or may not describe features included with your tablet. A ‑ ampere ‑ A measure of the amount of electric charge passing a point in an electric circuit. - Page 40 device ‑ Hardware such as a disk drive, printer, or keyboard that is installed in or connected to your tablet. Email ‑ Electronic mail ‑ a method of exchanging digital messages from an author to one or more recipients via the Internet. Email servers accept, forward, deliver and store messages, and neither the users nor their computers are required to be online simultaneously.
- Page 41 Service Tag ‑ A bar code label on your tablet that identifies your tablet when you call Dell for customer service or technical support. shortcut ‑ An icon that provides quick access to frequently used programs, files, folders, and drives. When you place a shortcut on your Windows Start screen, the home screen of Windows 8 is made up of ‘Live Tiles’, and touch the tile, you can open its corresponding folder...
- Page 42 W ‑ watt ‑ The measurement of electrical power. One W is 1 ampere of current flowing at 1 volt. wallpaper ‑ The background pattern or picture on the Windows desktop. Wi-Fi ‑ A technology as a synonym for WLAN (wireless local area network) connects to the Internet when within range of a wireless network.
-
Page 43: Index
Index Accessory Gestures Micro‑USB cable, 8 Drag, 22 Power adapter, 8 Rotate, 23 Swipe or Slide, 22 Touch, 21 Touch and Hold, 21 Zoom in, 22 Battery Zoom out, 23 Tablet battery status, 10 Tablet charge, 9 Bluetooth setting, 20 Button Lock screen, 11 Power, 6... - Page 44 Screen Wi‑Fi setting, 18 Lock screen, 11 Windows button Login screen, 11 Location, 5 Swipe left , 25 Windows Start screen, 24 Swipe right, 26 Swipe up/down , 26 Turn off/on, 12 Service tag Locating, 36 Start icon Function, 25 Synchronize with computer, 27 Tablet Charge, 9...