Advertisement
Quick Links
Advertisement

Related Manuals for Zenith 12 XP

Summary of Contents for Zenith 12 XP
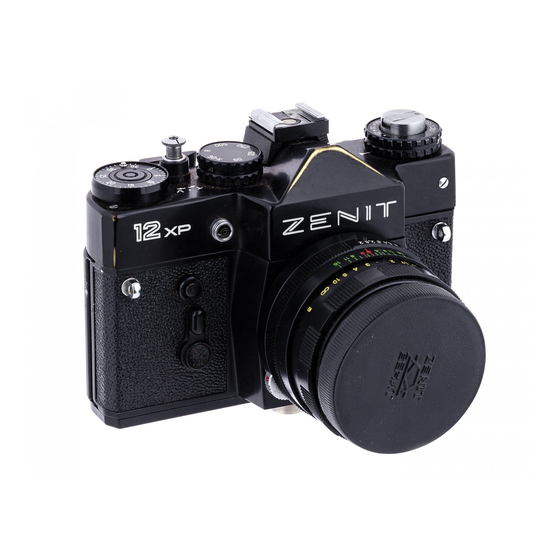
- Page 1 Zenith 12 XP...
- Page 2 This will enable any early operator errors to be corrected and will give you confidence for the future. As a 'system' camera your Zenith will accept a large number of different lenses and additional accessories; we particularly recommend as most suitable those from the Hellos range which will enable you to cope with almost any photographic situation.
- Page 3 Loading the Camera - Step by step instructions Always load the camera in subdued light; if outdoors shield from direct sunlight. Make sure that the indicator on the Shutter Release Button [3] is facing towards the front of the camera. Depress Shutter Release Button [3] - if shutter does not fire advance Transport Lever [2] in short strokes until it stops and press Shutter Release Button [3] again.
- Page 4 [22] slots ensuring that the second hole engages with a tooth on the spool. Ease film forward by swat strokes of Transport Lever [2] until it stops. The lower Sprocket Teeth [26] should be properly engaged. Fire shutter. Advance film by short strokes of transport lever until both top and bottom sprockets are engaged.
-
Page 5: Using The Camera
Using the Camera Set the Speed Dial [1 ] appropriately according to the subject. The dial is marked in figures that represent fractions of a second-i.e. "60" is 1/60th second. It may be turned in either direction but not between "500" and "B" and must not be between marked speeds. -
Page 6: Depth Of Field
Depth of Field The lens is also provided with a scale calibrated in meters but it will seldom be necessary to refer to this. This is the depth of field scale [13] and works the following way: All lenses when focused on a given subject will show some objects in front of and behind that subject sharply in focus. -
Page 7: Using The Meter
Aperture Rinai9l then alter the Shutter Speed Dial [1] up or down and repeat the process. The meter fitted in the Zenith 12 XP is very sensitive and in some cases the indicator lights may move from top to bottom without an intermediate 'flashing' stage. - Page 8 Set Film Speed In the cut-outs in the Aperture Indicator Dial [15a] there are two scales for ferris rated in ASA and DIN. Set the speed of the film in use by turning the dial with the small projection. Any intermediate positions may be used and are proportionate Point the camera at the subject, if outdoors with a bright sky tilt it downwards somewhat.
- Page 9 Removing Exposed Film - Step by step instructions Replace the lens cap to prevent accidental exposure of film during rewinding. Press Shutter Release Button [3]. With the finger tip depress the Film Rewind Sleeve (arrowed above) into the cut-out portion of the surrounding sleeve.
- Page 10 Photography with Flash The meter cannot be used when taking flash pictures as the burst of light is too short. In all cases the Speed Dial [1] must be set to, "30-X", the aperture being determined by the camera-to-subject distance. Tables or calculators for this are given in the instructions for the flashgun often being incorporated into the gun itself.
- Page 11 For exposures longer than the meter range (1/30th at f/2) the "B" setting on the Speed Dial [1] must be used. The exposure should be determined by using a hand-held meter such as the Leningrad or by experience/estimation. Although the camera may be rested on a firm surface the best results will be obtained by the use of a tripod but avoid those of a flimsy nature.
- Page 12 The Self Timer [7j provides about a seven second delay in the firing of the shutter and enables you to get into the picture yourself. Flash can be used. Place camera preferably on a tripod, otherwise on a firm surface. Set speed and aperture.
-
Page 13: Changing The Batteries
Zenith including an exciting range under the Hellos name. Alternative Lenses. The Zenith lens has a 42mm screw mount and may be removed from the camera body by grasping the whole lens barrel and fuming it anticlockwise. Other 42mm screw lenses of a different focal length may then be fitted providing they are of the single-pin operating type.