Table of Contents
Advertisement
Quick Links
Advertisement
Table of Contents
Troubleshooting

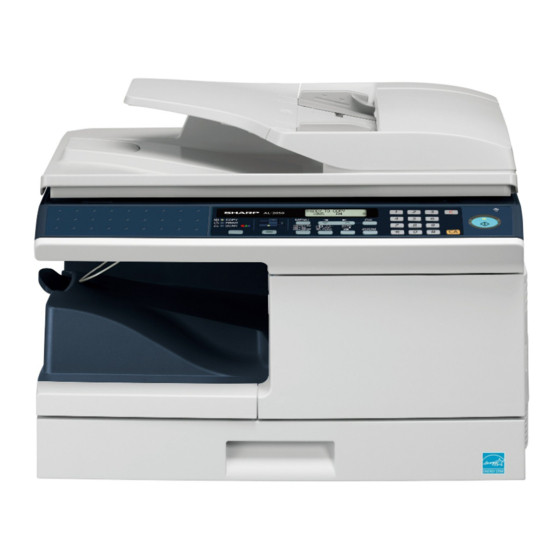
Related Manuals for Sharp AL-2050


Summary of Contents for Sharp AL-2050
- Page 1 AL-2050/2060 Online Manual Start Start Click this "Start" button.
-
Page 2: Introduction
Introduction This manual describes the printer and scanner functions of the AL-2050/2060 digital multifunctional system. ● For information on the following topics, please refer to the Operation Manual for the digital multifunctional system. Note • Basic machine procedures (adding paper, replacing the TD cartridge, removing misfeeds, using peripheral devices) •... -
Page 3: How To Use The Online Manual
How to Use the Online Manual This section explains how to view the online manual. Please read this section before using the online manual. For information on using Acrobat Reader, see Acrobat Reader Help. How to Control the Online Manual Following Links In this manual, the following buttons are displayed at the bottom This manual uses a link function that allows you to jump to a... -
Page 4: Table Of Contents
Contents Introduction 3 TROUBLESHOOTING How to Use the Online Manual Troubleshooting If a Notice Page is printed 1 PRINT Basic Printing 4 PRINTER DRIVER FEATURES Opening the Printer Driver From the "Start" Button Printer Driver Features Printer Driver Settings Printing Multiple Pages on One Page Fitting the Printed Image to the Paper 5 WEB PAGE IN THE MACHINE Two-sided Printing... -
Page 5: Basic Printing
Before printing, make sure that the correct size of paper for your document has been loaded in the machine. Start WordPad and open the document that you Make sure that "SHARP AL-XXXX" is selected as wish to print. the printer. If you need to change any print settings, click the "Preferences"... - Page 6 PRINT Basic Printing (part 2) If the tray runs out of paper during printing When "Paper Source" is set to "Auto Select" If "Paper Source" is set to "Auto Select" in the "Paper" tab of the Printing will automatically resume when paper is loaded in the printer driver setup screen and the correct size of paper for a tray.
-
Page 7: Opening The Printer Driver From The "Start" Button
Click the "Start" button, select "Settings" and Panel". then click "Printers". On Windows 2000, click the "Start" button and select "Settings". Click the "SHARP AL-XXXX" printer driver icon and select "Properties" from the "File" menu. Click "Printers and Other Hardware", and then click "Printers and Faxes". -
Page 8: Printer Driver Settings
PRINT Printer Driver Settings To view Help for a setting, click the button in the upper right-hand corner of the window and then click the setting. Some restrictions exist on the combinations of settings that can be selected in the printer driver setup screen. When a restriction is in effect, an information icon ( ) will appear next to the setting. -
Page 9: Printing Multiple Pages On One
PRINT Printing Multiple Pages on One Page This feature allows you to reduce and print two or four document pages on a single sheet of paper. To use this function, open the printer driver setup screen and select "2-Up" or "4-Up" for "N-Up Printing" on the "Main" tab. ☞... -
Page 10: Fitting The Printed Image To The Paper
PRINT Fitting the Printed Image to the Paper The printer driver can adjust the size of the printed image to match the size of the paper loaded in the machine. Follow the steps shown below to use this function. The explanation below assumes that you intend to print an A4 size document on A5 size paper. -
Page 11: Two-Sided Printing
PRINT Two-sided Printing This feature allows you to print on both sides of the paper. To use this function, open the printer driver setup screen and select "2-Sided (Book)" or "2-Sided (Tablet)" from "Document Style" in the "Main" tab. ☞ Basic Printing for details on how to open the printer driver. -
Page 12: Rotating The Print Image 180 Degrees
PRINT Rotating the Print Image 180 Degrees The print image can be rotated 180 degrees. This feature is used to enable correct printing on envelopes and other paper with flaps that can only be loaded in one orientation. To use the feature, select the image orientation in "Image Orientation" on the "Paper" tab, and then select the "Rotate 180 degrees"... -
Page 13: Printing A Watermark
PRINT Printing a Watermark You can print a watermark such as "CONFIDENTIAL" on your document. To print a watermark, open the printer driver, click the "Watermarks" tab, and follow the steps below. Basic Printing for details on how to open the printer driver. How to Print a Watermark From the "Watermark"... -
Page 14: Outline Of The Print Status Window
PRINT Outline of the Print Status Window When printing begins, the Print Status Window automatically opens. The Print Status Window is a utility that monitors the machine and shows the name of the document being printed and any error messages that occur. When the machine is used as a network printer, the Print Status Window will not function. -
Page 15: Scanning Overview
SCAN Scanning Overview The flow chart shown below provides an overview of scanning. The scanning function can only be used when your computer is connected to the machine by a USB cable. Caution Scanning from a TWAIN* -compliant Scanning from the "Scanner and Using the machine to begin scanning*3 or WIA* -compliant application... -
Page 16: Scanning From A Twain-Compliant Application
(part 1) The SHARP scanner driver is compatible with the TWAIN standard, allowing it to be used with a variety of TWAIN-compliant applications. Below is a step-by-step guide for acquiring a scanned image to the Sharpdesk desktop screen using Sharpdesk. - Page 17 SCAN Scanning from a TWAIN-Compliant Application (part 2) Select "Acquire Image" from the "File" menu, or Click the "Preview" button. click the "Acquire" button ( The preview image will appear. The scanner driver setup screen will appear. ● If the angle of the image is not correct, reset the ☞...
- Page 18 SCAN Scanning from a TWAIN-Compliant Application (part 3) Specify the scanning area and set the scan When you are ready to begin scanning, click the preferences. "Scan" button. For information on specifying the scan area and setting To cancel a scanning job after clicking the "Scan" the scan preferences, see scanner driver Help.
- Page 19 SCAN Scanning from a TWAIN-Compliant Application (part 4) Scanner Driver Settings The scanner driver setup screen consists of the "Set-up screen", which lets you select scan settings, and the "Preview screen", which shows the scanned image. For details on the scan settings, click the "Help" button in the preview screen to display Help. Set-up screen "Scanning Position"...
- Page 20 SCAN Scanning from a TWAIN-Compliant Application (part 5) Preview screen "Rotate" button Click to rotate the preview image 90 degrees clockwise. This allows the orientation to be corrected without resetting the original. Upon scanning, the image file is created in the orientation shown in the preview window.
-
Page 21: Scanning From A Wia-Compliant Application (Windows Xp/Vista)
Place the original that you wish to scan on the Note computer, the "Select Device" screen will open. Select document glass/RSPF. "SHARP AL-XXXX" and click the "OK" button. ☞ For information on setting an original for scanning, refer to "NORMAL COPYING" in the Operation Manual. - Page 22 SCAN Scanning from a WIA-Compliant Application (Windows XP/Vista) (part 2) ● If you select "Document Feeder" for the "Paper source" Select the paper source and picture type, and Note and click the "Preview" button, the top original in the click the "Preview" button. RSPF is previewed.
-
Page 23: Scanning From The "Scanner And Camera Wizard" (Windows Xp)
Click the "start" button, click "Control Panel", click "Printers and Other Hardware", and then click "Scanners and Cameras". Click the "SHARP AL-XXXX" icon and then click "Get pictures" in "Imaging Tasks". The "Scanner and Camera Wizard" will appear. CO NT E N TS... - Page 24 SCAN Scanning from the "Scanner and Camera Wizard" (Windows XP) (part 2) ● If you select "Document Feeder" for the "Paper source" Select the "Picture type" and "Paper source", Note and click the "Preview" button, the top original in the and click the "Next"...
- Page 25 SCAN Scanning from the "Scanner and Camera Wizard" (Windows XP) (part 3) When scanning ends, the following screen will Click the "Finish" button. appear. Select the next task that you wish to The "Scanner and Camera Wizard" closes and the scanned image is saved in the specified folder.
-
Page 26: Outline Of Button Manager
SCAN Outline of Button Manager Button Manager is a software utility that allows you to use the scanner function at the machine. Button Manager allows you to configure six sets of scanning settings as a scan menu on the machine. To view Help for a setting, click the button in the upper right-hand corner of the window and then click the setting. -
Page 27: Button Manager Settings
If the Button Manager icon does not appear on the task Button Manager scan menu (Factory default) Note bar, click the "start" button, select "All Programs" ("Programs" in Windows 98/Me/2000), select "Sharp Display/Button Manager Button Manager O", and then click "Button Manager" to Application that starts menu start Button Manager. - Page 28 SCAN Button Manager Settings (part 2) Set up the "Color Mode", "Edge" and other scan settings in the "Scan Setup" area. The tab names are initially "SC1:" to "SC6:". To assign a name to a tab, click the "Menu Name" button and enter the desired name. After entering the name, click the "Apply"...
-
Page 29: Troubleshooting
→ Reconfigure the port setting of the shared printer. The machine is not selected in the application. → After choosing "Print" from the "File" menu, make sure that "SHARP AL-XXXX" is selected as the printer in the "Print" window. CO NT E N TS... - Page 30 3 If the icon is shown but you still cannot print, the printer driver may not have been installed correctly. In this case, delete "SHARP AL-2050/2060 Series MFP Driverr" and then reinstall A copy job is in progress. The machine does not print.
- Page 31 TROUBLESHOOTING Troubleshooting (part 3) Problem Cause and solution Page Simultaneous use of two or more application software programs. Printing is slow. → Start printing after quitting all unused application software programs. The paper is loaded so that printing takes place on the back side of the paper. →...
-
Page 32: Troubleshooting
TROUBLESHOOTING Troubleshooting (part 4) Problem Cause and solution Page The size of paper loaded in the tray is not the size specified in the printer driver. → Check if the "Paper Size" options suit the size of paper loaded in the tray. If the "Fit To Page"... - Page 33 TROUBLESHOOTING Troubleshooting (part 5) Problem Cause and solution Page You have not specified a suitable value for the "B/W Threshold" setting. → If you are scanning with a TWAIN-compliant application and are using "Red", "Green" or "Blue" mode from "Light Source" menu, make sure that a suitable value is specified for the "B/W Threshold"...
- Page 34 TROUBLESHOOTING Troubleshooting (part 6) Problem Cause and solution Page If scanning is not possible, shut down your computer, turn off the machine's power switch, and unplug the machine's power cord. Next, start your computer, restore power to the machine, and try scanning again. If scanning is still not possible, check the following items.
-
Page 35: If A Notice Page Is Printed
TROUBLESHOOTING If a Notice Page is printed If you find that a notice page has been printed at the end of a print job, the print data received from the computer has not been printed as specified. If the following Notice Page is printed, disable the ROPM function by removing the checkmark from "ROPM" in the "Configuration" tab of the printer driver setup screen. -
Page 36: Printer Driver Features
PRINTER DRIVER FEATURES Printer Driver Features (part 1) Setting Selections Initial setting Main Copies 1 to 999 Collate On/Off N-Up Printing 1-Up/2-Up/4-Up 1-Up Border On/Off Document Style 1-Sided/2-Sided (Book)/2-Sided (Tablet) 1-Sided User Settings Factory Defaults [User Settings] Setting Name Up to seven names, 20 characters each Paper A3 [Fit To Page]* , A4, A5, A6, B4 [Fit To Page]*... - Page 37 PRINTER DRIVER FEATURES Printer Driver Features (part 2) Setting Selections Initial setting Advanced Print Quality Draft/Normal/Photo Normal 2 Gradation Print On/Off [Image Adjustment] Brightness 0 to 100 Contrast 0 to 100 Watermarks Watermark (None)/TOP SECRET/CONFIDENTIAL/DRAFT/ORIGINAL/COPY (None) Text Size 6 to 300 Angle -90 to +90 Gray Scale...
-
Page 38: About The Web
WEB PAGE IN THE MACHINE About the Web Page If the machine is used as a network printer, you can access the Web page in the machine using a Web browser. You can check and change network settings in the Web page, and check the printer status. ●... -
Page 39: Configuration Via The Web
After changing the network settings, click the "Submit" button to store the new settings. If you wish to cancel the new settings, click the "Reset" button. If a message appears prompting you to enter your user name and password, enter "admin" for the user name, "Sharp" for the Note password, and click the "OK"... - Page 40 INDEX Index For detailed information on the settings in the printer driver, Print Status Window, scanner driver, and Button Manager, see the help files for each. Scanning Mode....19 Scanning Overview .... 15 Scanning Position ....19 About the Web Page ..38 Help Paper.........
- Page 41 AL-2050 / AL-2060-v1...