Table of Contents
Advertisement
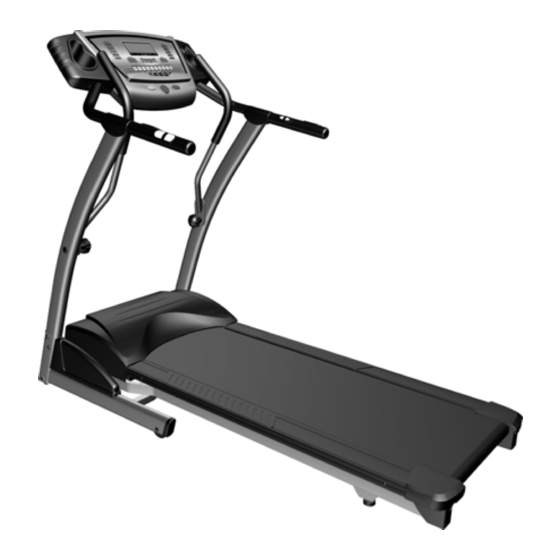
C 249 30066 0
OWNER'S MANUAL
ASSEMBLY‧OPERATION‧MAINTENANCE
WARRANTY‧PART ORDERING
CAUTION:
Exercise of a strenuous nature, as is customarily done on this equipment, should not be
undertaken without first consulting a physician. No specific health claims are made or implied as they
relate to the equipment.
IMPORTANT:
Read all instructions carefully before using this product. Retain this owner's
manual for future reference.
‧
SEARS CANADA INC.
TORONTO , ONTARIO M5B 2M8
Advertisement
Table of Contents

Related Manuals for Sears Free Spirit


Summary of Contents for Sears Free Spirit
- Page 1 No specific health claims are made or implied as they relate to the equipment. IMPORTANT: Read all instructions carefully before using this product. Retain this owner’s manual for future reference. ‧ SEARS CANADA INC. TORONTO , ONTARIO M5B 2M8...
-
Page 2: Table Of Contents
TABLE OF CONTENTS Warranty……………………………… Safety Precautions……………………. Before you begin ..……………………. Assembly Check List…………………. Assembly………………………………. Treadmill & Monitor Operation…….. 10-16 Folding………………………………… Parts list……………………………….. 18-21 Overview Drawing……………………. 22-23 Trouble Shooting……………………… Maintenance…………………………... 25-28 Training guidelines…………………… 29-31 Stretching……..………………………. 32-33 Ordering Replacement parts ……….. Service and Parts ……………………. -
Page 3: Warranty
10 years on the frame from date of purchase. This warranty is not transferable and is extended only to the original owner. WHAT WILL SEARS DO? Sears will provide a replacement part at no charge for any part found defective in workmanship or materials during the warranty period. -
Page 4: Safety Precautions
IMPORTANT SAFETY INFORMATION THIS UNIT IS INTENDED FOR HOUSEHOLD USE ONLY READ ALL INSTRUCTIONS BEFORE USING THIS TREADMILL CAUTION: Before starting any exercise program, it is recommended that you consult your physician. WARNING: Connect this unit to a properly grounded outlet only. DANGER: To reduce the risk of electric shock, always unplug the treadmill from the electrical outlet immediately after using and before cleaning. - Page 5 18.Do not attempt to raise, lower or move the treadmill until it is properly assembled. See assembly on page 7 and to fold and move the treadmill on page 16. Care must be taken when lifting or moving the equipment, so as not to injure your back. Always use proper lifting techniques.
-
Page 6: Before You Begin
Before you begin Thank you for purchasing our product. Even though we go to great efforts to ensure the quality of each product we produce, occasional errors and /or omissions do occur. In any event should you find this product to have either a defective or a missing part please contact us for a replacement. -
Page 7: Assembly Check List
HARDWARE CHECK LIST #105. 5/16”x18x1.5T #106. 5/16”x23x1.5T Flat Washer (x4) Curved Washer (x4) #104. 5/16”x1/2” #44. Safety Key # 109. Lubricant Button Head Socket Bolt (x12) #107. Combination M5 Allen Wrench & # 108. M6 Allen Wrench (x1) Phillips Head Screw Driver (x1) -
Page 8: Assembly Instructions
ASSEMBLY INSTRUCTIONS It will take two people to assemble your unit. Set the treadmill in a cleared area and remove all packing material. Do not dispose of the material until your assembly is completed. Note: The underside of your treadmill’s walking belt is coated with a lubricant. During shipping, a small amount of lubricant may be transferred to the top of the walking belt or the shipping carton. - Page 9 STEP 3 Insert right and left uprights (4, 5) into the Frame base (2). Secure with 8pcs of 5/16" ×15m/m button head socket bolts (104), 4pcs of 5/16" × 18 × 1.5T flat washers (105) and 4pcs of 5/16" × 23 × 1.5T curved washers (106) by using combination M5 allen wrench &...
- Page 10 STEP 6 1. Remove the adjustment knobs (116) on left and right uprights (4,5) by turning the knobs counterclockwise. 2. Attach the left handlebar (38) to the left upright (5). Securing using one Ø54 × 8T bushing (115), one Ø25 ×...
-
Page 11: Treadmill & Monitor Operation
TREADMILL OPERATION Your treadmill features a walking belt coated with a lubricant. IMPORTANT: Never apply silicone spray or other substances to the walking belt or walking board. Such substances will deteriorate the walking belt and cause excessive wear. How to plug in the power cord. GROUNDING INSTRUCTIONS. -
Page 12: Operation Of Your Treadmill
Operation of Your Treadmill Getting familiar with the control panel CAUTION: Before operating the console, read the following precautions: Do not stand on the walking belt when turning on the treadmill Always wear the safety key Adjust the speed in small increments to avoid sudden jumps in speed To reduce the possibility of electric shock, keep the console dry. - Page 13 Press the “up” button to increase your incline level from 1 to 15. In program mode, press the “up” button to change the display between speed or incline. Down: Press the “down: button to decrease your incline level from 15 to 1 In program mode, press the “down”...
- Page 14 TO OPERATE TREADMILL CAUTION: To avoid injury, hold onto Handrail while mounting and dismounting treadmill. Hold onto handrail and place feet on side rails before starting. Step onto treadbelt only at slowest speed. Before operating the console make sure that the power cord (48) is properly plugged in and the on / off button (47) is on.
- Page 15 D- Heart Rate Control: Heart Rate Control: Heart Rate Control H1-H2: H1= (200-age) * 60% = Target heart rate H2= (200-age) * 80% = Target heart rate Select your heart rate program by pressing the “H.R.C.1 or H.R.C. 2” button. Press the “SELECT” button to set the time using the “fast”...
- Page 16 Sweat is the best conductor to measure very minute heart beat electrical signals. However, plain water can also be used to pre-wet the electrodes (2 black square areas on the reverse side of the belt and either side of transmitter). It is recommended that you wear the transmitter strap a few minutes before your work out. Some users, because of body chemistry, have a more difficult time in achieving a strong, steady signal.
- Page 17 SPEED PROFILE INCLINE PROFILE P2 INCLINE PROFILE P2 SPEED PROFILE P3 SPEED PROFILE P3 INCLINE PROFILE P4 INCLINE PROFILE P4 SPEED PROFILE P5 SPEED PROFILE P5 INCLINE PROFILE P6 SPEED PROFILE P6 INCLINE PROFILE...
-
Page 18: Folding
FOLDING AND MOVING YOUR TREADMILL Before folding the treadmill, ensure that the treadmill is at it’s lowest incline position. Turn the power switch off, located on the front of the motor cover and unplug the power cord. CAUTION: You must be able to safely lift 20 kg (45lbs) in order to raise and lower the treadmill. To decrease the possibility of injury, bend your legs and keep your back straight while you are raising or lowering your treadmill. -
Page 19: Parts List
PARTS LIST KEY NO. PART NO. DESCRIPTION Q'TY 277901 Main Frame 277902 Frame Base 277903 Incline Bracket 277904 Right Upright 277905 Left Upright 277906 Console Support 277907 Outer Slide 277908 Inner Slide 277909 Folding Pin Assembly 277910 Incline Motor 277911 Drive Belt 277913 Motor... - Page 20 KEY NO. PART NO. DESCRIPTION 277932 Frame Base End Cap 277933 Front Transportation Wheel 277934 Rear Transportation Wheel 277935 Leveling Foot 277936 Adjustment Foot Pad 277937 Foot Rail 277938 Left Handlebar 277939 Right Handlebar 277940 Lower Handle Bar Foam 277941 □21.4 ×...
- Page 21 KEY NO. PART NO. DESCRIPTION 277975 1/2" × 8T_Nyloc Nut 277976 3/8" × 7T_Nyloc Nut 277977 5/16" × 7T_Nyloc Nut 277978 3/8" × 7T_Nut 277979 M8 × 7T_Nyloc Nut 277980 3/8" × 2T_Split Washer 277983 3/8" × 19× 1.5T_Flat Washer 277984 3/8"...
- Page 22 KEY NO. PART NO. DESCRIPTION 2779117 Bearing 2779118 M12 × 75m/m_Carriage Bolt 2779119 Ø1"_Button Head End Cap 2779121 Hand le bar End Cap 2779122 M5 × 10m/m_Phillips Head Screw 2779123 M5_Split Washer Sleeve PU Non-Slip(L) PU Non-Slip(R)...
-
Page 23: Overview Drawing
EXPLODED DIAGRAM... -
Page 25: Trouble Shooting
TROUBLE SHOOTING Problem Cause Correction Treadmill will not start Treadmill not plugged in Plug into three prong (grounded) outlet On / off switch not on Push the on/off button to on House circuit breaker tripped Reset or replace Treadmill reset switch tripped Reset treadmill reset switch see reset switch resetting Treadmill motor controller fuse... -
Page 26: Treadbelt Adjustment
TREADBELT ADJUSTMENT The treadbelt has been factory pre-adjusted, however if during the operation: If TREADMILL If Treadbelt slips during use slips during use. Treadbelt slips during use if the treadbelt is too loose: a) Tighten both rear roller adjusting bolts 1/4 turn clockwise using allen wrench. -
Page 27: Treadmill Lubrication
LUBRICATION SCHEDULE 1. After the first 25 (hours) apply one half bottle of lubricant. 2. Every 30 hours of use apply one half bottle of lubricant. We recommend that you use: LUBE-N-Walk™ Treadmill Lubrication Kit, available from Sears parts and service. -
Page 28: Cleaning And Maintenance
CLEANING AND MAINTENANCE Care has been taken to assure that your treadmill has been properly adjusted and lubricated at the factory. It is not recommended that the user attempt service on the internal components instead seek service from an authorized service center. However, from time-to-time the outer surfaces may appear dull or dirty, following the instructions listed below will restore and preserve the original finish. -
Page 29: Reset Switch Resetting
RESET SWITCH RESETTING If your treadmill looses power or will not start, check the reset switch located on the front of the motor cover. If the white tab of the reset switch is not showing then the reset switch has not been tripped. If the white tab of the reset switch is showing, the reset switch has tripped. -
Page 30: Training Guidelines
TRAINING GUIDELINES Exercise is one of the most important factors in the overall health of an individual. Listed among its benefits are: ž Increased capacity for physical work (strength endurance) ž Increased cardiovascular (heart and arteries/veins) and respiratory efficiency ž Decreased risk of coronary heart disease ž... - Page 31 Specificity Different forms of exercise produce different results. The type of exercise that is carried out is specific both to the muscle groups being used and to the energy source involved. There is little transfer of the effects of exercise, i.e. from strength training to cardiovascular fitness. That is why it is important to have an exercise program tailored to your specific needs.
- Page 32 Target heart Rate 10 Second Count Beats per Minute Don’t push yourself too hard to reach the figures on this table. It can be very uncomfortable if you overdo it. Let it happen naturally as you work through your program. Remember, the target is a guide, not a rule, a little above or below is just fine.
-
Page 33: Stretching
STRETCHING Stretching should be included in both your warm up and cool down, and should be performed after 3-5 minutes of low intensity aerobic activity or callisthenic type exercise. Movements should be performed slowly and smoothly, with no bouncing or jerking. Move into the stretch until slight tension, not pain, is felt in the muscle and hold for 20-30 seconds. Breathing should be slow, rhythmical and under control, making sure never to hold your breath. -
Page 35: Ordering Replacement Parts
Always mention this MODEL NUMBER when requesting service or replacement parts for your TREADMILL. OWNER`S MANUAL All parts listed herein may be ordered through SEARS CANADA Model No. INC.RETAIL OR CATALOG STORES AND SERVICE C249 30066 0 CENTERS. If the parts you need are not stocked locally your... -
Page 36: Service And Parts
_______________________________________________________________________________________________ Pour service en francais: 1-800-LE-FOYER (1-800-533-6937) www.sears.ca ®/TM Trademarks of Sears, Roebuck and Co. used under license by Sears Canada ® Marque deposée/ Marque de commerce de Sears, Roebuck and Co. utilisée en vertu d’une licence de Sears Canada...