Honeywell Dolphin 6000 User Manual
With window mobile 6.5
Hide thumbs
Also See for Dolphin 6000:
- User manual (125 pages) ,
- Quick start manual (18 pages) ,
- User manual (104 pages)
Table of Contents
Advertisement
Quick Links
Advertisement
Table of Contents

Related Manuals for Honeywell Dolphin 6000


Summary of Contents for Honeywell Dolphin 6000
- Page 1 ™ Dolphin 6000 ® with Windows Mobile User’s Guide...
- Page 2 Disclaimer Honeywell International Inc. (“HII”) reserves the right to make changes in specifications and other information contained in this document without prior notice, and the reader should in all cases consult HII to determine whether any such changes have been made.
-
Page 3: Table Of Contents
Table of Contents Chapter 1 - Agency Information Label Locations ........................1-1 Laser Safety Label .......................1-1 Laser Safety Statement .......................1-1 LED Safety Statement ......................1-2 UL and C-UL Statement.......................1-2 CB Safety Statement ......................1-2 FCC............................1-2 Waste Electrical and Electronic Equipment Information ............1-3 Pacemakers, Hearing Aids and Other Electrically Powered Devices ........1-3 Operating Temperature......................1-3 Approvals by Country......................1-4 Chapter 2 - Getting Started... - Page 4 Installing a SIM Card ......................3-8 Bottom Panel ........................3-8 I/O Connector ........................ 3-8 Using the Touch Panel ......................3-9 Battery Pack ........................3-9 Charging Options......................3-9 Charging Time ....................... 3-9 Storing Batteries ......................3-10 Battery Pack Use and Disposal ................... 3-10 Managing Battery Power ....................
- Page 5 System Menu........................7-6 About ........................... 7-7 Backlight ..........................7-7 Backlight Intensity......................7-9 Certificates........................... 7-9 Encryption.......................... 7-10 Error Reporting ........................7-10 External GPS........................7-11 Managed Programs ......................7-11 Memory..........................7-11 Main Tab........................7-12 Storage Card ....................... 7-12 Power ..........................7-13 Battery ......................... 7-13 Advanced Tab......................
- Page 6 Connecting and Synchronizing the Terminal and Workstation..........8-4 Capabilities ........................8-5 Communication Types ....................8-5 Software Requirements for Communication ..............8-5 Setting Up the Host Workstation..................8-5 Connecting the Dolphin Terminal to the Workstation ............ 8-5 Synchronizing with the Host Workstation ..............8-5 Exploring the Terminal from the Workstation..............
- Page 7 Assisted GPS Support....................... 11-1 Communication Ports ......................11-1 Selecting the Port ......................11-1 Baud Rate........................11-1 GPS Intermediate Driver ....................11-1 Chapter 12 - Dolphin 6000 HomeBase Overview..........................12-1 Capacity..........................12-1 Charge Time........................12-1 Charging Process ......................12-1 Communications........................ 12-1 Parts and Functions......................
-
Page 9: Chapter 1 - Agency Information
Agency Information The Dolphin 6000 mobile terminal meets or exceeds the requirements of all applicable standards organizations for safe opera- tion. However, as with any electrical equipment, the best way to ensure safe operation is to operate them according to the agency guidelines that follow. -
Page 10: Led Safety Statement
5GHz band: UNII (Unlicensed National Information Infrastructure) or band1 (5.150 to 5.250 GHz) is restricted to indoor use only. Any other use will make the operation of the device illegal. For further information, please contact: Honeywell Imaging & Mobility Europe BV Nijverheidsweg 9 5627 BT Eindhoven... -
Page 11: Waste Electrical And Electronic Equipment Information
For European Community Users Honeywell complies with Directive 2002/96/EC OF THE EUROPEAN PARLIAMENT AND OF THE COUNCIL of 27 January 2003 on waste electrical and electronic equipment (WEEE), European REACH Regulation 1907/2006 of 1 June, 2007, and Restriction of Hazardous Substances Directive (RoHS)2002/95/EC of 1 July 2006. -
Page 12: Approvals By Country
Approvals by Country Country EMC, Radio, & SAR Safety U.S.A. FCC Part 15, Subpart B Class B UL60950-1 FCC Part 15, Subpart C, 15.247 FCC Part 15, Subpart E FCC Part 22H FCC Part 24E FCC SAR OET 65 Supplement C FCC 20.19 Canada ICES-003 (Class B) -
Page 13: Chapter 2 - Getting Started
Ensure all components are dry prior to placing the battery in the terminal. Mating wet components may cause damage not covered by the warranty. The Dolphin 6000 device is shipped with the battery packaged separately from the terminal. Perform the following to install the battery: 1. -
Page 14: Charging The Batteries
Note: Gentle force is required to lift and remove the battery from the battery bay. Charging the Batteries Power for the Dolphin 6000 terminal comes from the battery pack, which is accessed from the back panel. Before Initial Use The terminals are shipped with the battery discharged of all power. The initial charging time for the battery pack is 4 hours. -
Page 15: Booting The Terminal
4. Plug the power adapter into a standard wall outlet. The LED on front of the terminal flashes and illuminates red when the terminal begins the initializing boot process. Booting the Terminal The terminal boots when power is applied and the PWR button is pressed for three seconds. Caution: Do not press any keys or interrupt the boot process. -
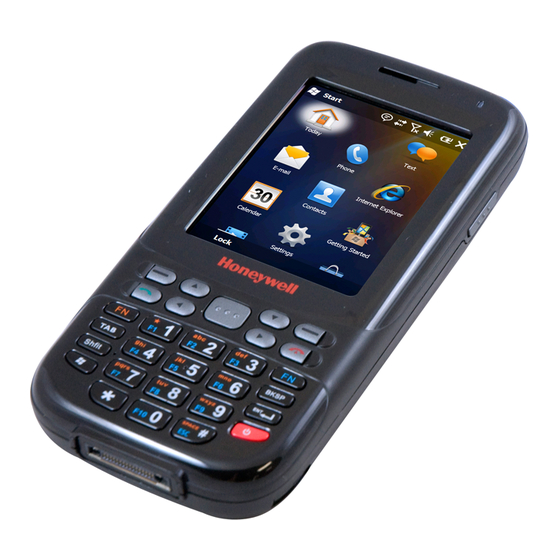
Page 16: Home Screen
Home Screen After the terminal initializes the first time, the Home screen appears. Navigation Bar The Navigation bar is located at the top of the screen. The active program and current time are shown. Command Bar The Command bar is located at the bottom of the screen. 2 - 4... -
Page 17: Navigation Bar Icons
Navigation Bar Icons Indicator Meaning Synchronizing data The terminal could not synchronize data with the workstation via ActiveSync. New e-mail New text message New voicemail New instant message Vibrate on Ringer off Speakerphone on Voice call in progress Calls are forwarded Call on hold Missed call Data call in progress... - Page 18 Indicator Meaning Battery has a low charge. Battery has a very low charge and requires charging. The terminal is running on external power. If a battery pack is installed, battery is charging in the background. The terminal is not connected to external power. A battery is installed, but is defective; its charge level cannot be measured.
-
Page 19: Set Time Zone, Time, And Date
Indicator Meaning Wi-Fi data call Pending alarm Bluetooth Set Time Zone, Time, and Date 1. On the Home screen, tap the time and date section. The Clock & Alarms menu opens. 2. Select the Time tab to set the system clock. 3. -
Page 20: Pop-Up Menus
4. Set the correct time zone from the drop-down menu. 5. Set the correct time and date in the remaining fields and tap OK to save the settings. Pop-Up Menus Pop-up menus allow you to choose an action for a selected file. 1. -
Page 21: File Explorer
File Explorer Use the File Explorer to find and move files. 1. Tap > File Explorer. 2. Locate a file. 3. To move a file, hold the stylus on the file to bring up the menu shown below. Tap Cut or Copy on the pop-up menu. 4. -
Page 22: Search Phone
7. Tap Menu on the Command bar. A pop-up menu appears. 8. Tap the down arrow on the pop-up menu to view the Edit option. 9. Tap Edit > Paste. Search Phone Use the Search Phone application to quickly find information. 1. -
Page 23: Chapter 3 - Hardware Overview
Dolphin Mobile Charger The Dolphin 6000 Mobile Charger is an optional accessory. The Dolphin Mobile Charger is a charging cable that connects the terminal directly to a 12 Volt DC power source, such as a cigarette lighter port inside a vehicle, eliminating the need for a cradle. -
Page 24: Front View
Front View Front Speaker LED Indicator Volume Control Picture/Video Button Buttons Touch Panel Display Navigation Keys SCAN Key Orange FN Key Blue FN Key BKSP g hi Shift pqrs wxyz Power Key SPACE Microphone Item Description Front Speaker Receives voice calls when using a handset. Refer to Voice Communication on page 9-3. - Page 25 Item Description SCAN Key Activates the scanner. Blue FN Key Switches the numeric keypad to an alpha/numeric mode or to F1-F10 function keys mode. Power Key Pressing and holding the Power key for 3 seconds turns the terminal on. Pressing and holding the Power key for 5 seconds turns the terminal off. Pressing and releasing the Power key puts the terminal in the Suspend Mode or wakes the terminal from the Suspend Mode.
-
Page 26: Back View
Back View Laser/Scan Engine Rear Speaker Stylus Tether/ Lanyard Slot Camera Flash Color Camera Battery Door SIM Card Socket MicroSD Memory Card Socket MicroSD Memory Card Socket Item Description Image/Scan Engine The image engine reads and decodes linear, stacked linear (e.g., PDF417), and Window 1D matrix bar code symbologies. -
Page 27: Left View
Item Description Color Camera Provides easy picture caption with Automated Camera Control (ACC). Additional features include automated picture profiles and an Application Programming Interface (API). Camera Flash Can be used and is controlled by the terminals color camera. Battery Door Secures the Li-ion Battery Pack in the terminal battery well. -
Page 28: Right View
Right View Right Button Stylus Tether/Lanyard Slot Item Description Right Button Acts as an Enter key; handy when taking pictures/videos. Stylus Tether/Lanyard Attach point for stylus tether/lanyard Slot Memory Card Installation Perform the following to install the memory card: 1. Power down the terminal. 2. - Page 29 7. Unlock the memory card latch by sliding the latch away from serial number label located in the battery well. 8. Lift the latch up to expose the MicroSD or MicroSDHC socket. 9. Remove and discard SD card blank and replace with SD card to be installed. 10.
-
Page 30: Installing A Sim Card
15. Close the SIM card latch. 16. Lock the SIM card latch by sliding the latch towards the bottom of the terminal. 17. Install the battery. 18. Install and lock the battery door. 19. Power on the terminal. Note: It is recommended to format all SD cards before initial use. Installing a SIM Card For instructions on installing a SIM card, refer to Installing a SIM Card on page... -
Page 31: Using The Touch Panel
Replacement screen protectors can be purchased directly from Honeywell. Please contact a Honeywell sales associate for details. Honeywell also mandates use of a proper stylus, which is one that has a stylus tip radius of no less than 0.8mm. Use of the Honeywell stylus included with the terminal is recommended at all times. -
Page 32: Storing Batteries
• Replace defective batteries immediately. Using a defective battery could damage the Dolphin 6000 terminal. • Do not use a battery in any other manner outside of its intended use in the Dolphin 6000 terminal and peripherals. • Excessive discharge damages a battery. Recharge the battery when the terminal indicates low battery power. -
Page 33: Suspending/Resuming Terminal
1. Press and hold the Power button for 3 seconds. Note: Turning the terminal off is the equivalent to a hard boot. To turn the Dolphin 6000 terminal off: 1. To turn the terminal off, press the Power button for 5 seconds. - Page 34 3 - 12...
-
Page 35: Chapter 4 - Using The Scan Image Engine
Using the Scan Image Engine Overview The bar code engine in the Dolphin 6000 terminal is the Honeywell IS4813. Angled Imaging The scan engine view of field is 54 degrees. Image Engine Specifications Depth of Field vs. Minimum Bar Code Element... -
Page 36: Supported Bar Code Symbologies
Supported Bar Code Symbologies Symbology Type Symbology Name 1D Symbology Codabar Code 3 of 9 Code 11 Code 32 Pharmaceutical (PARAF) Code 93 Code 128 EAN with Add-On EAN with Extended Coupon Code EAN-8 EAN-13 GS1-128 GS1 Databar Interleaved 2 or 5 ISBT 128 Matrix 2 of 5 Plessey... -
Page 37: Aiming Options
Aiming Options The aiming beam is narrower when you hold the terminal closer to a bar code and the aiming beam is wider when you hold it far- ther from a bar code. The aiming beam must be aimed closer to symbologies that have smaller bars or elements (mil size). The aiming beam must be aimed farther from symbologies that have larger bars or elements (mil size). - Page 38 4 - 4...
-
Page 39: Chapter 5 - Using The Camera
Using the Camera Overview The Dolphin 6000 terminal contains a 3.0-megapixel color camera, Automated Camera Control (ACC) and an Application Pro- gramming Interface (API). The API provides easy access to color picture and video capture functions. The camera lens and camera flash are located on the back of the terminal. -
Page 40: Options
Options Tap Menu > Options. The Options menu contains four tabs: General Tab Slide Show Tab Camera Tab Video Tab Recording Video 1. Tap > Pictures & Videos > Camera > Menu > Video. 2. Point the camera lens at an object. 3. -
Page 41: Chapter 6 - Using The Keypad
Using the Keypad 29-Key Numeric Keypad The Dolphin 6000 terminal has a 29-key alpha/numeric keypad. BKSP g hi Shift pqrs wxyz SPACE Using the Function Keys Name Function Backspace Moves the cursor back one space each time the key is pressed. If typing text, it deletes the previous character each time it is pressed. -
Page 42: Using The Navigation Keys
Name Function 4-way Moves the cursor left, right, up or down. Navigation Keys Shift Key Changes the keyboard between uppercase alphabet mode and lowercase alphabet mode. Orange FN Key The orange FN key has 3 operating modes for Normal (default), Uppercase and Lowercase mode. - Page 43 Orange FN Key Blue FN Key Toggle On/Off, the Numeric Keypad Numeric Mode Off mode operates Lowercase Mode Uppercase Mode (Default) in default mode of Orange FN Key 7 F7 pqrs pqrs PQRS 8 F8 tuv 9 F9 wxyz wxyz WXYZ 0 F10 # ESC SPACE...
- Page 44 6 - 4...
-
Page 45: Chapter 7 - System Settings
System Settings Overview The terminal settings can be changed in the Settings menu. Tap > Settings and the Settings menu opens. 7 - 1... -
Page 46: Settings Menu
Settings Menu Icon Description Bluetooth Adjust Bluetooth radio settings. This icon shows only if the Bluetooth radio and driver are installed. See Working with Bluetooth Radio on page 10-1. Clocks & Set the system clock, date, time and schedule alarms. See Clock &... -
Page 47: Personal Menu
> Settings > Clock & Alarms . The Clock & Alarms menu opens. 4. Select the Time tab. This setting sets the system clock. 5. Tap the Time Zone box to open the drop-down menu. 6. Set the correct time zone from the drop-down menu. 7. -
Page 48: Using File Explorer
1. Tap > Settings > Personal. Icon Description Buttons Program buttons on Dolphin 6000 terminal to do specified tasks. See 29-Key Numeric Keypad on page 6-1. Owner Enter contact information. Information This information appears on the Home screen. Phone When the GSM radio is turned on, tap this icon to set up user settings and enable or disable the vibrator function. -
Page 49: Using Activesync On The Workstation
4. Tap Copy on the pop-up menu. 5. Navigate to the Windows folder and open the Start Menu (My Device > Windows > Start Menu). Then tap and hold a blank area in the window, and tap Paste Shortcut on the pop-up menu. Note: If there is no blank area in the window, tap Menu >... -
Page 50: System Menu
System Menu The system settings can be changed in the System menu. To access the System menu: 1. Go to > Settings > System. 2. Tap an icon to open a system setting. Icon See Page About About on page 7-7. -
Page 51: About
Icon See Page Remove Remove Programs on page 7-14. Programs Screen Screen on page 7-15. Task Task Manager on page 7-17. Manager A-GPS A-GPS on page 7-18. Version Version on page 7-18. Network Network Time on page 7-18. Time Schedule Schedule Power On/Off on page 7-18. - Page 52 1. Tap > Settings > System > Backlight. There are three tabs: Battery Settings for the backlight to turn off when the terminal is using battery power. Power External Settings for the backlight to turn off when the terminal is using external Power power.
-
Page 53: Backlight Intensity
Backlight Intensity In the backlight menu, tap the Brightness tab and move the slider to change the screen brightness for battery power and external power settings. The default setting is 4. Certificates The Certificates menu shows certificates that the operating system recognizes. 7 - 9... -
Page 54: Encryption
Encryption The Encryption menu can be adjusted to encrypt files on storage cards so that those files cannot be read by another terminal. Error Reporting The Error Reporting menu can be adjusted to enable or disable the error reporting function of Windows Mobile 6.5. 7 - 10... -
Page 55: External Gps
External GPS The External GPS menu gives you the option to choose a port for a third-party GPS software application to access the GPS receiver. Note: Obtain the GPS program port from the third-party GPS software application vendor. Managed Programs Managed Programs is a list of programs that is managed if enrolled to enterprise domain. -
Page 56: Main Tab
• Free = MB that can still be used One memory card can be installed in the Dolphin 6000 terminal. If a memory card is installed in the terminal, select it in the drop-down list to see the capacity and usage statistics for the card. -
Page 57: Power
Power The Power settings menu has two tabs: • Battery • Advanced Battery Note: For more information, see Battery Pack on page 3-9. Advanced Tab In the Advanced tab, you can adjust settings so the screen turns off when the terminal is not in use. To change the settings for On battery power: 1. -
Page 58: Regional Settings
Remove Programs enables you to remove programs installed on the terminal. The programs will be removed from the memory. Any program (usually CAB or DLL files) saved in the Auto-install folder (My Device > Honeywell > Autoinstall) re-installs after a hard reset. -
Page 59: Screen
3. Tap Remove. The following message appears. 4. Tap Yes. Wait for the program to be removed. 5. Verify that the program no longer appears in the list. Screen The Screen menu has three tabs: • General • ClearType • Text Size General Tab Orientation The General tab is used to set dynamic screen rotation. -
Page 60: Cleartype Tab
Align Screen The General tab allows you to re-align the screen. You need to re-align the screen if tapping buttons or icons with the stylus does not work correctly. 1. Tap the Align Screen to open the align screen window. 2. -
Page 61: Task Manager
• Messaging • Tasks Font scaling means the point size of the fonts can increase or decrease in applications. To change the font size: 1. Move the slider to Smallest or Largest. The Example text changes to show the font change. 2. -
Page 62: A-Gps
This feature enables you to turn the device on and/or off at a particular time. HAC Mode This feature enables you to put the Dolphin 6000 in hearing aid compatible mode improving the usability of the terminal for hear- ing aid users. -
Page 63: Chapter 8 - Communication
Communication Connections Menu The Connections menu provides access to the terminal’s wireless communication options. 8 - 1... -
Page 64: Connections Manager
Note: Do not enter connection parameters in the connections manager if: • You are using one of the on-board wireless radios to connect to a network. The Dolphin 6000 terminal uses the settings from each radio’s configuration utility to connect. -
Page 65: Tasks Tab
To open the Connections Manager, navigate to > Settings > Connections > Connections. Tasks Tab The Tasks tab enables you to initially configure and to then manage network settings when using a modem. Select an item from the menu and follow the instructions on the screen to complete the network configuration. My ISP Enables you to add and manage modem connections to an ISP. -
Page 66: Online Help
• IP address exceptions for modem connections. Note: Advanced settings should not be need to be modified. Most ISPs use DHCP addresses. Online Help For more information about modem connection setup, tap the Help icon on the setup screens. Dolphin Wireless Manager The Dolphin Wireless Manager provides a centralized interface that enables and disables all the on-board radios. -
Page 67: Capabilities
• Select which information types are synchronized, controlling how much data is synchronized. For example, you can choose how many weeks of past appointments you want synchronized. Communication Types The Dolphin 6000 terminal supports the following type of communication via ActiveSync or Windows Mobile Device Center through its I/O Connector (see I/O Connector... -
Page 68: Exploring The Terminal From The Workstation
1. Open the main ActiveSync window (on the desktop). 2. Click Explore. The Mobile Device folder opens in Windows Explorer. 3. The Dolphin 6000 terminal is treated as a mass storage device. You can transfer files by dragging and dropping the files or copying and pasting them. -
Page 69: Adding Programs Directly From The Internet
. The program and its icon appears on the After the installation on the terminal is complete, tap screen. Tap the icon to run the program. Adding Programs Directly from the Internet When selecting programs, verify that the program and version of the program are designed for Windows Mobile and the termi- nal’s processor. - Page 70 8 - 8...
-
Page 71: Chapter 9 - Working With Gsm/Gprs/Edge
Installing a SIM Card, page 9-2). Voice and Data Communication Dolphin 6000 terminals with integrated GSM/GPRS/EDGE radios are best for the following two-way voice and data communica- tions: • Voice: GSM voice data (dial-up) • Data: Available speed depends on the wireless network carrier and their supported packet-data technology and network conditions. -
Page 72: Sim Card Requirements
SIM Card Requirements Before installing the SIM card: • The service provider must activate the SIM card. • The terminal must be turned off. Note: If no SIM card is installed, emergency phone calls such as 9-1-1 can still be made. Installing a SIM Card 1. -
Page 73: Enabling The Gsm Radio
> Settings > Connections > Dolphin Wireless Manager (WLAN). If the Phone is set to OFF, tap the Phone rectangle and the GSM radio enables. Voice Communication Dolphin 6000 terminal can operate as a phone over GSM radio. Audio Modes Hands-free Hands-free mode is when you use the rear speaker as a speakerphone. -
Page 74: Dialing
The Phone dialer opens. Dialing Once the dialer window is open, the terminal can dial two ways: • Use the touch screen and tap buttons on the dialer window. • Use the physical keypad (when keypad is in numeric mode). Sending Calls After a number is dialed, tap Talk on the screen or press the green call button on keypad. -
Page 75: Accessing Voice Mail
Accessing Voice Mail > Phone -> Speed Dial -> Voice Mail -> Call. Note: Update the voice mail retrieval number by turning off the terminal and then turning on the terminal via the Dolphin Wireless Manager. See Enabling the GSM Radio, page 9-3. -
Page 76: Sounds
Sounds In the Sounds tab, ring tones, ring types, and keypad sounds can be changed. Services The phone reads settings for each service on the SIM card and shows the available options from carrier. 9 - 6... -
Page 77: Network
Network The Network tab displays options to find and set networks. Security You can make or change a PIN on the Security tab. Data Communication You set up data communication via the Connections Manager. The carrier on the SIM card is the ISP. System Requirements •... -
Page 78: Establishing Data Communication
Establishing Data Communication 1. Tap > Settings -> Connection -> Connections. 2. Under My ISP, tap Add a new modem connection. 3. Enter a name for connection. Select Cellular Line (GPRS) as modem 4. Tap Next. 5. Enter an Access point name. Tap Next. 9 - 8... - Page 79 6. Enter a username and password from the account. Tap Finish. 7. In the Connections window, tap Manage existing connections. The new connection should show on the list in the modem tab. 8. Press and hold the connection. A pop-up menu appears. 9 - 9...
-
Page 80: Ending The Data Connection
9. Select Connect on the pop-up menu. 10. The network icon in the navigation bar shows GSM radio is attempting to connect. Note: Data connection failure occurs if terminal is in use for a voice call while attempting a data connection. Voice and data cannot be used at the same time. - Page 81 > Settings -> Personal -> Phone -> Menu -> Options . The Phone 1. When an active SIM card is inserted in terminal, tap menu window opens. 2. Select the Network tab. 3. Under Network selection, choose Automatic (the default setting) or Manual. 9 - 11...
- Page 82 a. If you selected Manual, the terminal searches for available networks. b. The available networks display. c. Choose a new network and tap OK. The terminal registers on the new network and the Network tab opens. d. To switch to another network, tap the Select button and the process repeats. 9 - 12...
- Page 83 5. To switch back to automatic roaming, select Automatic under Select networks and tap OK. 9 - 13...
- Page 84 9 - 14...
-
Page 85: Chapter 10 - Working With Bluetooth Radio
Working with Bluetooth Radio Enabling the Bluetooth Radio You enable the Bluetooth radio in the Dolphin Wireless Manager on page 8-4. > Settings > Connections > on the Home screen to access the Dolphin Wireless Manager. Tap anywhere inside the Bluetooth rectangle and Bluetooth begins activating. When the radio is activated (i.e., transmitting a signal), the OFF button changes to ON. -
Page 86: Connecting To Other Bluetooth Devices
Connecting to Other Bluetooth Devices To connect to other bluetooth devices, you need to perform a device discovery, select a discovered device, and then connect to the selected device. Pairing happens as part of the connection process. Make sure the Bluetooth device is in range and set to be discoverable by other Bluetooth devices. In the Dolphin Wireless Manager, tap Menu >... - Page 87 The Bluetooth radio tries to connect with the device. If you created a passcode, you will be prompted by the other device to enter the same passcode. Enter the created passcode to establish a paired connection. If you entered a device specific passcode, you should not have to do anything on the other device. When the connection is complete, a list of matching and supported services on the device appears.
-
Page 88: Transferring Files
If you are connecting to a printer or headset, complete any additional steps required by device. 11. After the passcodes have been accepted on both sides, you have a trusted (paired) connection. Transferring Files > File Explorer. Navigate to the file you want to transfer. Tap and hold on the file and select Beam File on the popup menu. -
Page 89: Making The Terminal Discoverable
Tap the device to begin sending the selected file. While trying to connect, the selected device reads “Pending”. When the file is being transferred, the selected device reads “Sending”. Making the Terminal Discoverable By default, the Dolphin terminal is not discoverable, which means that the terminal will not be found by other Bluetooth devices. 1. - Page 90 10 - 6...
-
Page 91: Chapter 11 - Working With Gps
Working with GPS Overview The Dolphin 6000 terminal contains an integrated GPS module that allows location tracking of workers and vehicles, providing better utilization of field assets. Optional mapping and navigation software provides turn-by-turn driving directions and location information. Assisted GPS Support The operating system software supports assisted GPS mode, which usually requires installing a vendor-specific client on the device that communicates with the GPS module. - Page 92 11 - 2...
-
Page 93: Chapter 12 - Dolphin 6000 Homebase
The Dolphin 6000 HomeBase supports both RS232 and USB communications, which makes it able to connect with majority of PC-based enterprise systems. Capacity The HomeBase holds one Dolphin 6000 terminal and has an auxiliary battery well behind the terminal well. The HomeBase can charge two battery packs: • Battery installed in Dolphin 6000 terminal •... -
Page 94: Parts And Functions
Terminal Well Place the Dolphin 6000 in the terminal well to use the terminal and to charge a battery pack in the terminal. The HomeBase charges the battery in 4 hours. If the host terminal is a workstation that uses ActiveSync, synchronization begins immedi- ately. -
Page 95: Back Panel
The terminal requires 5V, 2A DC input for communications and battery charging; the power adapter on power cable converts voltage from the power source to 5V, 2A DC. Only the Honeywell 5 VDC, 2A power supply provided with the HomeBase con- verts the voltage correctly. -
Page 96: Charging The Battery
Installing Battery Pack on page 2-1. 2. Connect the HomeBase to a power supply provided by Honeywell. 3. Put the terminal into the terminal well until the LED on the terminal turns red, indicating that it is charging. The battery pack begins to charge. -
Page 97: Charging A Battery In The Auxiliary Battery Well
The HomeBase also supports USB communications via the USB port located on the back of HomeBase. The base acts as a USB device by interfacing the USB signals of the Dolphin 6000 terminal to the USB of the host workstation. Using a stan- dard USB Communication Cable, the HomeBase’s USB interface allows the Dolphin 6000 terminal to communicate with a... -
Page 98: Connecting The Communication Cables
The RS232 port is accessed by opening COM3 on the terminal and can be used for general purpose communication between an application running on the Dolphin 6000 and an application on a PC or a connected device. Note: An ActiveSync connection cannot be established via RS232. -
Page 99: Chapter 13 - Customer Support
E-mail: hsmlasupport@honeywell.com Brazil Telephone: +55 (11) 5185-8222 Fax: +55 (11) 5185-8225 E-mail: brsuporte@honeywell.com Mexico Telephone: 01-800-HONEYWELL (01-800-466-3993) E-mail: soporte.hsm@honeywell.com Europe, Middle East, and Africa Telephone: +31 (0) 40 7999 393 Fax: +31 (0) 40 2425 672 E-mail: hsmeurosupport@honeywell.com Hong Kong... -
Page 100: Product Service And Repair
Product Service and Repair Honeywell International Inc. provides service for all its products through service centers throughout the world. To obtain warranty or non-warranty service, contact the appropriate location below to obtain a Return Material Authorization number (RMA #) before returning the product. -
Page 101: Limited Warranty
• The duration of the limited warranty for touch screens is one year. • The duration of the limited warranty for the Dolphin 6000 HomeBase device is one year. • The duration of the limited warranty for batteries is one year. Use of any battery from a source other than Honeywell may result in damage not covered by the warranty. - Page 102 Honeywell International Inc. in a reduced state may or not be replaced under this warranty. Battery life will be greatly increased when following the battery instructions in this user’s guide. 13 - 4...
- Page 104 Honeywell Scanning & Mobility 9680 Old Bailes Road Fort Mill, SC 29707 www.honeywellaidc.com ™ 6000-UG Rev A 7/11...