Pioneer XV-BD707 Operating Instructions Manual
Blu-ray disc surround system
Hide thumbs
Also See for XV-BD707:
- Operating instructions manual (166 pages) ,
- Operating instructions manual (448 pages) ,
- Operating instructions manual (152 pages)
Table of Contents

Related Manuals for Pioneer XV-BD707


Summary of Contents for Pioneer XV-BD707
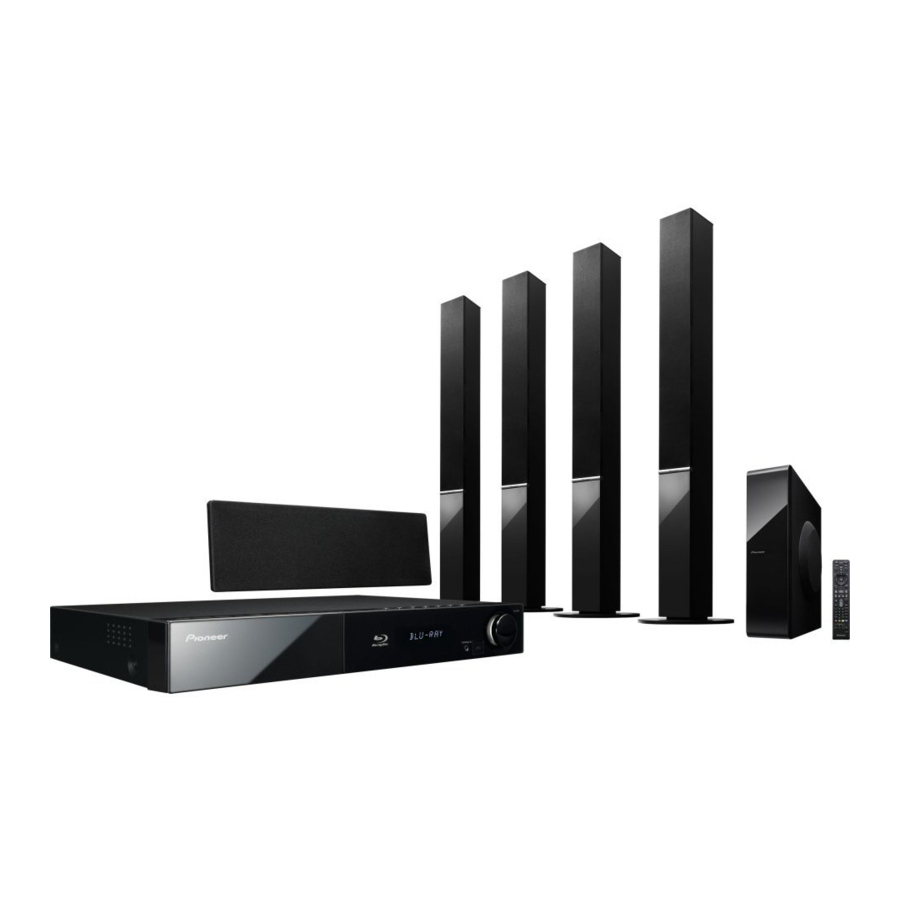
- Page 1 BCS-707 Blu-ray Disc surround system XV-BD707 Blu-ray Disc receiver S-BD707T Speaker System S-BD707SW Speaker System (only subwoofer) BCS-303 Blu-ray Disc surround system XV-BD707 Blu-ray Disc receiver S-BD303 Speaker System P/NO: MFL65220805...
-
Page 2: Safety Information
Safety Information Safety Information Cautions and Warnings CAUTION WARNING: TO PREVENT FIRE OR ELECTRIC SHOCK RISK OF ELECTRIC SHOCK DO NOT OPEN HAZARD, DO NOT EXPOSE THIS PRODUCT TO RAIN OR MOISTURE. CAUTION: TO REDUCE THE RISK OF ELECTRIC WARNING: Do not install this equipment in a SHOCK DO NOT REMOVE COVER (OR BACK) NO confi ned space such as a book case or similar unit. -
Page 3: Safety Information 3
To disconnect power from the mains, pull out the mains cord plug. When installing the product, ensure that the plug is easily accessible. PIONEER hereby declares that this/ these product(s) is/are in compliance with the essential requirements and... - Page 4 Safety Information Information for users on collection and disposal Notes on Copyrights of old equipment and used batteries • Because AACS (Advanced Access Content System) is approved as content protection system for BD format, similar to use of CSS (Content Scramble System) for DVD format, certain restrictions are imposed on playback, analogue signal output, etc., of AACS protected contents.
- Page 5 Safety Information Important Notice for TV colour system The colour system of this player diff ers according to currently playing discs. For example, when the player plays the disc recorded in the NTSC colour system, the image is output as an NTSC signal.
-
Page 6: Table Of Contents
Contents Installation Assemble the speakers Speaker Setup for BCS-707 Speaker Setup for BCS-303 Wall mounting the centre speaker Safety Information Additional notes on speaker Positioning the system Cautions and Warnings Connecting to Your TV HDMI Connection Component Video Preparation Connection Video Connection Introduction Resolution Setting... - Page 7 Operation Appendix General Playback Controlling a TV with the Supplied Remote Control Advanced Playback Area Code List On-Screen display Language code List Enjoying BD-LIVE Video output resolution Playing movie fi le and VR discs Trademarks and Licences Viewing a photo Specifi cations Listening to music Open source software notice...
-
Page 8: Preparation
Preparation Preparation A section whose title has one of the following Introduction symbols are applicable only to the disc represented by the symbol. BD-ROM disc About the “ ” Symbol Display DVD-Video, DVD±R/RW in “ ” may appear on your TV display during Video mode or VR mode operation and indicates that the function and fi nalized... -
Page 9: Supplied Accessories
Preparation Supplied Accessories Accessaries of speaker box (S-BD707SW) Video cable (1) Remote control (1) Speaker cable (1) Large non-skid pads Accessaries of speaker box Battery (1) FM antenna (1) (S-BD303) Small non-skid pads Colour-coded iPod cradle (1) Speaker cables (6) Accessaries of speaker box (S-BD707T) Large non-skid pads... -
Page 10: Playable Discs
Preparation Playable Discs NOTE Blu-ray Disc • Depending on the conditions of the recording - Discs such as movies that can equipment or the CD-R/RW (or DVD±R/RW) be purchased or rented. disc itself, some CD-R/RW (or DVD±R/RW) discs - BD-R/RE discs that contain cannot be played on the unit. -
Page 11: File Compatibility
Preparation File compatibility NOTE Overall • HD movie fi les contained on the CD or USB 1.0/1.1 may not played properly. BD, DVD or USB Available File extensions: 2.0 are recommended to play back HD movie “.jpg”, “.jpeg”, “.png”, “.avi”, “.divx”, “.mpg”, “.mpeg”, fi les. -
Page 12: Regional Code
Preparation Regional Code Certain System Requirements This unit has a regional code printed on the For high defi nition video playback: rear of the unit. This unit can play only BD-ROM • High defi nition display that has or DVD discs labeled same as the rear of the COMPONENT or HDMI input jacks. -
Page 13: Remote Control
Preparation Remote control • • • • • • • • • a • • • • • • • • • MUTE: Mute the unit. SOUND: Selects a sound eff ect 1 (STANDBY/ON): Switches the mode. player ON or OFF. VOL +/- : Adjusts speaker volume. -
Page 14: Front Panel
Preparation Front panel a Disc Tray c Remote sensor b Operation buttons d Display window STANDBY/ON Button e PORTABLE IN (OPEN/CLOSE) FUNCTION f USB Port Changes the input source or function g Volume control (PLAY / PAUSE) (STOP) > (SKIP) - TUNE + (Radio tuning) -
Page 15: Rear Panel
Preparation Rear panel a AC Power cord g COMPONENT VIDEO (Y P Plug into the power source. OUTPUT (PROGRESSIVE SCAN) b Speakers connectors h OPTICAL IN 1(TV) / 2 c Cooling Fan i iPod (24 pin) Connect to the furnished iPod cradle. d Antenna Connector j HDMI OUT (type A, Version 1.3) e VIDEO OUT... -
Page 16: Installation
Installation Installation For centre speaker: Assemble the Use the supplied adhesive to attach four speakers small pads to the base of centre speaker. Speaker Setup for BCS-707 small non-skid pads Preparing the speakers 1. Attach the non-skid pads to the base of each speaker stand bases, the subwoofer and the centre speaker. - Page 17 Always use a cord when stabilizing the speaker. • Pioneer disclaims all responsibility for any losses or damage resulting from improper assembly, installation, insuffi cient strength of the installation materials, misuse, or natural disasters.
-
Page 18: Speaker Setup For Bcs-303
Installation For centre speaker: Speaker Setup for BCS-303 Use the supplied adhesive to attach four small pads to the base of centre speaker. Preparing the speakers 1. Attach the non-skid pads to the base of each speaker. small non-skid pads For speaker stand bases: Use the supplied adhesive to attach four middle pads to the base (bottom) of each... -
Page 19: Wall Mounting The Centre Speaker
TV or the wall, consult a professional for advice. monitor. Magnetic storage media (such as • Pioneer is not responsible for any accidents or fl oppy discs and tape or video cassettes) damage that result from improper installation. -
Page 20: Positioning The System
Installation Positioning the system CAUTION The following illustration shows an example of positioning the system. Note that the • Be careful to make sure children do not put their illustrations in these instructions diff er from the hands or any objects into the *subwoofer duct. actual unit for explanation purposes. -
Page 21: Connecting To Your Tv
Installation Connecting to Your TV HDMI Connection If you have a HDMI TV or monitor, you can connect it to this player using a HDMI cable(Type A, Version 1.3). Connect the HDMI Make one of the following connections, OUT jack on the player to the HDMI IN jack on depending on the capabilities of your existing a HDMI compatible TV or monitor. -
Page 22: Component Video Connection
Installation Component Video Connection NOTE Connect the COMPONENT VIDEO OUT jacks on the player to the corresponding input jacks on • Changing the resolution when the connection the TV using Y Pb Pr cables. You can hear the has already been established may result in sound the through the system’s speaker. -
Page 23: Video Connection
Installation Video Connection Resolution Setting Connect the VIDEO OUT jack on the player to The player provides several output resolutions the video in jack on the TV using a video cable. for HDMI OUT and COMPONENT VIDEO OUT You can hear the sound through the system’s jacks. -
Page 24: Antenna Connection
Installation Antenna connection Connections with external device Connect the supplied antenna for listening to the radio. AUX Connection Antenna Connection You can enjoy the sound from an external component through the speakers of this system. Connect the analogue audio output jacks of your component into the AUX L/R (INPUT) on this unit. -
Page 25: Portable In Connection
Installation PORTABLE IN connection OPTICAL IN 1/2 connection You can enjoy the sound from your portable You can enjoy the sound from your component audio player through the speakers of this with a digital optical connection through the system. speakers of this system. Connect the headphones (or line out ) Connect the optical output jack of your jack of the portable audio player into the... -
Page 26: Bluetooth® Connection
Bluetooth device. Your unit appears rooms.) as “PIONEER AUDIO”. Connecting individual devices under 3. Enter the PIN code. Bluetooth wireless technology does not incur PIN cord : 0000 any charges. - Page 27 Installation Checking the information of connected Bluetooth device NOTE This function is operated after pairing. You can • This units dose not be supported the Mono check the Bluetooth information. Headset Profi le (Hands Free Profi le). Press DISPLAY repeatedly. •...
-
Page 28: Connecting To Your Home Network
Installation Connecting to your Network Connection Home Network Router Router Broadband Broadband This player can be connected to a local area Service Service network (LAN) via the LAN port on the rear panel. Please refer to the documentation for your LAN 1 network device for further instructions. -
Page 29: Network Setup
Installation Network Setup NOTE Before setting the wired network, you need to If there is no DHCP server on the network and you connect the broadband internet to your home want to set the IP address manually, select [Static] network. then set the [IP Address], [Subnet Mask], [Gateway] and [DNS Server] using U / u / I / i and numerical If there is a DHCP server on the local area... - Page 30 Installation Notes on Network Connection: • Some internet connection operations may not be possible due to certain restrictions • Many network connection problems during set by the Internet service provider (ISP) set up can often be fi xed by re-setting the supplying your broadband Internet router or modem.
-
Page 31: Usb Device Connection
Installation USB device NOTE connection • This player supports USB fl ash memory/external HDD formatted in FAT16, FAT32 and NTFS when accessing fi les (music, photo, movie). However, for BD-LIVE and Audio CD recording, only FAT16 This player can play movie, music and photo and FAT32 formats are supported. -
Page 32: Settings
Installation 4. Use U / u to select a second setup option, Settings and press ENTER ( ) to move to the third level. Adjust the Setup Settings You can change the settings of the player in the [Setup] menu. 1. -
Page 33: Display] Menu
Installation Resolution [DISPLAY] Menu Sets the output resolution of the Component and HDMI video signal. Refer to page 23 and TV Aspect Ratio 70 or details about the resolution setting. Select a TV aspect ratio option according to your TV type. [Auto] If the HDMI OUT jack is connected to [4:3 Letter Box]... -
Page 34: Language] Menu
Installation 1080p Display Mode [LANGUAGE] Menu When the resolution is set to 1080p, select [24 Hz] for smooth presentation of fi lm material Display Menu (1080p/ 24 Hz) with a HDMI-equipped display Select a language for the [Setup] menu and compatible with 1080p/ 24 Hz input. -
Page 35: Audio] Menu
Installation HD AV Sync [AUDIO] Menu Sometimes Digital TV encounters a delay between picture and sound. If this happens Speaker Setup you can compensate by setting a delay on the To obtain the best possible sound, use the sound so that it eff ectively ‘waits’ for the picture speaker setup display to specify the volume to arrive: this is called HD AV Sync. -
Page 36: Lock] Menu
Installation DVD Rating [LOCK] Menu Blocks playback of rated DVD based on their To access any features in the [LOCK] settings, content. (Not all discs are rated.) you must enter the 4-digit security code you have created. [Rating 1-8] If you have not entered a password yet, you are Rating one (1) has the most restrictions and prompted to do so. -
Page 37: Network] Menu
Installation [NETWORK] Menu [OTHERS] Menu Connection Setting DivX VOD If your home network environment is ready to ABOUT DIVX VIDEO: DivX® is a digital video connect to the player, the player needs to be format created by DivX, Inc. This is an offi cial set up for network communication. - Page 38 Installation Auto Power Off The screen saver appears when you leave the player in Stop mode for about fi ve minutes. If you set this option to [On], the unit automatically turns itself off after the Screen Saver is displayed for 25 minutes. Set this option to [Off ] to leave the screen saver until the unit is operated by the user.
-
Page 39: Sound Eff Ect
This mode is available only to 2 channel and eff ects. sources. [Pioneer 1]: Gives you suitable sound setting [Loudness]: Improves bass and treble sound. with connecting small type of speakers (S-BD303). -
Page 40: General Playback
Operation Operation 4. Select [Movie], [Photo] or [Music] using General Playback U / u / I / i , and press ENTER ( ). 5. Select the Disc option using I / i , and press ENTER ( ). Playing Discs 1. -
Page 41: Using The Disc Menu
Operation To stop playback Using the disc menu Press x STOP during playback. AVCHD To pause playback To display the disc menu Press X PAUSE/STEP during playback. The menu screen may be displayed fi rst after Press B PLAY to resume playback. loading a disc which contains a menu. -
Page 42: Advanced Playback
Operation Advanced Playback Repeating a specifi c portion AVCHD This player can repeat a portion you have selected. Repeat Playback 1. During playback, press REPEAT ( ) to AVCHD ACD MUSIC select [A-] at the beginning of the portion During playback, press REPEAT ( ) repeatedly you wish to repeat. -
Page 43: Using The Search Menu
Operation To delete a Marker Using the search menu 1. Press SEARCH and the search menu appears AVCHD MOVIE on the screen. Using search menu, you can easy to fi nd the point where you want to start playback. To search a point 2. -
Page 44: Last Scene Memory
Operation Last Scene Memory On-Screen display This unit memorizes the last scene from the last disc that is viewed. The last scene remains You can display and adjust various information in memory even if you remove the disc from and settings concerning the content. the unit or switch off the unit. -
Page 45: Playing From Selected Time
Operation 2. Select an option using U / u . Playing from selected time 3. Use I / i to adjust the selected option AVCHD MOVIE value. 1. Press DISPLAY ( ) during playback. The time search box shows the elapsed playing 4. -
Page 46: Selecting A Subtitle Language
Operation Hearing diff erent audio Selecting a subtitle language AVCHD MOVIE AVCHD MOVIE 1. During playback, press DISPLAY ( ) to 1. During playback, press DISPLAY ( ) to display the on-screen display. display the on-screen display. 2. Use U / u to select the [Audio] option. 2. -
Page 47: Changing The Picture Mode
Operation Watching from a diff erent angle Changing the Picture Mode AVCHD MOVIE If the disc contains scenes recorded at diff erent You can change the [Picture mode] option camera angles, you can change to a diff erent during playback. camera angle during playback. -
Page 48: Enjoying Bd-Live
Operation 3 . Press HOME MENU, and set the [BD-LIVE Enjoying BD-LIVE connection] option on the [Setup] menu (page 37). Depending on the disc, the BD-LIVE function may not operate if This unit allows you to enjoy functions such as [BD-LIVE connection] option is set to picture-in-picture, secondary audio and Virtual [Partially Permitted]. -
Page 49: Playing Movie Fi Le And Vr Discs
Operation Playing movie fi le and NOTE VR discs • The fi le requirements are described on page 11. • You can use various playback functions. Refer to pages 40-47. • Unfi nalized DVD VR format discs may not be You can play DVD-RW discs that are recorded played in this player. -
Page 50: Changing Subtitle Code Page
Operation Selecting a subtitle fi le Changing subtitle code page MOVIE MOVIE If a movie fi le name and the subtitle fi le If the subtitle is not displayed properly, You name are the same, subtitle fi le is played can change the subtitle code page to view the automatically when playing the movie fi le. -
Page 51: Viewing A Photo
Operation To play a slide show Viewing a photo Press B PLAY to start slide show. To stop a slide show You can view photo fi les using this player. Press x STOP during slide show. 1. Press HOME MENU To pause a slide show Press X PAUSE/STEP during slide show. -
Page 52: Options While Viewing A Photo
Operation Options while viewing a photo Listening to music during a slide show You can use various options while viewing a photo in full screen. You can display photo fi les while listening to music fi les. 1. While viewing a photo in full screen, press DISPLAY ( ) to display the option menu. -
Page 53: Listening To Music
Operation 7. Use U / u to select a device, and press ENTER Listening to music ( ). Devices that you can select may diff er depending on the location of the photo fi le you are displaying in full screen. The player can play Audio CDs and music fi les Photo location Available Device... -
Page 54: Audio Cd Recording
Operation 6. Use U / u / I / i to select [Start], and press Audio CD Recording ENTER ( ). You can record one desired track or all of the 7. Use U / u / I / i to select the destination tracks in Audio CD to a USB storage device. - Page 55 Operation NOTE • The table below shows the average recording time from an audio track with 4 minutes of playback time to a music fi le with 192 kbps as an example. stop mode during playback 1.4 min. 2 min. •...
-
Page 56: Playing The Ipod
Operation 1. Connect the iPod fi rmly. Playing the iPod Connect the iPod You can enjoy the sound with your iPod. For details about iPod, refer to the iPod’s User Connect the cradle and Guide. put your iPod on it. Preparation •... -
Page 57: Enjoying The Ipod In Mode
Operation Enjoying the iPod IN mode NOTE You can operate your iPod by using the supplied remote control and controls on your • An error message “CHECK IPOD” or “Connected iPod. iPod model is not supported. ” appears when: - your iPod is not available for the function to be 1. -
Page 58: Radio Operations
Operation Radio Operations Deleting all the saved stations Press and hold CLEAR for two seconds. “ERASE ALL” will fl ash up. Press CLEAR again. Then all the saved stations are deleted. Be sure that the antenna is connected. (Refer to the page 24) Improving poor FM reception Press D (blue) (ST/ MONO) coloured button on Listening to the radio... -
Page 59: Playing Content Via Your Home Network
Operation Playing content via Accessing a DLNA media server 1. Check the network connection and settings your home network (pages 28-30). 2. Press HOME MENU. 3. Select [Home Link] using U / u / I / i , and This player can browse and play content from press ENTER ( ). -
Page 60: Accessing A Share Folder From Your Pc
Operation Accessing a share folder from NOTE your PC • The fi le requirements are described on page 11. 1. Start your PC that is connected on your • You can use various playback functions. Refer to local area network. pages 40-47. - Page 61 Operation PC requirements NOTE • Windows® XP (Service Pack 2 or higher), Windows Vista® (no Service Pack required) • The fi le requirements are described on page 11. Windows 7® • You can use various playback functions. Refer to pages 40-47. •...
- Page 62 Operation Entering a network user ID and the 3. When you fi nish entering the network user ID and password, select [OK] using U / u / I / password i and press ENTER ( ) to access the folder. Depending on your PC’s environment, you The network user ID and password will be may need to enter a network user ID and the...
-
Page 63: Maintenance
Maintenance Maintenance Notes on Discs Handling the Unit Handling Discs When shipping the unit Please save the original shipping carton and packing materials. If you need to ship the unit, for maximum protection, re-pack the unit as it was originally packed at the factory. Keeping the exterior surfaces clean Never stick paper or tape on the disc. -
Page 64: Troubleshooting
Troubleshooting Troubleshooting General The Power does not turn • Plug the power cord into the wall outlet securely. The unit does not start • Insert a playable disc. (Check the disc type, colour system, playback. and regional code.) • Place the disc with the playback side down. •... -
Page 65: Picture
Troubleshooting Picture There is no picture. • Select the appropriate video input mode on the TV so the picture from the unit appears on the TV screen. • Connect the video connection securely. • Check the [HDMI Colour Setting] in the [Setup] menu is set to the appropriate item that conforms to your video connection. -
Page 66: Network
[Prohibited]. Set the option to [Permitted]. Design and specifi cations are subject to change without notice. Updates Note that information on this product is available on the Pioneer website. Please check the website for information on updating or servicing your Blu-ray Disc PLAYER. -
Page 67: Appendix
If your TV is listed in the table below, set the appropriate manufacturer code. 1. While holding down 1 (TV POWER) button, You can control your PIONEER TV using the and press the manufacturer code for your buttons below. TV with the numerical buttons (see the table below). -
Page 68: Area Code List
Appendix Area Code List Choose an area code from this list. Area Code Area Code Area Code Area Code Afghanistan Fiji Monaco Singapore Argentina Finland Mongolia Slovak Republic Australia France Morocco Slovenia Austria Germany Nepal South Africa Belgium Great Britain Netherlands South Korea Bhutan... -
Page 69: Language Code List
Appendix Language code List Use this list to input your desired language for the following initial settings: [Disc Audio], [Disc Subtitle] and [Disc Menu]. Language Code Language Code Language Code Language Code Afar 6565 French 7082 Lithuanian 7684 Sindhi 8368 Afrikaans 6570 Frisian... -
Page 70: Video Output Resolution
Appendix Video output resolution When the non-copy protected media is playing back Video Out COMPONENT VIDEO OUT HDMI OUT HDMI connected HDMI disconnected Resolution 576i (480i) 576p (480i) 576i (480i) 576p (480p) 576p (480p) 576p (480p) 720p 720p 720p 1080i 1080i 1080i 1080p / 24 Hz... -
Page 71: Trademarks And Licences
Appendix Trademarks and Licences HDMI, the HDMI Logo and High-Defi nition Multimedia Interface are trademarks or registered “Blu-ray Disc” and are trademarks. trademarks of HDMI Licensing, LLC in the United States and other countries. “BD-LIVE” logo is a trademark of Blu-ray Disc Association. - Page 72 The Bluetooth word mark and logos are owned by the Bluetooth SIG, Inc. and any use of such marks by Pioneer Corporation is under license. Other trademarks and trade names are those of their iPod is a trademark of Apple Inc., registered in the respective owners.
-
Page 73: Specifi Cations
Appendix Specifi cations Tuner • FM Tuning Range: 87.5 to 108.0 MHz or 87.50 to 108.00 MHz General Amplifi er • Power requirements: • Power output, (PEAK), (4Ω/3Ω) AC 220-240 V, 50/ 60 Hz Total 1100 W • Power consumption: Front 180 W x 2 150 W... - Page 74 Appendix Speakers for BCS-707 Speakers for BCS-303 S-BD707 S-BD303 • Front/Surround speaker (Left/ Right) • Front/Surround speaker (Left/ Right) Type: 2 Way Type: 1 Way Impedance Rated: 4 Ω Impedance Rated: 4 Ω Net Dimensions 260 x 1097 x 260 mm Net Dimensions 96 x 96 x 85 mm (W x H x D):...
-
Page 75: Open Source Software Notice
© 1993 Ulrich Pegelow obtained by being charged the fee for distribution. copyright © 1995, 1996 Michael Elizabeth Chastain To obtain a copy, contact your local Pioneer copyright © 1993, 1994, 1995, 1996 Rick Sladkey Customer Support . copyright © 1999,2000 Wichert Akkerman You can obtain a copy of the GPL, LGPL licenses •... - Page 76 1999/5/EF. Suomi: Deutsch: Pioneer vakuuttaa täten että BCS-707 (BCS- Hiermit erklärt Pioneer, dass sich dieses BCS- 303) tyyppinen laite on direktiivin 1999/5/ 707 (BCS-303) in Übereinstimmung mit den EY oleellisten vaatimusten ja sitä koskevien grundlegenden Anforderungen und den direktiivin muiden ehtojen mukainen.
- Page 77 1999/5/EF. Malti: Íslenska: Hawnhekk, Pioneer jiddikjara li dan BCS-707 Hér með lýsir Pioneer yfi r því að BCS-707 (BCS-303) jikkonforma mal-ħtiġijiet essenzjali (BCS-303) er í samræmi við grunnkröfur u ma provvedimenti oħrajn relevanti li hemm og aðrar kröfur, sem gerðar eru í tilskipun fi d-Dirrettiva 1999/5/EC.
- Page 80 253 Alexandra Road, #04-01, Singapore 159936 TEL: 65-6472-7555 PIONEER ELECTRONICS AUSTRALIA PTY. LTD. 178-184 Boundary Road, Braeside, Victoria 3195, Australia, TEL: (03) 9586-6300 PIONEER ELECTRONICS DE MEXICO S.A. DE C.V. Blvd.Manuel Avila Camacho 138 10 piso Col.Lomas de Chapultepec, Mexico, D.F. 11000 TEL: 55-9178- 4270...