Bosch Security System User Manual
Hide thumbs
Also See for Security System:
- User manual (88 pages) ,
- Owner's manual (72 pages) ,
- User manual (56 pages)
Table of Contents
Advertisement
Quick Links
Advertisement
Table of Contents

Related Manuals for Bosch Security System


Summary of Contents for Bosch Security System
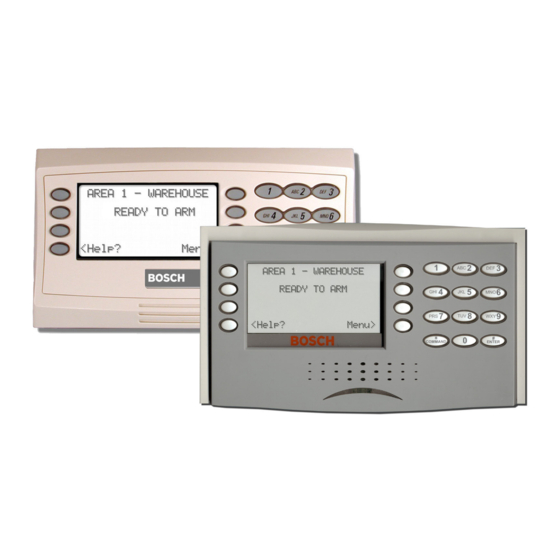
- Page 1 Security System User's Guide Keypad...
- Page 2 In the unlikely event that the central station is not able to receive the report, your phone may be unavailable for up to 20 minutes while the control panel makes additional communication attempts. Bosch Security Systems | 9/04 | 4998122475D...
-
Page 3: Table Of Contents
Security System | User's Guide | Contents Contents Introduction..................6 View Faulted or Bypassed Points..........14 About This User’s Guide ............7 To Automatically Scroll Faulted or Bypassed Points....14 Part I: Security System Basics...........8 To Manually Scroll Faulted or Bypassed Points ..... 15 Using the Keypad ................8... - Page 4 (COMMAND + 4)..............42 Turning the System Off (Disarming).........29 Description................... 42 To Turn Your Security System Off (Disarm) ......29 Using COMMAND 4..............42 Turning the System On (Arming) With a Duress Passcode ...30 VIEW MEMORY ? (COMMAND + 4 + 0) ......43...
- Page 5 Security System | User's Guide | Contents View Event Memory..............43 Description................... 57 WALK TEST ? (COMMAND + 4 + 4) ........45 Using Bypass a Point ..............57 Walk Test ..................45 UNBYPASS A POINT? (COMMAND + 0 + 0)....60 Using Walk Test ................45 Description...................
-
Page 6: Introduction
Introduction Your security system helps to secure life, property, and investments against fire, theft, and bodily harm. The keypad is an advanced digital device that offers a variety of features not available with other systems. Its highly visible, backlit keypad and built-in sounder alert you to a number of system events. -
Page 7: About This User's Guide
Security System | User's Guide | About This User’s Guide - About This User’s Guide This owner’s manual is divided into three main sections: Bold Text is the text on the display. Security System Basics: Covers how to use the D1260/D1260B Keypad, the various keys, what a “Point”... -
Page 8: Part I: Security System Basics
Security System | User's Guide | Part I: Security System Basics - Part I: Security System Basics For example, if Reset Sensors?> is being displayed, pressing Using the Keypad the soft key adjacent to this will begin the function. Your security system provides quick access to functions by To exit the Menu List, press the <Exit soft key. - Page 9 Security System | User's Guide | Part I: Security System Basics - Keypad Keys ENTER ENTER key is used to complete the Previous When viewing a list, pressing the <Previous entry of your passcode at the command key will take you back to the previously enter.
-
Page 10: Points
Security System | User's Guide | Part I: Security System Basics - Points Perimeter Points Points These points usually include all exterior doors and windows of What is a Point? the building. A “point” is a detection device, or group of devices connected Interior Points to your security system. -
Page 11: Non-Fire Points
Security System | User's Guide | Part I: Security System Basics - Points When there is a fire alarm, the display *FIRE ALARM* is on the first line, text identifying the point as a fire point is displayed on the second line, and instructions for silencing the alarm are displayed on the third and fourth lines. -
Page 12: Your Custom Display
Security System | User's Guide | Part I: Security System Basics - Your Custom Display Turned off with faulted points (doors or windows open) in Your Custom Display the area. “At an idle state” means that the system is not currently This manual uses the default idle state displays for examples performing a function entered by a user. - Page 13 Security System | User's Guide | Part I: Security System Basics - Your Custom Display Default Text Custom Text Area Is On Text _ _ _ _ _ _ _ _ _ _ _ _ _ _ _ _ Indicates the area is turned on (armed) and ready to detect intruders.
-
Page 14: View Faulted Or Bypassed Points
Security System | User's Guide | Part I: Security System Basics - View Faulted or Bypassed Points 2. Press the digit key. The text for Area 1 is displayed first View Faulted or Bypassed Points followed by the number (#) of faulted points on the next To properly arm your system, all the exterior points (doors line. -
Page 15: To Manually Scroll Faulted Or Bypassed Points
Security System | User's Guide | Part I: Security System Basics - Warning Displays and Tones To Manually Scroll Faulted or Bypassed Points Warning Displays and Tones 1. Ensure your keypad shows idle text. Your keypad emits one of several distinct tones and displays 2. -
Page 16: Fire Alarms
Security System | User's Guide | Part I: Security System Basics - Fire Alarms Fire Troubles and Fire Supervisory conditions Fire Alarms Non-Fire Troubles and Non-Fire Supervisory conditions. Fire alarms are the highest priority events. When a fire point The group with the highest priority scrolls first in the keypad’s activates, your keypad emits a pulsating high-pitched fire tone. - Page 17 Security System | User's Guide | Part I: Security System Basics - Fire Alarms The system will now display *Alarm Silenced* … and then To clear the event memory and remove the *Alarm the number of points in alarm (# FIRE ALARMS) and then...
-
Page 18: Burglary Alarms
Security System | User's Guide | Part I: Security System Basics - Burglary Alarms The system will now display *Alarm Silenced* and then the Burglary Alarms number of points in alarm (### ALARMS) and the custom Burglary alarms are the second priority. When a burglary... -
Page 19: Fire Trouble And Fire Supervisory Events
Security System | User's Guide | Part I: Security System Basics - Fire Trouble and Fire Supervisory Events Fire Trouble and Fire Supervisory Events Some systems may be programmed to automatically re-sound the keypad’s trouble tone When a fire trouble or fire supervisory condition occurs, your after a period of time if the fire trouble or fire keypad emits three warble tones, then a pause (repeatedly). -
Page 20: Viewing Fire Trouble And Fire Supervisory Conditions
Security System | User's Guide | Part I: Security System Basics - Non-Fire Point Trouble and Supervisory Events Non-Fire Point Trouble and Supervisory Events Some fire points, when activated, will display FIRE TROUBLE for a preset amount of time. If no... -
Page 21: Viewing Non-Fire Trouble Events
Security System | User's Guide | Part I: Security System Basics - Special System Trouble Display Viewing Non-Fire Trouble Events Entry Delay Tone and Display After pressing COMMAND 4 or the Silence> soft key, press When you enter an armed system through a point any numeric key to view the faulted points. - Page 22 Security System | User's Guide | Part I: Security System Basics - Special System Trouble Display Figure 2: Enter Passcode If you fail to turn off the security system before the entry delay time expires, it will sound the burglary tone and may also send an alarm report to your security company.
-
Page 23: Exit Delay Tone And Display
Security System | User's Guide | Part I: Security System Basics - Exit Delay Tone and Display Exit Delay Tone and Display Figure 4: Exit now After you arm your system, the keypad emits a repeating beep tone and displays Figure 3 followed by Figure 4 and the keypad counts down the exit delay time. -
Page 24: Silencing An Alarm
Security System | User's Guide | Part I: Security System Basics - Silencing an Alarm Your system makes repeated attempts to send reports to your Silencing an Alarm security company. The audible alarm sounds for a specific period of time before it automatically shuts off. -
Page 25: Part Ii: System Commands
Security System | User's Guide | Part II: System Commands - Part II: System Commands Refer to page 26 for a summary of the commands covered in this section. Some of these functions may not be available in your system. Please consult your security company to determine which commands have been made available to you. - Page 26 Security System | User's Guide | Part II: System Commands - Press the COMMAND key and then the one or two digits shown in the table below to perform the function. When you use a command to perform a function, the displays in the function list below do not appear at your keypad.
-
Page 27: Passcode Protected Commands And Functions
Security System | User's Guide | Part II: System Commands - Passcode Protected Commands and Functions 3. Enter the passcode and press Passcode Protected Commands and Functions ENTER key. Commands and/or Functions within your system may be programmed to require a valid passcode prior to gaining access to that function. -
Page 28: Turning The System On (Arming)
Security System | User's Guide | Part II: System Commands - Turning the System On (Arming) displays Area # Area Text is Turning the System On (Arming) now arming… followed by Your security system can be turned on (armed) in many different ways, depending on the arming command used. -
Page 29: Turning The System Off (Disarming)
Security System | User's Guide | Part II: System Commands - Turning the System Off (Disarming) To Turn Your Security System Off (Disarm) Turning the System Off (Disarming) ENTER 1. Enter your passcode and press Entering your personal passcode turns off your security ENTER 2. -
Page 30: Turning The System On (Arming) With A Duress Passcode
Security System | User's Guide | Part II: System Commands - Turning the System On (Arming) With a Duress Passcode Turning the System On (Arming) With a Duress Passcode Your passcode may have a special duress feature that is simply your personal passcode with its last digit increased by one or two digits. -
Page 31: Turning The System On (Arming) With Doors Or Windows Open
Security System | User's Guide | Part II: System Commands - Turning the System On (Arming) With Doors or Windows Open 2. The display shows Turning the System On (Arming) With Doors or Check Area #. Windows Open If a protected door or window is open, you may have the option of “force arming”... - Page 32 Security System | User's Guide | Part II: System Commands - Turning the System On (Arming) With Doors or Windows Open Indicates that the Indicates that more than system’s number of the number of allowable allowable bypassed points are faulted.
- Page 33 Security System | User's Guide | Part II: System Commands - Turning the System On (Arming) With Doors or Windows Open 5. Pressing the View Points> soft key will show the specifics If you do not want to go for any points that are faulted or bypassed.
- Page 34 Security System | User's Guide | Part II: System Commands - Turning the System On (Arming) With Doors or Windows Open 8. Once the last bypassed point is displayed, the display will change to show the soft key to either force arm the faulted points (Force Arm>) or force arm the...
-
Page 35: Master Arm ? (Command + 1)
Security System | User's Guide | Part II: System Commands - MASTER ARM ? (COMMAND + 1) Using Master Arm MASTER ARM ? (COMMAND + 1) Using the COMMAND +1 shortcut will only arm Description the area where the keypad has been assigned. - Page 36 Security System | User's Guide | Part II: System Commands - MASTER ARM ? (COMMAND + 1) 4. Press the 5. The display shows Exit now! # seconds remaining (# = exit delay time remaining). 6. After the exit delay time expires, the display changes to idle armed text.
-
Page 37: Master Arming All Areas
Security System | User's Guide | Part II: System Commands - Master Arming all Areas Or press the Next> soft key to view each unarmed area and Master Arming all Areas optionally arm each one. To arm a selected area, press Next>... -
Page 38: Perimeter Instant (Command + 2)
Security System | User's Guide | Part II: System Commands - PERIMETER INSTANT (COMMAND + 2) Using Perimeter Instant PERIMETER INSTANT (COMMAND + 2) 1. Interior points are not armed with this command and may Turn On the Perimeter With No Delays remain faulted while arming with COMMAND 2. - Page 39 Security System | User's Guide | Part II: System Commands - PERIMETER INSTANT (COMMAND + 2) 5. The display shows Perimeter On Instant. After arming the perimeter without delays, you cannot enter or exit the premises without disarming the system.
-
Page 40: Perimeter Delay ? (Command + 3)
Security System | User's Guide | Part II: System Commands - PERIMETER DELAY ? (COMMAND + 3) 2. Press the COMMAND key. PERIMETER DELAY ? (COMMAND + 3) Turn On the Perimeter With Delays 3. The display shows *System Description Command*. - Page 41 Security System | User's Guide | Part II: System Commands - PERIMETER DELAY ? (COMMAND + 3) 5. The display shows Exit now! # seconds remaining (# = exit delay time remaining). 6. After the exit delay expires, Perimeter On Delayed appears.
-
Page 42: Silence Trouble Sounder/Clear Trouble Display (Command + 4)
Security System | User's Guide | Part II: System Commands - Silence Trouble Sounder/Clear Trouble Display (COMMAND + 4) 3. Press the key. Silence Trouble Sounder/Clear Trouble Display (COMMAND + 4) 4. The Keypad sounder is silenced. Description Use COMMAND 4 to silence the trouble sounder during system events. -
Page 43: View Memory ? (Command + 4 + 0)
Security System | User's Guide | Part II: System Commands - VIEW MEMORY ? (COMMAND + 4 + 0) 2. Press the COMMAND key. VIEW MEMORY ? (COMMAND + 4 + 0) View Event Memory 3. The display shows *System Description Command*. - Page 44 Security System | User's Guide | Part II: System Commands - VIEW MEMORY ? (COMMAND + 4 + 0) 7. If there are no events to view, fire alarm summary line, There are currently no events point text for each fire in memory displays.
-
Page 45: Walk Test ? (Command + 4 + 4)
Security System | User's Guide | Part II: System Commands - WALK TEST ? (COMMAND + 4 + 4) If the battery cannot maintain the system for the four-minute WALK TEST ? (COMMAND + 4 + 4) period, the keypad will appear to go dead. If this happens, Walk Test contact your security company. - Page 46 Security System | User's Guide | Part II: System Commands - WALK TEST ? (COMMAND + 4 + 4) 3. The display shows *System 5. The burglary bell sounds for two Command*. seconds. When the display shows ### points remain to be tested you 4.
- Page 47 Security System | User's Guide | Part II: System Commands - WALK TEST ? (COMMAND + 4 + 4) Test each point by first opening and then closing the door The display changes to show or window. the information for that point.
- Page 48 Security System | User's Guide | Part II: System Commands - WALK TEST ? (COMMAND + 4 + 4) The display momentarily shows All points have been tested before returning to idle text. Bosch Security Systems | 9/04 | 4998122475D...
-
Page 49: Reset Sensors ? (Command + 4 + 7)
Security System | User's Guide | Part II: System Commands - RESET SENSORS ? (COMMAND + 4 + 7) 2. Press the COMMAND key. RESET SENSORS ? (COMMAND + 4 + 7) Reset Sensors 3. The display shows *System Description Command*. - Page 50 Security System | User's Guide | Part II: System Commands - RESET SENSORS ? (COMMAND + 4 + 7) 5. This display SENSORS… RESETTING… PLEASE WAIT…shows for approximately three seconds and then shows Retrieving Panel Information while retrieving the control panel...
-
Page 51: Watch Mode ? (Command + 6)
Security System | User's Guide | Part II: System Commands - WATCH MODE ? (COMMAND + 6) WATCH MODE ? (COMMAND + 6) Contact your security company to find out which points are watch points and whether or not your... - Page 52 Security System | User's Guide | Part II: System Commands - WATCH MODE ? (COMMAND + 6) 5. The display shows *Watch mode is now on. 6. To disable Watch Mode, press Command again. The keypad will display Watch mode is now off.
-
Page 53: Perimeter Partial ? (Command + 8)
Security System | User's Guide | Part II: System Commands - PERIMETER PARTIAL ? (COMMAND + 8) Using Perimeter Partial PERIMETER PARTIAL ? (COMMAND + 8) 1. Ensure your keypad shows idle Partially Turn On the Perimeter disarmed text. Description... - Page 54 Security System | User's Guide | Part II: System Commands - PERIMETER PARTIAL ? (COMMAND + 8) 5. The display shows Exit now! # seconds remaining. When exit delay time expires and the system turns on, the display shows Perimeter On Partial.
-
Page 55: Special Alerts (Command + 7, Command + 9)
Security System | User's Guide | Part II: System Commands - Special Alerts (COMMAND + 7, COMMAND + 9) 3. The display shows *System Special Alerts (COMMAND + 7, COMMAND + 9) Command*. Description Commands 7 and 9 can be programmed to respond to a 4. -
Page 56: Using Command 9
Security System | User's Guide | Part II: System Commands - Special Alerts (COMMAND + 7, COMMAND + 9) Using COMMAND 9 1. Ensure your keypad shows idle Your COMMAND 9 special alert has been programmed disarmed text. notify your security company COMMAND 2. -
Page 57: Bypass A Point? (Command + 0)
Security System | User's Guide | Part II: System Commands - BYPASS A POINT? (COMMAND + 0) Using Bypass a Point BYPASS A POINT? (COMMAND + 0) 1. Ensure your keypad shows idle Description disarmed text. Bypass points that you do not want included in the system. - Page 58 Security System | User's Guide | Part II: System Commands - BYPASS A POINT? (COMMAND + 0) When the point text of the point If you prefer, you may use the Command Menu in you wish to bypass appears, place of steps 2 and 3 to initiate this function.
- Page 59 Security System | User's Guide | Part II: System Commands - BYPASS A POINT? (COMMAND + 0) 6. One of the following messages displays (FRONT DOOR 8. If the bypassed point is a 24 hour point, the message is used here as an example): 24Hr Point Bypassed begins scrolling in the display.
-
Page 60: Unbypass A Point? (Command + 0 + 0)
Security System | User's Guide | Part II: System Commands - UNBYPASS A POINT? (COMMAND + 0 + 0) 4. Press the keys. UNBYPASS A POINT? (COMMAND + 0 + 0) Description If you prefer, you may use the Command Menu in Unbypassing a point is a way to return a bypassed point to the place of steps 2 and 3 to initiate this function. - Page 61 Security System | User's Guide | Part II: System Commands - UNBYPASS A POINT? (COMMAND + 0 + 0) 6. One of the following messages displays (FRONT DOOR If you don’t know the number of the point you wish to...
- Page 62 Security System | User's Guide | Part II: System Commands - UNBYPASS A POINT? (COMMAND + 0 + 0) 7. You can return to idle text by pressing the <Exit soft key. Bosch Security Systems | 9/04 | 4998122475D...
-
Page 63: Appendix
Security System | User's Guide | Appendix - Security System Limitations If the AC power supply is OFF and the back-up battery is Appendix either missing or dead, sensors will not detect intrusion nor the fire points detect the presence of smoke. -
Page 64: Fire Safety And Evacuation
Security System | User's Guide | Appendix - Fire Safety and Evacuation 3. A smoke detector should be provided to protect each Although having a security system may make you sleeping area in a home (refer to Figure 5 and Figure 6 on eligible for reduced insurance premiums, the page 65). - Page 65 Security System | User's Guide | Appendix - Fire Safety and Evacuation Figure 5: Smoke detector placement Figure 6: Smoke detector placement (elevation view) 1 - Smoke detector 4 - Dining room 2 - TV room 5 - Kitchen 1 - Smoke detector...
- Page 66 Security System | User's Guide | Appendix - Fire Safety and Evacuation 5. Plan both primary and alternate escape routes. Since Figure 7: Escape routes stairwells and hallways may be blocked during a fire, exiting through a bedroom window must be a part of the escape plan.
-
Page 67: Standard Displays
Security System | User's Guide | Appendix - Standard Displays 6. As a part of this plan, all family members should arrange Standard Displays to meet at a location away from the house (such as a Your keypad uses standard and custom displays to show the neighbor’s house) so you will know that everyone is... - Page 68 Security System | User's Guide | Appendix - Standard Displays *No Authority* Enter passcode and press the ENTER key to disarm The system does not recognize the passcode entered and displays *No Authority*. followed by Area # Name Text is in entry delay.
- Page 69 Security System | User's Guide | Appendix - Standard Displays Perimeter On Instant Indicates that the perimeter is armed (turned on) without entry/exit delay time and displays Perimeter On Instant. (refer to PERIMETER INSTANT (COMMAND + 2) on page 38)
-
Page 70: System Trouble Displays
Security System | User's Guide | Appendix - System Trouble Displays Service Parameter System Trouble Displays Indicates a problem with the control If you see any of the system trouble displays shown below, panel. Your control panel may not contact your security company to determine whether repairs be operating properly. - Page 71 Security System | User's Guide | Appendix - System Trouble Displays Service AC Failure In the event your security system fails to communicate, the keypad Indicates that AC power to the buzzes and displays security system is interrupted. Comm Fail Route Grp1 (Route...
- Page 72 Security System | User's Guide | Appendix - System Trouble Displays Service Printer Service Point Bus 1 (or 2) Indicates that a local printer (if Displays when a problem has installed) at your premises is in a occurred with one of the control trouble condition.
-
Page 73: Security System Glossary
Security System | User's Guide | Appendix - Security System Glossary Security System Glossary A facility where trained personnel monitor Central your security system 24 hours a day. Your Station A group of detection devices connected to your Area security system may be programmed to contact security system. - Page 74 Security System | User's Guide | Appendix - Security System Glossary A programmed delay of system alarm response To turn on (arm) the security system even Entry Delay Force Arm that allows you to enter an armed area through though one or more points are faulted. Force the correct point and disarm the area.
- Page 75 Security System | User's Guide | Appendix - Security System Glossary A detection device, or group of devices Point connected to your security system. Points display individually at the keypad with custom text. The text can describe a single door, motion sensor, smoke detector, or an area such as UPSTAIRS or GARAGE.
- Page 76 For technical support, please contact: For technical support, please contact: © 2004 Bosch Security Systems 4998122475D...