Table of Contents
Advertisement
Advertisement
Table of Contents
Troubleshooting

Related Manuals for Brother DS-620


Summary of Contents for Brother DS-620
- Page 1 User’s Guide DS-620/DS-720D DS-620 DS-720D Version 0 ARL/ASA/NZ/SAF/GLF...
-
Page 2: Using The Documentation
Using the documentation Thank you for buying a Brother machine! Reading the documentation will help you make the most of your machine. Symbols and conventions used in the documentation The following symbols and conventions are used throughout the documentation. IMPORTANT IMPORTANT indicates a potentially hazardous situation which, if not avoided, may result in damage to property or loss of product functionality. - Page 3 Trademarks The Brother logo, Brother and DSmobile are registered trademarks of Brother Industries, Ltd. Apple, Macintosh, and Mac OS are trademarks of Apple Inc., registered in the United States and other countries. Windows and Windows Vista are either registered trademarks or trademarks of Microsoft Corporation in the United States and / or other countries.
-
Page 4: Table Of Contents
Table of Contents General Information Scanner overview .............................1 LED indications ............................2 Installing the Scanner Driver and Scanning Software ® For Windows users ..........................3 For Macintosh users ..........................5 Document Specifications Acceptable documents ..........................6 Unacceptable documents .........................7 Documents recommended for use with the Carrier Sheet ................7 Scan Preparation Loading a document ..........................9 Loading the Carrier Sheet ........................10... - Page 5 Troubleshooting ............................45 Appendix A Specifications ............................50 General .............................50 Scanner ............................51 Interfaces ............................52 Computer requirements ........................52 Appendix B Contacting Brother ..........................53 Register your product ........................53 Frequently asked questions (FAQs) ....................53 For customer service ........................54 ® ® Technical support (For PageManager and BizCard...
-
Page 6: General Information
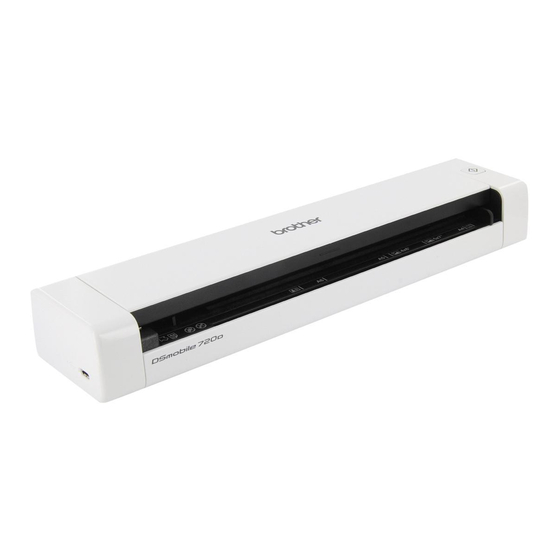
General Information Scanner overview Front 1 Top cover 2 Start button ® • (For Windows Press to start scanning while using Button Manager V2. ® For more information, see Using Button Manager V2 (for Windows ) on page 31. • (For Macintosh) Press to start scanning while using DSmobileCapture. -
Page 7: Led Indications
General Information Rear DS-620 DS-720D 1 Micro USB port 2 Paper ejection slot LED indications LED indication Machine Status No light The machine is not connected to your computer. Green light The machine is ready to scan. Blinking green The machine is scanning a document. -
Page 8: Installing The Scanner Driver And Scanning Software
When the Setup screen appears, click Install Scanner Driver and follow the on-screen instructions. NOTE • If the Brother screen does not appear automatically, go to My Computer (Computer), double-click the CD-ROM icon, and then double-click AutoRun.exe. • When you install the scanner driver, DSmobileCapture (a scanning application) will be installed at the ®... - Page 9 Installing the Scanner Driver and Scanning Software Click Additional Applications to install any of these applications during setup. • Button Manager V2: document scanning and storing (to specified destinations). • PaperPort™ 12SE or PageManager9: document scanning, editing and management. (Available software applications can vary depending on your country.) •...
-
Page 10: For Macintosh Users
Insert the DVD-ROM. Double-click on the DVD icon, and then double-click DS-620 (DS-720D). Double-click on Brother DS-620 (DS-720D) and follow the on-screen instructions to install the scanner driver. NOTE When you install the scanner driver, DSmobileCapture (a scanning application) will be installed at the same time. -
Page 11: Document Specifications
215.9 × 355.6 mm 215.9 × 279.4 mm Letter Plastic Cards Length 40 mm to 86 mm Width 40 mm to 86 mm (DS-620: non- embossed cards 85.6 × 54.0 × 0.76 mm Standard Size (ISO) only) Material Plastic (PET) Type Plastic card such as a driver’s license or an insurance card... -
Page 12: Unacceptable Documents
Document Specifications Unacceptable documents Documents with paper clips or staples Documents with wet ink Fabrics, metallic sheets, overhead projector sheets Glossy or mirrored media Embossed plastic cards Documents that exceed recommended thicknesses Documents recommended for use with the Carrier Sheet Use the supplied Carrier Sheet when you scan the following: Documents with a carbon sheet attached on the back Documents written in pencil... - Page 13 Document Specifications IMPORTANT • Do not place the Carrier Sheet in direct sunlight or in an area subject to high temperatures and high humidity, or the Carrier Sheet may warp. • Do not place large or heavy objects on the Carrier Sheet. •...
-
Page 14: Scan Preparation
Scan Preparation Loading a document IMPORTANT • Insert only one page into the scanner at a time. Insert the next page only after the first one is completely scanned. Inserting more than one page at a time may cause your scanner to malfunction. •... -
Page 15: Loading The Carrier Sheet
Scan Preparation Loading the Carrier Sheet NOTE Make sure documents that have ink or correction fluid on them are completely dry. Place the document you want to scan in the left corner of the Carrier Sheet and align the top of the document with the top left corner of the Carrier Sheet. -
Page 16: Important Carrier Sheet Tips
Scan Preparation Important Carrier Sheet tips To avoid document jams, do not load the Carrier Sheet upside down. For more information, see Loading the Carrier Sheet on page 10. To avoid document jams, do not put several small documents into the Carrier Sheet at the same time. Insert only one document into the Carrier Sheet at a time. -
Page 17: Scanning Applications And Settings
After downloading the scanner drivers, select a scanning software application for saving scanned images to your computer. Brother has supplied several options for you on the DVD-ROM; use this table to help determine which of the included scanning applications will work best for you:... -
Page 18: Using Dsmobilecapture (For Windows ® )
Connect the supplied Micro USB Cable to the Micro USB port on your scanner. Connect the cable to your computer. Double-click the DSmobileCapture shortcut on your desktop. The Select Scanner Model dialog box appears. Select TWAIN under Driver Type, select Brother DS- 620 (DS-720D) under Scanner Model, and then click OK. DSmobileCapture launches. - Page 19 Scanning Applications and Settings Change the scanning settings, if needed. For more information on changing settings, see Changing DSmobileCapture scan settings (for ® Windows ) on page 16. Insert a document into your scanner. Click Scan . Your scanner starts scanning. A thumbnail of the scanned image appears in the DSmobileCapture screen and the scanned image will be saved in the directory you specified in step 5.
- Page 20 Scanning Applications and Settings For continuous scanning, insert the next document into the scanner while Waiting for next job... screen is displayed. When the document is ready, scanning will start automatically. To stop the continuous scanning, click Cancel on Waiting for next job... screen. NOTE •...
-
Page 21: Changing Dsmobilecapture Scan Settings (For Windows ® )
Scanning Applications and Settings ® Changing DSmobileCapture scan settings (for Windows File settings (4) (5) Setup Change scanner properties. File Format Change the file format. Select the format you want from the drop-down list. Path Specify the directory where you want to save scanned images. Fit Page You can view and size the scanned image. -
Page 22: Image Settings
Scanning Applications and Settings Image settings Click Setup , and then click the Image tab to choose the image type and to set basic scan settings. NOTE This image is from the DS-720D. Image Selection Box Choose the type of document you want to scan. Duplex (DS-720D only) Select the Duplex check box to perform Duplex (2 side) scanning. -
Page 23: Paper Settings
Scanning Applications and Settings Paper settings Click Setup , and then click the Paper tab to define values related to image output. Cropping Cropping allows you to capture a portion of the scanned document. Automatic Choose Automatic to allow the software to adjust the cropping window according to the document size. - Page 24 Scanning Applications and Settings Scan Area Choose your paper size from the drop-down list or create a custom paper size by clicking Add in the drop-down list. If you selected Fix for Transfer in Cropping (1), define the X-Offset and Y-Offset or specify Width and Length to redefine the scan area.
-
Page 25: Preview Settings
Scanning Applications and Settings Preview settings Click Setup , and then click the Preview tab to preview your image before scanning, to make sure the scan area is set correctly. Preview Window When you click Preview (3), the scanned image will appear in this area. This preview image lets you define your scan area. -
Page 26: Options Settings
Scanning Applications and Settings Options settings Click Setup , and then click the Options tab to choose additional image processing settings or calibrate your scanner. NOTE This image is from the DS-720D. Flip Side Rotation Book (DS-720D only) Select Book to maintain the same image orientation on the reverse side of the output page. -
Page 27: Imprinter Settings
Scanning Applications and Settings Imprinter settings Click Setup , and then click the Imprinter tab to print alphanumeric characters, date, time, document count and custom text on your scanned images. (10) (11) Digital Imprinter Select Digital Imprinter to print the message on the front of your scanned image. Print All Select the Print All check box to print your chosen text content, on all pages of your document. -
Page 28: Information
Scanning Applications and Settings Information Click Setup , and then click the Information tab to view system and scanner information. -
Page 29: Using Dsmobilecapture (For Macintosh)
Scanning Applications and Settings Using DSmobileCapture (for Macintosh) Connect the supplied Micro USB Cable to the Micro USB port on your scanner. Connect the cable to your computer. Double-click the DSmobileCapture shortcut on your desktop. DSmobileCapture launches. Change the scanning settings, if needed. For more information on changing settings, see Changing DSmobileCapture scan settings (for Macintosh) on page 25. -
Page 30: Changing Dsmobilecapture Scan Settings (For Macintosh)
Scanning Applications and Settings Changing DSmobileCapture scan settings (for Macintosh) Image settings Click the Image tab to choose image type and to set several basic scan settings. NOTE This image is from the DS-720D. (10) Image Selection Box Choose the type of document you want to scan. Duplex (DS-720D only) Select the Duplex check box to perform Duplex (2 sided) scanning. - Page 31 Scanning Applications and Settings (10) Preview Window Click to preview your image before scanning. This preview image helps you define your scan area. When you click Preview, scanning for the preview starts and the scanned image will appear in the Preview Window. Note that the scanned image is only for the preview and will not be saved.
-
Page 32: File Settings
Scanning Applications and Settings File settings Click the File tab to configure the settings related to the file name and the directory where you want to save the scanned image. Directory Specify the directory where you want to save scanned images. File Name Set the rule for the file name of the scanned image. -
Page 33: Paper Settings
Scanning Applications and Settings Paper settings Click the Paper tab to define values related to image output. Page Size Page Size allows you to capture a portion of the scanned document. Choose your paper size from the Page Size pop-up list, define the X Offset and Y Offset values or specify Width and Length to define your scanned area. -
Page 34: Options Settings
Scanning Applications and Settings Options settings Click the Options tab to set some additional image processing settings or calibrate your scanner. Rotation Degrees Choose the rotation angle from the pop-up list if you want to rotate your scanned image. Mirror Select the Mirror check box to reverse your image. -
Page 35: Information
Scanning Applications and Settings Information Click the Information tab to view system and scanner information. Language Choose the language you want to display from the pop-up list. -
Page 36: Using Button Manager V2 (For Windows ® )
Scanning Applications and Settings ® Using Button Manager V2 (for Windows NOTE • For more detailed instructions, see the Button Manager V2 User’s Guide from the application’s help menu. • To see the help menu, right-click the Button Manager V2 icon on the system tray, and then click Help. - Page 37 To launch Button Manager V2 from the Windows Start button Click Start > All Programs > Brother DS-620 (DS-720D) Scanner > Button Manager > Button Manager V2. When the Select Scanner Model dialog box appears, select your scanner model from the list, and then click OK.
-
Page 38: Scanning Methods
Scanning Applications and Settings Scanning methods There are two ways to scan using Button Manager V2. If necessary, check or change scan settings before scanning. To scan using the scan button on the Button Manager V2 Button Panel Insert a document into your scanner. Launch Button Manager V2. -
Page 39: Scan Buttons In The Button Manager V2 Button Panel (For Windows ® )
Scanning Applications and Settings Scan buttons in the Button Manager V2 Button Panel (for ® Windows Scan to an image Use this option to open the scanned image in a specific application. Note that the application must already be open and running on your computer. To change scan settings, right-click the Scan button (see the Button Manager V2 User’s Guide). -
Page 40: Scan To An Email
Scanning Applications and Settings Scan to an email Use this option to attach the scanned image to an email. To change scan settings or email software, right-click the E-mail button. Insert a document into your scanner. Launch Button Manager V2. Click E-mail to start scanning. -
Page 41: Scan To A Ftp Server
Scanning Applications and Settings Scan to a FTP server Use this option to save the scanned image in a folder on your FTP server. To change scan settings, right-click the FTP button. Insert a document into your scanner. Launch Button Manager V2. Click FTP to start scanning. -
Page 42: Scanner Calibration
® Calibration using software (for Windows Double-click the DSmobileCapture shortcut on your desktop. The Select Scanner Model dialog box appears. Select TWAIN under Driver Type, select Brother DS-620 (DS-720D) under Scanner Model, and then click OK. DSmobileCapture launches. Click Setup... - Page 43 Scanner Calibration Click the Options tab. Click Calibration to start calibrating the scanner. A message appears, prompting you to insert the Calibration Sheet.
- Page 44 Scanner Calibration Hold the edges of the Calibration Sheet and insert it into the feeder slot as shown below. Click Yes. NOTE Hold only the edges of the Calibration Sheet and be careful not to touch the white or black area. Leaving marks or fingerprints on this sheet can cause errors in calibration.
-
Page 45: Calibration Using Software (For Macintosh)
Scanner Calibration Calibration using software (for Macintosh) Double-click the DSmobileCapture shortcut on your desktop. DSmobileCapture launches. Click the Options tab. Click Calibration to start calibrating the scanner. A message appears, prompting you to insert the Calibration Sheet. - Page 46 Scanner Calibration Hold the edges of the Calibration Sheet and insert it into the feeder slot as shown below. Click OK. NOTE Hold only the edges of the Calibration Sheet and be careful not to touch the white or black area. Leaving marks or fingerprints on this sheet can cause errors in calibration.
-
Page 47: Scanner Maintenance
Scanner Maintenance IMPORTANT Do not use any solvents or corrosive liquid, such as alcohol, kerosene, etc., to clean any part of the scanner, or the plastic may be permanently damaged. Cleaning the outside of your scanner To prevent dust accumulation, we recommend cleaning the exterior of your scanner periodically. Remove the Micro USB Cable from both your scanner and your computer. - Page 48 Scanner Maintenance Gently wipe the scanning glass strip and feed rollers with the supplied cleaning cloth. Close the top cover. Reconnect the Micro USB Cable to your scanner and your computer.
-
Page 49: Troubleshooting
If you think there is a problem with your scanner, check the chart below and follow the suggestions. Most problems can be easily resolved by yourself. If you need additional help, go to the Brother Solutions Center at http://solutions.brother.com/ for more FAQs and troubleshooting tips. -
Page 50: Troubleshooting
Troubleshooting Error message Cause Action Calibration failed. Please reboot the An error caused the calibration to fail. Remove the Micro USB Cable machine. For example, the Calibration Sheet is from your computer. Reconnect not inserted in the correct direction. the Micro USB Cable to the computer, and perform the calibration again. - Page 51 Troubleshooting Difficulty Cause Suggestions My document did not The Document Guides are not adjusted Adjust the Document Guide to fit the width of the scan correctly. to fit the width of the document. document. The settings are not suitable for your Make sure the document size settings are suitable document.
- Page 52 Troubleshooting Difficulty Cause Suggestions The scan quality is Paper dust has accumulated inside Clean your scanner (see Scanner Maintenance on poor. your scanner. page 42). Calibration needs to be performed. Perform the calibration. ® • For Windows : to perform the calibration using software, see Calibration using software (for ®...
- Page 53 Troubleshooting Difficulty Cause Suggestions Bleed-through is seen Your document is too thin. Check that your document is acceptable (see in the scanned image. Document Specifications on page 6). The contrast setting is improper. Increase the contrast level. ® For Windows : see Image settings on page 17.
- Page 54 Calibration Sheet. your scanner will give you the best calibration results. To order a new Calibration Sheet, please contact Brother. I want to use a USB Causes may vary. A USB hub may not be able to supply enough hub.
-
Page 55: A Appendix A
Appendix A Specifications NOTE This chapter provides a summary of the scanner’s specifications. For additional specifications, go to your scanner’s product page at http://www.brother.com/ and click the Specifications tab. General DS-620 DS-720D Power Source USB bus-power 5V DC Power consumption Scanning 2.5 W 500 mA or less... -
Page 56: Scanner
400 dpi) ® ® ® Windows XP in this User’s Guide includes Windows XP Home Edition and Windows XP Professional. For the latest driver updates for the version of Mac OS X you are using, visit us at http://solutions.brother.com/... -
Page 57: Interfaces
Mac OS X 10.7.x Intel Processor 1 GB 2 GB System ® Mac OS X 10.8.x Intel Processor 2 GB 4 GB For the latest driver updates, visit http://solutions.brother.com All trademarks, brand and product names are property of their respective companies. -
Page 58: B Appendix B
Frequently asked questions (FAQs) The Brother Solutions Center is our one-stop resource for all your Brother machine needs. You can download the latest software documents and utilities, read FAQs and troubleshooting tips, and learn how to get the most from your Brother product. -
Page 59: For Customer Service
For customer service For Australia Only: Support - For technical support of your Brother Product other than what you can resolve through the User's Guide, please visit our Web Site or Solutions Web Site (see below) to find an answer to FAQs/Troubleshooting, locating Drivers &... -
Page 60: Technical Support (For Pagemanager ® And Bizcard ® )
Appendix B ® ® Technical support (For PageManager and BizCard Taiwan Tel: +886-2-8751-8200 Fax: +886-2-8751-2880 E-mail: contactus@newsoft.com.tw All other locations E-mail: tech@newsoft.eu.com (English only)