Table of Contents
Advertisement
Quick Links
Advertisement
Table of Contents

Related Manuals for Honeywell IPGSM-DP


Summary of Contents for Honeywell IPGSM-DP
- Page 1 800-08074 1/11 Rev. A...
-
Page 2: Table Of Contents
STEP 4 – Mount and Wire ......................3 STEP 5 – Program the Communications Module ..............6 STEP 6 – Configure the Fire Panel ...................7 STEP 7 – Test the System......................7 IPGSM-DP Trouble Detection Information ...................8 Dialer Capture Module Information ....................8 LED Display Information .......................8 PowerBoost1 Module Information....................9 iGSM Communications Module Information ................10... -
Page 3: General Information
Dialer Capture Module returns a handshake to the fire panel. The fire panel then sends the contact ID reports to the IPGSM-DP, which in turn sends a kiss-off after the report is successfully received from the fire panel. Within the IPGSM-DP, the Dialer Capture Module sends the contact ID reports over the ECP bus to the iGSM Communications Module. -
Page 4: Step 1 - Activate The Sim And Setup The Customer Account
GSM/I”. Search for the account using the Account Information or MAC ID. Under the “Actions” column, use the pulldown menu and choose Register. OR After the IPGSM-DP is installed and programmed, you can register the module by clicking the ... -
Page 5: Step 3 - Determine The Signal Strength And Select A Location
IPGSM-DP Commercial Fire Communicator – Installation and Setup Guide STEP 3 – Determine the Signal Strength and Select a Location IMPORTANT - Do Not mount this device outdoors. RF Exposure Warning - The antenna(s) used for this transmitter must be installed to provide a separation distance of at least 20 cm from all persons and must not be collocated or operating in con- junction with any other antenna or transmitter. - Page 6 IPGSM-DP Commercial Fire Communicator – Installation and Setup Guide 3. Install the two plastic mounting rails for the LED Display board. They simply snap into the back plate holes. 4. Connect the LED Display board to its connector, then slide the board into the mounting rails.
- Page 7 IPGSM-DP Commercial Fire Communicator – Installation and Setup Guide ANTENNA WALL OUTLET BOX (K14358) TRANSFORMER (N8167) NUT, WASHER ANTENNA MOUNTING ADAPTER CABINET DOOR 2 3 4 GREEN Dialer Capture Module FOR EXTERNAL ANTENNA 50 OHM MMCX ONLY 7720P PROGRAMMER PORT NOT FOR TELEPHONE SERVICE USE! PRIMARY POWER: 9 - 16.5 VAC...
-
Page 8: Step 5 - Program The Communications Module
IPGSM-DP Commercial Fire Communicator – Installation and Setup Guide STEP 5 – Program the Communications Module You must use the 7720P Programming tool to program the IPGSM-DP. When using the 7720P Programming tool, the values given below are for most installations. Press the [#] key to accept the displayed default value (xxx) or enter the new value and press the [#] key for the next prompt. -
Page 9: Step 6 - Configure The Fire Panel
IPGSM-DP Commercial Fire Communicator – Installation and Setup Guide To exit the programming mode, press [N] in response to the "Review?" prompt. Then press [Y] to the "Exit Prog Mode?" prompt. Upon exiting, the root file is updated to log the changes made. A message is displayed telling the user that this step is being executed. -
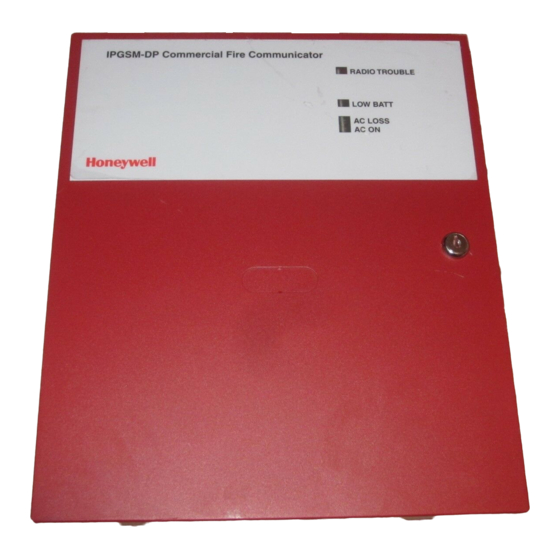
Page 10: Ipgsm-Dp Trouble Detection Information
IPGSM-DP Trouble Detection Information Telco 1 is used for the Fire Panel to output contact ID messages to the IPGSM-DP, and Telco 2 is used by the IPGSM-DP to report faults to the Fire Panel. If Telco 1 is not operational, the Fire Panel will use Telco 2 to report events if there are no faults in the iGSM Communications module. -
Page 11: Powerboost1 Module Information
IPGSM-DP Commercial Fire Communicator – Installation and Setup Guide Violet Note: If a wire pulled out of the LED Board Connector LED Board Black refer to the diagram on right and reinsert wire, ensuring Connector White the connector pin is locked in. -
Page 12: Igsm Communications Module Information
IPGSM-DP Commercial Fire Communicator – Installation and Setup Guide iGSM Communications Module Information ON – NOT registered with AlarmNet. OFF – Registered with AlarmNet. FAST BLINK – Download session with Compass in progress. SLOW BLINK – In unison with yellow LED, PRIMARY POWER: 9 - 16.5 VAC... -
Page 13: Rf Specifications
IPGSM-DP Commercial Fire Communicator – Installation and Setup Guide RF Specifications Transmission Transmit Receive Receive Number Channel Duplex Frequency Power Frequency Separation Band Sensitivity Spacing Channels (MHz) (dBm) (MHz) (kHz) (dBm) (MHz) GSM 850 824-849 869-894 -107 GSM 900 890-915... - Page 14 IPGSM-DP Commercial Fire Communicator – Installation and Setup Guide NOTES – 12 –...
-
Page 15: Wiring Diagram
All circuits are power limited except the backup battery which is non-power limited. Non-power limited wiring must be separated from the power limited wiring by at least 1/4 inch. If desired, use a Honeywell 955WH Tamper Switch with the 28-2 bracket. ... - Page 16 For the latest documentation and online support information, please go to: http://www.security.honeywell.com/hsc/resources/MyWebTech/ WARRANTY For the latest warranty information, please go to: http://www.security.honeywell.com/hsc/resources/wa/ 2 Corporate Center Drive, Suite 100, P.O. Box 9040, Melville, NY 11747 Ê800-08074AŠ Copyright 2011 Honeywell International Inc. www.honeywell.com/security 800-08074 1/11 Rev. A...