Table of Contents
Advertisement
The purpose of Safety Concerns is to ensure users' safety and to prevent property losses.
Please read this document carefully for proper use.
© 2013 SAMSUNG ELECTRONICS Co., Ltd. All rights reserved.
Notice: This product is for one way cable only,
not interactive cable.
Part No: GL68-00568A(Ed.01)
USER MANUAL
SMART Media Player (GX-SM530CF)
Advertisement
Table of Contents

Related Manuals for Samsung GX-SM530CF


Summary of Contents for Samsung GX-SM530CF
- Page 1 The purpose of Safety Concerns is to ensure users’ safety and to prevent property losses. Please read this document carefully for proper use. Notice: This product is for one way cable only, not interactive cable. © 2013 SAMSUNG ELECTRONICS Co., Ltd. All rights reserved. Part No: GL68-00568A(Ed.01)
- Page 2 To find the nearest recycling location, go to our website: www.samsung.com/recyclingdirect or call, (877) 278 - 0799 Contact SAMSUNG USA If you have any questions or comments relating to Samsung products, please contact the SAMSUNG customer care center. CALL: 1-800-SAMSUNG (726-7864) OR VISIT US ONLINE AT: http://www.samsung.com...
- Page 4 afety Information Warning IMPORTANT NOTE TO REDUCE THE RISK OF ELECTRIC SHOCK, DO NOT REMOVE THE COVER If the power plug on this unit does not fit the wall outlets in your house, have the (OR BACK). NO USER-SERVICEABLE PARTS ARE INSIDE. REFER SERVICING TO wall outlets replaced with outlets that fit by a licensed electrician.
-
Page 5: Important Safety Instructions
safety Information FCC NOTES (for U.S.A) PrECaUTiOnS 14. Refer all servicing to qualified service personnel. Servicing is required when the apparatus has been damaged in any way, such as when the power- supply cord or plug is damaged, liquid has been spilled or objects have fallen Important Safety Instructions into the apparatus, the apparatus has been exposed to rain or moisture, does not operate normally, or has been dropped. - Page 6 • Do not use or store the Smart Media Player in hot, cold, damp or dusty places. without the prior written permission of SAMSUNG ELECTRONICS AMERICA. • Do not block the ventilation holes of the Smart Media Player. Leave a space of at least 2 inches (5cm) around all sides.
-
Page 7: Table Of Contents
Accessories ........The Samsung Link Screen ...... -
Page 8: Media File Format Compatibility
Started The GX-SM530CF is an Hybrid Type digital HD Smart Media Player that supports MSO Cable TV and OTT Service, Multi-Media File Playback, Samsung Apps, and Samsung Link. MEdia FilE FOrMaT COMPaTiBiliTy Contents your product can play Contents Media... - Page 9 Getting Started Media File Format Compatibility Supported Formats Video File Support • Limitations - Normal playback is not guaranteed if the file’s container information is wrong or the file itself is corrupted. - Files having a higher Bit rate/frame rate than indicated in the table on page 8 may stutter when played back. - The Seek (Jump) function is not available if the file’s index table is damaged.
-
Page 10: Getting Started
Getting Started Media File Format Compatibility • Supported DivX subtitle file formats - *.ttxt, *.smi, *.srt, *.sub, *.txt \ Some DivX, MKV and MP4 format files may not play, depending on their video resolution and frame rate. Frame rate Bit rate File Extension Container... - Page 11 Getting Started Media File Format Compatibility Supported Subtitle File Formats Name File Extension Name File Extension .ttxt MPEG-4 Timed text Xsub SAMI .smi SubStation Alpha SubRip .srt Advanced SubStation Alpha External .sub Internal SubViewer SubRip .sub or.txt Micro DVD MPEG-4 Timed text SubStation Alpha .ssa...
- Page 12 • During the playback or copying, do not disconnect a USB device. *.mpo 15360x8640 • SAMSUNG is not responsible for any data file damage or data loss. • Your product does not support NTFS file compression, NTFS sparse file, or NTFS file encryption.
-
Page 13: Accessories
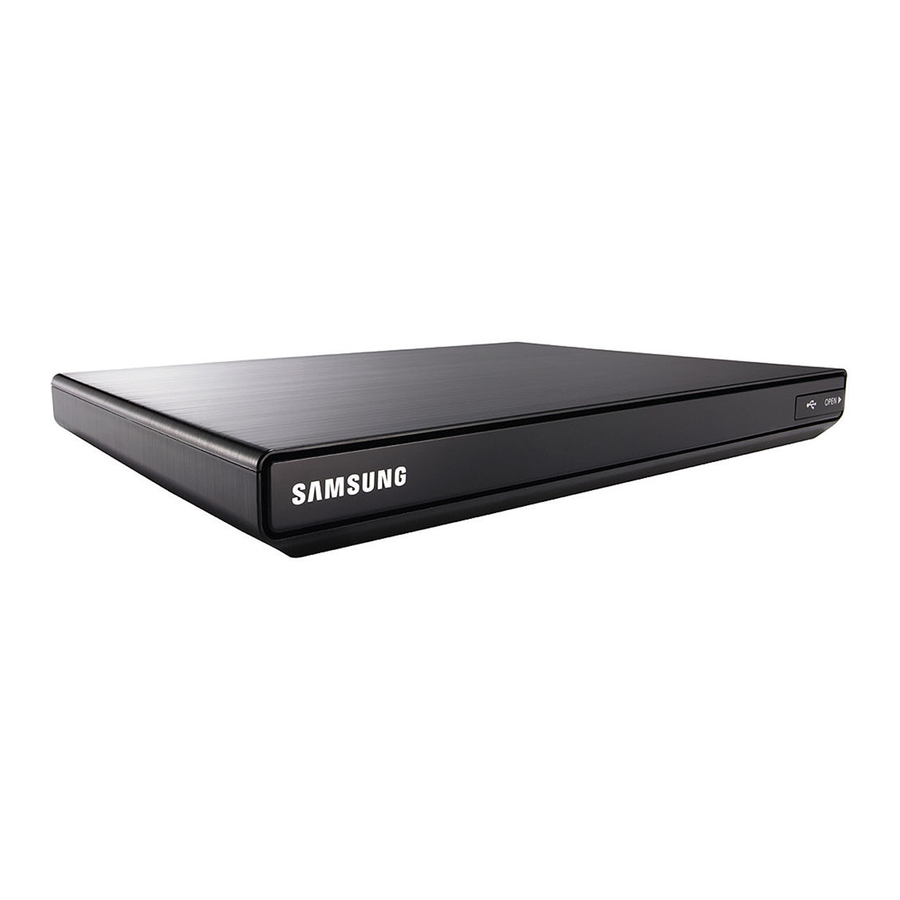
Batteries for Remote Remote Control Power Adapter User Manual Quick Start Guide Control (AAA Size) \ You can obtain cable accessories that are not supplied from your local Samsung dealer. FrOnT PanEl and rEar PanEl POWER USB 0.5A POWER LED CABLE IN... -
Page 14: Remote Control
Getting Started Remote Control rEMOTE COnTrOl Tour of the Remote Control Turn the product on and off. Turn the TV on and off. Press numeric buttons to operate options or to access channels directly. Tune to the previously viewed channel. Used to toggle between normal &... - Page 15 Getting Started Remote Control Installing batteries \ If the remote does not operate properly: - Check the polarity +/– of the batteries. - Check if the batteries are drained. - Check if the remote sensor is blocked by obstacles. - Check if there is any fluorescent lighting nearby.
- Page 16 Brand Code Brand Code Brand Code TV+01, +02, +03, +04, +05, +06, FORMENTI TV+57 NOBLEX TV+66 SHARP TV+36, +37, +38, +39, +48 SAMSUNG +07, +08, +09 FUJITSU TV+84 NOKIA TV+74 SIEMENS TV+71 AIWA TV+82 GRADIENTE TV+70 NORDMENDE TV+72, +73, +75...
-
Page 17: Connections
onnections inSTalling a CableCard Before inserting the CableCARD supplied by your Cable Service Provider, write down the CableCARD Serial Number (SN) and “MAC” address. When you contact your Cable Service provider to activate your cable service, they will ask for the CableCARD Serial number and possibly the MAC Address. To prevent the possibility of electrical damage, insert the CableCARD before you connect the power cord to the product. -
Page 18: Connecting To A Tv
Connections Connecting to a TV COnnECTing TO a TV POWER Audio Video POWER Connect the product to your TV using an HDMI cable. Turn on the product and TV. Press the input selector on your TV remote control until the signal from the product appears on the TV screen. \ Do not connect the power cord until you have made all the other connections. -
Page 19: Connecting To An Audio System
Connections Connecting to an Audio System COnnECTing TO an aUdiO SySTEM HIMI OUT HIMI IN POWER Audio HIMI IN Method 2 Method 1 POWER Audio / Video Connect the product to an audio system using one of the two methods illustrated above. Turn on the product, audio system, and TV. -
Page 20: Connecting To A Network Router
Broadband service \ Internet access to Samsung’s software update server may not be allowed, depending on the router you use or your ISP’s policy. For more information, contact your ISP (Internet Service Provider). \ DSL users, please use a router to make a network connection. - Page 21 \ To use the Samsung Link function with your PC, you must connect your PC to your network. \ Web Authentication based Internet services, such as Hotel on Office networks, are not supported during the Initial Installation.
-
Page 22: Connecting The Power
Connections Connecting the Power COnnECTing THE POWEr After connecting your Smart Media Player to your TV and audio system, connect the included power adaptor to the Smart Media Player, and then plug the power adaptor into a wall socket. When you plug in the power adapter for the first time, the Smart Media Player will turn on automatically and display the Initial Settings screen. -
Page 23: Settings
ettings THE SETUP PrOCEdUrE • The Home screen will not appear if you do not configure the initial settings. • The OSD (On Screen Display) of this product may change after you upgrade the software version. • The access steps may differ depending on the menu you selected. Turn on your TV after connecting the Smart Media Player. - Page 24 Settings The Setup Procedure On the Essential Details screen, If you have not installed a CableCARD Select Network type, and then and not connected a Tuning Adaptor, press the v button. Select your go to Step 16. If you have installed a Network type from the list, and CableCARD, but have not connected a then press the v button.
- Page 25 Settings The Setup Procedure Select Close, and then press the v button. The Connect RF Cable screen If your cable company provided a Tuning Adapter (SDV), and you appears. have not connected it, connect it If you have not installed a CableCARD and not connected a Tuning Adaptor, go to the Smart Media Player now.
- Page 26 Settings The Setup Procedure The Smart Media Player downloads Review and then agree to the your provider’s information. Terms and Conditions by pressing When it is done, the Provider the v button. Press the v Setup complete window appears. button again to continue.
-
Page 27: The Home Screen
Guide : View the program schedule, select programs to watch, and view information about future programs. Movies & TV Shows : Access and watch video on demand (VOD) provided by Samsung. Apps : Access various for pay or free-of-charge applications. -
Page 28: Accessing The Settings Screen
FUNCTION TV SOURCE Settings Accessing the Settings Screen aCCESSing THE SETTingS SCrEEn Select Settings on the Home screen, and then press v button. The Settings menu screen appears. To access the Settings menus, sub-menus, and options, please refer to the remote control illustration and the Settings Control Button table below. MUTE Remote Control LIVE... -
Page 29: Display
BD Wise (Samsung Products only) When you connect a Samsung product and a Samsung TV with BD Wise to each other via HDMI, and BD Wise is on in both the Smart Media Player and TV, the product outputs video at the video resolution and frame rate of the video content. - Page 30 Settings Display Resolution Set the output resolution of the HDMI video signal. The number indicates the number of lines of video per frame. The i and p indicate interlaced and progressive scan, respectively. The more lines, the higher quality. • BD Wise : Automatically sets the resolution to the resolution of the video content if you have connected the Smart Media Player via HDMI to a TV with the BD Wise feature.
-
Page 31: Dtv Smart Resolution
Settings Display DTV Smart Resolution Use this function if you are using a TV/Projector/AV Receiver which incorporates a high-quality video processor and you want the Smart Media Player to transmit video in its original resolution to the processor. • Auto : The Smart Media Player outputs unprocessed video in its original resolution. • Off : The Smart Media Player outputs at the resolution you have selected in the Resolution option. -
Page 32: Hdmi Color Format
Settings Display HDMI Color Format Lets you set the color space format for the HDMI output so that it matches the capabilities of the connected device. • Auto : Automatically set the optimum format supported by the connected display device. • YCbCr (4:4:4) : Recommended when connected to a display that supports YCbCr (4:4:4). -
Page 33: Audio
Settings Audio aUdiO Digital Output Lets you select the digital audio output format that is suitable for your TV or AV Receiver. • PCM : PCM is the default setting and offers the best compatibility with most TV and AV Receivers. The Smart Media Player always outputs sound in the PCM format. - Page 34 Settings Audio Dynamic Range Control Lets you adjust the volume so that the difference between very loud and very quiet sound is reduced. This function works only when the Smart Media Player outputs Dolby Digital or Dolby Digital Plus sound in PCM format. • RF Mode : Compresses the dynamic range of the sound so that it is optimized for TV speakers.
-
Page 35: Broadcasting
Settings Broadcasting BrOadCaSTing Configure, manage, and access channels, create and edit favorites, block channels inappropriate for children. Auto Tuning Automatically scans and indexes all channels received through the Smart Media Player's cable input connector. The channels in the index of channels then appear when you press the CH button on your remote. - Page 36 Settings Broadcasting Change Channels Select a channel to jump to it right away. To scroll through the list of channels one at a time, use the ▲▼ buttons. To quickly scroll through the list a page at a time, use the channel up/down buttons.
- Page 37 Settings Broadcasting Program Rating Lock The Program Rating Lock feature lets you block programs based on their ratings. This is useful for controlling what children watch on TV. Program Rating Lock does not block programs originating from external sources, such as DVD players or USB files. Every time you access the Program Rating Lock feature, you must enter a PIN.
- Page 38 Settings Broadcasting Blocking Based on Movie Rating (MPAA) Block movies based on their MPAA rating. This applies to all material with supplied ratings in the USA. From the MPAA: “The Motion Picture Association of America (MPAA) has implemented a rating system that provides parents or guardians with advanced information on which films are appropriate for children.”...
-
Page 39: Network
Settings Network nETWOrk When you connect this product to a network, you can use network based applications and functions, and upgrade the Smart Media Player's software through the network connection. For more information about accessing and using Internet services, see the Network Services chapter of this manual on pages 74~90. Instructions for configuring the network connection start below. - Page 40 Settings Network ◈ Wired - Manual If you have a static IP address or the Automatic procedure does not work, you'll need to set the Network Settings parameters manually. Follow Steps 1 and 2 in Wired Network, and then follow these steps: Select Network Status.
- Page 41 Settings Network ◈ Wireless - Automatic In the Home screen, select Settings, and then press the v button. Select Network, and then press the v button. Select Network Settings, and then press the v button. Select Wireless in the Network Settings screen, and then press the v button. The Smart Media Player searches for and then displays a list of the available networks.
- Page 42 Settings Network ◈ Wireless - Manual If you have a static IP address or the Automatic procedure does not work, you'll need to set the Network Settings parameters manually. Follow the directions in Wireless - Automatic through Step 5. The Smart Media Player searches for a network, and then displays the connection failed message.
- Page 43 Settings Network ◈ WPS(PBC) In the Home screen, select Settings, and then press the v button. Select Network, and then press the v button. Select Network Settings, and then press the v button. Select Wireless in the Network Settings screen, and then press the v button. Use the ▼▶...
- Page 44 The Wi-Fi Direct function allows you to connect Wi-Fi Direct devices to the Smart Media Player and each other using a peer-to-peer network, without a wireless router. \ Some Wi-Fi Direct devices may not support the Samsung Link function if connected via Wi-Fi Direct. If this is the case, we recommend changing the network connection method between the devices.
-
Page 45: Device Name
Settings Network Through the Smart Media Player Using PBC Select the Wi-Fi Direct device you want to connect to this product, and then press the v button. The PBC/PIN pop up appears. Select PBC, and then press the v button. The PBC pop-up appears. Press the PBC button on the Wi-Fi Direct device within 2 minutes. -
Page 46: Smart Features
Reset Smart Hub Reset the App services and Samsung account settings stored on your device. Smart Hub Reset removes all Samsung accounts and everything linked to them, including apps, from your device. You must enter your password (PIN) to access this option. -
Page 47: System
Settings System SySTEM Setup Lets you re-run the Initial Settings procedure. See the Quick Start Guide for details. Quick Start Lets you set the Smart Media Player to turn on quickly by decreasing the boot time. • With Quick Start On: When you turn off the Smart Media Player, it will go into Active Standby mode. In this state, the product starts up faster. - Page 48 Settings System Samsung Link Settings - Content Sharing Lets you control which devices on your network, such as smart phones and tablets, can share content with your product. Keyboard Settings Lets you select a wireless USB keyboard connected to the Smart Media Player, and then configure it for use.
- Page 49 Settings System Clock Sets the current date and time. Auto When you set Clock Mode to Auto, your unit automatically downloads the correct time from a digital channel. To enable this option, the Smart Media Player must be connected to a cable system through its Cable In jack and must receive digital broadcasts. • Time Zone: Choose your time zone.
-
Page 50: Auto Power Off
Settings System Auto Power Off Setting Auto Power Off option to On saves energy by turning off the Smart Media Player automatically if no user operation is detected for 4 hours. \ If the Quick Start option is Off, the product go into Deep Sleep mode when it is turned off by this function. \ If the Quick Start option is On, the product will go into Active Standby mode when it is turned off by this function. - Page 51 Adjust the transparency of the menu box. You can select Low, Medium, or High. Anynet+ (HDMI-CEC) Anynet+ is a convenient function that offers linked operations with other Samsung products that have the Anynet+ feature. To operate this function, connect this product to an Anynet+ Samsung TV using an HDMI cable.
-
Page 52: Support
\ The update is complete when the Smart Media Player turns off, and then turns on again by itself. \ SAMSUNG ELECTRONICS takes no legal responsibility for Smart Media Player malfunction caused by an unstable Internet connection or consumer negligence during a software Update. - Page 53 If you do not select OK or Cancel in one minute, the Smart Media Player stores the new update software. You can update the software later using Auto Update. If you select Cancel, the Smart Media Player cancels the update. \ When the system update is done, check the software details in the Product Information section of the Contact Samsung screen.
- Page 54 Select OK. The Smart Media Player upgrades the software, turns off, and then turns on automatically. \ When the system update is done, check the software details in the Product Information section of the Contact Samsung screen. \ Do not turn off the Smart Media Player during the software Update. It may cause the product to malfunction.
- Page 55 Settings Support Contact Samsung Displays support contact information and important product information such as model number, serial number, software version, and MAC address. Reset Resets all settings to their default settings except for the network and App service settings. The default PIN is 0000.
-
Page 56: Dtv Functions
TV Functions WaTCHing TV CHannElS After Auto Programming is completed, you can watch your TV channels. Using the channel option Using the remote control buttons To use these buttons, see the table on the right. NUMBER buttons : To move to a TV channel directly, press the number buttons that correspond to the desired TV channel. -
Page 57: Editing Channels
DTV Functions Editing Channels EdiTing CHannElS Channel List Press the MENU button to bring up the Home screen. In the Home screen, select Settings, and then press the v button. Select Broadcasting, and then press the v button. Select Channel List, and then press the v button. Press the ◀... - Page 58 DTV Functions Editing Channels Remove Channels On the Edit Channels screen, remove registered channels from the channel index or remove channels from a channel category list. Removing channels from the Recently Viewed or Mostly Viewed categories clears the channels from that category only and does not remove them from the index. When you remove a channel from the channel index, it will no longer appear when you scroll through the channels using the CH button on your remote.
- Page 59 DTV Functions Editing Channels Using the Go To Function The Go To function lets you scroll the Edit Channel list to the channel you want by entering the channel number. To use the Go To function, follow these steps: Using the number pad on your remote, enter the channel number of the channel you want to go to, and then press the v button.
- Page 60 DTV Functions Editing Channels Edit Favorites You can designate frequently watched channels as favorites. Favorite channels are identified in Edit Channel and the channel list screens with the symbol. You can create up to 5 favorite channel lists. You can also rename and edit favorite channel lists. To display the Edit Favorites screen, press the MENU button on your remote.
- Page 61 DTV Functions Editing Channels Remove Favorite Channels Remove channels from a favorite channels list. In the Edit Favorites screen, select the Change Fav. button on the left of the screen, and then press the v button. A favorite channels list appears on the right side of the screen. Select the Change Fav.
- Page 62 DTV Functions Editing Channels Rename a Favorite Channel List Rename an existing favorite channels list. On the Favorites screen, move the highlight to a favorite in a Favorite list on the right of the screen. Select the TOOLS button on your remote, and then press the v button. In the TOOLS menu, select Rename Favorites, and then press the v button.
-
Page 63: Viewing The Guide Screen
DTV Functions Viewing the Guide Screen ViEWing THE gUidE SCrEEn On the Guide screen, you can view each digital channel's programming schedule. The Guide screen will be available to you if you have inserted a CableCARD into your product and have connected the Smart Media Player to your network so that it has access to the Internet. -
Page 64: Media Play
THE SaMSUng link SCrEEn For all media, the Samsung Link Main screen or one of its sub screens is your primary means of accessing and playing contents saved on a variety of devices, either connected directly or using your network. - Page 65 Media Play Playing Files on a USB Device Method 2 Turn the Smart Media Player on. Connect the USB device to the USB port on the front panel of the Smart Media Player. Press the MENU button to go to Home screen. Select Photos, Videos & Music on the Home screen, and then press the v button.
-
Page 66: Using The Samsung Link Network Function
Using the Samsung Link Network Function USing THE SaMSUng link nETWOrk FUnCTiOn Samsung Link lets you play Videos, Photos, or Music located on your PC or your Samsung Link compatible device through the Smart Media Player using a wireless or wired network connection. - Page 67 Select the type of content you want to play - Photos, Videos, Music, or All Content - and then press the v button. In the list of Samsung Link connected devices that appears, select your PC or other Samsung Link compatible device, and then press the v button. A screen listing the available files appears.
-
Page 68: Controlling Video Playback
Media Play Controlling Video Playback COnTrOlling VidEO PlayBaCk You can control the playback of video content located on a USB drive, mobile device or PC. Depending on the contents, some of the functions described in this manual may not be available. Buttons on the Remote Control used for Video Playback Playback related buttons The Smart Media Player does not play sound in Search, Slow or Step mode. - Page 69 Media Play Controlling Video Playback Using the Tools Menu During playback or in pause mode, press the TOOLS button. Subtitle Select to set the desired subtitle options. This option may not Play from the Select to return to the beginning of the movie, and then press Settings be available depending on your region.
- Page 70 Media Play Controlling Video Playback Using the View & Options Menus Using the View Menu On a file screen containing video files, select View, and then press the v button. Displays all the folders with videos by date. If you select a folder, and then Date press the v button, displays all the videos in the folder by date.
-
Page 71: Controlling Music Playback
Media Play Controlling Music Playback COnTrOlling MUSiC PlayBaCk You can control the playback of music content located on a USB drive, mobile device or PC. Depending on the contents, some of the functions described in this manual may not be available. Buttons on the screen used for Music Playback Pause or resume playback. - Page 72 Media Play Controlling Music Playback Using the Options Menu A file screen containing music files, select Options, and then press the v button. Play Selected lets you create a playlist by selecting specific files to play. It works Play Selected essentially the same way for all media.
-
Page 73: Creating A Playlist
Media Play Controlling Music Playback Creating a Playlist With the Playback screen displayed, select Options, and then press the v button. The Options menu appears. Use the ▲▼ buttons to select Play Selected, and then press the v button. The Selection Play screen appears. Use the ▲▼... -
Page 74: Playing Photo Contents
Media Play Playing Photo Contents Playing PHOTO COnTEnTS You can play photo contents located on a USB, mobile device or PC. Using the Tools Menu During playback, press the TOOLS button. Previous Select to move to the previous picture. Next Select to move to the next picture. - Page 75 Media Play Playing Photo Contents Using the View & Options Menus Using the View Menu On a file screen containing photo files, select View, and then press the v button. Title Displays all the the photo files on the media or storage device by title. Groups all the the photo files on the media or storage device by Date.
-
Page 76: Network Services
- Configure the network settings. (See pages 37~43) lOgging in TO yOUr SaMSUng aCCOUnT Before you access Movies & TV Shows or Apps, we suggest you log in to your Samsung account. To log in to your Samsung account, follow these steps: With the Samsung Apps displayed, press the RED (A) button. -
Page 77: Before Using Apps
Network Services Before Using Apps BEFOrE USing aPPS If you haven’t set up Smart Hub, when you use Apps for the first time, the Smart Media Player will ask you to perform the Smart Hub set up procedure. On the Home screen, select Apps, and then press the v button. On the Smart Hub Terms &... -
Page 78: Using Apps
If it is a for pay app, select Buy, press the v button, and then follow the instructions on the screen. \ To buy an app, you must be logged into your Samsung account and have a credit card registered to the account. Press the RED (A) button on your remote to log in. - Page 79 Network Services Using Apps After the app has downloaded, select Run, and then press the v button to run the app now. To run the app later, press the RETURN button. In either case, the icon for the app will appear on the Apps screen. To see additional apps, use the ▲▼◀▶...
-
Page 80: Sorting The Apps
Network Services Using Apps Sorting the Apps To sort the apps on the More Apps screen, follow these steps: On the Home screen, select Apps, and then press the v button. On the Apps screen, use the ▼ button to move to the More Apps hotspot at the bottom of the page, and then press the v button. On the More Apps screen, use the ▲▶... - Page 81 Network Services Using Apps Edit My Apps Edit My Apps lets you add apps to and delete apps from My Apps. It also lets you change the position of an app in My Apps. ◈ Add an App to My Apps On the More Apps screen, use the ▲▶...
- Page 82 Network Services Using Apps ◈ Move an App in My Apps On the More Apps screen, use the ▲▶ buttons to go to Options at the top of the screen, and then press the v button. Select Edit My Apps, and then press the v button. The Edit My Apps screen appears. Select the app you want to move in My Apps, press the v button, and then press the ▲▼◀▶...
- Page 83 Network Services Using Apps Move to Folder Move to Folder lets you move apps to the folder of your choice. On the More Apps screen, use the ▲▶ buttons to go to Options at the top of the screen, and then press the v button. Select Move to Folder, and then press the v button.
- Page 84 Network Services Using Apps Delete Delete lets you delete apps and folders from the My Apps screen. If there are apps in a folder, both the folder and the apps are deleted together. Delete removes apps permanently. If you decide you want to use an app you deleted, you will need to download it again. On the More Apps screen, use the ▲▶...
- Page 85 Network Services Using Apps Update Apps Update Apps automatically searches the Internet for updated versions of the apps you have downloaded and updates them if it finds newer versions. On the More Apps screen, use the ▲▶ buttons to go to Options at the top of the screen, and then press the v button. Select Update Apps, and then press the v button.
-
Page 86: Screen Mirroring
Network Services Screen Mirroring SCrEEn MirrOring The Screen Mirroring function lets you view the screen of your smart phone or android tablet on the TV you have connected to the Smart Media Player. Press the MIRROR button on the remote. The Screen Mirroring pop-up appears. Launch AllShare Cast or the Screen Mirroring app on your device. -
Page 87: Using The Web Browser
Network Services Using the Web Browser USing THE WEB BrOWSEr You can access the Internet using the Web Browser application. Select Web Browser on the Apps screen, and then press the v button. \ The Web Browser is not compatible with Java applications. \ If you attempt to download a file, and the file cannot be saved, an error message will appear. - Page 88 The Control Panel, which runs across the top of the screen, has a series of icons which start a number of useful functions. The icons are described below, starting with the icon on the far left of the screen. • : Moves to the previous page. http://www.samsung.com 100% • : Moves to the next web page.
- Page 89 , the or access a data or text entry field, and then press the v button, the keyboard pop-up appears. http://www.samsung.com To use the keyboard pop-up with your remote, follow these steps: Use the ▲▼◀▶ buttons on your remote to move the highlight to a letter or number of your choice.
-
Page 90: Using The Setting Menu
The Setting menu contains functions that control how the Browser operates and Browser security functions. To open the Setting menu, highlight the icon in the Control Panel, and then press the v button. To select an option in the setting menu, highlight the option, and then press the v button. http://www.samsung.com 100% Enable Grabbing... - Page 91 Network Services Using the Web Browser Enable or disable the Privacy mode. When the Privacy mode is enabled, the browser does not retain the URLs of sites you visit. If you want to enable Privacy mode, select Private Browsing On/Off If the Privacy mode is running, the “Stop” icon appears in front of the URL at the top of the screen. To disable Privacy mode, select it again when Privacy mode is enabled.
-
Page 92: Linking Your Internet Service Accounts To The Smart Media Player
To create a service account link, follow these steps: On the Samsugn Apps screen, press the RED (A) button on your remote to log in to your Samsung Account. After you have logged in, press the RED (A) button on your remote again. -
Page 93: Appendix
Depending on your TV, certain HDMI output resolutions may not work. Please refer to the user manual of your TV. y This function is not available if the HDMI cable does not support CEC. y If your Samsung TV has an Anynet+ logo, then it supports the Anynet+ function. Turning on/off the Closed Caption y If you press the CC (Closed Caption) button on the remote control, the caption bar appears. -
Page 94: Troubleshooting
The screen ratio cannot be changed. ▪ If the problem still cannot be solved, please contact your nearest Samsung ▪ This is not a problem with the Smart Media Player. authorized service center. - Page 95 ▪ Samsung Link only shows Video, Photo, and Music files. Other types of files An engineer is called out to your home at your request and there is no are not displayed. defect in the Smart Media Player.
-
Page 96: Specifications
Appendix Specifications SPECiFiCaTiOnS General ▪ Net Weight: 1.5 lbs. (0.7 Kg) ▪ USB 2.0 Host x2 (0.5A) ▪ Dimensions: 9.17 (W) x .98 (H) x 6.8 (D) in. Power (233 (W) x 25 (H) x 173 (D) mm) ▪ Power Consumption ▪... -
Page 97: Network Service Disclaimer
PARTY, EVEN IF ADVISED OF THE POSSIBILITY OF SUCH DAMAGES. Third party services may be terminated or interrupted at any time, and Samsung makes no representation or warranty that any content or service will remain available for any period of time. Content and services are transmitted by third parties by means of networks and transmission facilities over which Samsung has no control. - Page 98 - In the case of using open source software, Open Source Licences are available on the Smart Media Player menu. To access the Open Source Licence, select Settings Support Contact Samsung on the Home screen. When the message, 'Press Red Key to see Open Source Licence' appears, press the Red (A) button.
-
Page 100: Samsung Brand Products
WarranTy TO Original PUrCHaSEr Antenna or Signal related external problems, such as broadcasting signal not available due to low signal power (not a problem of the Samsung box) and noise added signal from exterior. SAMSUNG does not warrant uninterrupted or error-free operation of This SAMSUNG brand product, as supplied and distributed by SAMSUNG and delivered the product.