Sony Z1 User Manual
Hide thumbs
Also See for Z1:
- User manual (141 pages) ,
- Working instructions (82 pages) ,
- Troubleshooting manual (68 pages)
Table of Contents
Advertisement
Quick Links
- 1 Sony Z1 User's Guide and Important Information Contents and Contacts
- 2 Power; Battery Charging; Switching On/Off
- 3 Playback; Recording Formats- Hdv, Dvcam and DV Sp
- 4 Recording Formats; Aspect Ratio; Using the Menu
- 5 Camera Setup, Monitoring, Auto Levels
- Download this manual
See also:
Setup Manual
Contents and contacts.......................................................................................... 1
Dos and Don'ts................................................................................................ 2
Visual Guide to the Camera.............................................................................. 3,4,5
Power; Battery charging; Switching on/off................................................................ 6
Tapes; Recording a shot...................................................................................... 7
Playback; Recording Formats- HDV, DVCam and DV SP.......................................... 8,9
Recording Formats; Aspect Ratio; Using the Menu..................................................... 9
Using a Tripod.............................................................................................. 10,11
Manual Controls- Focusing and Zooming; Picture Controls........................................... 12
- Iris, Gain & Shutter Speed............................................................. 13
- White balance........................................................................ 13,14
Timecode........................................................................................................14
Sound Recording- Internal, External, Sennheiser 416....................................................15
- Senn 416, Senn K6, Boom operating, Radio mics............................... 16
- Radio mics, Lip mic, Camera setup................................................. 17
- Camera setup, Monitoring, Auto levels.......................................... 18
- Auto levels, Sound Devices 302 mixer........................................ 18,19
Shooting language basics; Types of shot and how to do them........................................ 20
Shooting for the Edit........................................................................................ 22
The Rule of Thirds (Framing).............................................................................. 23
Broadcast Lab staff contact details..........................................................................23
BroadcastLab@bathspa.ac.uk
6334 for Gatehouse office: Naomi Smyth or Richard Wood
n.smyth@bathspa.ac.uk;
5420 for Ashton Begent's kit stores
a.begent@bathspa.ac.uk
6267 for Karen Cooper's admin centre; keys for Broadcast Lab and other queries
k.cooper@bathspa.ac.uk
Please email with comments, suggestions and congratulations.
r.wood@bathspa.ac.uk
This guide was produced by Naomi Smyth.
1
Advertisement
Table of Contents

Related Manuals for Sony Z1


Summary of Contents for Sony Z1
-
Page 1: Table Of Contents
Sony Z1 User’s Guide and Important information Contents and contacts……………………………………………………………………………... 1 Dos and Don’ts…………………………………………………………………………………… 2 Visual Guide to the Camera…………………………………………………………………… 3,4,5 Power; Battery charging; Switching on/off………………………………………………………. 6 Tapes; Recording a shot………………………………………………………………………….. 7 Playback; Recording Formats- HDV, DVCam and DV SP…………………………………… 8,9 Recording Formats;... -
Page 2: Dos And Don'ts
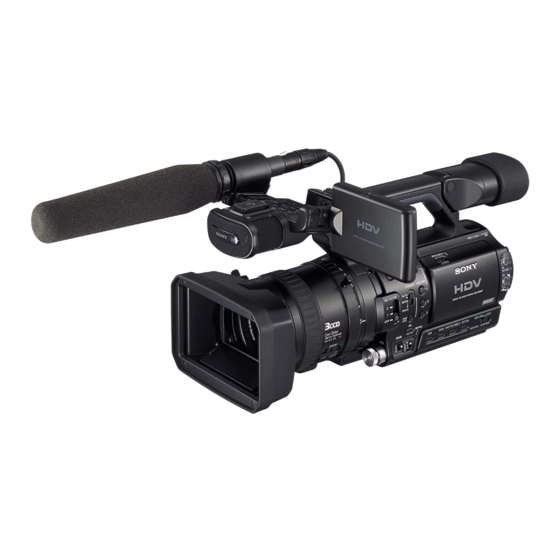
:Make sure that anyone you pass it to has a firm grip on it before you let go. :Remove the Z1 from the tripod and put it in the case before carrying it any distance. :Change tapes quickly and efficiently, making sure nothing gets into the tape slot. - Page 3 Guide to the Camera Lens hood Internal stereo microphone Lens cover release tab Accessory shoe LCD screen Manual focusing ring Ring/ lever External mic zoom switch holder Zoom ring Manual Iris dial Secondary Zoom lever + record button Neutral density filter switch 6 Assign Zoom response switch...
- Page 4 Guide to Camera Lens hood release screw External mic holder release screw S video, 2 XLR USB + microphone/ AV outputs line inputs under flap Visible security mark Primary zoom lever Velcro hand strap Expanded focus button Headphone and servo remote sockets under flap Record button Camera/ VCR/ Off...
- Page 5 LCD viewfinder with rubber eyepiece External mic holder Mic holder release screw Record light (also flashes when battery or tape is low) Battery release button Zebra switch- LCD will display overexposed areas with stripes Peaking switch- LCD will display faint outlines around the parts of the Auto/Man picture that are in focus audio level...
-
Page 6: Power; Battery Charging; Switching On/Off
SUPPLY. Battery charging: The Z1 takes ‘L’ size batteries. The multi-purpose charger is designed so that ‘L’ batteries slide on in one direction and ‘M’ size batteries in another. Slide the battery from the middle to the left onto the ‘L’ terminals on the charger. You should feel it click into place. -
Page 7: Tapes; Recording A Shot
RECORDING A SHOT I would encourage anyone who wants to use the Z1 to become familiar with its manual controls. I will go through those later in this guide. However, to start with, let’s look at how to record a shot and play it back, letting the camera take care of the other functions. -
Page 8: Playback; Recording Formats- Hdv, Dvcam And Dv Sp
PLAYING BACK YOUR SHOT First of all, it is best not to play footage back too often on the Z1. Playing back, rewinding and fast forwarding wears out the tape heads- the bit of the camera that records the footage for you. So it is very bad for future footage quality to use your camera as a VCR or for importing footage. -
Page 9: Recording Formats; Aspect Ratio; Using The Menu
Also, if you are mixing footage from a Z1 and a standard DV camera, the standard camera will not be able to record in widescreen. Therefore you should set the Z1 to record in 4:3 so that you do not lose any footage later by having to crop the image. -
Page 10: Using A Tripod
Pressing ‘Menu’ again exits the menu. USING A TRIPOD The tripod you are likely to use with the Z1 is the Manfrotto 501/525. It’s a very good tripod and easy to use. It’s a good idea to get your camera onto a tripod early on, unless you are shooting handheld. Even then it can be useful. - Page 11 Then slide the base plate back on. If you can’t get the red catch to ‘click’ as it slides on, or the base plate sticks, try putting it on another way. Have patience with this part, as it is not always easy to start with.
-
Page 12: Manual Controls- Focusing And Zooming; Picture Controls
MANUAL CONTROLS Focusing and zooming- Auto/manual switch- within manual mode, this switch can be pushed down to set focus to Infinity- use this if filming something on the horizon or a general wide view shot with nothing in the foreground. When in manual mode, you can control the focus by eye using the focusing ring However, it can be hard to tell if your subject is... -
Page 13: Iris, Gain & Shutter Speed
Picture controls- this row of buttons switches between auto and manual modes for each function. The switch can be set to ‘auto lock’, which means ALL functions are automatic; To the central position which enables individual adjustment of functions; To ‘hold’, which will freeze the current settings until released. When a function is under manual control, the settings will appear on the LCD screen or viewfinder window. -
Page 14: White Balance
-The shutter speeds on the Z1 will go up into the thousands if you want. -Very fast shutter speeds can be very useful for sports documentaries or any situation where you need to film something that moves at high speed and possibly slow it down later. -
Page 15: Sound Recording- Internal, External, Sennheiser 416
‘frames’ will go up to 24 and then to zero. -In NTSC (USA TV standard) there are roughly 30 frames per second. -The tapes the Z1 uses should record an hour at the most- though in practice sometimes they run for up to 63 mins. -
Page 16: Senn 416, Senn K6, Boom Operating, Radio Mics
If you are only using one mic, plug it into the top port (Input 1). Only use Input 2 when Input 1 is already in use. Make sure the XLR cables are pushed in firmly- it’s not always easy to tell so give it a controlled push and make sure it’s in as far as it can go. -
Page 17: Radio Mics, Lip Mic, Camera Setup
The boom operator needs to hold the mic as close as possible to the desired sound without getting the mic in shot. This can be difficult and tiring, so allow time for a new boom op to practice and get used to it. You also need to allow time to get mic positioning just right. -
Page 18: Camera Setup, Monitoring, Auto Levels
There are various other controls for the mic inputs, like the Limiter (best left on) and Wind sens (as low as possible if shooting outside). It’s worth trying out what difference it makes to change the settings, but only if you have time to absorb the information. Just before a vital shot is not the time! Monitoring and levels control You can monitor each track through each side of the headphones, but also by looking at the levels. - Page 19 DYN= Dynamic: For mics that do no require power from the mixer T= For T-powered mics only. These are particular types of 12v mics and we don’t have any as yet so don’t worry. Setting up the Camera Go into the menu and the Audio submenu. Make sure the camera input levels are set to ‘Line’...
-
Page 20: Shooting Language Basics; Types Of Shot And How To Do Them
Shooting language Basics The starter session is to teach you the basics of operating the camera and to cover some health and safety stuff. You really learn how to use the camera when you take it out and start trying to shoot a drama or documentary. - Page 21 CU- Close-up. eg. Someone’s head filling the frame BCU- Big Close-up. eg. Someone’s face filling the frame ECU- Extreme Close-up. eg. Someone’s eyes or mouth filling the frame. Basic Camera movements and how to do them: Pan- Side to side horizontal camera movement from a fixed point. How to: Fix the camera to a tripod, loosen the horizontal axis as much as you need and move the pan handle smoothly from side to side.
-
Page 22: Shooting For The Edit
the last frame and which way they were facing. Having them come from a different direction can be confusing and seem false. If two or more characters are having a conversation, think about what side of the • conversation you want to shoot from. It’s best to decide and stick with it. If you change sides mid-scene the characters can seem to switch places in the frame, which can be very confusing. -
Page 23: The Rule Of Thirds (Framing)
This is called ‘the rule of thirds’, and has been used as a standard of visual beauty in art for centuries. Many of the world’s most famous paintings are based on this rule. See below for a more detailed demonstration of the rule of thirds. The Rule of Thirds ( http://www.hippasus.com/resources/viscomp/RuleThirds.html) For the rule of thirds, imaginary lines are drawn dividing the image into thirds. - Page 24 image a image b In image a, the subway shot, the most important person is the woman in the third on the left of the image. She could be the main character of a video, or she could be about to do something important that will influence the story.