
Related Manuals for Kenmore HE4 Gas dryer 110.9586


Summary of Contents for Kenmore HE4 Gas dryer 110.9586
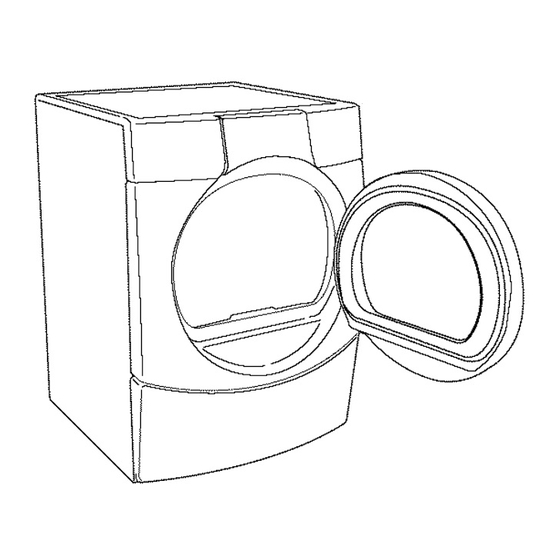
- Page 1 ® Gas Dryer Secadora a Gas Models/Modelos 110.9586=_, 9587_ #: = color number/nemero de color iiiiii!Jiiiiiiiii 8562130A Sears Roebuck and Co., Hoffman Estates, IL 60179 U.S.A. www.sears.com...
-
Page 2: Table Of Contents
WARRANTY ..................Congratulations on making a smart purchase. Your new PEDESTAL OPTION WARRANTY ..........Kenmore ®product is designed and manufactured for years of dependable operation. But like all products, it may require DRYER SAFETY ................preventive maintenance or repair from time to time. That's when INSTALLATION INSTRUCTIONS .......... -
Page 3: Warranty
WARRANTY PEDESTAL OPTION WARRANTY FULL ONE-YEAR WARRANTY ON MECHANICAL ELECTRICAL PARTS Full One-Year Warranty on Mechanical Parts For one year from the date of purchase, when this dryer is installed and operated according to the instructions provided in For one year from the date of purchase, supplier will repair or this Use and Care Guide, Sears will repair this dryer, free of replace any of its mechanical parts if defective in material or charge, if defective in materials or workmanship. -
Page 4: Dryer Safety
DRYER SAFETY Your safety and the safety of others are very important. We have provided many important safety messages in this manual and on your appliance. Always read and obey all safety messages. This is the safety alert symbol. This symbol alerts you to potential hazards that can kill or hurt you and others. All safety messages will follow the safety alert symbol and either the word "DANGER"... - Page 5 iMPORTANT SAFETY iNSTRUCTiONS WARNUNG: To reduce the risk of fire, electric shock, or injury to persons when using the dryer, follow basic precautions, including the following: Read all instructions before using the dryer. Do not repair or replace any part of the dryer or attempt any servicing unless specifically recommended in this Do not place items exposed to cooking oils in your dryer.
-
Page 6: Installation Instructions
INSTALLATION INSTRUCTIONS Gather the required tools and parts before starting installation. Are you placing the dryer on a pedestal? You can purchase a Read and follow the safety instructions provided with any tools pedestal separately for this dryer. This pedestal will add about listed here. - Page 7 Alevel floor w itha maximum s lope of1"(2.5 cm) u nder entire Custom undercounter installation - Dryer only dryer. (Ifslope isgreater than1"[2.5cm], i nstall Extended Dryer Feet K it,Part N o.279810.) Clothes m ay nottumble 0" properly andautomatic sensor cycles m ay notoperate correctly ifdryer i s notlevel.
- Page 8 Electrical Shock Hazard Explosion Hazard Plug intoa grounded Use a new AGA or CSA approved gas supply line. 3 prong outlet. _nstaH a shut-off valve. Do not remove ground prong. Securely tighten al gas connections. Do not use an adapter. ff connected to LP, have a qualified person make sure...
- Page 9 • Must i nclude a shutoff valve: Burner input requirements Anindividual shutoff valve must b einstalled within 6feet Elevations up to 10,000 ft (3,048 m): (1.8 m)ofthedryer i naccordance withtheNational Fuel Gas • The design of this dryer is certified by CSA International for Code, ANSI Z 223.1.
- Page 10 Use clamps to seal all joints. Exhaust vent must not be Optional exhaust installations connected or secured with screws or other fastening devices This dryer can be converted to exhaust out the right side, left which extend into the interior of the duct. Do not use duct side, or through the bottom.
-
Page 11: Connect Vent
Periscope Installation (For use with dryer vent to wall vent The angled hood style (shown following) is acceptable. mismatch): 4" Part Number 26-49901 - Less than 5" (12.7 cm) mismatch Part Number 26-49908 - 5" (12.7 cm) to 18" (45.72 cm) mismatch Z4'J:m Part Number 26-49904 - 18"... - Page 12 Check the levelness of the dryer. Check levelness first side to side, then front to back. To protect the floor, use a large flat piece of cardboard from the dryer carton. Place cardboard under the entire back edge of the dryer. See illustration. If the dryer is not level, prop up the dryer using a wood block.
- Page 13 Reverse the hinge and hinge cover 1. Place the inner door, screw head side up, on the work space. 2. Gently pull the plastic cover out and down. This unsnaps the 1. Using a 4" (10.2 cm) clamp, connect vent to exhaust outlet in plastic hinge cover from the inside door assembly.
- Page 14 Reverse the door handle Insert a screw in the 2nd opening from the top of the hinge opening and partially tighten. Hang the door by placing the 1. Place the outer door assembly face down on work space. top hinge keyhole over the 2nd screw head and tighten the 2.
-
Page 15: Dryer Use
DRYER USE DELICATE AUTO CASUAL MANUAL ES]IM# _D OPTIONS MODIFIERS IMED DRY HIGH CYCLES B_F REr_9_<U DAr_I> 0 O MORE NORMAL MEDIUM HiGH [oo[ DO,VNo _IATt I S WETO CYCLES 0 LESS MEDIUM E TME START EXPRESS WlINKL_ (iu_ • HIGH cm _EsD_YO AUTO DRY... - Page 16 To use a Manual Cycle Select a Manual Cycle. Properly loading your dryer can lower your utility bill and prolong Press MORE TIME or LESS TIME until the desired drying the life of your garments. time is displayed. Tap MORE TIME or LESS TIME and the time will change by 1-minute intervals.
-
Page 17: Control Locked
Follow the progress of your dryer with the drying Status indicator Select the drying cycle that matches the type of load you are lights. drying. See Auto Dry or Manual Preset Cycle Settings charts. AUTO DRY CASUAL DEUCATE MANUAL WET @ CYCLES CYCLES TIMED DRY... - Page 18 Auto Dry Preset Cycle Settings You can customize your cycles by selecting options. Auto Dry Cycles Temperature Time* Load Type (Minutes) HEAVY DUTY OAiv]P DRYSF:BIA High Heavyweight, towels (Au'o CYCLES O F, S) BULKY/BEDDING Medium Jackets, comforters, pillows WFqNI(LE G UAR/3 JEANS Medium High Denim jeans, jackets...
-
Page 19: Modifiers
Air Dry Use the Air Dry Modifier for items that require drying without heat such as rubber, plastic and heat-sensitive fabrics. This table shows examples of items that can be dried using Air Dry. End of Cycle Signal The End of Cycle Signal produces an audible sound when the Type of Load Time* drying cycle is finished. -
Page 20: Dryer Care
4. Close the door. DRYER CARE 5. Select TIMED DRY and MORE TIME or LESS TIME. Reset time as needed to complete drying. Refer to the following table. 6. Select the desired temperature setting to match the fabrics in your load by pressing TEMPERATURE. Items containing foam, rubber, or plastic must be dried on a clothesline or by Keep dryer area clear and free from items that would obstruct the flow of combustion... -
Page 21: Cleaning The Lint Screen
As needed cleaning Laundry detergent and fabric softener residue can build up on the ti{!i!!!:]:;::=:::)_: i::!_:ii=:i),i lint screen. This buildup can cause longer drying times for your Vacation care clothes, or cause the dryer to stop before your load is completely Operate your dryer only when you are at home. -
Page 22: Troubleshooting
TROUBLESHOOTING First try the solutions suggested here and possibly avoid the cost of a service call... Dryer displaying code message Lint on load • "PF" (power failure), check the following: • Is the lint screen clogged? Clean lint screen. Check for air movement. Was the drying cycle interrupted by a power failure? Press and hold START to restart the dryer. - Page 24 GARANTJA DE LA OPCION DE PEDESTAL ......25 iFelicitaciones per su inteligente adquisici6n! Su nuevo producto SEGURIDAD DE LA SECADORA ..........Kenmore ®ha sido diser_ado y fabricado para brindarle argos de INSTRUCCIONES DE INSTALACION ........funcionamiento confiable. Pero al igual que todos los productos, Herramientas y piezas ...............
-
Page 25: Garantia
GARANTIA GARANTiA DE LA OPCION DE PEDESTAL Garantia completa de un aho para las piezas mec&nicas y componentes el_ctricos Garantia completa de un aho para partes mec&nicas Durante un a_o a partir de la fecha de compra, si se instala y pone en funcionamiento la secadora de conformidad con las... -
Page 26: Seguridad De La Secadora
SEGURIDAD DE LA SECADORA Su seguridad y la seguridad de los demas es muy importante. Hemos incluido muchos mensajes importantes de seguridad en este manual yen su electrodomestico. Lea y obedezca siernpre todos los mensajes de seguridad. Este simbolo le llama la atencidn sobre peligros potenciales que pueden ocasionar la muerte o una lesidn a usted y a los demas. - Page 27 INSTRUCCiONES iMPORTANTES DE SEGURiDAD ADVERTENCUA: A fin de reducir et riesgo de incendio, descarga electrica o de daho a Ias personas que usen la secadora, deben seguirse las precauciones basicas, incluidas las siguientes: Lea todas las instrucciones antes de usar la secadora. No repare o reempiace ninguna pieza de Ia secadora ni trate de repararia a menos que esto se recomiende No coloque Ios objetos expuestos...
-
Page 28: Instrucciones De Instalacion
INSTRUCCIONES DE INSTALACION Retina las herramientas y piezas necesarias antes de comenzar &Va a colocar la secadora sobre un pedestal? Usted puede la instalaci6n. Lea y siga las instrucciones provistas con adquirir per separado un pedestal para esta secadora. Este cualquiera de las herramientas enlistadas aquL pedestal agregara unas 14"... -
Page 29: Requisites Electricos
• Un contacto con conexi6n a tierra ubicado a unos 2 pies Espacio minimo para la instalacibn personalizada debajo (61 cm) de cualquiera de los lados de la secadora. Vea del mostrador, en areas empotradas, o en clbsets "Requisitos electricos." Las siguientes dimensiones ilustradas son para el espacio minimo permitido. - Page 30 Instalacibn empotrada o en el cl6set - Secadora sobre el pedestal © Peligro de Choque Emectrico Io"1_ 31,/=" _1 o" Conecte a un contacto de pared de conexi6n a tierra de 0"--_--- 27" _-_, 0" (0 cm) (68,6 cm) (0 cm) (0 cm) (80cm) (0 cm) 3 terminamee.
- Page 31 • Debe incluir una valvula de cierre: Debe instalarse una valvula de cierre individual a una distancia de unos seis (6) pies (1,8 m) de la secadora de acuerdo con el C6digo Nacional de Gas combustible (National Fuel Gas Code), ANSI Z223,1. La valvula debera ubicarse en un lugar donde se pueda alcanzar con facilidad para cerrarla y abrirla, Peligro de Expmosi6n...
- Page 32 El tubo de gas de la secadora • El tubo de gas que sale por la parte posterior de su secadora tiene una conexidn de filete macho de %"..Peligro de Incendio ..1V2" (3,8crn) Use an dacto de escape de metam pesado. No use un ducto de escape de pmasticoo A.
- Page 33 Use un ducto de escape de metal pesado. No use un ducto de Instalaciones opcionales de escape escape de plastico o de aluminio. Esta secadora puede ser adaptada con el escape hacia el lade derecho, hacia el lado izquierdo o en la parte inferior. P6ngase en Se recomienda el ducto de escape de metal rfgido para evitar contacto con su distribuidor local para hacer convertir su...
- Page 34 Instalaci6n en la parte superior: El estilo de capota de ventilaci6n angular (que se ilustra a continuaci6n) es aceptable. Pieza nOmero 26-49900 Instalaci6n de periscopio (Pars usar si hay desacoplo entre el ducto de escape la pared y el ducto de escape): Pieza nQmero 26-49901 - Desacoplo de menos de 5"...
- Page 35 5. Coloque un esquinal de cart6n debajo de cada una de las 2 esquinas posteriores de la secadora. Ponga la secadora de pie. Deslicela sobre los esquinales hasta que este cerca de 1. Instale la capota de ventilaci6n. Emplee una masilla de su ubicacidn final.
- Page 36 Quite la tapa roja del tube de gas. Traslade la secadora cerca Si Io desea, puede cambiar la direcci6n del cierre de la puerta del de su ubicaci6n final. lade derecho al lade izquierdo. Utilizando una Ilave de tuercas, conecte el suministro de gas Desmontaje de la puerta a la secadora.
- Page 37 Inversibn de la bisagra y de la tapa de la bisagra Inversibn de la manija de la puerta 1. Coloque la puerta interna, con la cabeza del tomillo hacia 1. Coloque el conjunto externo de la puerta boca abajo en la arriba, en la zona de trabajo.
-
Page 38: Nivelaci6N De La Secadora
Use un pequedo destornillador de cuchilla plana para quitar la cinta de tap6n en la abertura de la puerta. Deslice la cabeza del destornillador debajo de la parte superior de la 1. Revise para cerciorarse de que todas las piezas esten cinta de tap6n, siendo cuidadoso de no rayar la superficie de instaladas. -
Page 39: Uso De La Secadora
USO DE LA SECADORA DELICATE AUTO DRY CASUAL STATUS CYCLES OFf IONS MODIFmERS W_TO HIGH DArJ O O MORE NORMAL MEDIUM HIGH coo! Dow_ao O LESS - EXPRESS DRY MORE ]]ME c,_ 14Ls D RYo MEDIUM Wl. KLEGU,_ JEANS LESSTIME €... - Page 40 Para usar un ciclo manual: • Seleccione un ciclo manual. Esta caracteristica le permite bloquear sus ajustes para evitar el Presione Mas tiempo (MORE TIME) o Menos tiempo uso accidental de la secadora. Asimismo puede usar la (LESS TIME) hasta que el tiempo de secado deseado aparezca en la pantalla.
-
Page 41: Control Bloqueado
_:i:ii!ili_iiJJ!!iii_,_i!!!_!!,_ii_,i:::?_iii%3iii,;ili!:iilS !;_it,_i!i:i!!! ¸ OiiiiiC!/OS ii!_ii_' !I%IIIRC:_II!!i:_!;III:I_O Seleccione el nivel de secado o la temperatura y el ciclo Observe el progreso de su secadora con las luces indicadoras de estado. correctos para su carga. Si esta funcionando un ciclo de secado automatico, la pantalla muestra el tiempo estimado del ciclo cuando su secadora detecta automaticamente... -
Page 42: Cambio De Ciclos, Opciones Y Modificadores
Ajustes de ciclos prefijados de secado autom&tico Seleccione el ciclo de secado de acuerdo con el tipo de carga Ciclos de secado Temperatura Tiempo* que va a secar. Vea los cuadros de Ajustes de ciclos prefijados automatico (Minutos) manuales o de secado automatico. Tipo de carga DEUCATE AUTO DRY... - Page 43 Protector antiarrugas (WRINKLE GUARD _) Ajustes de ciclos prefijados manuales WRINKLE GUARD ®previene las arrugas que se forman cuando usted no puede descargar la secadora tan pronto termina el Ciclos manuales Temperatura Tiempo por ciclo. Durante esta opci6n la secadora detiene la acci6n de omisi6n Tipo de carga rotaci6n y luego rota nuevamente durante un perfodo breve.
- Page 44 Cuando use el secado con aire • Revise las cubiertas para ver si las costuras estan firmes. • Sacuda y palmotee las almohadas peri6dicamente durante el ciclo. El estante de secado fue embalado en su lugar dentro de su secadora. Retirelo y deshagase de los bloques de embalaje •...
-
Page 45: Cuidado De La Secadora
Articulos sugeridos para Ajuste de Tiempo el secado en el estante temperatura sugerido* (minutos) Limpieza de cada carga El filtro de pelusa esta Iocalizado en la puerta de la secadora. Articulos lavables de lana Bajo Limpielo antes o despues del secado de cada carga. Un filtro (deles forma y extiendalos (Low) obstruido con pelusa puede aumentar el tiempo de secado. -
Page 46: Limpieza Del Filtro De Pelusa
1. Desenchufar la secadora o desconectar el suministro de energia. i!_.]iit _ ili])iii@]i!::!)_i!:ili i;:;i:iii@ii iiiiili lI!@_iiOl "(]i_@ !ii;!i!i S@,O_:!!_(]ilO_'_ili!!i 2. Cerrar la valvula de cierre en la linea de suministro de gas. Para limpiar el tambor de la escadora 3. Limpie el filtro de pelusa. Vea "Limpieza del filtro de pelusa'. 1. - Page 47 _,Estan las hojas de suavizante de tejidos bloqueando filtro? Use t]nicamente una hoja de suavizante de tejidos y Manchas en la carga o cambio de color s61o una vez. &Se ha empleado adecuadamente el suavizante de &Esta la secadora Iocalizada en un cuarto cuya tejidos? temperatura es inferior a 45°F (7°0)?
- Page 48 Your Home ....For repair-in your home-of all major brand appliances, lawn and garden equipment, or heating and cooling systems, no matter who made it, no matter who sold it! For the replacement parts, accessories owner's manuals that you need to do-it-yourself. For Sears professional installation of home appliances and items like garage door openers and water heaters.