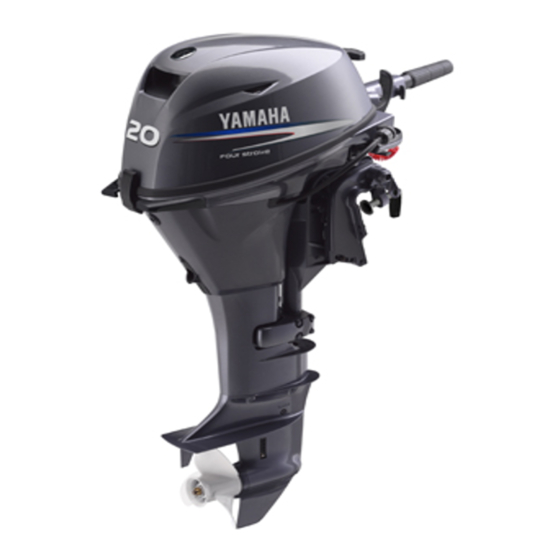
Yamaha F15C Owner's Manual
Hide thumbs
Also See for F15C:
- Owner's manual (126 pages) ,
- Owner's manual (102 pages) ,
- Owner's manual (94 pages)
Table of Contents

Related Manuals for Yamaha F15C


Summary of Contents for Yamaha F15C
- Page 1 F15C OWNER’S MANUAL U.S.A.Edition LIT-18626-07-17 6AG-28199-10...
- Page 2 EMU25060 ZMU01690 Read this owner’s manual carefully before operating your outboard motor.
-
Page 3: Important Manual Information
Therefore some items may not ap- tain maximum enjoyment from your new ply to every model. Yamaha. If you have any question about the EMU25110 operation or maintenance of your outboard motor, please consult a Yamaha dealer. -
Page 4: Table Of Contents
Table of contents General information ......1 Starter button ........18 Main switch ........18 Identification numbers record..1 Power tilt switch ......18 Outboard motor serial number ..1 Steering friction adjuster ....19 Key number........1 Steering friction adjuster ....20 Emission control information ... - Page 5 Periodic maintenance....55 Consumer information ....83 Replacement parts ......56 Important warranty information for Maintenance chart ......57 U.S.A. and Canada ..... 83 Maintenance chart (additional)..58 YAMAHA MOTOR Greasing ......... 59 CORPORATION, U.S.A. FOUR-STROKE OUTBOARD Cleaning and adjusting spark...
- Page 6 Table of contents MOTOR THREE-YEAR LIMITED WARRANTY ........ 85 IMPORTANT WARRANTY INFORMATION IF YOU USE YOUR YAMAHA OUTSIDE THE USA OR CANADA ...... 87...
-
Page 7: General Information
Record your outboard motor serial number in the spaces provided to assist you in ordering spare parts from your Yamaha dealer or for reference in case your outboard motor is sto- len. 1. Key number... -
Page 8: Star Labels
General information particular label. ZMU05159 ZMU05623 EMU25262 Manufactured date label 1. Star labels location This label is attached to the clamp bracket or the swivel bracket. EMU25280 One Star—Low Emission The one-star label identifies engines that meet the Air Resources Board’s 2001 ex- haust emission standards. -
Page 9: Safety Information
General information the outboard should be equal to or less than the rated horsepower capacity of the boat. If the rated horsepower capacity of the boat is unknown, consult the dealer or boat manufacturer. Do not modify the outboard. Modifications could make the motor unfit or unsafe to use. -
Page 10: Important Labels
Do not touch or remove electrical parts Never illegally discard (dump) the product. when starting or during operation. Yamaha recommends consulting the deal- Keep hands, hair, and clothes away er on discarding the product. from flywheel and other rotating parts Be informed about boating safety. -
Page 11: Caution Labels
General information EMU25431 Label EWM01300 WARNING This engine is equipped with a neutral starting device. The engine will not start unless the shift control is in neutral position. EMU25465 Caution labels ZMU05630 ZMU05515 EMU25500 EMU25473 Basic boating rules (Rules of Label ECM01191 the road) -
Page 12: Steering And Sailing Rules And Sound Signals
General information you will be using your boat. case, both vessels become “Give-Way” ves- sels. EMU25510 Steering and sailing rules and sound EMU25520 Rules when encountering vessels signals There are three main situations which you Whenever two vessels on the water meet may encounter with other vessels which one another, one vessel has the right-of- could lead to a collision unless the Steering... -
Page 13: Other Special Situations
General information EMU25530 Other special situations There are three other rules you should be aware of when driving your boat around oth- er vessels. Narrow channels and bends When navigating in narrow channels, you should keep to the right when it is safe and practical to do so. - Page 14 General information Reading buoys and other markers The waters of the United states are marked for safe navigation by the lateral system of buoyage. Simply put, buoys and markers have an arrangement of shapes, colors, numbers and lights to show which side of the buoy a boater should pass on when navigat- ing in a particular direction.
-
Page 15: Fueling Instructions
General information ZMU01708 EMU25540 away from sparks, flames, or other Fueling instructions sources of ignition. EWM00010 Stop engine before refueling. WARNING Refuel in a well-ventilated area. Refuel GASOLINE AND ITS VAPORS ARE HIGH- portable fuel tanks off the boat. LY FLAMMABLE AND EXPLOSIVE! Take care not to spill gasoline. -
Page 16: Gasoline
10% and CAUTION: the fuel meets minimum octane ratings. All 4-stroke engines are shipped from the Yamaha does not recommended gasohol factory without engine oil. containing methanol because it can cause fuel system damage or engine performance... -
Page 17: Battery Requirement
General information EMU25711 Battery specifications Minimum cold cranking amps (CCA/ SAE): F15CEH 245.0 A F15CPH 245.0 A F20EH 245.0 A F20ER 245.0 A F20PH 245.0 A ZMU01710 F20PR 245.0 A EMU25690 Minimum marine cranking amps (MCA/ Battery requirement ABYC): ECM01060 F15CEH 323.0 A CAUTION: F15CPH 323.0 A... -
Page 18: Propeller Selection
18 volts or 3. Type of propeller (propeller mark) higher with the above models. Consult your NOTE: Yamaha dealer for details on installing an optional Rectifier Regulator. Select a propeller which will allow the engine EMU25742... -
Page 19: Basic Components
EMU25799 Main components NOTE: * May not be exactly as shown; also may not be included as standard equipment on all mod- els. F15C, F20 ZMU05518 1. Top cowling 14. Clamp screw 2. Top cowling lock lever 15. Steering friction lever* 3. -
Page 20: Fuel Joint
Basic components fuel tank, its function is as follows. EMU26180 Remote control EWM00020 The remote control lever actuates both the WARNING shifter and the throttle. The electrical switch- The fuel tank supplied with this engine is es are mounted on the remote control box. its dedicated fuel reservoir and must not be used as a fuel storage container. -
Page 21: Neutral Interlock Trigger
Basic components when the remote control lever is in neutral. The remote control lever will operate only when the neutral throttle lever is in the closed position. 1. Neutral “ ” 2. Forward “ ” 3. Reverse “ ” 4. Shift 5. -
Page 22: Throttle Grip
Basic components ZMU05337 ZMU05519 1. Throttle indicator 1. Forward “ ” 2. Neutral “ ” EMU25971 3. Reverse “ ” Throttle friction adjuster A friction device provides adjustable resis- EMU25941 tance to movement of the throttle grip or the Throttle grip remote control lever, and can be set accord- The throttle grip is on the tiller handle. -
Page 23: Engine Stop Lanyard Switch
Basic components NOTE: The engine cannot be started with the lock plate removed. ZMU02001 When constant speed is desired, tighten the adjuster to maintain the desired throttle set- ting. EMU25990 Engine stop lanyard switch 1. Lanyard 2. Lock plate The lock plate must be attached to the en- gine stop switch for the engine to run. -
Page 24: Manual Starter Handle
Basic components EMU26090 Main switch The main switch controls the ignition system; its operation is described below. “ ” (off) With the main switch in the “ ” (off) posi- tion, the electrical circuits are off, and the key can be removed. “... -
Page 25: Steering Friction Adjuster
Basic components To increase resistance, turn the lever to the port side “A”. To decrease resistance, turn the lever to the starboard side “B”. EWM00040 WARNING Do not overtighten the friction adjuster. If there is too much resistance, it could be difficult to steer, which could result in an accident. -
Page 26: Steering Friction Adjuster
Basic components right or left by applying the same amount of NOTE: force. Steering movement is blocked when the EWM00840 adjuster lever is set to the “A” position. WARNING Check the tiller handle for smooth move- An improperly adjusted trim tab could ment when the lever is turned to the star- cause difficult steering. -
Page 27: Tilt Lock Mechanism
Basic components the release position. EMU26320 Tilt support knob To keep the outboard motor in the tilted up position, push the tilt support knob under the swivel bracket. ZMU05525 EMU30530 Tilt lock mechanism The tilt lock mechanism is used to prevent the outboard motor from lifting out of the wa- ter when in reverse gear. -
Page 28: Top Cowling Lock Lever (Pull Up Type)
Do not continue to operate the engine if a hose and tap water. warning device has activated. Consult NOTE: your Yamaha dealer if the problem can- For details on usage, see page 54. not be located and corrected. EMU26816 Overheat warning... -
Page 29: Low Oil Pressure Warning
Basic components If the engine temperature rises too high, the warning device will activate. Activation of warning device The engine speed will automatically de- crease to about 2000 r/min. If equipped with an overheat warning indi- cator, it will light or blink. EMU30167 Low oil pressure warning If the oil pressure drops too low, the warning... - Page 30 Check the oil level and add oil as needed. If the oil level is correct and the warning device does not switch off, consult your Yamaha dealer. ECM00100 CAUTION: Do not continue to run the engine if the low oil pressure warning indicator is on.
-
Page 31: Operation
Operation EMU26901 specific boat and motor combination. Installation EWM00830 ECM00110 WARNING CAUTION: Improper mounting of the outboard mo- Incorrect engine height or obstructions tor could result in hazardous conditions to smooth water flow (such as the design such as poor handling, loss of control, or or condition of the boat, or accessories fire hazards. - Page 32 Operation boats without a keel or which are asym- metrical, consult your dealer. ZMU01760 1. Center line (keel line) EMU26920 Mounting height To run your boat at optimum efficiency, the water resistance (drag) of the boat and out- board motor must be made as little as possi- ZMU05633 ble.
-
Page 33: Clamping The Outboard Motor
Other- termine the optimum mounting height. wise the engine could be completely lost Consult your Yamaha dealer or boat man- if it accidentally falls off the transom. ufacturer for further information on deter- mining the proper mounting height. -
Page 34: Breaking In Engine
CAUTION: Check fuel line connections to be sure they Failure to follow the break-in procedure are tight (if equipped Yamaha fuel tank or could result in reduced engine life or boat tank). even severe engine damage. Be sure the fuel tank is positioned on a se-... -
Page 35: Checking The Engine Oil Level
Operation Look for loose or damaged fasteners. NOTE: Check the propeller for damage. Be sure to completely insert the dipstick into EMU27163 the dipstick guide. Checking the engine oil level EMU27433 Put the outboard motor in an upright po- Filling fuel sition (not tilted). -
Page 36: Operating Engine
While many additives available may reduce deposits, Yamaha recommends the use of Ring Free Fuel Additive, available from your Yamaha dealer. Ring Free Fuel Addi- tive has repeatedly proven its ability to clean combustion deposits from inside the engine, ZMU02295... -
Page 37: Starting Engine
Operation the fuel line to the fuel line clamp. arm or leg. Then install the lock plate on the other end of the lanyard into the en- NOTE: gine stop switch. During engine operation place the tank hori- EWM00120 zontally, otherwise fuel cannot be drawn WARNING from the fuel tank. - Page 38 Operation Pull the manual starter handle slowly un- NOTE: til you feel resistance. Then give a The start-in-gear protection device prevents strong pull straight out to crank and start the engine from starting except when in neu- the engine. Repeat if necessary. tral.
- Page 39 Operation NOTE: When the engine is cold, it needs to be warmed up. For further information, see page 34. If the engine is warm and fails to start, open the throttle slightly and try to start the engine again. If the engine still fails to start, see page 73.
-
Page 40: Warming Up Engine
Consult Never turn the main switch to “ ” your Yamaha dealer if the cause for the (start) while the engine is running. low oil pressure warning indicator can- Do not keep the starter motor turning not be found. -
Page 41: Shifting
ZMU05600 Consult your Yamaha dealer if the prob- lem cannot be located and corrected. Move the gear shift lever quickly and firmly from neutral to forward. -
Page 42: Reverse (Automatic Reverse Lock And Power Trim And Tilt Models)
Operation EMU31970 equipped) and move the remote control Reverse (automatic reverse lock and lever quickly and firmly from neutral to power trim and tilt models) reverse. EWM00190 WARNING When operating in reverse, go slowly. Do not open the throttle more than half. Oth- erwise the boat could become unstable, which could result in loss of control and an accident. -
Page 43: Stopping Engine
Operation lever quickly and firmly from neutral to reverse. ZMU05541 Move the gear shift lever quickly and firmly from neutral to reverse. EMU27820 Stopping engine Before stopping the engine, first let it cool off for a few minutes at idle or low speed. Stop- ping the engine immediately after operating at high speed is not recommended. -
Page 44: Trimming Outboard Motor
Operation the engine stop switch, then turning the main switch to “ ” (off). EMU27861 Trimming outboard motor The trim angle of the outboard motor helps determine the position of the bow of the boat in the water. Correct trim angle will help im- prove performance and fuel economy while reducing strain on the engine. -
Page 45: Adjusting Trim Angle (Power Tilt Models)
Operation gle. EMU27902 Adjusting trim angle (power tilt Stop the engine. models) Tilt the outboard motor up, and then re- EWM00751 move the trim rod from the clamp brack- WARNING Be sure all people are clear of the out- board motor when adjusting the tilt an- gle, also be careful not to pinch any body parts between the drive unit and clamp bracket. -
Page 46: Adjusting Boat Trim
Operation also be adjusted to help offset this effect. When the bow of the boat is down, it is easier to accelerate from a standing start onto plane. ZMU05579 Bow Up Too much trim-out puts the bow of the boat too high in the water. -
Page 47: Tilting Up And Down
Operation danger of “bow steering” and making opera- few minutes. Otherwise fuel may leak. tion difficult and dangerous. ECM00241 CAUTION: Before tilting the outboard motor, stop the engine by following the procedure on page 37. Never tilt the outboard mo- tor while the engine is running. -
Page 48: Procedure For Tilting Up (Power Trim And Tilt Models / Power Tilt Models)
Operation EMU28007 Procedure for tilting up (power trim and tilt models / power tilt models) Place the remote control lever / gear shift lever in neutral. ZMU05547 Place the tilt lock lever (if equipped) in the release/up position. ZMU05533 ZMU05548 Pull up the shallow water lever (if equipped). -
Page 49: Procedure For Tilting Down (Manual Tilt Models)
Operation ZMU02812 EWM00260 WARNING After tilting the outboard motor, be sure to support it with the tilt support knob or tilt support lever. Otherwise the outboard motor could fall back down suddenly if oil in the power trim and tilt unit loses pres- sure. -
Page 50: Procedure For Tilting Down (Power Trim And Tilt Models / Power Tilt Models)
Operation ZMU02825 ZMU05541 Slightly tilt the engine up until the tilt sup- Push the power trim and tilt switch / pow- port bar is automatically released. er tilt switch “ ” (down) to lower the out- board motor to the desired position. ZMU05528 ZMU01936 Slowly tilt the engine down. -
Page 51: Cruising In Shallow Water
Operation deeper water. ECM00260 CAUTION: Do not tilt the outboard motor up so that the cooling water inlet on the lower unit is above the surface of the water when set- ting up for and cruising in shallow water. Otherwise severe damage from overheat- ing can result. -
Page 52: Power Trim And Tilt Models / Power Tilt Models
Operation ZMU03087 ZMU05541 Place the tilt lock lever in the release/up Slightly tilt the outboard motor up until position. the tilt support bar automatically returns to the free position. Slowly lower the outboard motor to the normal position. EMU28090 Power trim and tilt models / power tilt models The outboard motor can be tilted up partially to allow operation in shallow water. -
Page 53: Cruising In Other Conditions
For cooling system flushing instructions, see page 50. Cruising in turbid water Yamaha strongly recommends that you use the optional chromium-plated water pump kit (not available for some models) if you use the outboard motor in turbid or muddy water... -
Page 54: Maintenance
Maintenance EMU31480 F15CMH 438 mm (17.2 in) Specifications F20EH 438 mm (17.2 in) NOTE: F20ER 438 mm (17.2 in) F20MH 438 mm (17.2 in) “(AL)” stated in the specification data below F20PR 443 mm (17.4 in) represents the numerical value for the alumi- Transom height L: num propeller installed. - Page 55 Maintenance HP@5500 r/min) F20PR Electric F20ER 14.7 kW@5500 r/min (20 Starting carburetion system: HP@5500 r/min) Prime start F20MH 14.7 kW@5500 r/min (20 Valve clearance (cold engine) IN: HP@5500 r/min) 0.15–0.25 mm (0.0059–0.0098 in) F20PH 14.7 kW@5500 r/min (20 Valve clearance (cold engine) EX: HP@5500 r/min) 0.25–0.35 mm (0.0098–0.0138 in) F20PR 14.7 kW@5500 r/min (20...
-
Page 56: Transporting And Storing Outboard Motor
Engine oil drain bolt: sition using a motor support device such as 28.0 Nm (20.7 ft-lb) (2.86 kgf-m) a transom saver bar. Consult your Yamaha Engine oil filter: dealer for further details. 18.0 Nm (13.3 ft-lb) (1.84 kgf-m) - Page 57 Maintenance nals. To prevent steering movement, turn the adjuster lever to “A”. ZMU05632 Loosen the clamp screw(s). ZMU05634 Hold the handgrips and steering brack- When transporting or storing the out- ets as shown in the illustration and lift up board motor while removed from a boat, the outboard motor to dismount it from keep the outboard motor in the attitude the boat.
-
Page 58: Storing Outboard Motor
12-00) to each gallon of fuel. EMU28241 NOTE: Storing outboard motor The use of “Yamaha Fuel Conditioner and When storing your Yamaha outboard motor Stabilizer” eliminates the need to drain the for prolonged periods of time (2 months or fuel system. Consult your Yamaha dealer or... -
Page 59: Lubrication
Cooling system flushing is essential to Seal replacement should be performed prevent the cooling system from clog- by an authorized Yamaha dealer prior to ging up with salt, sand, or dirt. In addi- use. tion, fogging of the engine is mandatory Grease all grease fittings. -
Page 60: Flushing Power Unit
Maintenance dling or working near batteries. EMU28442 Flushing power unit Antidote (EXTERNAL): Perform this procedure right after operation SKIN - Flush with water. for the most thorough flushing. EYES - Flush with water for 15 minutes ECM01530 and get immediate medical attention. CAUTION: Antidote (INTERNAL): Do not perform this procedure while the... -
Page 61: Cleaning The Outboard Motor
If you or the owner is not famil- EMU28450 iar with machine servicing, this work Cleaning the outboard motor should be done by your Yamaha dealer or After use, wash the exterior of the outboard other qualified mechanic. motor with fresh water. Flush the cooling system with fresh water. -
Page 62: Replacement Parts
EMU28510 Replacement parts If replacement parts are necessary, use only genuine Yamaha parts or parts of the same type and of equivalent strength and materi- als. Any part of inferior quality may malfunc- tion, and the resulting loss of control could endanger the operator and passengers. -
Page 63: Maintenance Chart
When operating in salt water, turbid or muddy water, the engine should be flushed with clean water after each use. The “ ” symbol indicates the check-ups which you may carry out yourself. The “ ” symbol indicates work to be carried out by your Yamaha dealer. Initial Every 50 hours Item... -
Page 64: Maintenance Chart (Additional)
Maintenance Initial Every 50 hours Item Actions 10 hours hours (6 hours (1 (1 month) months) months) year) Inspection / replace- Water pump ment Engine oil Inspection / change Oil filter (cartridge) Change Cleaning / adjustment / Spark plug(s) replacement Inspection / replace- Timing belt ment... -
Page 65: Greasing
Maintenance EMU28931 Greasing Yamaha marine grease (Water resistant grease) F15CEH, F15CMH, F15CPH, F20EH, F20MH, F20PH ZMU05557... -
Page 66: Cleaning And Adjusting Spark
Maintenance F20ER, F20PR ZMU05595 EMU28953 fire. Cleaning and adjusting spark plug EWM01550 EWM00560 WARNING WARNING The engine will still be very hot when it When removing or installing a spark plug, has just been turned off. Take extremely be careful not to damage the insulator. A care so that neither you nor anyone else damaged insulator could allow external gets burnt. -
Page 67: Checking Fuel System
Improper repairs can make the outboard unsafe to operate. Check the fuel lines for leaks, crack, or mal- function. If a problem is found, your Yamaha dealer or other qualified mechanic should re- 1. Spark plug gap pair it immediately. -
Page 68: Inspecting Fuel Filter
Gasoline is highly flammable, and its va- necessary. If any water is found in the pors are flammable and explosive. fuel, the Yamaha portable fuel tank or If you have any question about properly other fuel tanks should be checked and doing this procedure, consult your cleaned. -
Page 69: Inspecting Idling Speed
If you have difficulty ver- 1. Filter cup ifying the idle speed, or the idle speed re- 2. Filter element quires adjustment, consult a Yamaha dealer 3. Filter housing or other qualified mechanic. 4. O-ring Verify whether the idle speed is set to Reinstall the filter element in the cup. - Page 70 Maintenance could cause leakage or damage. ECM01240 CAUTION: Change the engine oil after the first 10 hours of operation, and every 100 hours or at 6-month intervals thereafter. Other- wise the engine will wear quickly. NOTE: ZMU05561 Change the engine oil when the oil is still warm.
-
Page 71: Checking Wiring And Connectors
Consult Check that each connector is engaged se- your Yamaha dealer if the problem can- curely. not be located and corrected. Turn off the engine and wait 3 minutes. -
Page 72: Water Leakage
Engine oil leakage NOTE: Check for oil leaks on the around the engine. Consult your Yamaha dealer if any operation NOTE: is abnormal. If any leaks are found, consult your Yamaha dealer. EMU29171 Checking propeller EMU29163 EWM00321 Checking power trim and tilt / power... -
Page 73: Removing The Propeller
Maintenance age. NOTE: If the shear pin equipped: it is designed to break if the propeller hits a hard underwater obstacle to help protect the propeller and drive mechanism. The propeller will then spin freely on the shaft. If this happens, the shear pin must be replaced. -
Page 74: Changing Gear Oil
Apply Yamaha marine grease or a cor- Tilt the outboard motor so that the gear rosion resistant grease to the propeller oil drain screw is at the lowest point pos- shaft. -
Page 75: Cleaning Fuel Tank
Gasoline is highly flammable, and its va- install the fuel joint assembly and tighten pors are flammable and explosive. the screws firmly. If you have any question about properly EMU29312 doing this procedure, consult your Inspecting and replacing anode(s) Yamaha outboard motors are protected from... -
Page 76: Checking Battery (For Electric Start Models)
EMU29320 Checking battery (for electric start external anodes periodically. Remove scales models) from the surfaces of the anodes. Consult a EWM00330 Yamaha dealer for replacement of external WARNING anodes. Battery electrolytic fluid is dangerous; it ECM00720 CAUTION: contains sulfuric acid and therefore is poisonous and highly caustic. -
Page 77: Connecting The Battery
NOTE: Consult a Yamaha dealer when charging or 1. Red cable re-charging batteries. 2. Black cable 3. -
Page 78: Checking Top Cowling
Checking top cowling Check the fitting of the top cowling by push- ing it with both hands. If it is loose have it re- paired by your Yamaha dealer. EMU29400 Coating the boat bottom A clean hull improves boat performance. The boat bottom should be kept as clean of ma- rine growth as possible. -
Page 79: Trouble Recovery
Q. Has fuel pump malfunctioned? If your outboard motor requires repair, bring A. Have serviced by a Yamaha dealer. it to your Yamaha dealer. If the engine trouble warning indicator is Q. Are spark plug(s) fouled or of incorrect flashing, consult your Yamaha dealer. - Page 80 Q. Is fuel contaminated or stale? A. Fill tank with clean, fresh fuel. Q. Is carburetor clogged? A. Have serviced by a Yamaha dealer. Q. Is fuel filter clogged? A. Clean or replace filter. Q. Is fuel joint connection incorrect? A.
- Page 81 Trouble Recovery A. Have serviced by a Yamaha dealer. Q. Are weeds or other foreign matter tangled on gear housing? Q. Is load on boat improperly distributed? A. Remove foreign matter and clean lower A. Distribute load to place boat on an even unit.
-
Page 82: Temporary Action In Emergency
EWM00630 Q. Is steering pivot loose or damaged? WARNING A. Tighten or have serviced by a Yamaha Be sure to use the specified fuse. An in- dealer. correct fuse or a piece of wire could allow EMU29433 excessive current flow. -
Page 83: Power Trim And Tilt / Power Tilt Will Not Operate
2. Fuse (20 A) used to start the engine, the start-in- NOTE: gear protection device does not oper- Consult your Yamaha dealer if the new fuse ate. Make sure the remote control lever immediately blows again. is in neutral. Otherwise the boat could... -
Page 84: Emergency Starting Engine (Manual Starter Model)
Trouble Recovery preventing it from functioning. Disconnect the start-in-gear protection Avoid accidentally pulling the lanyard cable from the starter, if equipped. during normal operation. Loss of en- gine power means the loss of most steering control. Also, without engine power, the boat could slow rapidly. This could cause people and objects in the boat to be thrown forward. -
Page 85: Emergency Starting Engine (Electric Start Model)
Trouble Recovery Insert the knotted end of the emergency starter rope into the notch in the flywheel rotor and wind the rope 1 or 2 turn(s) around the flywheel clockwise. Pull the rope slowly until resistance is felt. Give a strong pull straight out to crank and start the engine. - Page 86 Trouble Recovery ZMU05611 ZMU05624 Remove the electrical system cover by Remove the starter/flywheel cover after removing its screw(s). removing the bolt(s). ZMU05612 ZMU05614 Remove the screw(s) from the plate, and pull it down. ZMU05615 Secure the electrical system plate by ZMU05613 tightening the bolt(s), and fix the plate.
- Page 87 Trouble Recovery ZMU05616 ZMU05533 Prepare the engine for starting. For fur- ther information, see page 31. Be sure that the gear shift is in neutral and that the engine stop switch lanyard lock plate is attached to the engine stop switch. The main switch must be “...
-
Page 88: Treatment Of Submerged Motor
EMU29760 Treatment of submerged motor If the outboard motor is submerged, immedi- ately take it to a Yamaha dealer. Otherwise some corrosion may begin almost immedi- ately. If you cannot immediately take the outboard motor to a Yamaha dealer, follow the proce- dure below in order to minimize engine dam- age. -
Page 89: Consumer Information
Consumer information EMU29811 Important warranty information for U.S.A. and Canada... - Page 90 Consumer information...
-
Page 91: Yamaha Motor Corporation, U.s.a. Four-Stroke Outboard
Consumer information EMU29830 YAMAHA MOTOR CORPORATION, U.S.A. FOUR-STROKE OUTBOARD MOTOR THREE-YEAR LIMITED WARRANTY... - Page 92 Consumer information...
-
Page 93: Information If You Use Your Yamaha Outside The Usa Or Canada
Consumer information EMU29841 IMPORTANT WARRANTY INFORMATION IF YOU USE YOUR YAMAHA OUTSIDE THE USA OR CANADA... - Page 96 Printed in Japan April 2006–2.0 × 1 ! Printed on recycled paper...
- Page 97 (A l’usage du concessionnaire) MODÉLE ET NO. DE SÉRIE DU MOTEUR HORS-BORD (sur l’étiquette d’identification de la presse de fixation) YAMAHA DEALER NUMBER NO. DU CONCESSIONNAIRE YAMAHA DEALER NAME YAMAHA MOTOR CO., LTD. NOM DU MADE IN JAPAN CONCESSIONNAIRE PAYS D'ORIGINE JAPON USAGE...
- Page 98 PLACE POSTAGE HERE ATTN: WARRANTY DEPARTMENT...