Table of Contents
Advertisement
All about the
Use
of your
Important Safety Instructions ......................2
Features at a Glance ...................................5
Installation ................................................6
Door Removal Instructions ........................10
Installing Door Handles .............................13
Controls ...................................................18
Automatic Ice & Water Dispenser ..............21
www.frigidaire.com USA 1-800-944-9044
&
Care
Refrigerator
TA B L E O F C O N T E N T S
Automatic Ice Maker - Freezer ...................23
Storage Features ......................................24
Storing Food and Saving Energy ................28
Normal Operating Sounds and Sights .........29
Changing the Filter ...................................30
Care and Cleaning ....................................32
Before you Call .........................................36
Major Appliance Warranty .........................40
www.frigidaire.ca Canada 1-800-265-8352
Advertisement
Table of Contents

Related Manuals for Frigidaire FFHB2740PE


Summary of Contents for Frigidaire FFHB2740PE
-
Page 1: Table Of Contents
Normal Operating Sounds and Sights ..29 Installing Door Handles ......13 Changing the Filter ........30 Connecting Water Supply ......16 Care and Cleaning ........32 Controls ...........18 Before you Call .........36 Automatic Ice & Water Dispenser ....21 Major Appliance Warranty ......40 www.frigidaire.com USA 1-800-944-9044 www.frigidaire.ca Canada 1-800-265-8352... -
Page 2: Important Safety Instructions
IMPORTANT SAFETY INSTRUCTIONS WARNING Installation Checklist Please read all instructions before using this Doors refrigerator. Handles are secure and tight For your Safety Door seals completely to cabinet on all • DO NOT store or use gasoline, or other sides flammable liquids in the vicinity of this or ... -
Page 3: Electrical Information
IMPORTANT SAFETY INSTRUCTIONS Proper Disposal of your Electrical information Refrigerator or Freezer • The refrigerator must be plugged into its own dedicated 115 Volt, 60 Hz., 15 Amp, Risk of child entrapment AC only electrical outlet. The power cord of Child entrapment and suffocation are not the appliance is equipped with a three- problems of the past. - Page 4 IMPORTANT SAFETY INSTRUCTIONS Grounding type wall receptacle Do not, under any circumstances, cut, remove, or bypass the grounding prong. Power cord with 3-prong grounded plug CAUTION To avoid personal injury or property damage, handle tempered glass shelves carefully. Shelves may break suddenly if nicked, scratched, or exposed to sudden temperature change.
-
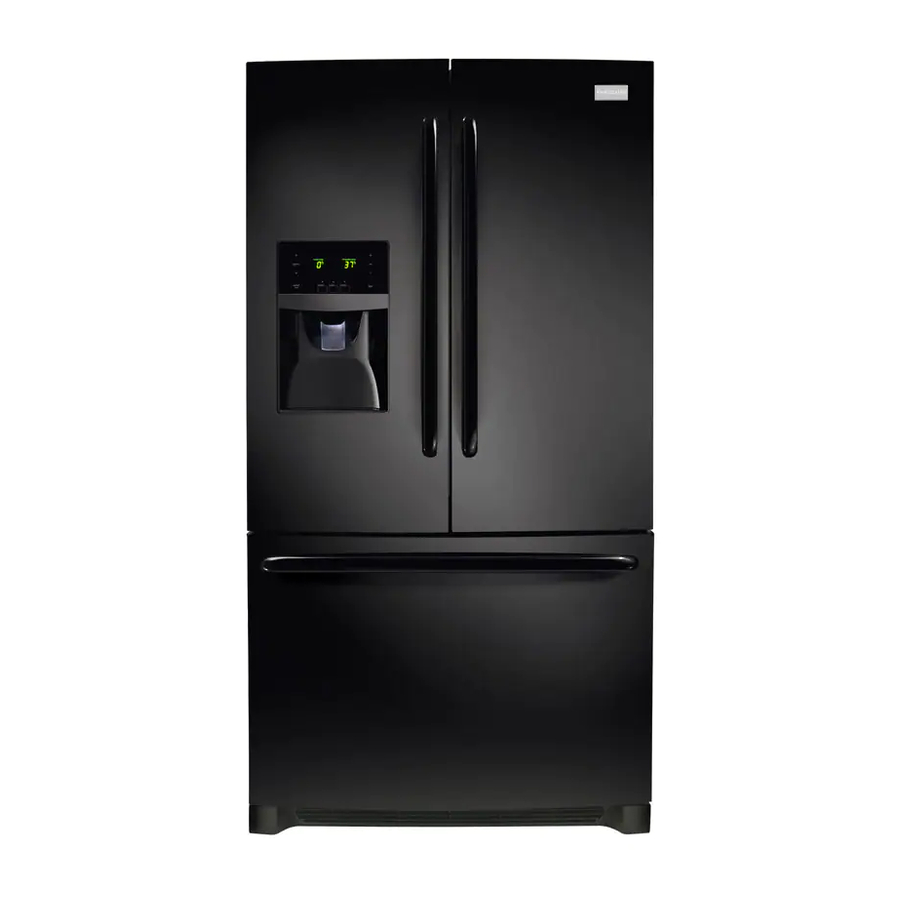
Page 5: Features At A Glance
Light Shelf *LED Cluster Light Crisper Drawer *Store- *Door Bin More Drawer Adjustable Hinges Freezer Baskets *Freezer Ice Maker Removable Ice Bin Toe Grille IMPORTANT Features not purchased with your refrigerator can be purchased at www.frigidaire.com or by calling 1-800-944-9044. -
Page 6: Installation
INSTALLATION Tools Necessary: (OR) 3/8" Fixed Phillips Head Wrench Adjustable #2 Square Socket Drive Head Wrench Set Wrench Components Provided: CAUTION Top Hinge Top Hinge Cover Front Cover Rear Screw Screw o Not install the refrigerator where the temperature will drop below 55° F (13°... - Page 7 INSTALLATION Leveling Freezer Drawer (if necessary) To level the freezer drawer: 1 Check gasket seal around top, bottom, and sides of freezer drawer. 2 If gasket is not sealed, open drawer and slightly loosen four drawer screws (two on each side) to allow drawer to rotate.
- Page 8 INSTALLATION 1 Open door to provide access to screw. 4 After unit is leveled, lower anti-tip leg until it contacts the floor. 2 Loosen screw. 3 Adjust door to desired location. Door Door Rotate Door to Desired Location Raise Anti-tip Adjusting Door Lower 4 Rotate door stop until it makes contact with the lower hinge.
- Page 9 INSTALLATION To level the doors using the adjustable To adjust the flipper mullion: lower hinge (select models): 1 Loosen the screw located on the flipper 1 Remove all food items from door bins on mullion hinge. door being adjusted. 2 Open doors to 90 degrees. Flipper Mullion 3 Loosen or remove screw.
-
Page 10: Door Removal Instructions
DOOR REMOVAL INSTRUCTIONS Getting through narrow spaces To remove the refrigerator doors: 1 Trace lightly around the door’s top hinges If your refrigerator will not fit through an with a pencil. This makes reinstallation easier. entrance area, you can remove the doors. Check first by measuring the entrance. To prepare for removing the doors: 1 Make sure the electrical power cord is unplugged from the wall outlet. - Page 11 DOOR REMOVAL INSTRUCTIONS Press Press Water Line Approximately 5 Feet NOTE You will be pulling approximately five feet of water tube from the back of the refrigerator. 4 Unscrew the three lower hinge screws and hinge if necessary. To reinstall the right door, reverse the above steps.
- Page 12 DOOR REMOVAL INSTRUCTIONS Removing Freezer Drawer 1 Open freezer drawer. 2 Remove drawer screws on right and left sides (two screws on each side). Remove Hex Remove Hex Head Drawer Head Drawer Screw Screw Do Not Remove Do Not Remove Other Screws Other Screws Remove Hex...
-
Page 13: Installing Door Handles
INSTALLING DOOR HANDLES Door Handle Mounting Mounting Refrigerator Handles Instructions for Frigidaire 1 Remove handles from carton and any other protective packaging. 2 Position fresh food handle end caps over upper and lower pre-installed shoulder bolts (A) that are fastened... - Page 14 INSTALLING DOOR HANDLES Door Handle Mounting Mounting Refrigerator Handles Instructions for Frigidaire Gallery ® 1 Remove handles from carton and any other protective packaging. 2 Position fresh food handle end over upper and lower pre-installed shoulder bolts (A) that are fastened into...
- Page 15 INSTALLING DOOR HANDLES Door Handle Mounting Mounting Refrigerator Handles Instructions for Frigidaire Professional ® 1 Remove handles from carton and any other protective packaging. 2 Position fresh food handle end over upper and lower pre-installed shoulder bolts (A) that are fastened into...
-
Page 16: Connecting The Water Supply
6 ft. Stainless Steel Water Line) and for manufacturer will not be responsible for homes without an existing valve, Frigidaire any damage if plastic tubing is used for recommends its Smart Choice water line ®... - Page 17 CONNECTING THE WATER SUPPLY To Connect Water Supply Line To Plastic Water Tubing Steel Ice Maker Inlet Valve to Ice Maker Clamp Fill Tube 1 Disconnect refrigerator from electric power Brass source. Compression 2 Place end of water supply line into sink or bucket. Turn ON water supply and flush Ferrule supply line until water is clear.
-
Page 18: Controls
CONTROLS User Interface (options may vary) Enlarged view of user interface display menu (options may vary) -
Page 19: Setting Cooling Temperatures
CONTROLS Options May Vary air filter Displays the current status of the air filter (Good, Order, or options Used to enter and exit the Replace). To reset the filter (∧ or ∨) options menu and make status to “Good”, press and selections. hold the “set” key for three seconds. exit Toggles the options and run modes. -
Page 20: Sabbath Mode
CONTROLS Alarms Sabbath Mode Power Failure The Sabbath Mode is a feature that disables portions of the refrigerator and its controls In the event of a power failure, the power fail in accordance with observance of the weekly alert will be illuminated. Press alarm reset to Sabbath and religious holidays within the acknowledge the alarm. -
Page 21: Automatic Ice & Water Dispenser
AUTOMATIC ICE & WATER DISPENSER Priming the water supply system Turning the fresh food ice maker on and off CAUTION Ice production is controlled by the ice maker’s On/Off icon on the control panel. Press and For proper dispenser operation, recommended hold the “Ice Off”... -
Page 22: Cleaning The Ice Maker
AUTOMATIC ICE & WATER DISPENSER Ice maker/dispenser tips 4 Allow the ice bin to dry completely before replacing in the freezer. • If your refrigerator is not connected to a 5 Replace the ice bin. Turn the ice maker on. water supply or the water supply is turned off, turn off the ice maker by holding the Remove and empty the ice bin if:... -
Page 23: Automatic Ice Maker - Freezer
AUTOMATIC ICE MAKER - FREEZER Operation & Care of the Freezer • The following sounds are normal when the Ice Maker ice maker is operating: (select models) - Motor running After the refrigerator is installed properly, the ice maker can produce ice within 24 hours. It can - Ice dropping into ice bin completely fill the ice bin in about three days. -
Page 24: Storage Features
STORAGE FEATURES Drawers CAUTION Your refrigerator includes a variety of storage drawers. These drawers are located in fixed To avoid personal injury or property positions at the bottom of the fresh food damage, handle tempered glass shelves compartment. carefully. Shelves may break suddenly if nicked, scratched, or exposed to sudden Crispers temperature change. -
Page 25: Deli Drawer
STORAGE FEATURES 2 Lift the front slightly and remove the 4 Place the bin just above desired position. drawer. 5 Lower the bin onto supports until locked in place. Removing Crisper Drawer Deli drawer Ideal for storage of deli meats and cheese. Adjustable Door Bin 6 Place bin liner into bin. - Page 26 STORAGE FEATURES Dairy compartment NOTE Use the dairy compartment, If basket is not resting on stabilizer bar retainer at the top of clips, the drawer will not close properly. the fresh food To Remove Lower Basket compartment door, for short- 1 Remove all items from basket.
- Page 27 STORAGE FEATURES Dividers Removal Lift up on the front of the divider and pull out. Basket Divider Retainers Stabilizer Basket Divider Lift up on the rear of the lower divider and pull out. Lower Basket Divider Lower Basket Divider & Spill Guard Tray ...
-
Page 28: Storing Food And Saving Energy
STORING FOOD AND SAVING ENERGY Ideas for storing foods • Activating “quick freeze” also will help your freezer more efficiently maintain the Fresh food storage selected temperature after placing new purchases with pre-existing frozen foods. • Keep the fresh food compartment between 34° F and 40° F with an optimum • Avoid adding too much warm food to the temperature of 37°... -
Page 29: Normal Operating Sounds And Sights
NORMAL OPERATING SOUNDS AND SIGHTS Understanding the sounds you NOTE may hear Your new, high-efficiency refrigerator may Energy efficient foam in your refrigerator is introduce unfamiliar sounds. These sounds not a sound insulator. normally indicate your refrigerator is operating correctly. Some surfaces on floors, walls, and kitchen cabinets may make these sounds more noticeable. NOTE The following is a list of major components in your refrigerator and the sounds they can... -
Page 30: Changing The Filter
4 Unpackage the new filter cartridge. Using the alignment guide, slide it gently into the To order your replacement filters, please visit filter housing until it stops against the snap-in our online store at www.frigidaire.com/store, connector at the back of the housing. by calling toll-free at 877-808-4195, or by visiting the dealer where you purchased your 5 Push firmly until the cartridge snaps into refrigerator. -
Page 31: Air Filter
CHANGING THE FILTER Air filter Ordering replacement filters (select models) The air filter is located under the utility bin. Order new filters by calling 877-808-4195, online at www.frigidaire.com/store, or through the dealer Replacing your PureAdvantage where you bought your refrigerator. You may want to consider ordering extra filters when you first air filter install your refrigerator. To ensure optimal filtering of refrigerator odors, Air Filter Replacement cartridge, part #PAULTRA... -
Page 32: Care And Cleaning
CARE & CLEANING Protecting your investment Keeping your refrigerator clean maintains its appearance and prevents odor build-up. Wipe up any spills immediately and clean the freezer and fresh food compartments at least twice a year. NOTE Do not use abrasive cleaners such as window sprays, scouring cleansers, flammable fluids, cleaning waxes, concentrated detergents, bleaches, or cleansers containing petroleum products on plastic parts, interior doors, gaskets, or cabinet liners. - Page 33 CARE & CLEANING Care & Cleaning Tips Part What To Use Tips and Precautions Interior & Door • Soap and water Use two tablespoons of baking soda in Liners one quart of warm water. Be sure to • Baking soda and water wring excess water out of sponge or cloth before cleaning around controls, light bulb or any electrical part.
- Page 34 CARE & CLEANING Ice Chute Extension Installing the Ice Chute Extension (select models) The ice chute extension is designed to better 1 Turn the refrigerator off using the direct ice flow into containers. button on the control panel (refer to the “Controls” section of this Manual). 2 Align the extension with the ice chute so that the snap clips are just inside the front edge of the chute.
- Page 35 Ordering Replacement LED Lights NOTE Order new LEDs by calling 877-808-4195, online at www.frigidaire.com/store, or through the dealer where you bought the refrigerator. Here is LED lights are in series so if one is bad or the product number to request when ordering: unplugged, several lights may not light up.
-
Page 36: Before You Call
BEFORE YOU CALL 1-800-944-9044 (United States) Visit our web site at 1-800-265-8352 (Canada) www.frigidaire.com CONCERN POTENTIAL CAUSE COMMON SOLUTION AUTOMATIC ICE MAKER Ice maker is • Ice maker is turned off. • Turn on ice maker. For the fresh food ice maker, not making press and hold the “Ice Off”... - Page 37 BEFORE YOU CALL CONCERN POTENTIAL CAUSE COMMON SOLUTION AUTOMATIC ICE MAKER (continued) Ice cubes • Ice cubes are not being • Remove ice container and discard ice. The ice are freezing used frequently enough maker will produce fresh supply. Ice should be together.
- Page 38 BEFORE YOU CALL CONCERN POTENTIAL CAUSE COMMON SOLUTION DISPENSER (Ice & Water) (continued) Water • Cut-off and cut-on • Have someone turn up the cut-off and cut-on pressure is pressures are too low pressure on the water pump system (well extremely (well systems only).
- Page 39 DIGITAL TEMPERATURE DISPLAY Digital • Electronic control • Call your Frigidaire service representative, temperature system has detected a who can interpret any messages or number displays are performance problem. codes flashing on the digital displays. flashing.
-
Page 40: Major Appliance Warranty
Obligations for service and parts under this warranty must be performed by Electrolux or an authorized service company. Product features or specifications as described or illustrated are subject to change without notice. Canada 1.800.944.9044 1.800.265.8352 Frigidaire Electrolux Canada Corp. 10200 David Taylor Drive 5855 Terry Fox Way Charlotte, NC 28262 Mississauga, Ontario, Canada...