Table of Contents
Advertisement
Available languages
Available languages
perator_s
nual
I:RRF rgMRN°
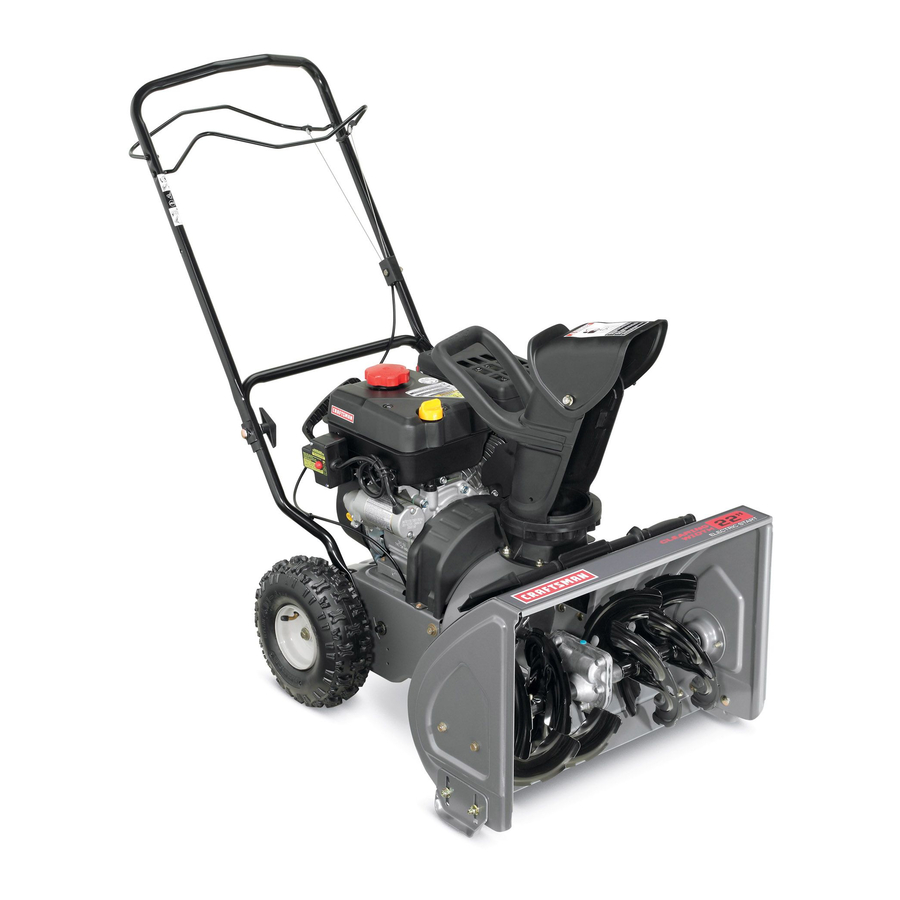
Electric Start
-INCH
SNOW THROWER
Model No. 247.881700
CAUTION:
Before
using this product,
read this manual and follow
all safety
rules and operating
instructions.
,, SAFETY
o ASSEMBLY
OPERATION
MAINTENANCE
PARTS LIST
o ESPANOL
Sears Brands Management
Corporation,
Hoffman
Estates,
IL 60179, U.S.A.
Visit our website:
www.craftsman.corn
FormNo. 769-08167
(May21,2012)
Advertisement
Table of Contents

Related Manuals for Craftsman 247.881700


Summary of Contents for Craftsman 247.881700
- Page 1 I:RRF rgMRN° Electric Start -INCH SNOW THROWER Model No. 247.881700 ,, SAFETY o ASSEMBLY OPERATION MAINTENANCE PARTS LIST CAUTION: Before using this product, o ESPANOL read this manual and follow all safety rules and operating instructions. Sears Brands Management...
- Page 2 FORTWO YEARSfrom the dateof purchase,this productis warrantedagainstanydefectsin materialor workmanship. A defective productwill receivefree repairor replacementif repairis unavailable. Forwarranty coverage details to obtain free repair or replacement,visit the web site: www.craftsman.com This warranty coversONLYdefects in material and workmanship. Warranty coverage does NOT include: •...
- Page 3 This machinewas builtto be operatedaccordingto the safeopera- This symbolpointsout importantsafetyinstructionswhich,if not tion practicesin this manual.As with anytype of powerequipment, followed,couldendangerthepersonalsafetyand/orpropertyof carelessnessor error on the partof the operatorcan resultin serious yourselfand others. Readand followall instructionsin this manual injury.This machineis capableof amputatingfingers,hands,toes beforeattemptingto operatethis machine.Failureto complywith and feet and throwingdebris.Failureto observethe followingsafety these instructionsmay resultin personalinjury.Whenyou seethis...
- Page 4 Safe Handling of Gasoline • Exerciseextremecautionwhenoperatingon or crossinggravel surfaces.Stay alertfor hidden hazardsor traffic. Toavoidpersonalinjuryor propertydamageuseextremecare in handlinggasoline.Gasolineis extremelyflammableand the vaporsare Exercisecautionwhenchangingdirectionand whileoperatingon explosive.Seriouspersonalinjurycan occurwhengasolineis spilled slopes.Do notoperateon steep slopes. on yourselfor yourclotheswhichcan ignite. Washyour skin and Planyoursnow-throwing patternto avoiddischargetowards changeclothesimmediately. windows,walls,cars etc.
- Page 5 MAINTENANCE & STORAGE DO NOT MODIFY ENGINE • Nevertamperwith safetydevices.Checktheirproperoperation Toavoidseriousinjuryor death,do not modifyengine in any way. regularly.Referto the maintenance and adjustmentsectionsof Tampering with the governorsettingcanlead to a runawayengineand this manual. cause it to operateat unsafespeeds.Nevertamperwithfactory setting of engine governor. •...
- Page 6 SAFETY SYMBOLS This pagedepictsand describessafetysymbolsthat mayappear on this product. Read,understand,and followall instructionson the machine beforeattemptingto assembleand operate. READ THE OPERATOR'S MANUAL(S) Read, understand, and follow all instructions in the manual(s) before attempting to assemble operate WARNING-- ROTATING BLADES Keep hands out of inlet and discharge openings while machine is running.
- Page 7 iMPORTANT: T his unitis shippedwith theengine fullof oil. After assembly,see page 10for fuel and oil details. Removing From Carton 1. Cut the cornersof thecarton and lay the sidesflat on the ground. Removeall packinginserts. 2. Movethe snowthrowerout of thecarton. 3. Makecertainthe carton has beencompletelyemptiedbefore discardingit.
- Page 8 Skid Shoe Clean-Out Tool Thesnow throwerskid shoesare adjustedupwardat thefactory Thechute clean-out t oolisfastened to thetopoftheaugerhousing witha for shippingpurposes.Adjust themdownward,if desired,priorto mounting clipanda cabletieat thefactory. C utthecabletiebeforeoperating operatingthe snowthrower. thesnowthrower. SeeFigure 5. It isnot recommended that youoperatethis snowthroweron gravel ChuteClean-outTool as itcan easilypick up and throwloosegravel,causingpersonal injury or damageto the snowthrowerand surroundingproperty.
- Page 9 Fuel Recommendations Checking Oil Level Use automotive gasoline(unleadedor low leadedto minimizecombus- tionchamberdeposits)with a minimumof 87 octane.Gasolinewith up to 10%ethanolor 15%MTBE(MethylTertiaryButyl Ether)canbe The engineis shippedwith oil in theengine.Youmust, however, used. Neverusean oil/gasolinemixtureor dirty gasoline.Avoidgetting checkthe oil levelpriorto operatingthe snowthrower.Runningthe dirt, dust,or waterin thefuel tank. DO NOTuse E85gasoline. enginewith insufficientoil cancause seriousengine damageand Refuelin a well-ventilated areawith the engine stopped.Donot void theenginewarranty.
- Page 10 Discharge Chute Auger Control Test iMPORTANT: P erformthefollowingtest beforeoperatingthesnow 1. Loosenthe wingknobon the upperchute,adjustchuteand chute throwerfor the firsttime and at the startof eachwinterseason. controlto desiredoperatingposition. 2. Tightenthewing knobon the upper chutemakingsurethe carriage Checkthe adjustment o f theauger controlas follows: bolt iscorrectlypositioned.Referto Figure8. 1.
- Page 11 Upper Handle Drive AugerControl Control Upper Chute FuelCap Chute Assembl RecoilStarter Handle Clean-out Tool Chute Knob Auger Shave Plate Oil Drain Electric Starter Outlet Skid Shoe Be familiarwith all the controlson the snowthrowerandtheir properoperation.Knowhowto stopthe machineand disengagethem quickly. Snowthrowercontrolsand featuresare describedbelowand illustrated Chute Handle in thefigureabove.
- Page 12 Clean=Out Tool Auger Whenengaged,the auger rotatesand drawssnow intothe auger housing. Neveruseyour handsto clear a cloggedchuteassembly.Shutoff Chute Assembly engineand remainbehindhandlesuntilall movingpartshavestopped Snowdrawnintothe augerhousingis dischargedout the chute beforeusingthe clean-outtoolto clear thechute assembly. assembly. The chuteclean-outtool is conveniently fastenedto the rearof the Choke Control auger housingwith a mountingclip.
- Page 13 Gasoline Determinethatyour home'swiringisa three-wiregroundedsystem. Ask a licensedelectricianifyouare notcertain. Use automotive gasoline(unleaded or low leadedto minimizecombus- If you havea groundedthree-prongreceptacle,proceedas follows. tionchamberdeposits)with a minimumof 87 octane.Gasolinewith If you do not havethe properhousewiring, DO NOTusethe electric up to 10%ethanolor 15%MTBE(MethylTertiaryButylEther)can be starterunder anyconditions. used.
- Page 14 Stopping The Engine Positioning Discharge Chute Runenginefor a few minutesbeforestoppingto help dry off any Loosenthechuteknoband pivotupperchuteto desiredposition.Tighten moistureon the engine. the chuteknobmakingsurethe carriageboltiscorrectlypositioned. Movethrottlecontrolto STOP position. Raising the chutethrowssnowfurther. Removethe key.Removingthe key will reducethe possibilityof Rotatechutehandleto desiredoperatingposition. unauthorized startingof the enginewhileequipmentis not in use. Keepthe key in a safeplace.The enginecannotstart withoutthe key.
- Page 15 Follow t he maintenance schedule given b elow. This chart describes service guidelines only. Use the Service Log column tokeep t rack Before servicing, repairing, lubricating orinspecting, disengage all c on- ofcompleted maintenance tasks. To trols a nd stop e ngine. Wait until all m oving parts have come toacomplete locatethe nearest Sears stop.
- Page 16 Usedoil is a hazardouswasteproduct.Disposeof usedoil properly. Donotdiscardwith householdwaste.Checkwith yourlocalauthori- ties or SearsServiceCenterfor safedisposal/recycling facilities. Reinstallthe drain plugand tightenit securely. Refillwith the recommended oil and checkthe oil level.See Recommended Oil Usagechart.Theengine'soil capacityis 20 ounces. Oil Drain Plug (%-400 -200 0o 200 400 ("c) -30°...
- Page 17 Lubrication NOTE:Wheninstallinga newsparkplug,tighten 1/2-turnafter the spark plugseatsto compressthe washer.Whenreinstalling a used Fora viewof the lubricationpointson the snowthrower,see Figure16. spark plug,tighten 1/81to 1/41turn after the sparkplug seatsto 1. Lubricatepivotpoints on the augercontroland drivecontrol with a compressthe washer.General Recommendations light engineoil once a season. 1.
- Page 18 Check V=Belts Auger Belt Followinstructionsbelowto checkconditionof drivebelts every50 iMPORTANT:Because gas could leakfromthe carburetorwhen hoursof operation. servicingaugerbelt, run the engineuntilthe fuel tank isdry, as previ- 1. Removetheplasticbelt coveron the front of the engineby ously instructed i n ReplacingBelts. removingthe self-tappingscrewand pressingthe plastictabs to 1.
- Page 19 Drive Belt Adjusting The Auger Cable Referto theAssemblysectionfor instructionson adjustingthe auger NOTE: Replacethe drivebelt beforereassembling the newauger belt. controlcable. 1.Tip the snowthrowerup and forward sothat it restson theauger housing. iMPORTANT:Becausegas couldleakfrom the carburetorwhen servicingauger belt, runthe engine untilthe fueltank is dry, as previ- ously instructedin ReplacingBelts.
- Page 20 If the snowthrowerwillnot be usedfor30 daysor longer,or if it is the end of the snowseasonwhenthe last possibilityof snowis gone,the equipmentneedsto be storedproperly.Followstorageinstructionsbelowto ensuretop performance from the snowthrowerfor manymoreyears. PREPARING SNOW THROWER PREPARING ENGINE Whenstoringthe snowthrowerin an unventilatedor metal stor- Enginesstoredover30 days need to be drainedof fuel to prevent age shed,careshouldbe taken to rustprooftheequipment.Using deterioration and gumfrom formingin fuel systemor on essential a light oil or silicone,coat theequipment,especiallyanychains,...
- Page 21 This sectionaddresses minor serviceissues.To locate the near- est Sears Service Centeror to scheduleservice,simplycontact Beforeperforming anytypeof maintenance/service, disengage all Searsat 1-800-4-MY-HOME®. controlsandstopthe engine. W aituntilall movingpartshavecometo a complete stop.Remove thekeyto prevent u nintended starting. A lways wearsafetyglassesduringoperation or whileperforming anyadjustments or repairs. Enginefails to start Chokecontrolnot in Chokeposition.
- Page 22 Craftsman Snow Thrower IViodel 247.881700...
- Page 23 Craftsman Snow Thrower IViodel 247.881700 731-04218B 984-04037 ChuteAssembly Impeller 71o-o4o71 932-0611 ExtensionSpring CarriageBolt 5/16-18x 1.0" WaveWasher 71o-o451 736-0174 CarriageBolt 5/16-18 ShoulderScrew3/8-16 710-0260A 938-0281 CarriageBolt 5/16-18x .62 720-04072A 941-0245 WingKnob5/16-18 Hex FlangeBearing 731-04388A ChuteHandle 941-0309 Ball Bearing 950-04191 731-04426A UpperChute Spacer...
- Page 24 Craftsman Snow Thrower Model 247.881700...
- Page 25 Craftsman Snow Thrower IViodel 247.881700 784-o419C-4O43 71o-o572 CarriageScrew5/16-18x 2.25 DriveHousingFrame 71o-o6o5 Mach.Screw 1/4-20x 1.825 790-00223A-0637 AugerCable Bracket 71o-o4484 Screw5/16-18x .75 790-00224 AugerCable Adj. Bracket 934-04282B 712-o4o64 FlangeLock Nut 1/4-20 Wheel AssySnow HogGray 720-04072A 734-04322 Tube,Tire, 4.10/3.50-4.0 WingKnob5/16-18 LockBolt 5/16-24x .75...
- Page 26 Craftsman Snow Thrower Model 247.881700 777S32636 777X43688 ....OONOT ..... 1OO1£RO=NV313 "]VgNVN S,HOIVH3dOQV]U "_ "S]3VdHgS13AVU9NO9NlVU3dO ..USEE85 ORFUEL' N3HM NOilgVO VUIX33Sn"SU3QNVISAB IV 39UVHOSiQ CONTAiNiNG MORE 'S3iUIlrNI 133U10 U 3A3N S I33F80 NMOUHI OIOM Ol "t_ "_NJHOVN 5 NI3JAU3S HO9N199013Nn THAN 10% ETHANOL 3UOd3B03ddOIS 3AVHSIUVd9NIAON]IV]JlN[i S_]QNVH QNJH38 NJVNBU ONV '3NJON3 dOIS'S83A33 HOlff]O 39VgNBSJQ "£...
- Page 27 Craftsman Engine Model 265=SUA For Snow Model 247.881720 951-11282 MufflerAssembly 710-05001 StudM8x36 751-14190 MufflerStud Kit 951-11289 ExhaustPipe Gasket 712-04214 Nut,M8 710-04915 Bolt M6x12 951-10642B MufflerShield...
- Page 28 Craftsman Engine Model 265=SUA For Snow Model 247.881720 °0 951-10634 Air CleanerHousing 712-04213 951-11284 ChokeKnob 951-10757 ThrottleControlKnob 951-10637 KeySwitch 731-05632 951-10640 Choke PushRod 951-10635 HeaterBox 710-04943 Bolt M6x28...
- Page 29 Craftsman Engine Model 265=SUA For Snow Model 247.881720 132- 6asket Kit-Complete 133- 6asket Kit-External 134- Complete Engine...
- Page 30 Craftsman Engine IViodel 265=SUA For Snow IViodel 247.881720 951-11688 710-04932 Bolt M8x32 PistonRingSet 951-11632 951-11283 PistonPin Snap Ring Oil FillPlugAssembly 951-11900 Piston 951-11577 O-Ring15.8x2.5 951-11901 PistonPin 951-11368 Oil Seal,25x41.25x6 710-04915 Bolt M6x12 951-11248A CrankcaseKit 951-11113 Air Shield (Incl.59,62,74,75,79) 951-11573 951-11062B...
- Page 31 Craftsman Engine Model 265=SUA For Snow Model 247.881720 _'45 132- Gasket Kit-Complete 133-Gasket Kit-External 134- Complete Engine...
- Page 32 Craftsman Engine IViodel 265=SUA For Snow IViodel 247.881720 710-04968 Bolt M6x16 951-11054A ValveCover 731-07059 BreatherHose 726-04101 BreatherHose Clamp 951-11565 ValveCoverGasket 951-12000 ValveSpring Retainer(Intake) 951-11892 RockerArmAssembly 751-11124 Nut, PivotLocking 751-11123 AdjustingNut ,Valve 951-11893 RockerArm 710-04902 Bolt, Pivot 951-12002 ExhaustLashCap 951-12003 ValveSpring Retainer(Exhaust)
- Page 33 Craftsman Engine IViodel 265=SUA For Snow IViodel 247.881720 135 - Carburetor Kit...
- Page 34 Craftsman Engine IViodel 265=SUA For Snow IViodel 247.881720 710-04939 Stud M6x117 710-04910 Stud M6x105 951-11567 CarburetorInsulatorGasket 951-11896 CarburetorInsulator 951-11569A CarburetorGasket 951-10639A PrimerAssembly 951-11824 PrimerBulb 951-12705 Carburetor Assembly 951-11897 CarburetorGasketPlate 951-11112 ChokeControl 951-14050 CarburetorKit (Incl.h,n,o,p,q,r,s,t,v,x) ChokeShaft ChokePlate ThrottleShaft ThrottlePlate Screw M3x6...
- Page 35 Craftsman Engine Model 265-SUA For Snow Model 247.881720 92/° _3 92-_ _/93 951-10646 IgnitionCoil Assembly 951-11110 Air FlowShield 710-04940 BoltM6xlO 710-04919 BoltM6x25 951-12416 Flywheel 951-10934 CoolingFan 951-10911 Starter Cup 712-04209 Nut,Special,M14x1.5 710-04915 BoltM6x12 951-10663A BlowerHousing 736-04455 Gasket6 710-04974 BoltM6xlO 951-14151...
- Page 36 Craftsman Engine Model 265=SUA For Snow Model 247.881720 ,115 _--117 951-10758 PrimerBracket 951-11914 DipstickDecorationCover 710-05103 BoltM6x12 710-04905 Bolt 951-11108 710-04915 Bolt M6x12 GovernorSystemShield 951-11935 951-11913 GovernorSpring Oil FillTubeAssembly 951-10664 951-11381 ThrottleLinkageSpring O-Ring 951-10665 951-10656 Oil FillTube ThrottleLinkage 951-11106 GovernorArm 951-11904...
- Page 37 Craftsman Engine Model 265=SUA For Snow Model 247.881720 _128 1119 710-04914 BoltM6xlO 951-11680 i 120 WireClip 951-11114 1121 SwitchHousingMountingBracket 712-05015 i 122 Nut,M6 710-04935 BoltM4x60 i 123 710-04965 BoltM4x55 i 124 710-05182 BoltM6x32 i 125 715-04088 DowelPin8x8 i 126 951-10645A...
- Page 40 MTD CONSUMER GROUP INC (MTD), the California Air Resources Board (CARB) and the United States Environment Protection Agency (U. S. EPA) Emission Control System Warranty Statement (Owner's Defect Warranty Rights and Obligations) EMISSION CONTROLSYSTEM COVERAGE IS APPLICABLE TOCERTIFIEDENGINESPURCHASED IN CALIFORNIA IN 2005 ANDTHERE- AFTER,WHICHARE USEDIN CALIFORNIA, A NDTO CERTIFIED MODELYEAR2005 AND LATERENGINESWHICHARE PURCHASED AND USEDELSEWHERE IN THE UNITEDSTATES.
- Page 41 (6)The owner must not b echarged fordiagnostic labor that l eads tothe determination that a warranted part i sinfact d efective, provided that such diagnostic work i sperformed atawarranty station. (7) The engine manufacturer isliable f or d amages toother engine components proximately caused by afailure u nder warranty ofany warranted part.
- Page 42 Look For Relevant Emissions Durability Period and Air index information On Your Engine Emissions Label Engines that are certified to meet the California Air Resources Board (CARB) Tier 2 Emission Standards must display information regarding the Emissions Durability Period and the Air Index. Sears Brands Management Corporation makes this information available to the consumer on our emission...
- Page 43 Congratulations on making a smart purchase. Your new Craftsman® product is designed manufactured for years of dependable operation. But like all products, it may require repair from time to time. That's when having a Repair Protection Agreement can save you money and aggravation.
- Page 44 La presentegarantiase anula si se utilizaeste productoalguna vezpara prestarservicioscornerciales o si se Ioalquilaa otra persona. Paraobtener informaci6n sobre el alcance de la garantiay solieitar la reparaci6no el reemplazo, v isite el sitio Web: www.craftsman.com Esta garantia eubre0NICAMENTElos defectos en los rnateriales y en la mano de obra. Esta garantia NOcubre: •...
- Page 45 Esta rn_.quina r ue construidapara seroperadade acuerdocon La presenciade este sfrnboloindicaque setrata de instrucciones las reglasde seguridadcontenidasen este manual.AI igualque irnportantesde seguridadque se deben respetarpara evitar concualquiertipo de equipo rnotorizado, u n descuidoo error por poner en peligrosu seguridadpersonaly/o materialy la de otras partedel operadorpuedeproducirlesionesgraves.Esta rn_.quina personas.Lea y siga todaslas instruccionesde este manualantes es capazde arnputarrnanosy piesy de arrojarobjetoscon gran...
- Page 46 Manejo seguro de la gasolina • Nuncaoperela rn_.quina si falta un rnontajedel canalo si el rnisrnoest,. daSado.Mantengatodos losdispositivosde seguri- Paraevitar lesiones personales 0 daSosrnateriales tengarnucho dad en su lugaryen funcionarniento. cuidadocuandotrabajecon gasolina.La gasolinaes surnarnente inflarnabley sus vaporespuedencausarexplosiones. S i se derrarna •...
- Page 47 • Paraencenderel motor,jale de la cuerdalentarnente hasta que • SegOn la Cornisi6nde Seguridad de Productosparael Consurni- sienta resistencia,luegojale r_.pidarnente. El replieguer_.pido de dor de los EstadosUnidos(CPSC)y la Agenciade Protecci6n la cuerdade arranque(tensi6nde retroceso)le jalar_,la rnanoy Arnbiental d e los EstadosUnidos(EPA),este productotieneuna el brazohaciael motor rn_.s r_.pido de Io que usted puedesoltar.
- Page 48 SiMBOLOS DE SEGURIDAD Esta p_ginadescribelossirnbolosy figurasde seguridadinternacionales que puedenapareceren este producto.Lea el manualdel operador )araobtenerla inforrnaci6n terrninadasobreseguridad,reunirse,operaci6ny rnantenimiento y reparaci6n. LEA ELMANUAL DELOPERADOR(S) Lea,entienda, y siga todas lasinstrucciones en el manual (es)antes de intentar reunirse y funcionar. LA ADVERTENCIA -- PLATOS ROTATORIOS Guarde manos de entrada y aperturas de la descarga mientras la m_iquina corre.
- Page 49 IMPORTANTE:Esta unidadse enviaconel motorIlenode aceite, Despu_sdel rnontaje,consultela p_.gina 10 para losdetallesdel combustible y el aceite, Extracci6n de la unidad de la caja 1, Corte lasesquinasde la cajade cart6ny extiendaloslados de rnaneraque quedenpianossobreel piso Quitetodos los separadores de ernpaque, 2, Saquela rn_.quina q uitanievede la caja. 3, Aseg@ese de vaciarcornpletarnente la cajaantes de tirarla, NOTA:Lasreferencias q ue contiene estemanual s obrelosladosderecho o izquierdo de la rn_.quina q uitanieve sehacenobservando la rnisrna...
- Page 50 Pasadores de cuchilla Zapata antideslizante Laszapatas antideslizantes de lam_quina quitanieve s eajustan haciaarriba Su rn_.quina q uitanievetrae un par de pasadores enf_brica, p arael envio. S i Iodesea, p uede ajustarlas hacia abajoantes de de cuchillade la barrenay pasadoresde chaveta hacer f uncionar l a m_quina q uitanieve.
- Page 51 Recomendaciones sobre el combustible Verificaci6n del nivel de aceite Utilicegasolinaparaautorn6viles ( sinplorno o bajocontenido de plorno pararninirnizar losdep6sitos en la c_rnara de cornbusti6n) con unrninirno El motorse enviacon aceiteen el motor.Sin embargo,debe de 87octanos.Sepuedeusargasolinaconhastaun 10%de etanol o un controlarel nivelde aceiteantes de hacerfuncionarla rn_.quina 15%de MTBE(eterrnetilico terciario-bufilico).
- Page 52 Canal de descarga Si la barrenamuestraALGONsignode rotaci6n,vuelva inmediatamente a la posici6ndel operadory apagueel motor. Aflojela perilla dealetas delcanal s uperior, ajuste el canal y elcontrol Esperea quetodas las partesm6vilessedetenganantesde delcanal a la posici6n defuncionamiento deseada. reajustarel cablede controlde la barrena. Apriete la perilla dealetas delcanal s uperior asegur_ndose dequeel Aflojela tuercahexagonal posterior en el soportede ajustedel cable.
- Page 53 Control de la barrena de la transmisi6n Cuerda de Tapa de la arranque, gasolina Canal superior del canal Tap6n de Manija del Montaje del canal Silenciador combustible arrancador de retroceso Herramienta de limpieza Cebador Llavede encendido Perilla del canal Barrena Placa de raspado Zapata...
- Page 54 Barrenas El controldel regulador est,. ubicadoen el motor.Regulala velocidad del motor,y Io apagacuandose presionahaciaabajocornpletarnente. Cuandoest_.nengranadas, l as barrenasgiran y rnandanla nievehacia La irnagende la derecharepresentalasvelocidadesdel control el interiorde la caja de la barrena. del reguladory coincidecon la etiquetaubicadaen el motor.Las IVIontaje del canal imP.genes a continuaci6nilustran la definici6nde cada sirnbolo.
- Page 55 Gasolina NO use ei arrancador electrico en ninguna circunstancia. Utiiice gasolina para autom6viles (sin plomo o bajo contenido de plomo Conecte el prolongador a la salida situada en ia superficie del motor. Conecte ei otto extremo del prolongador a un tomacorriente de CA, para minimizar los dep6sitos en la ca.marade combusti6n) con un minimo 120voltios con conexi6n a tierra, para tres patas, en un a.reabien de 87 octanos.
- Page 56 Detenci6n del motor Ubicacibn del canal de descarga Deje encendido el motor durante aigunos minutos antes de detenerlo para Afloje la perilladel canal y gireel canal superior hasta la posici6ndeseada. permitir que se seque la humedad en el mismo. Ajuste la perilladel canal comprobandoque el perno de carro este ubicado 1.
- Page 57 MANTENIMIENTO DEL MOTOR "_ Antes de realizar tareas de lubricaci6n, reparaci6n o inspecci6n, desengrane todos los controles y detenga ei motor. Esperea que se detengan completamente todas las piezas m6viles. Control del aceite del motor NOTA: Verifique ei nivel de aceite antes de cada uso y despues de cada cinco horas de funcionamiento para cerciorarse que se mantiene el nivel de aceite indicado.
- Page 58 Control de la bujia Bujia de encendido NO pruebe lachispa si no esta.la bujia de encendido. NO de arranque al motor si no esta.la bujia de encendido. Si el motor ha estado funcionando, el silenciador estara,muy caiiente. Tenga cuidado de no tocar el silenciador. NOTA: Controle la bujia una vez por temporada o cada 25 horas de funcionamiento.
- Page 59 Recomendaciones generales Pasadorde "_ cuchilla Pasadorde chaveta 1. Respete siempre las regias de seguridad cuando reaiice tareas de ..Zapata mantenimiento. antideslizante 2. La garantfa de esta ma.quinaquitanieve no cubre elementos que han estado sujetos al real uso o negligencia del operador. Para recibir el reembolso total de la garantfa, ei operador debera,dar mantenimiento a la ma.quinaquitanieve como se indica en este manual.
- Page 60 Antes de realizartareas de servicio, reparaci6n, iubricaci6n o inspecci6n, desengrane todos los controles y detenga el motor. Espere a que se detengan completamente todas ias piezas m6viles. Desconecte el cable de la bujia y p6ngalo haciendo masa contra el motor para evitar que se encienda accidentalmente.
- Page 61 Ajuste del cable de la barrena Es posible que se requieran ajustes peri6dicos del cable de control de la barrena debido ai estiramiento y al desgaste normal de la correa. Se necesitara.najustes si las barrenas parecen temblar mientras giran pero el motor mantiene su velocidad, o si sigue girando con ei control de la barrena desengranado.
- Page 62 Si no sevaa utiliza el equipo durante30 dfaso rn_.s, o sies el finalde la ternporada de nievey ya noexisteposibilidad deque nieve, e s necesario alrnacenar e l equipo de rnanera adecuada. S igalasinstrucciones d e alrnacenarniento quese indicana continuaci6n p aragarantizar e l rendirniento rn_.xirno d e la rn_.quina q uitanieve durante rnuchos a_os.
- Page 63 Antesde realizarcuaiquiertipo de mantenimientoo servicio,desenganche todos loscontrolesy detengael motor.Esperea que se detengancomple- tamentetodas laspiezas m6viles.Desconecteel cablede la bujh y p6ngalo haciendomasacontraei motorpara evitarquese enciendaaccidentalmente. Utilicesiempreanteojosde seguridaddurantela operaci6no mientrasrealiza ajusteso reparaciones. Esta secci6nanaliza problemasmenores de servicio.Paraubicar el Centrode Servicio Sears m_s cercanoo para programarun servi- eio, simplemente eomuniquese con Sears al tel_fono 1-800-4-MY-HOME®.
- Page 64 MTD CONSUMER GROUP, iNC. (MTD), el Bordo de Recursos de Aire de California (CARB) y la Agencia de Protecci6n Medioambiental de Estados Unidos (U. S. EPA) Declaraci6n de Garantia del Sistema de Control de Emisiones (Derechos y obligaciones del propietario seg_n la garantia contra defectos) LA COBERTURADESISTEMADECONTROLDEEMISIONES APLICABLE A MOTORES CERTIFICADOS COMPRADOS ENCALIFORNIA EN2005 Y A PARTIRDE ENTONCES, QUESON USADOS EN CALIFORNIA, Y HASTA ANO2005 DE MODELOCERTIFICADO Y MOTORES POSTERIORES QUESON COMPRADOS Y USADOSENOTRAPARTEEN LOSESTADOS UNIDOS.
- Page 65 (3) Cualquier pieza g arantizada que est_ prograrnada para reernplazo segQn elrnantenirniento requerido deconforrnidad con lasinstruc- clones escritas delaSubsecci6n (c)segarantiza por e lperiodo detiernpo anterior alaprirnera fecha d ereernplazo prograrnada para e sa pieza. Silapieza f alla antes del p rimer reernplazo programatic, larnisrna ser_.
- Page 66 Busque el periodo de duraci6n de emisiones importantes yla informaci6n de clasificaci6n de aire en la etiqueta de emisiones de su motor Los motores cuyo cumpiimiento con los estAndares de emisi6n Tier 2 de la Comisi6n de Recursos Ambientales de California (CARB) est6 certificado deben exhibir la informaci6n relacionada con el periodo de duraci6n de ias emisiones y la clasificaci6n de aire.
- Page 67 Felicitaciones por haber realizado una adquisici6n inteligente. El producto Craftsman® que ha adquirido esta diseSado y fabricado para brindar muchos aSos de funcionamiento confiable. Pero como todos los productos a veces puede requerir de reparaciones. Es en ese momento cuando...
- Page 68 Your Home For troubleshooting, product manuals and expert advice: managernylife www.managemylife.com For repair - in your home - of all major brand appliances, lawn and garden equipment, or heating and cooling systems, no matter who made it, no matter who sold it! For the replacement parts, accessories owner's manuals that you need to do-it-yourself.