Table of Contents
Advertisement
Advertisement
Table of Contents

Related Manuals for La Crosse Technology WS-9077TWC-IT


Summary of Contents for La Crosse Technology WS-9077TWC-IT
- Page 1 WS-9077TWC-IT Wireless 915 MHz Weather Station Instruction Manual...
-
Page 2: Table Of Contents
TABLE OF CONTENTS Topic Page Inventory of Contents/Additional Equipment About WWVB Quick Set-Up Guide Detailed Set-Up Guide Battery installation Program Mode Program Sequence and Default Settings Function Keys Setting the LCD Contrast Setting the Time Zone Daylight Saving Time Setting Radio-controlled Time Setting 12/24-hour Time Setting Setting the Time... -
Page 3: Inventory Of Contents/Additional Equipment
INSTANT TRANSMISSION is the state- This product offers: of-the-art new wireless transmission technology, exclusively designed and developed CROSSE TECHNOLOGY. INSTANT TRANSMISSION offers you an immediate update (every 4 seconds!) of all your outdoor data measured from the SENSORs: follow your climatic variations in real-time! INVENTORY OF CONTENTS The Wireless Weather Station/ (Figure 1). -
Page 4: About Wwvb
ABOUT WWVB (Radio Controlled Time) The NIST (National Institute of Standards and Technology—Time and Frequency Division) WWVB radio station is located in Ft. Collins, Colorado, and transmits the exact time and date signal continuously throughout the United States at 60 kHz. The signal can be received up to 2,000 miles away through the internal antenna in the Weather Station. -
Page 5: Detailed Set-Up Guide
To complete the set up of your Wireless Weather Station after the 15 minutes have passed please follow the steps that follow in the Detailed Set-Up Guide. DETAILED SET-UP GUIDE BATTERY INSTALLATION (When one temperature sensor is being used) First, insert the batteries to the temperature sensor (see “A. Remote Temperature Sensor”... -
Page 6: Program Mode
* When the signal is successfully received by the Weather Station, the icon will be switched on. (If not successful, the icon will not be shown in LCD) So the user can easily see whether the last reception was successful (icon on) or not (icon off). On the other hand, the short blinking of the icon shows that a reception is being done now. -
Page 7: Daylight Saving Time Setting
Note: There are 8 LCD contrast levels to choose from—“Lcd 0” is the lightest, and “Lcd 7” is the darkest. Press and release the IN button to select the level you desire. Press and release the SET button to confirm and advance to the Time Zone setting. -
Page 8: Radio-Controlled Time Setting
“DST 0” indicates that the feature is off and the WWVB will not change times automatically. “DST 1” indicates that the feature is on and the WWVB will change times automatically. Note: Some locations (Arizona and parts of Indiana) do not follow Daylight Saving Time, and should select “DST 0.”... -
Page 9: Manual Time Setting
There are two methods by which the time and date can be set: A) Automatically via WWVB reception, or B) Manually. A. WWVB (Remote Control Time) This method requires you to do nothing, except wait for the signal to be received, and to select a time zone. -
Page 10: Setting The Snooze
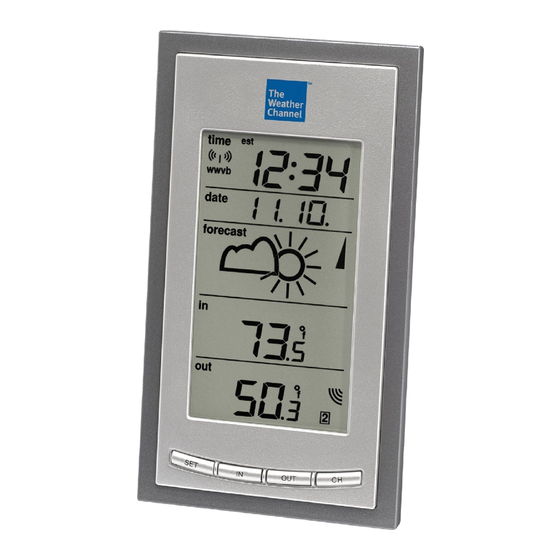
Press and release the IN button to advance the year. Press and release the SET button to confirm and advance to the day/month setting. The day and month will flash in the date LCD. Press and release the IN button to advance the month. Press and release the OUT button to advance the day. - Page 11 Press and release the IN button to select the forecast sensitivity Press and release the SET button to confirm the forecast sensitivity and complete the programming. FEATURES OF THE WS-9077U-IT WWVB Tower Icon (indicates time reception) Forecast icon Weather Tendency Arrow Satellite icon (indicates outdoor transmission) Remote Sensor Number...
-
Page 12: Ii. Indoor Temperature
Sunny—indicates that the weather is expected to improve (not that the weather will be sunny). Sun with Clouds—indicates that the weather is expected to be fair (not that the weather will be sunny with clouds). Clouds with Rain—indicates that the weather is expected to get worse (not that the weather will be rainy). - Page 13 temperature is displayed. The minimum record will display for 30 seconds before returning to the normal display mode. Press the IN button again (once while “MIN” is still displayed, twice otherwise). “MAX” appears above the indoor temperature and the LCD will flash, indicating that the maximum temperature and the time and date of occurrence of the indoor temperature is displayed.
- Page 14 Remove all the batteries from the receiver and sensor(s) and wait 60 seconds. During these 60 seconds, press any button 20 times to discharge any excess power. Insert the batteries to the first temperature sensor. Within 30 seconds of powering up the first sensor, insert the batteries to the Weather Station.
-
Page 15: Mounting
MOUNTING Note: Before permanently mounting, ensure that the Wireless Weather Station is able to receive WWVB signals from the desired location. Also, extreme and sudden changes in temperature will decrease the accuracy of the Wireless Weather Station, and changes in elevation will result with inaccurate weather forecasting for the next 12 to 24 hours. -
Page 16: Troubleshooting
4) Gently pull the Wireless Weather Station down to lock the screw into place. TROUBLESHOOTING NOTE: For problems not solved, please contact La Crosse Technology. Problem: No reception of WWVB time signal. Solution: 1) Wait overnight for signal. 2) Be sure Weather Station is at least 6 feet from any electrical devices, such as televisions, computers, or other radio-controlled clocks. -
Page 17: Specifications
5.63" x 3.18" x 1.21" (143.2 x 80.8 x 30.9mm) Remote Temperature Sensor: 5.05” x 1.50” x 0.83” (128.3 x 38.2 x 21.2 mm) WARRANTY INFORMATION La Crosse Technology, Ltd provides a 1-year limited warranty on this product against manufacturing defects in materials and workmanship. - Page 18 La Crosse Technology, Ltd or La Crosse Technology, Ltd’s authorized service center. La Crosse Technology, Ltd will repair or replace this product, at our option and at no charge as stipulated herein, with new or reconditioned parts or products if found to be defective during the limited warranty period specified above.
- Page 19 Fax: 608.796.1020 e-mail: support@lacrossetechnology.com (warranty work) sales@lacrossetechnology.com (information on other products) web: www.lacrossetechnology.com Questions? Instructions? Please visit: www.lacrossetechnology.com/9077it All rights reserved. This handbook must not be reproduced in any form, even in excerpts, or duplicated or processed using electronic, mechanical or chemical procedures without written permission of the publisher. This handbook may contain mistakes and printing errors.
- Page 20 The internal / external antennas used for this mobile SENSOR must provide a separation distance of at least 20 cm (8 inches) from all persons and must not be co-located or operating in conjunction with any other antenna or SENSOR." Statement according to FCC part 15.19: This device complies with Part 15 of the FCC Rules.