Advertisement
Quick Links
Take the time to read through this instruction manual.
Familiarity with installation and operation procedures will help you obtain the best
performance from your new Universal Camera.
For your records
Record the serial number, found on the back of the unit, in the spaces designated on the warranty
card, and in the space provided below. Refer to the model and serial numbers whenever you call
upon your Kenwood dealer for information or service on the product.
Model CMOS-310/CMOS-210 Serial number
US Residence Only
Register your Kenwood product at
© 2011 JVC KENWOOD Corporation
CMOS-310
CMOS-210
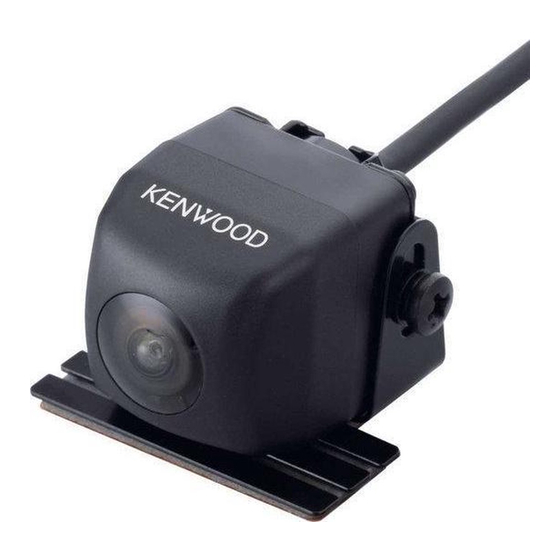
UNIVERSAL MULTI-VIEW CAMERA/ UNIVERSAL REAR VIEW CAMERA
INSTRUCTION MANUAL
CAMÉRA MULTI-VUES UNIVERSELLE/ CAMÉRA DE RECUL UNIVERSELLE
MODE D'EMPLOI
UNIVERSAL MULTIVIEW-KAMERA/ UNIVERSAL RÜCKFAHRKAMERA
BEDIENUNGSANLEITUNG
UNIVERSELE MULTIVIEWCAMERA/ UNIVERSELE ACHTERUITRIJCAMERA
GEBRUIKSAANWIJZING
TELECAMERA MULTIVISIONE UNIVERSALE/ TELECAMERA PER RETROMARCIA UNIVERSALE
ISTRUZIONI PER L'USO
CÁMARA DE MULTIVISIÓN UNIVERSAL/ CÁMARA DE VISTA TRASERA UNIVERSAL
MANUAL DE INSTRUCCIONES
CÂMARA MULTIVISÃO UNIVERSAL/ CÂMARA TRASEIRA UNIVERSAL
MANUAL DE INSTRUÇÕES
Register Online
www.Kenwoodusa.com
B64-4963-08/00 (W)
Advertisement

Summary of Contents for Kenwood CMOS-310
- Page 1 Record the serial number, found on the back of the unit, in the spaces designated on the warranty card, and in the space provided below. Refer to the model and serial numbers whenever you call upon your Kenwood dealer for information or service on the product. Model CMOS-310/CMOS-210 Serial number...
-
Page 2: Care And Maintenance
• Do not cut out the fuse from the ignition wire (Red). The and the unit and the system work. power supply must be connected to the wires via the fuse. CMOS-310/CMOS-210... - Page 3 • Do not route wiring in places that get hot, such as near the heater outlet. If the insulation of the wiring melts or gets torn, there is a danger of the wiring short-circuiting to the CMOS-310 only vehicle body. • When replacing the fuse, be sure to use only fuse of the Switch unit..1...
-
Page 4: Recommended Installation Position
12345 Mount so that the “KENWOOD” logo appears at the top. The CMOS-310 should be installed at a height of 55 cm (1.8 feet) or more. Attach the camera on the rear center position of the vehicle taking care not to hide the license plate. Make sure that the... - Page 5 Inspect the retaining screws at times. If they are loose, tighten them fi rmly. Perform the operations in “Camera Setting” (page 8). (CMOS-310 only) If an adjustment is not possible in the currently available range, change the camera position before retrying.
- Page 6 Power cord Connect the camera to the camera connection cord. Camera Camera’s cord length 1.5 m (4.92 feet), Power cord 7.5 m (24.6 feet) Switch unit (CMOS-310 only): 1 m (3.28 feet) CAM+ (Green/red) CAM- (Green/white) Fuse (2A) Fuse Engine key...
- Page 7 This allows the control unit to switch the display view and adjust the camera as well on touch the control unit screen. • When using two CMOS-310 units (for the front and rear), it is required to set an ID for the front camera. For details, see “Camera ID Setting” (page 13).
- Page 8 Camera Setting (CMOS-310 only) Switch Unit Operation Camera Setting Procedure The switch unit can be used to switch the image display Complete all of the required connections in mode, view/hide the guideline display and adjust the advance. camera. Display the camera video.
- Page 9 ADJUSTMENT (Up-and-Down ANGLE)”. resets the camera setting of that item to the default. • Select [ ] to invert the icon upside down. After completing the adjustment, press the view button. Advances to “OVERHEAD VIEW IMAGE ADJUSTMENT (Right-and-Left ANGLE)”. CMOS-310/CMOS-210...
- Page 10 Camera Setting (CMOS-310 only) Overhead View Image Adjustment For Guideline Adjustment (Up-and-Down Angle) • The subsequent adjustments adjust the sizes, lengths and positions of the guidelines displayed in the wide view and overhead view. This item adjusts the vertical angle (inclination) of the By default, three guidelines shown below (green, yellow and red) camera installation position.
- Page 11 Press the + or – button of the switch unit to adjust the left-right positioning. After completing the adjustment, press the view button. After completing the adjustment, press the view button. Advances to “WIDE VIEW GUIDELINE ADJUSTMENT (Horizontal direction)”. Advances to “WIDE VIEW GUIDELINE ADJUSTMENT (Vertical direction)”. CMOS-310/CMOS-210...
- Page 12 Camera Setting (CMOS-310 only) Wide View Guideline Adjustment Wide View Guideline Adjustment (Vertical Direction) (Red Line Position Setting) This item adjusts the length of the guidelines displayed in This item adjusts the position of the red line displayed in the wide view.
-
Page 13: Camera Id Setting
Finishing the Camera Setting Camera ID Setting When connecting two CMOS-310 units to a Kenwood navigation system etc. equipped with the camera control function, it is required to assign different camera IDs to the 2 cameras. The camera IDs of both cameras have been set to ID1 at the factory. - Page 14 Display View Switching The overhead view is displayed on the upper half of the The CMOS-310 camera system can display 5 kinds of camera screen while the wide view is displayed on the lower half. The overhead view in the upper half of the screen shows the area images.
- Page 15 Number of pixels: Approx. 310,000 pixels Operating voltage: 14.4V (9.0 V – 16.0 V) Lens Max. current consumption (CMOS-310): 80 mA : Wide angle, Focal length f=0.82 mm, F value 2.4 Max. current consumption (CMOS-210): 60 mA Angles of view : Horizontal: Approx.


