Electrolux Gas Range Use & Care Manual
36” gas range
Hide thumbs
Also See for Gas Range:
- Use & care manual (52 pages) ,
- Installation instructions manual (28 pages) ,
- Installation instructions manual (21 pages)
Table of Contents
Advertisement
Advertisement
Table of Contents

Related Manuals for Electrolux Gas Range


Summary of Contents for Electrolux Gas Range
- Page 1 Use & Care Guide 3 6 ” G a s R a n g e 318 203 962 (0809) Rev. A...
-
Page 2: Finding Information
QUESTIONS? For toll-free telephone support in the U.S. and Canada: 1-877-4ELECTROLUX (1-877-435-3287) For online support and internet product information: www.electroluxicon.com ©2008 Electrolux Home Products, Inc. Post Office Box 212378, Augusta, Georgia 30917, USA All rights reserved. Printed in the USA... -
Page 3: Table Of Contents
Finding Information TABLE OF CONTENTS Finding Information ........... 2-3 Care & Cleaning ..........25-32 Make a Record for Future use ........ 2 Using the Self-Clean Feature ........ 25 Questions? .............. 2 Starting the Oven Self-Clean Cycle ...... 26 General Cleaning ..........27 Safety .............. -
Page 4: Safety
Safety IMPORTANT SAFETY INSTRUCTIONS This manual contains important safety symbols and instructions. Please pay attention to these symbols and follow all instructions given. WARNING WARNING WARNING WARNING WARNING This symbol will help alert you to situations that may cause serious bodily harm, death or property damage. - Page 5 Safety • User Servicing—Do not repair or replace any part of the appliance unless specifically recommended in the manuals. All other servicing should be done only by a qualified technician to reduce the risk of personal injury and damage to the range. •...
- Page 6 Safety • Wear proper apparel—Loose-fitting or hanging garments should never be worn while using the appliance. Do not let clothing or other flammable materials contact hot surfaces. • Do not use water or flour on grease fires—Smother the fire with a pan lid, or use baking soda, a dry chemical or foam-type extinguisher.
- Page 7 Safety IMPORTANT INSTRUCTIONS FOR USING YOUR COOKTOP • Know which knob controls each surface heating unit. Always turn the knob to the LITE position when igniting the burners. Visually check that burner has lit. Then adjust the flame so it does not extend beyond the edge of the utensil. •...
- Page 8 Safety IMPORTANT INSTRUCTIONS FOR USING YOUR OVEN • Use care when opening oven door or warmer drawer (if equipped)—Stand to the side of the range when opening the door of a hot oven. Let hot air or steam escape before you remove or replace food in the oven/ warmer drawer.
- Page 9 Safety IMPORTANT INSTRUCTIONS FOR CLEANING YOUR RANGE • Clean the range regularly to keep all parts free of grease that could catch fire. Exhaust fan ventilation hoods and grease filters should be kept clean. Do not allow grease to accumulate on hood or filter. Greasy deposits in the fan could catch fire. When you are flaming food under the hood, turn the fan on.
-
Page 10: Grounding Instructions
Safety GROUNDING INSTRUCTIONS For personal safety, the cooktop must be properly grounded. For maximum safety, the power cord must be plugged into an electrical outlet that is correctly polarized and properly grounded. DO NOT Operate the cooktop using a 2-prong adapter or an extension cord. If a 2-prong wall receptacle is the only available outlet, it is the personal responsibility of the consumer to have it replaced with a properly grounded 3-prong wall receptacle installed by a qualified electrician. -
Page 11: Range Features
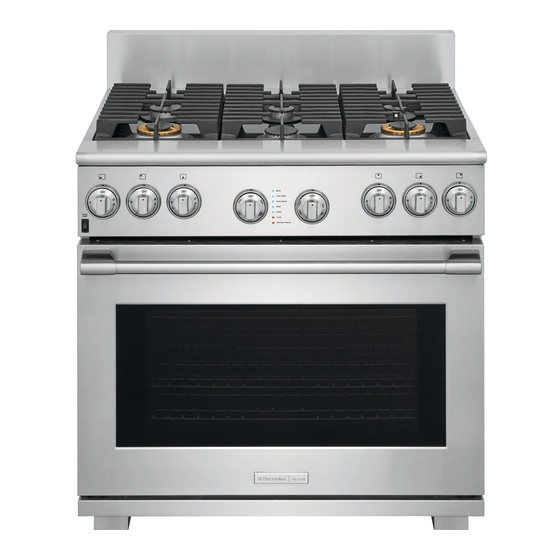
Range Features 36” RANGE FEATURES Oven Light Switch Left Front Burner Control Knob Left Rear Burner Control Knob Center Front Burner Control Knob Oven Function Control Knob Oven Function Indicator Lights Oven Temperature Control Knob Center Rear Burner Control Knob Right Front Burner Control Knob 10. -
Page 12: Surface Cooking
Surface Cooking FLAME SIZE For most cooking, start on the highest control setting and then turn to a lower one to complete the process. Use the chart below as a guide for determining proper flame size for various types of cooking. The size and type of utensil used and the amount of food being cooked will influence the setting needed for cooking. -
Page 13: Placement Of Burner Heads And Caps
Surface Cooking PLACEMENT OF BURNER HEADS AND CAPS Burner Cap For the 18 000 BTU burner: Place the burner head over the gas orifice (Figure 1). Be careful not to damage the electrode while placing the burner head over the orifice. -
Page 14: Surface Cooking Utensils
Surface Cooking SURFACE COOKING UTENSILS *GOOD POOR • Curved and warped pan bottoms. • Pan overhangs unit by more than • Flat bottom and straight sides. 2.5 cm (1”). • Tight fitting lids. • Weight of handle does not tilt pan. Pans should have flat bottoms. -
Page 15: Using The Wok Stand
Surface Cooking USING THE WOK STAND The Wok Stand provided with your cooktop is designed to allow round-bottomed woks to be used. It is recommended that you use a 14 inch diameter (35.5 cm) or less Wok. It is recommended that you use the right front POWER burner with the wok stand for best performance. -
Page 16: Using The Simmer Plate
Surface Cooking USING THE SIMMER PLATE The simmer plate (Figure 1) is intended to diffuse lower temperature of the burner to help cooking delicate aliment such as chocolate, milk, bechamel, etc... It can also be use for cooking sauce during long period. With the grate in position over the burner, set the simmer plate on top of the grate positioning the notches in the simmer plate over the grate fingers (See Figure 2) and then place the utensil on the simmer plate. -
Page 17: Setting Surface Controls
Surface Cooking SETTING SURFACE CONTROLS Your cooktop may be equipped with any combination of the following burners: Simmer Burner: best used for simmering delicate sauces, etc. Standard Burner: used for most all surface cooking needs. Large Burner: best used when bringing large quantities of liquid to temperature and when preparing larger quantities of food. -
Page 18: Getting Started
Getting Started BEFORE SETTING OVEN CONTROLS Oven Vent Location Removing and Replacing Oven Racks Oven vent The oven is vented in the backguard. ALWAYS ARRANGE OVEN RACKS When the oven is on, warm air is WHEN THE OVEN IS COOL (PRIOR released through the vent. -
Page 19: Getting Started
Getting Started BEFORE SETTING OVEN CONTROLS (CONT’D) Oven Rack Positions ALWAYS ARRANGE OVEN RACKS WHEN THE OVEN Rack IS COOL (PRIOR TO OPERATING THE OVEN) Always positions use oven mitts when the oven is hot. CAUTION UTION UTION UTION UTION Always use pot holders or oven mitts when adjusting the oven racks. -
Page 20: Oven Control Features
Setting the oven controls CONTROL FEATURES READ THE INSTRUCTIONS CAREFULLY BEFORE USING THE OVEN. For satisfactory use of your oven, become familiar with the various features and functions of the oven as described below. Detailed instructions for each feature and function follow later in this Use &... -
Page 21: Setting The Oven Controls
Setting the oven controls BAKING PROBLEMS For best cooking results, pre-heat the oven before baking cookies, breads, cakes, pies or pastries, etc. The cooking times and temperatures needed to bake a product may vary slightly from your previously owned appliance. Baking Problems and Solutions Chart Baking Causes... -
Page 22: Convection Baking
Setting the oven controls CONVECTION BAKING Use the Convection Bake feature when cooking on multiple racks is desired. The oven can be programmed for Convection baking at any temperature between 300°F and 550°F. Convection baking uses a fan to circulate the oven's heat evenly and continuously within the oven (See Figure 1). -
Page 23: Broiling
Setting the oven controls BROILING Broiling is a method of cooking tender cuts of meat by direct heat under the broil element of the oven. Preheating For an optimum browning, preheat the broil element for 2 minutes. To Broil Broil one side until the food is browned; turn and cook on the second side. Season and serve. -
Page 24: Setting Broil
Setting the oven controls SETTING BROIL When broiling, heat radiates downward from the oven broiler for even coverage. Grid The broil pan and broil pan insert used together allow dripping grease to drain and be kept away from the high heat of the oven broiler. DO NOT use the broil pan without the insert. -
Page 25: Care & Cleaning
Care & Cleaning USING THE SELF-CLEAN FEATURE Adhere to the Following Cleaning Precautions: DO NOT Hand • Allow the oven to cool before cleaning. DO Hand Clean • Wear rubber gloves when cleaning any exterior parts of the Clean Door oven manually. -
Page 26: Starting The Oven Self-Clean Cycle
Care & Cleaning STARTING THE OVEN SELF-CLEAN CYCLE If you are planning to use the oven directly after a self-clean cycle remember to allow time for the oven to cool down and the oven door to unlock. This normally takes about one hour. -
Page 27: General Cleaning
Care & Cleaning GENERAL CLEANING Cleaning Various Parts of Your appliance Before cleaning any part of the appliance, be sure all controls are turned OFF and the appliance is COOL. REMOVE SPILLOVERS AND HEAVY SOILING AS SOON AS POSSIBLE. REGULAR CLEANINGS WILL REDUCE THE NUMBER OF MAJOR CLEANINGS LATER Surfaces How to Clean Aluminum (Trim Pieces) -
Page 28: Cleaning The Burner Grates, Burner Caps, Burner Heads, Simmer Plate And Griddle
Care & Cleaning CLEANING THE BURNER GRATES, BURNER CAPS, BURNER HEADS, SIMMER PLATE AND GRIDDLE The Burner Grates, Burner Caps, Burner Heads, simmer plate and griddle should be routinely cleaned. Keeping the burner ports clean will prevent improper ignition and an uneven flame. -
Page 29: Cooktop Cleaning And Maintenance
Care & Cleaning COOKTOP CLEANING AND MAINTENANCE Consistent and proper cleaning is essential to maintaining your ceramic glass cooktop Prior to using your cooktop for the first time, apply the recommended Cleaning Creme to the ceramic surface. A sample of that cleaning creme is supplied with your appliance and you will find it in store. -
Page 30: Care And Cleaning Of Stainless Steel
Care & Cleaning CLEANING RECOMMENDATIONS FOR THE CERAMIC GLASS COOKTOP (CONTINUED) CAUTION UTION UTION UTION UTION Damage to the ceramic glass cooktop may occur if you use scrub pad. Plastic or foods with a high sugar content: These types of soils need be removed immediately if spilled or melted onto the ceramic cooktop surface. -
Page 31: To Remove And Replace The Oven Door
Care & Cleaning TO REMOVE AND REPLACE OVEN DOOR 1. Open the door to the fully opened position. 2. Pull up the lock located on each hinge support toward front of range. You may have to apply a little upward pressure on the lock to pull it up. 3. -
Page 32: Oven Light
Care & Cleaning OVEN LIGHT An interior oven light will turn automatically when the oven door is opened. The oven light may be turned on when the door is closed by using the oven light switch located on the control panel. The lamp is covered with a glass shield. -
Page 33: Solutions To Common Problems
Solutions to Common Problems IMPOR IMPORT T T T T ANT IMPOR IMPOR IMPOR Before calling for service, review this list. It may save you both time and expense. This list includes common experiences that are not the result of defective workmanship or material in your cooktop. -
Page 34: Metal Marks On Ceramic Glass Cooktop Surface
Solutions to Common Problems METAL MARKS ON CERAMIC GLASS COOKTOP SURFACE • Sliding or scraping of metal utensils on cooktop surface. Do not slide metal utensils on cooktop surface. Use a mildly abrasive cleanser to remove marks. BROWN STREAKS AND SPECKS ON CERAMIC GLASS COOKTOP SURFACE •... -
Page 35: Entire Oven Does Not Operate
Solutions to Common Problems ENTIRE OVEN DOES NOT OPERATE • When the unit is first plugged in, or when the power supply to the range has been interrupted, the indicator lights will flash and the control will beep. To stop the lights from flashing, turn the selector control knob to BAKE and back to OFF. -
Page 36: Self-Cleaning Cycle Does Not Work
Solutions to Common Problems SELF-CLEANING CYCLE DOES NOT WORK • Make sure the oven door is closed. • Make sure the two oven rack ladders are removed from the oven. • Controls not set properly. Follow instructions. • Self-cleaning cycle was interrupted. Start a clean again, wait 20 seconds for the Lock light to stop flashing, turn off the clean and wait again 20 seconds for the light to turn off. -
Page 37: Notes
Notes... -
Page 38: Warranty Information
Industries, Inc. We authorize no person to change or add to any of our obligations under this warranty. Our obligations for service and parts under this warranty must be performed by us or an authorized Electrolux Home Products North America servicer. In Canada, your appliance is warranted by Electrolux Canada Corp.