Dell Broadcom NetXtreme Family of Adapters User Manual
Broadcom netxtreme 57xx user guide
Hide thumbs
Also See for Broadcom NetXtreme Family of Adapters:
- Installation manual (58 pages) ,
- Manual (15 pages) ,
- User manual (224 pages)
Table of Contents
Advertisement
Quick Links
Broadcom NetXtreme
The information below is provided by the supplier of the referenced device without independent verification by Dell and is
subject to the
Restrictions and Disclaimers
Introduction
Functionality and Features
Teaming
Virtual LANs (VLANs)
Manageability
Installing the Hardware
Installing the Driver Software
Creating a Driver Disk
Broadcom Boot Agent Driver Software
NDIS2 Driver Software
ODI Driver Software
Linux Driver Software
NetWare Driver Software
Installing Windows Driver and Management Applications
Using iSCSI
Configuring Teaming
Using Broadcom Advanced Control Suite 3
Specifications
Regulatory Information
User Diagnostics
Troubleshooting
Information in this document is subject to change without notice.
© 2010 Broadcom Corporation. All rights reserved.
Trademarks used in this text: Broadcom, NetXtreme, Ethernet@Wirespeed, LiveLink, and Smart Load Balancing are among
the trademarks of Broadcom Corporation and/or its affiliates in the United States, certain other countries, and/or the EU. Dell
and the DELL logo are trademarks of Dell Inc. Microsoft and Windows are trademarks of Microsoft Corporation. Linux is a
trademark of Linus Torvalds. NetWare is a trademark of Novell Corporation. Intel is a trademark of Intel Corporation. Magic
Packet is a trademark of Advanced Micro Devices, Inc. Red Hat is a trademark of Red Hat, Inc. PCI Express is a trademark of
PCI-SIG. Any other trademarks or trade names mentioned are the property of their respective owners.
Restrictions and Disclaimers
The information contained in this document, including all instructions, cautions, and regulatory approvals and certifications, is
provided by the supplier and has not been independently verified or tested by Dell. Dell cannot be responsible for damage
caused as a result of either following or failing to follow these instructions. All statements or claims regarding the properties,
capabilities, speeds or qualifications of the part referenced in this document are made by the supplier and not by Dell. Dell
specifically disclaims knowledge of the accuracy, completeness or substantiation for any such statements. All questions or
comments relating to such statements or claims should be directed to the supplier.
Export Regulations
Customer acknowledges that these Products, which may include technology and software, are subject to the customs and
®
57XX User Guide
noted below.
Advertisement
Table of Contents
Troubleshooting

Related Manuals for Dell Broadcom NetXtreme Family of Adapters


Summary of Contents for Dell Broadcom NetXtreme Family of Adapters
- Page 1 All statements or claims regarding the properties, capabilities, speeds or qualifications of the part referenced in this document are made by the supplier and not by Dell. Dell specifically disclaims knowledge of the accuracy, completeness or substantiation for any such statements.
- Page 2 export control laws and regulations of the United States ("U.S.") and may also be subject to the customs and export laws and regulations of the country in which the Products are manufactured and/or received. Customer agrees to abide by those laws and regulations.
-
Page 3: Functional Description
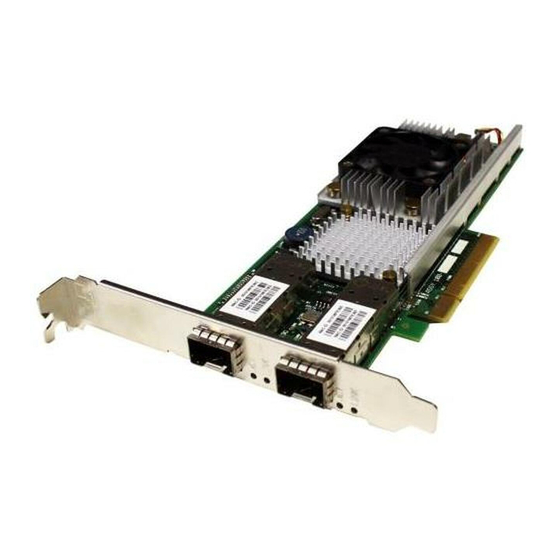
Back to Contents Page Functionality and Features: Broadcom NetXtreme 57XX User Guide Functional Description Features Supported Operating Environments Network Link and Activity Indication Functional Description Broadcom NetXtreme Gigabit Ethernet adapters connect a PCI, PCI-X (BCM5701 and BCM5703), or PCI Express™ (BCM5751, BCM5721, and BCM5722) compliant system to a Gigabit Ethernet network. -
Page 4: Power Management
Systems intending to use Wake on LAN (WOL) should be connected to a switch capable of both 1000 and 10/100 Mbps speeds. Dell supports Wake on LAN on one adapter in the system at a time. Adaptive Interrupt Frequency The adapter driver intelligently adjusts host interrupt frequency based on traffic conditions, to increase overall application throughput. -
Page 5: Supported Operating Environments
Supported Operating Environments The Broadcom NetXtreme Gigabit Ethernet adapter has software support for the following operating systems: ® ® Microsoft Windows (32-bit and 64-bit extended) ® Linux (32-bit and 64-bit extended) ® MS-DOS ® NetWare Sun Solaris ® ® UnixWare ®... -
Page 6: Load Balancing And Fault Tolerance
Back to Contents Page Teaming: Broadcom NetXtreme 57XX User Guide Overview Load Balancing and Fault Tolerance NOTE: See Broadcom Gigabit Ethernet Teaming Services for detailed information on the following topics: Glossary of Terms and Acronyms Teaming Concepts Software Components Hardware Requirements Supported Teaming by Processor Configuring Teaming by Operating System Supported Features by Team Type... - Page 7 Teaming provides traffic load balancing and fault tolerance (redundant adapter operation in the event that a network connection fails). When multiple adapters are installed in the same system, they can be grouped with up to four teams. Each team can consist of up to eight adapters, with one adapter used as a standby for Smart Load Balancing and Failover (SLB) or SLB (Auto-Fallback Disabled) team types.
- Page 8 approach is much simpler, in that there is not a formalized link aggregation control protocol (LACP). As with the other types of teams, the creation of teams and the allocation of physical adapters to various teams is done statically through user configuration software.
-
Page 9: Teaming And Large Send Offload/Checksum Offload Support
NOTE: If you do not enable LiveLink™ when configuring teams, disabling Spanning Tree Protocol (STP) at the switch is recommended. This minimizes the downtime due to the spanning tree loop determination when failing over. LiveLink mitigates such issues. LiveLink™ Functionality LiveLink™... -
Page 10: Vlan Overview
Back to Contents Page Virtual LANs: Broadcom NetXtreme 57XX User Guide VLAN Overview Adding VLANs to Teams VLAN Overview Virtual LANs (VLANs) allow you to split your physical LAN into logical parts, to create logical segmentation of workgroups, and to enforce security policies for each logical segment. Each defined VLAN behaves as its own separate network with its traffic and broadcasts isolated from the others, increasing bandwidth efficiency within each logical group. -
Page 11: Adding Vlans To Teams
separation between all of them. Accounting Available to VLAN #3 only. The Accounting Server is isolated from all traffic on VLANs #1 and #2. The switch Server port connected to the server has tagging turned off. Attached to a shared media hub that is then connected to the switch. PCs #1 and #2 belong to VLAN #2 only, PCs #1 and and are logically in the same IP subnet as the Main Server and PC #5. -
Page 12: Basp Subagent
Back to Contents Page Manageability: Broadcom NetXtreme 57XX User Guide SNMP The Common Information Model (CIM) is an industry standard defined by the Distributed Management Task Force (DMTF). Microsoft implements CIM on Windows platforms such as Windows Server 2003 and Windows Server 2008. Broadcom will support CIM on the Windows Server 2003 and Windows Server 2008 platforms. -
Page 13: Basp Extensible-Agent
as physical adapter link up/down, and adapter installed/removed events. To monitor this information, an SNMP manager must load the Broadcom BASP MIB database files to allow monitoring of the information described above. These files, which are shown below, are included with the driver source media: baspcfg.mib baspstat.mib basptrap.mib... -
Page 14: Operating System Requirements
Back to Contents Page Installing the Hardware: Broadcom NetXtreme 57XX User Guide System Requirements Safety Precautions Preinstallation Checklist Installing the Adapter Connecting the Network Cables NOTE: This section applies only to add-in NIC models of Broadcom NetXtreme Gigabit Ethernet adapters. System Requirements Before you install the Broadcom NetXtreme Gigabit Ethernet adapter, verify that your system meets the requirements listed for your operating system:... -
Page 15: Pre-Installation Checklist
Requirements. 2. Verify that your server is using the latest BIOS. NOTE: If you acquired the adapter software on a disk or from the Dell support website (http://www.support.dell.com), verify the path to the adapter driver files. 3. If your system is active, shut it down. - Page 16 1. Select an appropriate cable. Table 1: "10/100/1000BASE-T Cable Specifications" lists the cable requirements for connecting to 10/100/1000BASE-T ports: Table 1: 10/100/1000BASE-T Cable Specifications Port Type Connector Media Maximum Distance 10BASE-T RJ-45 Category 3, 4, or 5 UTP 100 meters (328 feet) RJ-45 100 meters (328 feet) 100/1000BASE-T...
- Page 17 Back to Contents Page Creating a Driver Disk: Broadcom NetXtreme 57XX User Guide Refer to the documentation that was supplied with your system for instructions for creating a driver disk. Please read all Restrictions and Disclaimers. Back to Contents Page...
-
Page 18: Setting Up Mba In A Client Environment
3. Setting up the BIOS for the boot order. Enabling the MBA Driver To enable or disable the MBA driver: 1. Insert an MS-DOS 6.22 or Dell Real Mode Kernel bootable disk containing the B57udiag.exe file in the removable disk drive and power up your system. 2. Type:... - Page 19 CD-ROM drive. NOTE: The B57udiag.exe file is on the installation CD or in the DOS Utilities package available from http://support.dell.com/. 3. Type: b57udiag -mba [ 0-disable | 1-enable ] -c devnum where devnum is the specific device(s) number (0,1,2, ...) to be programmed.
-
Page 20: Setting Up Mba In A Server Environment
The current version of Windows Server 2003 does not include the latest released network driver for the Broadcom NetXtreme Gigabit Ethernet adapter. You can create a driver disk for the adapter from the image distributed by Dell. To perform remote installations with PXE, include a network driver for the NetXtreme Gigabit Ethernet adapter as a part of the client installation image on the server. -
Page 21: Pre-Installation Requirements
A blank MS-DOS system disk (3.5" high-density floppy disk) Access to the Broadcom NDIS2 driver file (B57.dos). This file is located on the Dell-provided driver source media in the DOS Utilities package, or any of the Windows driver packages downloaded from Dell. - Page 22 1. Edit A:\Net\Protocol.ini with Notepad or a similar text editor. a. Change DriverName=$ to DriverName=B57$. b. Remove all other parameter entries under the [MS$NE2CLONE] or equivalent section such as IOBASE=0x300 or INTERRUPT=3, and so on. Example Protocol.ini file for IP [network.setup] version=0x3110 netcard=ms$ne2clone,1,MS$NE2CLONE,1...
- Page 23 workgroup=WORKGROUP reconnect=yes dospophotkey=N lmlogon=0 logondomain= preferredredir=basic autostart=basic maxconnections=8 [network drivers] netcard=B57.dos transport=ndishlp.sys,*netbeui devdir=A:\NET LoadRMDrivers=yes 3. Copy B57.dos to A:\Net. 4. Create the appropriate Autoexec.bat file in drive A for the chosen protocol as shown below. For TCP/IP path=a:\net a:\net\net initialize a:\net\netbind.com a:\net\umb.com a:\net\tcptsr.exe...
- Page 24 To perform this installation you must have a disk that contains the Broadcom NDIS2 driver files (B57.NIF and B57.OS2). These files are located on the Dell-provided driver source media in the DOS Utilities package, or any of the Windows driver packages downloaded from Dell.
-
Page 25: Using Keywords For The B57.Dos Drivers
DRIVERNAME = B573$ BUSNUM 3 DEVNUM 12 [B57_4] DRIVERNAME = B574$ BUSNUM 3 DEVNUM 13 The LineSpeed keyword is used to force the speed of the network connection. The LineSpeed keyword requires a decimal number and of either 10, 100, or 1000. Technically, a line speed of 1000 Mbit/s cannot be forced and can be achieved only through auto-negotiation. - Page 26 Please read all Restrictions and Disclaimers. Back to Contents Page...
-
Page 27: Installing The Driver Software
Back to Contents Page ODI Driver Software: Broadcom NetXtreme 57XX User Guide Installing the Driver Software Configuring Parameters for the B57.com Driver (in the Net.cfg file) The Open Data-Link Interface (ODI) driver software allows LAN drivers to work together irrespective of differences between the hardware and/or the protocol stacks of communicating systems. - Page 28 The following are optional custom keywords used in the Net.cfg file: BUSNUM DEVNUM FUNNUM SUBVID MODEL The first two keywords (BUSNUM and DEVNUM) are used concurrently and have been included for manufacturing purposes. Do not use them unless you are familiar with PCI device configuration. These two keywords are needed if multiple Broadcom NetXtreme Gigabit Ethernet adapters are installed in a system, and each adapter must be loaded in a specific order.
-
Page 29: Installing Tg3 Driver Software
This rebuilding is accomplished by creating a framework where a kernel-dependent module source can reside. To install the DKMS RPM driver package 1. Download the DKMS binary RPM from http://linux.dell.com/dkms/. dkms -version.noarch.rpm 2. Install the DKMS binary RPM package. rpm -ivh dkms-version.src.rpm... -
Page 30: Installing The Source Rpm Package
-ivh tg3-version dkms.noarch.rpm For more information, go to http://linux.dell.com/projects.shtml. Installing the Source RPM Package 1. Install the source RPM package. rpm -ivh tg3-version.src.rpm 2. Change the directory to the RPM path and build the binary driver for your kernel (the RPM path is different for different Linux distributions). -
Page 31: Patching Pci Files (Optional)
Patching PCI Files (Optional) For hardware detection utilities such as Red Hat kudzu to properly identify tg3 supported devices, a number of files containing PCI vendor and device information may need to be updated. Apply the updates by running the scripts provided in the Supplemental tar file. For example, on Red Hat Enterprise Linux, apply the updates by doing the following: ./patch_pcitbl.sh /usr/share/hwdata/pcitable pci.updates /usr/share/hwdata/pcitable.new... -
Page 32: Teaming With Channel Bonding
tg3: eth#: Link is down. Teaming with Channel Bonding With the TG3 driver, you can team adapters together using the bonding kernel module and a channel bonding interface. Refer to your Red Hat documentation for more information on Linux Channel Bonding. Linux iSCSI Offload User Application - bnx2id Open iSCSI User Applications... - Page 33 By default, the open-iscsi daemon connects to discovered targets using software initiator (transport name = 'tcp'). Users who wish to offload iSCSI connection onto CNIC device should explicitly change transport binding of the iSCSI node. This can be done using iscsiadm cli utility as follows, iscsiadm --mode node --targetname iqn.2004-06.com.broadcom:tg1 \ --portal 192.168.1.100 --op=update --name=node.transport_name --value=${XPORT_NAME}...
- Page 34 Back to Contents Page...
- Page 35 Back to Contents Page NetWare Driver Software: Broadcom NetXtreme 57XX User Guide NetWare Core Driver Software Broadcom Advanced Server Program Driver Software (NetWare) SNMP Agent NetWare Core Driver Software Preinstallation Requirements Installing NetWare Server 5.1 Driver Software Installing NetWare Server 6.5 Driver Software Configuration Properties for the B57.lan driver Removing Drivers from Autoexec.ncf Preinstallation Requirements...
- Page 36 1. From the NetWare Server console, type LOAD NWCONFIG, and then press ENTER. 2. From the Configuration Options menu, select Driver options, and then press ENTER. 3. Select Configure network drivers, and then press ENTER. 4. Select Select an additional driver, and then press ENTER. 5.
- Page 37 10. Choose Return to driver summary, and then press ENTER. 11. Choose Continue in Options. 12. Choose Continue from Protocol Options unless you want to configure and bind protocols before continuing. The installation is now complete. Viewing or Modifying Adapter Properties When an adapter configuration is saved, the NetWare installation program adds load and bind statements to the Autoexec.ncf file.
- Page 38 Enables the use of batching receives within a specific time period. Min = 0 (disabled) Max = 5000000 (5 seconds) Units are in microseconds and the default value is 300. TxTicks= Enables the use of a transmit tick threshold interrupt within a specific time period. Min = 0 (disabled) Max = 5000000 (5 seconds) Units are in microseconds.
- Page 39 NODE= Allows an input Ethernet node address to replace the adapter factory-programmed Ethernet node address until a subsequent reboot. NODE=nnnnnnnnnnnn FRAME= Specifies the frame type. The default value is ETHERNET_802.2. ETHERNET_II ETHERNET_802.3 ETHERNET_802.2 ETHERNET_SNAP SLOT= Used to set a system-wide unique hardware instance number (HIN) that may be the physical slot number on a slot-based bus such as PCI.
-
Page 40: Removing Drivers From Autoexec.ncf
Provides adapter link and data integrity even if the adapter is attached to a questionable cable and/or switch. For example, an adapter that is trying to connect at 1000 Mbit/s on a Category 3 cable ordinarily would not link. With Wirespeed= set to 1, the link is made at 100 Mbit/s. - Page 41 # LOAD B57 SLOT=2 FRAME=Ethernet_SNAP NAME=B57_1_ESP # BIND IPX B57_1_ESP NET=477A35BD # LOAD B57 SLOT=2 FRAME=Ethernet_II NAME=B57_1_EII # BIND IPX B57_1_EII NET=C3C8F2E4 # BIND IP B57_1_EII ADDR=172.16.1.1 MASK=ff.ff.ff.0 NOTE: If you modify the Autoexec.ncf file, you must reboot the server before the changes take effect. Please read all Restrictions and Disclaimers.
- Page 42 Before installing Broadcom Advance Control Suite 3, verify that .NET Framework 2.0, or above, is installed. A network device driver must be physically installed before the Broadcom NetXtreme Controller can be used with your Windows operating system. Drivers are located on the driver source media as well as at the Dell website at http://support.dell.com.
-
Page 43: Using The Installer
BACS 3. 1. When the Found New Hardware Wizard appears, click Cancel. 2. Insert the Dell-provided CD into the CD or DVD drive or download the software driver package from the Dell website at http://support.dell.com/. 3. On the driver source media, or from the location to which you downloaded the software driver package, open the folder for your operating system, open the Driver_Management_Apps_Installer folder, and then double-click Setup.exe to... -
Page 44: Using Silent Installation
Run the installer Install the Microsoft iSCSI Software Initiator along with the patch (MS KB939875) NOTE: If performing an upgrade of the device drivers from the installer, re-enable iSCSI Crash Dump from the Advanced section of the BACS Configuration tab. Perform this procedure after running the installer to install the device drivers and the management applications. -
Page 45: Removing The Device Drivers
AMD/EM64T platforms: setup /s /v"/qn ADDSOURCE=Driversa64,BACSa64,BASPa64,SNMPa64,CIMa64" The following command-line statement installs only the Broadcom drivers according to platform: IA32 platforms: setup /s /v"/qn ADDSOURCE=Driversi32" AMD64 platforms: setup /s /v"/qn ADDSOURCE=Driversa64" NOTE: The Broadcom device drivers are a required feature and are always installed, even if you do not specify ADDSOURCE. -
Page 46: Using The Netxtreme Ii Monolithic Driver
recommend that changes to driver versions be made only through the use of a driver installer. To remove the device drivers 1. In Control Panel, double-click Add or Remove Programs. 2. Click Broadcom Drivers and Management Applications, and then click Remove. Follow the onscreen prompts. Using the NetXtreme II Monolithic Driver The NetXtreme II, based on its advanced functionalities, uses a software architecture that includes a Virtual Bus Device (VBD) to extend functionalities beyond basic network connectivity. - Page 47 1. From All Programs, open Windows AIK and select Windows PE Tools Command prompt. 2. At the command prompt, run the copype.cmd script. The script requires two arguments: hardware architecture and destination location. copype.cmd <arch> <destination> For example: copype x86 c:\VistaPEx86 NOTE: The directory structure c:\VistaPEx86 is used throughout this procedure.
-
Page 48: Setting Power Management Options
[params_utp] hkr, , req_medium, 2, "0" [params_fiber] hkr, , req_medium, 2, "65283" These make up two separate sections that can be configured: one for standard RJ-45 copper interfaces (params_utp) and one for fiber devices (params_fiber). 1. As described in the file, replace the value above in quotation marks under the correct section, depending upon the network adapter in your system. - Page 49 NOTES: The Power Management tab is available only for servers that support power management. To enable Wake on LAN (WOL) when the computer is on standby, click Allow the device to bring the computer out of standby box. If you select Only allow management stations to bring the computer out of standby, the computer can be brought out of standby only by Magic Packet.
-
Page 50: Supported Operating Systems For Iscsi Boot
Back to Contents Page iSCSI Protocol: Broadcom NetXtreme 57XX User Guide iSCSI Boot iSCSI Crash Dump iSCSI Offload iSCSI Boot Broadcom NetXtreme Gigabit Ethernet adapters support iSCSI boot to enable network boot of operating systems to diskless systems. The iSCSI boot allows a Windows or Linux operating system boot from an iSCSI target machine located remotely over a standard IP network. -
Page 51: Configuring The Iscsi Boot Parameters
Target IP address Target TCP port number Target LUN Initiator IQN CHAP ID and secret Configuring the iSCSI Boot Parameters Configure the Broadcom iSCSI boot software for either static or dynamic configuration. Refer to Table 1 for configuration options available from the General Parameters screen. Table 1 lists parameters for both IPv4 and IPv6. - Page 52 Boot to iSCSI target: Disabled DHCP Vendor ID: BRCM ISAN Link Up Delay Time: 0 Use TCP Timestamp: Enabled (for some targets such as the Dell/EMC AX100i, it is necessary to enable Use TCP Timestamp) Target as First HDD: Disabled LUN Busy Retry Count: 0 IP Version: IPv6.
- Page 53 Boot to iSCSI target: Disabled DHCP Vendor ID: BRCM ISAN Link Up Delay Time: 0 Use TCP Timestamp: Enabled (for some targets such as the Dell/EMC AX100i, it is necessary to enable Use TCP Timestamp) Target as First HDD: Disabled...
- Page 54 IP Version: IPv6. (For IPv6, non-offload.) Windows HBA Boot Mode: Disabled 4. Select ESC to return to the Main menu. NOTE: Information on the Initiator Parameters and 1st Target Parameters screens are ignored and do not need to be cleared. 5.
- Page 55 It is recommended to always run iscsibcg.exe /verify /fix at a command prompt after updating the driver and before restarting the system. For information on configuring the iscsibcg utility to run automatically when a system shuts down, see http://support.microsoft.com/kb/934235. Transferring the OS Image to the iSCSI Target 1.
- Page 56 DHCP iSCSI Boot Configurations for IPv4 DHCP iSCSI Boot Configuration for IPv6 DHCP iSCSI Boot Configurations for IPv4 The DHCP protocol includes a number of options that provide configuration information to the DHCP client. For iSCSI boot, Broadcom adapters support the following DHCP configurations: DHCP Option 17, Root Path DHCP Option 43, Vendor-Specific Information DHCP Option 17, Root Path...
-
Page 57: Dhcp Iscsi Boot Configuration For Ipv6
DHCP iSCSI Boot Configuration for IPv6 The DHCPv6 server can provide a number of options, including stateless or stateful IP configuration, as well s information to the DHCPv6 client. For iSCSI boot, Broadcom adapters support the following DHCP configurations: DHCPv6 Option 16, Vendor Class Option DHCPv6 Option 17, Vendor-Specific Information NOTE: The DHCPv6 standard Root Path option is not yet available. -
Page 58: Other Iscsi Boot Considerations
Configuring the iSCSI Boot Parameters Configuring the iSCSI Boot Parameters. Changing the BIOS Boot Order Change the BIOS boot order to the following: iSCSI Option ROM CDROM/DVD Installing to Target 1. Update the iSCSI boot Option ROM with the target IQN and target IP address. 2. -
Page 59: Troubleshooting Iscsi Boot
Target as First HDD: Enable HBA: Disable 2. Order the boot order so that iSCSI precedes the DVD. 3. Copy the VBD and NDIS driver to a USB flash or a diskette. 4. Boot the system and connect to the target. The Windows Server 2008 DVD installation begins. 5. -
Page 60: Installing The Microsoft Iscsi Initiator
complete. Solution: Install or upgrade the Broadcom Virtual Bus Device (VBD) driver to 5.0.x, along with the OIS driver, prior to switching the iSCSI boot path. Problem: If a Windows 2003-based system is booted with an MPIO configuration in the first boot, the interface booted without a cable attached will not be functional since the IP address of the interface will be statically configured to a value of 0. - Page 61 features. 1. Open BACS 3. 2. Select the Broadcom NetXtreme II C-NIC iSCSI adapter. If the C-NIC iSCSI adapter is not present, then select the VBD device and enable iSCSI offload by selecting iSCSI Offload Engine from the Resource Reservations area of the Configuration tab.
- Page 62 4. DHCP is the default for IP address assignment, but this can be changed to static IP address assignment, if this is the preferred method of IP address assignment. NOTE: The IP address assignment method cannot be changed if the adapter was used for boot. 5.
- Page 63 Configure Microsoft Initiator to Use Broadcom's iSCSI Offload Now that the IP address has been configured for the iSCSI adapter, you need to use Microsoft Initiator to configure and add a connection to the iSCSI target using Broadcom iSCSI adapter. See Microsoft's user guide for more details on Microsoft Initiator.
- Page 64 5. Enter the IP address of the target and click Advanced. 6. From the General tab, select Broadcom NetXtreme II C-NIC iSCSI Adapter from Local adapter.
- Page 65 7. Select the IP address for the adapter from Source IP.
- Page 66 8. Click OK to close Advanced setting and then OK to add the target portal.
- Page 67 9. From the Targets tab, select the target and click Log On to log into your iSCSI target using the Broadcom iSCSI adapter.
- Page 68 10. Click on Advanced. 11. On the General tab, select the Broadcom NetXtreme Ii C-NIC iSCSI adapter from Local adapter. 12. Click OK to close Advanced settings.
- Page 69 13. Click OK to close the Microsoft Initiator. 14. To format your iSCSI partition, use Disk Manager. NOTES: No teaming support for iSCSI-enabled adapters is available at this point. MPIO handles all failover and link aggregation for iSCSI traffic. Network teaming and MPIO are supported concurrently on different ports. Ports running iSCSI use MPIO and ports running LAN traffic use network teaming.
- Page 70 Please read all Restrictions and Disclaimers. Back to Contents Page...
- Page 71 Back to Contents Page Configuring Teaming: Broadcom NetXtreme 57XX User Guide Configuring Teaming (Windows) Configuring Teaming (NetWare) Please read all Restrictions and Disclaimers. Back to Contents Page...
-
Page 72: Starting Broadcom Advanced Control Suite
Back to Contents Page Using Broadcom Advanced Control Suite 3: Broadcom NetXtreme 57XX User Guide Broadcom Advanced Control Suite 3 Overview Starting Broadcom Advanced Control Suite 3 Using Broadcom Advanced Control Suite 3 Configuring Teaming Configuring With the Command Line Interface Utility Broadcom Advanced Control Suite 3 Overview Broadcom Advanced Control Suite 3 (BACS 3) is an integrated utility that provides useful information about each network adapter that is installed in your system. - Page 73 To list items in Device Management by type At the top of the Device Management pane, click By Type. A single hardware device may be using several different drivers, so Device Management breaks each item out into separate categories. Network Adapters. Lists the available NDIS client adapters. iSCSI Controllers.
- Page 74 Device Icons The icon next to each device in the Device Management pane shows its status. An icon next to a device name that appears normal means the device is connected and working. X. A red "X" that appears on the device's icon indicates the device is currently not connected to the network. Greyed out.
-
Page 75: Viewing Vital Signs
To create or edit teams Configuring Teaming. Configuring BACS User Interface Options Enabling/Disabling the BACS Tray Icon BACS 3 places an icon in the Windows taskbar when the program is installed. Use the Options window to turn this icon on or off. To enable or disable the BACS tray icon 1. - Page 76 To view Vital Signs information for any installed network adapter, click the name of the adapter listed in the Device Management pane, then click the Information tab. If the Information tab is not visible, then from the View menu, select Navigate, then Device Management, and then Information. If the Vital Signs section within the Information tab is not visible, then from the Context View tab on the right side of the window, select Information and then select Vital Signs.
-
Page 77: Viewing Driver Information
The status of the network link. Up. A link is established. Down. A link is not established. Duplex The adapter is operating in the indicated duplex mode. Speed The link speed of the adapter, in megabits per second. Offload Capabilities The offload capabilities supported by the adapter. -
Page 78: Viewing Resource Information
Driver Status The status of the adapter driver. Loaded. Normal operating mode. The adapter driver has been loaded by Windows and is functioning. Not Loaded. The driver associated with the adapter has not been loaded by Windows. Information Not Available. The value is not obtainable from the driver that is associated with the adapter. Driver Name The file name of the adapter driver. - Page 79 Bus Type The type of input/output (I/O) interconnect used by the adapter. Bridge The bridge type, which is the PCI-E to PCI-X bridge. This information is only available for Broadcom NetXtreme II adapters. Bridge Lanes The number of PCI-E lanes connected to the bridge. This information is only available for Broadcom NetXtreme II adapters. Bridge Speed The clock speed on PCI-E bus.
-
Page 80: Viewing Hardware Information
The port number of the adapter. For a single-port adapter, the function number is 0. For a two-port adapter, the function number for the first port is 0, and the function number for the second port is 1. Interrupt Request The interrupt line number that is associated with the adapter. -
Page 81: Testing The Network
Boot Code Version The version of the boot code. This information is only available for Broadcom NetXtreme II adapters. Firmware Family Version The global firmware version that represents all firmware on the device. Management Firmware The firmware version installed on the system. Vendor ID The vendor ID. -
Page 82: Running Diagnostic Tests
Running Diagnostic Tests The Diagnostic Tests option on the Diagnostics tab lets you check the state of the physical components on a Broadcom network adapter. You can trigger the tests manually, or choose to have BACS 3 continuously perform them. If the test are performed continuously, then the number of passes and fails in the Status field for each test increments every time the tests are performed. - Page 83 Diagnostics. 3. From the Select a test to run list, select Diagnostic Tests. If the Diagnostic Tests option is not available, then from the Context View tab on the right side of the window, select Diagnostics and then select Diagnostic Tests. 4.
-
Page 84: Analyzing Cables
Interrupt This test verifies that the Network Device Driver Interface Specification (NDIS) driver is able to receive interrupts from the adapter. Loopback MAC and Loopback PHY These tests verify that the NDIS driver is able to send packets to and receive packets from the adapter. Test LED This test causes all of the port LEDs to blink 5 times for the purpose of identifying the adapter. -
Page 85: Setting Adapter Properties
Distance The valid cable length in meters (except when the Noise result is returned). Status The result of the analysis for the indicated pair. Good. Good cable/PCB signal paths, but no gigabit link. Crossed. Pin short or crosstalk along two or more cable/PCB signal paths. Open. - Page 86 NOTES: You must have administrator privileges to change the values for a property. The list of available properties for your particular adapter may be different. Some properties may not be available for all Broadcom network adapters. If an adapter is included as a member of a team and you change any advanced property, then you must rebuild the team to ensure that the team's advanced properties are properly set.
- Page 87 Ethernet@Wirespeed Enables a Gigabit Ethernet adapter to establish a link at a lower speed when only two pairs of wires are available in the cabling plant. The default setting for this property is Enabled. Flow Control Enables or disables the receipt or transmission of PAUSE frames. PAUSE frames allow the network adapter and a switch to control the transmit rate. The side that is receiving the PAUSE frame momentarily stops transmitting.
- Page 88 The appropriate assigned ranges and exceptions for the locally administered address include the following: The range is 00:00:00:00:00:01 to FF:FF:FF:FF:FF:FD. Do not use a multicast address (least significant bit of the high byte = 1). Do not use all 0s or all Fs. Do not assign a Locally Administered Address on any physical adapter that is a member of a team.
- Page 89 does not work if the Power Save setting does not enable WOL. WOL Speed Sets the speed at which the network adapter connects to the network while the network adapter is in Wake on LAN mode. By default, the WOL Speed property is set to Auto.
-
Page 90: Configuring System Settings
This property is the same as Ethernet@Wirespeed, and is only available when the blade server is attached to a pass-through module. Chassis PHY Flow Control This property is the same as Flow Control, and is only available when the blade server is attached to a pass-through module. Chassis PHY Speed &... - Page 91 General Statistics General Statistics show the transmitted and received statistics to and from the adapter. Frames Tx OK A count of the frames that were successfully transmitted. This counter is incremented when the transmit status is reported as Transmit OK. Frames Rx OK A count of the frames that were successfully received.
- Page 92 A count of frames that were successfully received and are directed to a broadcast group address. This count does not include frames received with frame- too-long, FCS, length, or alignment errors, nor frames lost because of internal MAC sublayer errors. This counter is incremented as indicated by the Receive OK status.
- Page 93 The statistics in this area only pertain to the named session. Session Name The name used for the session between the initiator and the target. Session Id The identifier used for the session between the initiator and the target. Bytes sent The number of bytes sent for the named session.
- Page 94 MAC Rx w/ no Pause Command MAC control frames with no pause command. MAC Sent X-on MAC Transmit with X-on was on. MAC Sent X-off MAC Transmit with X-on was off. Large Send Offload Transmit Requests The number of times the adapter was requested to transmit a packet performing TCP segmentation. Total Offload TCP Connections The total number of offloaded TCP connections.
- Page 95 The Configurations tab for 10 Gbps network adapters is shown below. To configure resource reservations 1. Select Reserved Resources for the Offload Configuration setting. Reservations allocate the minimum number of connections per technology. See Table 2 for the maximum number of connections available for various configurations. 2.
-
Page 96: Configuring The Ip Address For Iscsi Offload
4. If allocating iSCSI connections, select the iSCSI check box and slide the bar or enter a number in the value box. This is the maximum number of connections available for iSCSI offload. Increasing the number in Pending Tasks Per Connection (when 100% of the pre-allocated resources are already in use) reduces the overall number of allocated connections. - Page 97 and then Configurations. Configuring Teaming The teaming function allows you to group any available network adapters together to function as a team. Teaming is a method of creating a virtual NIC (a group of multiple adapters that functions as a single adapter). The benefit of this approach is that it enables load balancing and failover. Teaming is done through the Broadcom Advanced Server Program (BASP) software.
-
Page 98: Team Types
Team Types You can create four types of load balance teams: Smart Load Balance and Failover Link Aggregation (802.3ad) (TOE is not applicable) Generic Trunking (FEC/GEC)/802.3ad-Draft Static (TOE is not applicable) SLB (Auto-Fallback Disable) – The Auto-Fallback Disable feature is configured for Smart Load Balance and Failover type teams in the Teaming Wizard. - Page 99 To configure an existing team, select Edit Team from the Team menu, or right-click one of the teams in the list and select Edit Team. This option is only available if a team has already been created and is listed in the Team Management pane. NOTE: If you prefer to work without the wizard for now, click Expert Mode.
- Page 100 6. Select the type of team you want to create. If the team type is an SLB type team, click Next. If the team type is not an SLB type team, then a dialog box appears. Verify that the network switch connected to the team members is configured correctly for the team type, click OK, and continue. NOTE: NetXtreme II network adapters with iSCSI enabled is supported only in an SLB team type.
- Page 101 NOTES: If an adapter is included as a member of a team and you change any advanced property, then you must rebuild the team to ensure that the team's advanced properties are properly set. If an adapter with a TOE key is included as a member of a team and you remove the TOE key, then you must rebuild the team to ensure that the team does not appear as a TOE-enabled team.
- Page 102 10. If you want to configure LiveLink, select Yes, otherwise select No, then click Next. 11. Select the probe interval (the number of seconds between each retransmission of a link packet to the probe target) and the maximum number of probe retries (the number of consecutively missed responses from a probe target before a failover is triggered).
- Page 103 14. Select a listed team member, click Edit Member IP Address, and then type the member IP address in the IP Address box. Repeat for all listed team members and then click OK. Click Next. NOTE: All of the member IP addresses must be in the same subnet as the subnet of the probe targets. 15.
- Page 104 NOTE: The team name cannot exceed 39 characters, cannot begin with spaces, and cannot contain any of the following characters: & \ / : * ? < > | 17. To tag the VLAN, select Tagged and then click Next. Otherwise, click Untagged, click Next, and continue with the wizard to add additional VLANs (see Step 19.
- Page 105 19. Select Yes to add or manage another VLAN and then click Next. Repeat until you do not want to add or manage any additional VLANs. NOTE: You can define up to 64 VLANs per team (63 VLANs that are tagged and 1 VLAN that is not tagged). Adding several VLANS may slow down the reaction time of the Windows interface due to memory and processor time usage for each VLAN.
- Page 106 NOTE: At any point in the Broadcom Teaming Wizard procedure, click Preview to get a visual representation of what the team will look like before committing any changes. 21. Click the team name in the Team Management pane to view the team's properties in the Information tab, transfer and receive data in the Statistics tab, and team customization options in the Configurations tab.
-
Page 107: Using Expert Mode
Using Expert Mode Use Expert Mode to create a team, modify a team, add a VLAN, and configure LiveLink for a Smart Load Balance and Failover and SLB (Auto-Fallback Disable) team. To create a team using the wizard, see Using the Broadcom Teaming Wizard. - Page 108 5. Click the Create Team tab. NOTE: The Create Team tab appears only if there are teamable adapters available. 6. Click the Team Name field to enter a team name. 7. Click the Team Type field to select a team type. 8.
- Page 109 NOTE: There must be at least one Broadcom network adapter assigned to the team. NOTE: A team created with a single adapter will not have load balancing or failover capabilities. The TCP Offload Engine (TOE), Large Send Offload (LSO), and Checksum Offload (CO) columns indicate if the TOE, LSO, and/or the CO properties are supported for the adapter.
- Page 110 4. The wizard Welcome screen appears. Click Next to continue modifying a team using the wizard or click Expert Mode to work in Expert Mode. NOTE: The Edit Team tab in Expert Mode appears only if there are teams configured on the system. 5.
- Page 111 7. Type the VLAN name, then select the type and ID. 8. Click Create to save the VLAN information. As VLANs are defined, they can be selected from the Team Name list, but they have not yet been created. 9. Continue this process until all VLANs are defined, then click OK to create them. 10.
- Page 112 To configure LiveLink 1. Click the Team Management button at the bottom of the BACS 3 window, or from the View menu, select Navigate, then Team Management. 2. Select the Smart Load Balance and Failover or SLB (Auto-Fallback Disable) team. 3.
-
Page 113: Viewing Basp Statistics
BACSCLI also allows you the ability to team network adapters together for load balancing and failover. For a complete list of available commands and examples, see the BACSCLI ReadMe text file on the Dell-provided CD. Supported Operating Systems... -
Page 114: Installation
BACSCLI is supported on the following operating systems: Windows Server 2003 Windows Server 2008 (including Server Core) Windows Server 2008 R2 (including Server Core) Installation On a system with Broadcom NetXtreme I and NetXtreme II network adapters, BACSCLI is installed when BACS 3 is installed with the installer. Back to Contents Page... -
Page 115: Performance Specifications
Back to Contents Page Specifications: Broadcom NetXtreme 57XX User Guide 10/100/1000BASE-T Cable Specifications Performance Specifications Physical Characteristics Power Requirements Environmental Specifications 10/100/1000BASE-T Cable Specifications Table 1. 10/100/1000BASE-T Cable Specifications Port Type Connector Media Maximum Distance 10BASE-T RJ-45 Category 3, 4, or 5 unshielded twisted pairs (UTP) 100m (328 ft) 100/1000BASE-T 1 Category 5 2 UTP... -
Page 116: Power Requirements
Power Requirements Table 4. Power Requirements Item Value BCM5700 and BCM5701 Operating Voltage +5V ± 5% Power Consumption 2A @ +5VDC BCM5703 +3.3V ±10% for BCM95703A30 and BCM95703SA31 Operating Voltage +5V ±5% for BCM95703A30U and BCM95703SA31U Power Consumption 1.2A@ +3.3V for BCM95703A30 BCM5721 and BCM5751 Operating voltage +3.3V ±... -
Page 117: Fcc Class B Notice
Back to Contents Page Regulatory Information: Broadcom NetXtreme 57XX User Guide FCC Class B Notice VCCI Class B Notice CE Notice Canadian Regulatory Information (Canada Only) MIC Notice (Republic of Korea Only) BSMI FCC Class B Notice Broadcom NetXtreme Gigabit Ethernet Controller BCM95721A211 BCM95722A2202 The equipment complies with Part 15 of the FCC Rules. - Page 118 CE Notice...
-
Page 120: Canadian Regulatory Information (Canada Only)
Canadian Regulatory Information (Canada Only) Industry Canada, Class B This Class B digital apparatus complies with Canadian ICES-003. Notice: The Industry Canada regulations provide that changes or modifications not expressly approved by Broadcom could void your authority to operate this equipment. Industry Canada, classe B Cet appareil numérique de la classe B est conforme à... -
Page 121: Mic Notice (Republic Of Korea Only)
Avis : Dans le cadre des réglementations d'Industry Canada, vos droits d'utilisation de cet équipement peuvent être annulés si des changements ou modifications non expressément approuvés par Broadcom y sont apportés. MIC Notice (Republic of Korea Only) B CLASS Device Broadcom NetXtreme Gigabit Ethernet Controller BCM95721A211 BCM95722A2202... - Page 122 Please read all Restrictions and Disclaimers. Back to Contents Page...
- Page 123 Back to Contents Page User Diagnostics: Broadcom Broadcom NetXtreme 57XX User Guide Introduction System Requirements Running Broadcom NetXtreme User Diagnostics Diagnostic Test Descriptions Diagnostic Test Messages Introduction Broadcom NetXtreme User Diagnostics is an MS-DOS based application that runs a series of diagnostic tests (see Table 1: "MS-DOS Command Prompt Mode Command Options") on the Broadcom NetXtreme Gigabit Ethernet adapters in your system.
- Page 124 Enables/disables the Wake on LAN (WOL) property. b57udiag -w 1 = Enable <value> 0 = Disable Enables/disables Multi-Boot Agent (MBA) protocol. b57udiag - 1 = Enable mba <value> 0 = Disable Selects the specific MBA protocol. b57udiag - 0 = Preboot Execution Environment (PXE) mbap 1 = Remote Program Load (RPL) <value>...
-
Page 125: Diagnostic Test Descriptions
Enables/disables the Wake on LAN (WOL) property. setwol setwol e = Enable WOL setwol d = Disable WOL Enables/disables Preboot Exchange Environment (PXE) and sets PXE speed setpxe e = Enable PXE setpxe d = Disable PXE setpxe s 0 = Auto (Default) setpxe setpxe s 1 = 10 Mbps speed, half-duplex operation setpxe s 2 = 10 Mbps speed, full-duplex operation... - Page 126 incrementing test data. Each register specified in the configuration content defines the read-only bit and the read/write bits. The test writes 0s and 1s to the test bits to ensure the read-only bits are not changed, and that read/write bits are changed. Control This test attempts to read the register configuration file (Ctrlreg.txt) for the register definitions.
- Page 127 This test tests both high-priority direct memory access (DMA) and low-priority DMA. The test moves data from the host memory to the adapter SRAM and verifies the data. The test then moves data back to the host memory to again verify the data. The medium independent interface (MII) test function is identical to that of the Control Register Test (A2).
- Page 128 /* 5 */ "Read-only bit %s got changed after writing one at offset 0x%X", /* 6 */ "Read/Write bit %s did not get cleared after writing zero at offset 0x%X", /* 7 */ "Read/Write bit %s did not get set after writing one at offset 0x%X", /* 8 */ "BIST failed",...
- Page 129 /* 69 */ "Slot error, expected an UUT to be found at location %02X:%02X:00", /* 70 */ "Adjacent memory has been corrupted while testing block 0x%08x-0x%08x\nGot 0x%08x @ address 0x%08x. Expected 0x%08x", /* 71 */ "The function is not Supported in this chip", /* 72 */ "Packets received with CRC error", /* 73 */...
-
Page 130: Hardware Diagnostics
Back to Contents Page Troubleshooting: Broadcom NetXtreme 57XX User Guide Hardware Diagnostics Troubleshooting Checklist Checking for Network Link and Activity Checking if Current Drivers are Loaded Running a Cable Length Test Testing Network Connectivity Software Problems and Solutions Hardware Diagnostics Loopback diagnostic tests are available for testing the adapter hardware. -
Page 131: Troubleshooting Checklist
3. Replace the cable that is attached to the NIC/LOM. 4. Verify that the IP address is assigned correctly using the command "ipconfig" or by checking the OS IP assigning tool. 5. Verify that the IP address is correct for the network to which the adapter(s) is connected. Any test failure while running tests from the Diagnostics tab in Broadcom Advanced Control Suite 2 may indicate a hardware issue with the NIC or LOM that is installed in your system. -
Page 132: Running A Cable Length Test
Broadcom NetXtreme Gigabit Ethernet Adapter Version: Hardware Setting: Node Address: Frame Type: Board Name: LAN Protocol: ARP (see note) LAN Protocol: IP Addr: (see note) NOTE: The LAN protocol status is displayed after an IP address is assigned to the adapter. Linux To verify that the TG3 Linux driver is loaded properly, run: lsmod | grep tg3... -
Page 133: Software Problems And Solutions
The ping statistics that are displayed indicate whether the network connection is working or not. Linux To verify that the Ethernet interface is up and running, run ifconfig to check the status of the Ethernet interface. It is possible to use netstat -i to check the statistics on the Ethernet interface. Go to Linux Driver Software for information on ifconfig and netstat. - Page 134 Solution: This problem is not isolated to the Broadcom adapter. However, based on several inquiries, we are publishing the following instructions based on other customers successfully working around this issue: 1. Place the Broadcom driver files in the original image folder (the image folder created when risetup.exe was executed for the first time).
-
Page 135: Broadcom Boot Agent
A Sample Sysprep.inf file for Windows XP is shown below. ------------------------------------------------------------------------ ;SetupMgrTag [Unattended] OemSkipEula=Yes OemPreinstall=Yes TargetPath=\Windows UnattendedInstall=Yes OemPnpDriversPath=Drivers\Net [GuiUnattended] AdminPassword="password" EncryptedAdminPassword=NO AutoLogon=Yes AutoLogonCount=99 OEMSkipRegional=1 OEMDuplicatorstring="XP System" TimeZone=4 OemSkipWelcome=1 [UserData] FullName="User" OrgName="Organization" ComputerName=* [SetupMgr] DistFolder=C:\sysprep\i386 DistShare=whistlerdist [Identification] JoinDomain=workgroup [Networking] InstallDefaultComponents=Yes ------------------------------------------------------------------------ Linux and ASFIPMon Problem: I brought down the interface and now I cannot bring it back up. - Page 136 Reboot the system after the adapter has been added. Problem: The Broadcom NetXtreme Gigabit Ethernet adapter may not perform at optimal level on some systems if it is added after the system has booted. Solution: The system BIOS in some systems does not set the cache line size and the latency timer if the adapter is added after the system has booted.
- Page 137 Back to Contents Page Broadcom Gigabit Ethernet Teaming Services: Broadcom NetXtreme 57XX User Guide Introduction Teaming Mechanisms Teaming and Other Advanced Networking Properties General Network Considerations Application Considerations Troubleshooting Teaming Problems Frequently Asked Questions Event Log Messages Introduction Glossary Teaming Concepts Software Components Hardware Requirements Supported Teaming by Processor...
-
Page 138: Teaming Concepts
Storage devices use RAID technology to group individual hard drives. Switch ports can be grouped together using technologies such as Cisco Gigabit EtherChannel, IEEE 802.3ad Link Aggregation, Bay Network Multilink Trunking, and Extreme Network Load Sharing. Network interfaces on Dell servers can be grouped together into a team of physical ports called a virtual adapter. -
Page 139: Description Of Teaming Types
A team of adapters function as a single virtual network interface and does not appear any different to other network devices than a non-teamed adapter. A virtual network adapter advertises a single Layer 2 and one or more Layer 3 addresses. When the teaming driver initializes, it selects one MAC address from one of the physical adapters that make up the team to be the Team MAC address. - Page 140 and TCP/UDP port numbers.The same combination of source and destination IP addresses and TCP/UDP port numbers will generally yield the same hash index and therefore point to the same port in the team. When a port is selected to carry all the frames of a given socket, the unique MAC address of the physical adapter is included in the frame, and not the team MAC address.
-
Page 141: Software Components
available at both ends of the link, 802.3ad provides a manual aggregation that only requires both ends of the link to be in a link up state. Because manual aggregation provides for the activation of a member link without performing the LACP message exchanges, it should not be considered as reliable and robust as an LACP negotiated link. -
Page 142: Switching Hub
Autoexec.ncf file. By accessing this file, you can verify the parameters configured for each adapter, add or delete parameters, or modify parameters. Supported Features by Team Type Table 5 provides a feature comparison across the team types supported by Dell. Use this table to determine the best type of... -
Page 143: Selecting A Team Type
team for your application. The teaming software supports up to eight ports in a single team and up to four teams in a single system. The four teams can be any combination of the supported teaming types, but each team must be on a separate network or subnet. -
Page 144: Teaming Mechanisms
Teaming Mechanisms Architecture Types of Teams Driver Support by Operating System Supported Teaming Speeds Architecture The Broadcom Advanced Server Program is implemented as an NDIS intermediate driver (see Figure 2). It operates below protocol stacks such as TCP/IP and IPX and appears as a virtual adapter. This virtual adapter inherits the MAC Address of the first port initialized in the team. -
Page 145: Outbound Traffic Flow
assigned to a different port. Figure 2. Intermediate Driver Outbound Traffic Flow The Broadcom Intermediate Driver manages the outbound traffic flow for all teaming modes. For outbound traffic, every packet is first classified into a flow, and then distributed to the selected physical adapter for transmission. The flow classification involves an efficient hash computation over known protocol fields. -
Page 146: Protocol Support
each link (Inbound Flow Entries) represents an IP host located in the same subnet. When an inbound IP Datagram arrives, the appropriate Inbound Flow Head Entry is located by hashing the source IP address of the IP Datagram. Two statistics counters stored in the selected entry are also updated. These counters are used in the same fashion as the outbound counters by the load-balancing engine periodically to reassign the flows to the physical adapter. -
Page 147: Configuration Recommendations
Switch-Independent The Broadcom Smart Load Balancing type of team allows two to eight physical adapters to operate as a single virtual adapter. The greatest benefit of the SLB type of team is that it operates on any IEEE compliant switch and requires no special configuration. - Page 148 The following are the key attributes of Generic Static Trunking: Failover mechanism (link loss detection) Load balancing algorithm. Outbound traffic is balanced through Broadcom proprietary mechanism based L4 flows. Inbound traffic is balanced according to a switch specific mechanism. Outbound Load Balancing using MAC Address is not supported. Outbound Load Balancing using IP address is supported.
- Page 149 generate NESL events during link changes and other failure events. The various teaming mode features for each operating system are summarized in the table below. Table 6. Teaming Attributes by Operating System Features Windows NetWare Smart Load Balancing™ BACS 3 a User interface Command line Number of teams...
-
Page 150: Teaming And Other Advanced Networking Properties
Outgoing packet management BASP BASP Failover event Loss of link only Loss of link only Failover time <500 ms <500 ms 1.5 s b (approximate) 1.5 s b (approximate) Fallback time MAC address Same for all adapters Same for all adapters Multivendor teaming a Broadcom Advanced Control Suite 3 b Make sure that Port Fast or Edge Port is enabled... -
Page 151: Checksum Offload
Checksum Offload Checksum Offload is a property of the Broadcom network adapters that allows the TCP/IP/UDP checksums for send and receive traffic to be calculated by the adapter hardware rather than by the host CPU. In high-traffic situations, this can allow a system to handle more connections more efficiently than if the host CPU were forced to calculate the checksums. -
Page 152: General Network Considerations
Dynamic Host Control Protocol (DHCP) and the Trivial File Transfer Protocol (TFTP). Both of these protocols operate over IP and are supported by all teaming modes. General Network Considerations Teaming Across Switches Spanning Tree Algorithm Layer 3 Routing/Switching Teaming with Hubs (for troubleshooting purposes only) Teaming with Microsoft NLB/WLBS Teaming Across Switches SLB teaming can be configured across switches. - Page 153 The addition of a link between the switches allows traffic from/to Blue and Gray to reach each other without any problems. Note the additional entries in the CAM table for both switches. The link interconnect is critical for the proper operation of the team.
-
Page 154: Spanning Tree Algorithm
Figure 5 represents a failover event in which the cable is unplugged on the Top Switch port 4. This is a successful failover with all stations pinging each other without loss of connectivity. Figure 5. Failover Event Spanning Tree Algorithm Topology Change Notice (TCN) Port Fast/Edge Port In Ethernet networks, only one active path may exist between any two bridges or switches. - Page 155 that has a lost link on one of its physical adapters. If the physical adapter were to be reconnected (also known as fallback), the intermediate driver would detect that the link has been reestablished and would begin to pass traffic through the port. Traffic would be lost if the port was temporarily blocked by the Spanning Tree Protocol.
-
Page 156: Application Considerations
SLB Teams SLB teams are the only teaming type not dependant on switch configuration. The server intermediate driver handles the load balancing and fault tolerance mechanisms with no assistance from the switch. These elements of SLB make it the only team type that maintains failover and fallback characteristics when team ports are connected directly to a hub. - Page 157 High-Performance Computing Cluster Microsoft Cluster Software Dell Server cluster solutions integrate Microsoft Cluster Services (MSCS) with PowerVault SCSI or Dell/EMC Fibre-Channel based storage, Dell servers, storage adapters, storage switches and network adapters to provide high-availability (HA) solutions. HA clustering supports all adapters qualified on a supported Dell server.
- Page 158 NOTE: Microsoft Network Load Balancing is not supported with Microsoft Cluster Software. High-Performance Computing Cluster Gigabit Ethernet is typically used for the following three purposes in high-performance computing cluster (HPCC) applications: 1. Inter-Process Communications (IPC): For applications that do not require low-latency high-bandwidth interconnects (such as Myrinet, InfiniBand), Gigabit Ethernet can be used for communication between the compute nodes.
-
Page 159: Teaming And Network Backup
Advanced Features PXE is used extensively for the deployment of the cluster (installation and recovery of compute nodes). Teaming is typically not used on the host side and it is not a part of our standard offering. Link aggregation is commonly used between switches, especially for large configurations. -
Page 160: Load Balancing And Failover
Fault Tolerance When you perform network backups in a nonteamed environment, overall throughput on a backup server adapter can be easily impacted due to excessive traffic and adapter overloading. Depending on the number of backup servers, data streams, and tape drive speed, backup traffic can easily consume a high percentage of the network link bandwidth, thus impacting production data and tape backup performance. - Page 161 infrastructure must implement teaming such as load balancing and fault tolerance. Data centers will incorporate redundant switches, link aggregation, and trunking as part of their fault tolerant solution. Although teaming device drivers will manipulate the way data flows through teamed interfaces and failover paths, this is transparent to tape backup applications and does not interrupt any tape backup process when backing up remote systems over the network.
-
Page 162: Troubleshooting Teaming Problems
When troubleshooting network connectivity or teaming functionality issues, ensure that the following information is true for your configuration. 1. Although Dell supports mixed speed SLB teaming, it is recommended that all adapters in a team be the same speed (either all Gigabit Ethernet or all Fast Ethernet). -
Page 163: Frequently Asked Questions
12. Verify the base (Miniport) and team (intermediate) drivers are from the same release package.Dell does not test or support the mixing of base and teaming drivers from different CD releases. - Page 164 Broadcom's teaming software only supports IP/TCP/UDP traffic. All other traffic is forwarded to the primary Answer: adapter. Question: Which protocols are load balanced with SLB and which ones are not? Only IP/TCP/UDP protocols are load balanced in both directions: send and receive. IPX is load balanced on the Answer: transmit traffic only.
- Page 165 Question: What is the maximum number of ports that can be teamed together? Answer: Up to 8 ports can be assigned to a team. Question: What is the maximum number of teams that can be configured on the same system? Answer: Up to 4 teams can be configured on the same system.
-
Page 166: Windows System Event Log Messages
Question: Where can I get the latest supported drivers? Answer: Go to Dell support at www.support.dell.com for driver package updates or support documents. Question: Where do I monitor real time statistics for an adapter team in a Windows system? Answer: Use the Broadcom Advanced Control Suite 3 (BACS 3) to monitor general, IEEE 802.3, and custom counters. -
Page 167: Intermediate Driver (Virtual Adapter/Team)
network cable is properly connection with its link partner. that the link partner (for example, switch or hub) connected. is working correctly. The adapter has established a The network link is up. Informational message only. No action is required. link. Network controller The adapter has been manually configured for 10Mb half-... - Page 168 management interface. device instance. Unable to create symbolic link Another driver has created a Unload the conflicting device driver that uses the for the management interface. conflicting device name. name Blf. Broadcom Advanced Server Another driver has created a Informational message only. No action is Program Driver has started.
- Page 169 Back to Contents Page Broadcom Advanced Server Program Driver Software (NetWare): Broadcom NetXtreme 57XX User Guide BASP Overview Balance Modes and Limitations NESL Compliance Loading Broadcom Advanced Server Program Configuring Teaming BASP Overview BASP.LAN is Broadcom's virtual Ethernet driver for NetWare 5.1 and 6.x that provides load balancing, fault-tolerance, and VLAN features.
- Page 170 configured active or passive on the team and most switches allow active or passive selections on a per port basis. At least one side of each connection must be active otherwise the connection will never be selected for aggregation. This mode is also protocol-independent and all traffic should be load-balanced and fault-tolerant.
- Page 171 1. Bind BASP.LAN to the adapters on the team by using a custom BASP BIND command at the console. Example: BASP BIND BASP_1_EII B57_1_EII BASP BIND BASP_1_EII B57_2_EII NOTE: If there are multiple frame types loaded on the virtual and the physical adapters, it is necessary to bind only one frame type on the virtual adapter to the same frame type on the physical adapter.
-
Page 172: Configuring Teaming
For the adapter driver, at the Command Line Interface (CLI): UNLOAD B57 The response is: Module B57.LAN unloaded For the BASP driver, at the Command Line Interface (CLI): UNLOAD BASP The response is: Module BASP.LAN unloaded NOTE: BASP can not be unloaded if one or more adapters are bound to BASP. Configuring Teaming Balance Mode Selection Loading Frame Types... -
Page 173: Hot Standby
mode for all adapters in the team. Note that at least one side (system or switch) must be in LACP active mode for it to work. Example: LOAD BASP.LAN FRAME=ETHERNET_II NAME=BASP_1_EII VSLOT=1 MODE=802.3AD LACP=PASSIVE Loading Frame Types After one or more adapters are bound to a virtual adapter, additional frame types can only be loaded in the virtual adapter if the corresponding frame types are also loaded in the bound adapters. - Page 174 LOAD ODINEB.NLM LOAD ALT.LAN FRAME=ETHERNET_II NAME=ALT_1_EII SLOT=1 FORVLANS LOAD ALT.LAN FRAME=ETHERNET_II NAME=ALT_2_EII SLOT=2 FORVLANS 3. Bind BASP.LAN to the NIC adapters in the team for each protocol. Example: BASP BIND BASP_1_V2_EII B57_1_EII BASP BIND BASP_1_V2_EII B57_2_EII If there are multiple VLANs (each with one or more frame types) loaded on the virtual adapter, it is only necessary to bind one frame type on one VLAN on the virtual adapter to the same frame type on the physical adapter.
-
Page 175: Editing The Autoexec.ncf File
A team of two BCM5700 NICs with hardware checksums enabled. LOAD BASP.LAN FRAME=ETHERNET_II NAME=BASP_1_EII CHECKSUM=ON VSLOT=1 LOAD ODINEB.NLM LOAD B57.LAN FRAME=ETHERNET_II NAME=B57_1_EII CHECKSUM=ON SLOT=1 LOAD B57.LAN FRAME=ETHERNET_II NAME=B57_2_EII CHECKSUM=ON SLOT=2 BASP BIND BASP_1_EII B57_1_EII BASP BIND BASP_1_EII B57_2_EII NOSCREEN Disables the menu-driven screen when BASP.LAN is loaded for the first time. Example: LOAD BASP.LAN FRAME=ETHERNET_II NAME=BASP_1_EII VSLOT=1 NOSCREEN GVRP... - Page 176 BASP BIND BASP_1_V2_EII B57_2_EII # Bind protocols to BASP.LAN. BIND IP BASP_1_V2_EII ADDR=192.168.2.200 MASK=255.255.255.0 BIND IP BASP_1_V3_EII ADDR=192.168.3.200 MASK=255.255.255.0 BIND IP BASP_1_V4_EII ADDR=192.168.4.200 MASK=255.255.255.0 mount all NOTE: If you modify any adapter parameters, you must reboot the system before the changes takes effect. If you make changes and do not reboot, you may experience configuration problems.
- Page 177 The untagged 802.2 frame must be loaded to allow sending and receiving GVRP frames. Switch ports must be configured with GVRP enabled. Using INETCFG When INETCFG is used to set up teaming, the physical adapters being added to the team must not have any protocols bound to them before they are added to the team.
-
Page 178: Snmp Agent
Use names such as BASP1 for TEAM 1, BASP2 for TEAM 2, BASP3 for TEAM 3 and BASP4 for TEAM 4. When you modify a team, you may need to reboot after reinitialization for the changes to take effect. Repeat steps 22 through 27 to configure an additional physical driver and to configure additional frame types. The configuration can be viewed in the View Configuration - All INETCFG Commands console.