Samsung SRP-275 User Manual
Samsung impact printer user's manual
Hide thumbs
Also See for SRP-275:
- Service manual (136 pages) ,
- Operator's manual (111 pages) ,
- Brochure & specs (23 pages)
Table of Contents
Advertisement
Quick Links
Advertisement
Table of Contents

Related Manuals for Samsung SRP-275


Summary of Contents for Samsung SRP-275
-
Page 1: Impact Printer
User's Manual SRP-275 Impact Printer Rev. 1.03 http://www.samsungminiprinters.com... -
Page 2: Safety Precautions
• If not, a child may put the bag on his head. PROHIBIT Do not bend the cable by force or leave it under any heavy object. • A damaged cable can cause a fire. PROHIBIT - 2 - SRP-275... - Page 3 • After the disappearance of the smoke, call your dealer to repair it. TO UNPLUG PRINTER Install the printer on the stable surface. • If the printer falls down, it can be broken and you can hurt yourself. PRINTER PROHIBIT Do not let water or other foreign objects in the printer.
- Page 4 SRP-275 All rights reserved. No part of this publication may reproduced, stored in a retrieval, or transmitted in any form or by any means, electronic, mechanical, photocopying, recording, or otherwise, without the prior written permission of BIXOLON. No patent liability is assumed with respect to the use of the information contained herein.
-
Page 5: Emc And Safety Standards Applied
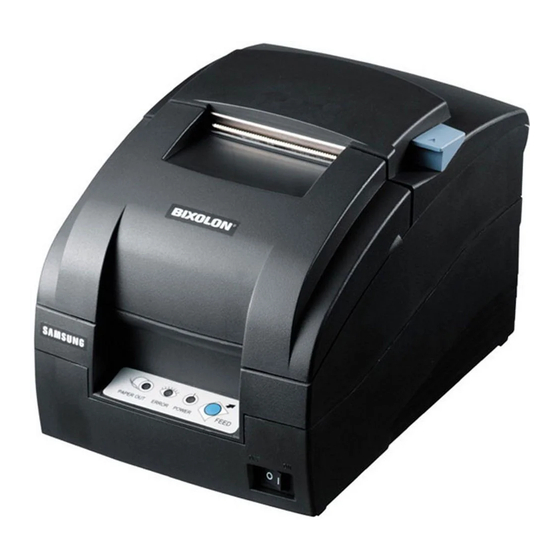
National : CB-scheme : IEC 60950-1: 2001 ■ WARNING The connection of a non-shielded printer interface cable to this printer will invalidate the EMC standards of this device. You are cautioned that changes or modifications not expressly approved by the party responsible for compliance could void your authority to operate the equipment. - Page 6 • Front view Rear cover Front cover Control panel Power switch NOTES Please be sure to read the instructions in this manual carefully before using your new printer. Rev. 1.03 • Rear view DIP Switch cover Open button Drawer kick-out...
-
Page 7: Table Of Contents
2-2-5 Drawer kick-out ·····························································································13 3. Setting the Switches ······································································································14 3-1 Setting the DIP Switch ······························································································14 3-1-1 DIP Switch setting for Epson(ESC/POS) mode ············································14 3-1-2 DIP Switch setting for Citizen(iDP 3550) mode·············································15 3-1-3 DIP Switch setting for Star(SP500) mode ·····················································16 3-1-4 Changing the DIP Switch setting···································································17 3-2 Setting the Memory Switches ···················································································18... -
Page 8: Setting Up The Printer
• Avoid locations that are subject to direct sunlight or excessive heat. • Avoid using or storing the printer in a place subject to excessive temperature or moisture. • Do not use or store the printer in a dirty location. -
Page 9: Using The Operation Panel
(See "ERROR LED blinking pattern" in Chapter 11.) If you see this light blinking, turn off the printer for a few seconds and then turn it back on. If the light is still blinking, call your supervisor or a service person. -
Page 10: Connecting The Cables
NOTES Connect the printer to the host ECR (host computer) though an interface cable matching the specification of the printer and the host ECR (host computer). Be sure to use a drawer that matches the printer’s specification. Depending on the interface your system uses, either connect the serial, parallel, USB or Ethernet communication cable to the appropriate connector on the back of the printer. -
Page 11: Serial Interface (Rs-232C)
IFC-S TYPE Interface connector Frame Ground Transmit Data Input Receive Data Input Data Set Ready Signal Ground Data Terminal Ready - 11 - SRP-275 Drawer kick-out Connector 1 (F.G) 2 (RXD) 3 (TXD) 4 (DTR) HOST SIDE 5 (S.G) (9Pin) -
Page 12: Parallel Interface (Ieee1284)
Xflag / Data1,5 nAutoFd HostBusy Logic-H Logic-H nInit nInit nFault nDataAbail / nSelectln 1284-Active - 12 - SRP-275 Drawer kick-out Connector Byte mode HostClk Data 0 (LSB) Data 1 Data 2 Data 3 Data 4 Data 5 Data 6 Data 7 (MSB) -
Page 13: Usb Interface
Solid orange White with green stripe Solid blue White with blue stripe Solid green White with brown stripe Solid brown Description - 13 - SRP-275 Drawer kick-out Connector Function Frame ground Differential data line Differential data line Signal ground Drawer kick-out... -
Page 14: Setting The Switches
(*1) Emulation Selection (DSW 1-1 and 1-2) Emulation EPSON STAR CITIZEN EPSON-KP - EPSON-KP(EPSON Kitchen Printer mode) : A alarm is generated by printer after auto cutting and in paper end error. (*2) Baud rate selection (Transmission speed) Transmission 2400 baud 4800 baud 9600 baud 19200 baud Rev. -
Page 15: Dip Switch Setting For Citizen(Idp 3550) Mode
(*1) Emulation Selection (DSW 1-1 and 1-2) Emulation EPSON STAR CITIZEN EPSON-KP - EPSON-KP(EPSON Kitchen Printer mode) : A alarm is generated by printer after auto cutting and in paper end error. (*2) International Character Selection DSW 1-5 Country U.S.A. France Germany U.K. -
Page 16: Dip Switch Setting For Star(Sp500) Mode
(*1) Emulation Selection (DSW 1-1 and 1-2) Emulation EPSON STAR CITIZEN EPSON-KP - EPSON-KP(EPSON Kitchen Printer mode) : A alarm is generated by printer after auto cutting and in paper end error. (*2) Baud rate selection (Transmission speed) Transmission 2400 baud 4800 baud 9600 baud... -
Page 17: Changing The Dip Switch Setting
If you need to change settings, follow the steps below to make your changes. CAUTION Turn off the printer before removing the DIP Switch cover to prevent an electric short, which can damage the printer. 1) Make sure the printer is turned off. -
Page 18: Setting The Memory Switches
Memory Switch setting”. Settings of the Memory Switch are stored in the NV memory; therefore, even if the printer is turned off, the settings are maintained. When you replace a SRP-270 with a SRP-275, you should adjust the MSW 8-5 to OFF. - Page 19 When On is selected, a bit of the “rear cover open / close" in each status that is transmitted from the printer is changed every time the rear cover is open or closed. When you replace a SRP-270 with a SRP-275, you should adjust the MSW 8-5 to Off. MSW 8-8: When Off is selected, a bit of the “automatic recoverable error”...
- Page 20 3) Press the FEED button twice while POWER, ERROR, and PAPER OUT LEDs are lit. 4) Close the cover. The printer prints the enabled settings of the Memory Switches and instructions. 5) Follow the instructions to process the switch setup.
- Page 21 Current setting: 640 bytes 522 bytes ③ Resetting Paper width? Current setting: 76 mm 69.5 mm 57mm Current setting: Paper out Cover open - 21 - SRP-275 Data bit Current setting: 8 bits Even 7 bits Finishing Memory S/W Setting Mode?
-
Page 22: Memory Switch Setting For Star Mode
Do not turn off the power to the printer while sending commands to the non volatile memory. Doing so will destroy the Memory Switch setting. It is also possible for all Memory Switch settings to become offset to their initial, default settings. - Page 23 MSW 7 MSW 8 Rev. 1.03 Ex-factory Settings (n1, n2, n3, n4) "0000" "0000" "0000" "0000" "0000" "0000" "0000" "0000" "0000" Ex-factory Settings (n1, n2, n3, n4) "0010" "0000" "0000" "0000" "0000" "0000" "0000" "0000" "0000" - 23 - SRP-275...
- Page 24 2) Inserts a one dot string of black printing to the head of the white/black inverted characters. 3) Printing data created on a conventional red/black printer, using 1 and 2 above, there are cases in which the printing position will shift to the right and a line of printable characters reduced.
- Page 25 Disabled Reflects the near end switch state to the status. Printing does not stop for near end, and the printer does not go offline. Reflects the near end switch state to the status. Printing does stop for near end, and the printer goes offline.
- Page 26 Page 30 (PC775 : Baltic) (*3) Page 31 (Thai character code 16) Page 32 (OldCode : Israel) Page 33 (WPC1255 : Israel) Page 34 (Thai character code 11) Page 35 (Thai character code 18) - 26 - SRP-275 Character Table...
- Page 27 - Memory Switch 5 Function Reserved - Memory Switch 6 Function BUSY Condition - Memory Switch 7 Function Reserved Rev. 1.03 Disabled Only Setting Prints “?” Reception Buffer or Offline - 27 - SRP-275 Enabled Auto-status sent only once Ignored Reception Buffer Full...
-
Page 28: Ribbon Cassette Installation
4. Ribbon Cassette Installation NOTES Malfunctions and other problems may arise if other than specified ribbon cassettes are used in the printer. The Warranty may be void if other than specified ribbon cassettes are used. Contact your dealer or place of purchase for more information about proper ribbon cassettes. -
Page 29: Roll Paper Installation
5. Roll Paper Installation CAUTION Do not touch the auto cutter blade when you open rear cover. Rev. 1.03 1) To prevent data loss, make sure that the printer is not receiving data. 2) Open the rear cover by pushing the open button. -
Page 30: Changing The Paper Width
3) Reattach the frame paper control in you want. (Insert and tighten two screws(3×6) to reattach.) 4) Close the rear cover. 5) Change the Memory Switch setting for changing paper roll width. (See the instructions "Setting the Memory Switches"(3.1) in Chapter 3.) - 30 - SRP-275... -
Page 31: Installing The Wall Mount (Option)
Be sure that the Bracket attached properly to match the direction of arrow as shown. And the Bracket mount should be always fixed vertically. 3) Insert the Bracket hanger of Set to the Bracket mount as shown. - 31 - SRP-275... -
Page 32: Self Test
The test is independent of any other equipment or software, so it is a good idea to run it when you first set up the printer or if you have any trouble. If the self test works correctly, the problem is in the other equipment or the software, not the printer. -
Page 33: Hexadecimal Dumping
This feature allows experienced users to see exactly what data is coming to the printer. This can be useful in finding software problems. When you turn on the hexadecimal dump function, the printer prints all commands and other data in hexadecimal format along with a guide section to help you find specific commands. -
Page 34: Specification
Life NOTES Malfunctions and other problems may arise if other than specified ribbon cassettes are used in the printer. The Warranty may be void if other than specified ribbon cassettes are used. Contact your dealer or place of purchase for more information about proper ribbon cassettes. -
Page 35: Electrical Characteristics
Mechanism : Approx. 10 million lines Auto cutter : Approx. 1 million cuts Life firing frequency (End of life is defined as the point at which the printer reaches the beginning of the Wear out Period.) Head Approx. 300 million dots/wire... -
Page 36: Dimensions & Weight
10-8 Optional features The optional features either replace a standard feature or enhance the operation of the printer. All optional features are installed at the factory and must be selected when the printer is ordered. ------------------------------------------------------------------------------------------------------------------------------------------------ • Auto cutter (SRP-275A : Exclude auto cutter, SRP-275C : Including auto cutter) ------------------------------------------------------------------------------------------------------------------------------------------------ •... -
Page 37: Appendix - Troubleshooting
(*2) Print head temperature error is not abnormal. • Recoverable errors When a recoverable error occurs, after the cause of the error is removed, the printer can recover from the error by receiving an error recovery command without turning off the power. -
Page 38: The Printer Does Not Start Printing
Wait until the light quits blinking and the printer is ready to use. - If the ERROR LED is on (but not blinking), the printer is off line. Check to see that the covers are closed and check the paper state. See Chapter 5 for instructions on installing or replacing the paper roll. -
Page 39: The Printer Stops Printing
See Chapter 5 for instructions on installing or replacing the paper roll. • If the ERROR LED is blinking, there is an error. In this case, turn off the printer for a few seconds and then turn it back on.