Casio Exilim EX-S3 User Manual
User documentation files
Hide thumbs
Also See for Exilim EX-S3:
- Service manual (29 pages) ,
- Function manual (20 pages) ,
- User manual (50 pages)
Table of Contents
Advertisement
EX-S3 User Documentation Files
• The EX-S3 user documentation available here has been divided among a number of files in order to facilitate downloading. You
can download the entire manual, or you can save time by using the table of contents below to find specific information and then
download only the files you need.
File 1 (File name : exs3_e_1.pdf)
2
Unpacking .................................................................... 2
Features ....................................................................... 9
Precautions ................................................................. 11
15
First, charge the battery! ............................................ 15
To record an image .................................................... 17
To view a recorded image .......................................... 17
To delete an image ..................................................... 18
19
About This Manual ..................................................... 19
General Guide ............................................................ 20
Monitor Screen Contents ........................................... 22
Indicator Lamps .......................................................... 24
Attaching the Strap .................................................... 24
Power Requirements ................................................. 25
Using the On-screen Menus ...................................... 35
41
Recording an Image ................................................... 41
Using Zoom ................................................................ 43
Using the Flash .......................................................... 45
Using the Self-timer ................................................... 47
Specifying Image Size and Quality ............................ 49
File 2 (File name : exs3_e_2.pdf)
51
Exposure Compensation (EV Shift) ........................... 51
Adjusting White Balance ............................................ 52
Using the Best Shot Mode ......................................... 54
11
12
13
13
(Coupling Shot) .......................................................... 58
14
14
14
Image (Pre-shot) ........................................................ 60
Using the Movie Mode ............................................... 62
Using the Histogram .................................................. 63
REC Mode Camera Settings ..................................... 65
File 3 (File name : exs3_e_3.pdf)
70
20
21
Basic Playback Operation .......................................... 70
Flipping the Display .................................................... 71
22
23
Zooming the Display Image ....................................... 72
23
Resizing an Image ..................................................... 73
Cropping an Image ..................................................... 74
Playing a Movie .......................................................... 75
Displaying the Calendar Screen ................................ 76
25
26
Playing a Slide Show ................................................. 77
30
34
34
Rotating the Display Image ........................................ 82
39
File 4 (File name : exs3_e_4.pdf)
83
42
43
Deleting a Single File ................................................. 83
Deleting All Files ........................................................ 84
46
49
50
1
53
56
65
66
66
67
68
69
79
80
80
81
Advertisement
Table of Contents

Related Manuals for Casio Exilim EX-S3


Summary of Contents for Casio Exilim EX-S3
-
Page 1: Table Of Contents
EX-S3 User Documentation Files • The EX-S3 user documentation available here has been divided among a number of files in order to facilitate downloading. You can download the entire manual, or you can save time by using the table of contents below to find specific information and then download only the files you need. - Page 2 FILE MANAGEMENT VIEWING IMAGES ON A COMPUTER Folders ............... 85 Using the Camera with a Windows Computer ..112 Memory Folders and Files USB Connection Precautions Protecting Files ............86 Using the Camera with a Macintosh Computer ..117 To protect a single file USB Connection Precautions To protect all files in memory Operations You Can Perform from Your Computer ..
-
Page 3: Digital Camera
Digital Camera EX-S3 User’s Guide Thank you for purchasing this CASIO Product. Before using it, be sure to read the precautions contained in this User’s Guide, and keep the User’s Guide in a safe place for future reference. K856PCM1DMX... -
Page 4: Introduction
INTRODUCTION INTRODUCTION Unpacking Check to make sure that all of the items shown below are included with your camera. If something is missing, contact your dealer as soon as possible. Rechargeable lithium ion Strap Camera battery (NP-20) USB Cradle (CA-22) * Loaded in the camera when you purchase it. - Page 5 INTRODUCTION GETTING READY Contents About This Manual ............. 19 INTRODUCTION General Guide ............20 Camera USB Cradle Unpacking ..............2 Monitor Screen Contents ........... 22 Features ............... 9 REC mode Precautions ..............11 PLAY mode General Precautions Changing the Contents of the Monitor Screen Data Error Precautions Indicator Lamps ............
- Page 6 INTRODUCTION Using the Movie Mode ..........62 BASIC IMAGE RECORDING Using the Histogram ..........63 Recording an Image ........... 41 REC Mode Camera Settings ........65 About the REC Mode Monitor Screen Specifying ISO Sensitivity Recording Precautions Turning Image Review On and Off Using Zoom ..............
- Page 7 INTRODUCTION DELETING FILES OTHER SETTINGS Deleting a Single File ..........83 Turning the Key Tone On and Off ......97 Deleting All Files ............84 Specifying an Image for the Startup Screen ..... 97 Specifying the File Name Serial Number Generation Method ............
- Page 8 INTRODUCTION USING A MEMORY CARD USING THE CAMERA WITH A COMPUTER Using a Memory Card ..........108 Using the Album Feature ......... 127 To insert a memory card into the camera Creating an album To remove a memory card from the camera Selecting an Album Layout Formatting a Memory Card Configuring Detailed Album Settings...
- Page 9 INTRODUCTION APPENDIX Menu Reference ............142 Indicator Lamp Reference ........144 Camera Indicator Lamps USB Cradle Indicator Lamps Troubleshooting Guide ..........147 Display Messages Specifications ............150 Main Specifications...
- Page 10 EX-S3. above, all copyrights and other related rights to these • CASIO COMPUTER CO., LTD. shall not be held applications revert to CASIO COMPUTER CO., LTD. liable for any damages or losses suffered by you or any third party due to the use of Photo Loader and/or Photohands.
-
Page 11: Features
INTRODUCTION • Best Shot Features Simply select the sample scene that matches the type of • 3.2 million Effective Pixels image you are trying to record and the camera performs A high-resolution megapixel CCD provides 3.2 million troublesome setups automatically for beautiful pictures effective pixels (3.35 million total pixels) for images that every time. - Page 12 INTRODUCTION • Alarm • PRINT Image Matching Compatible A built-in alarm helps to keep you on time for important Images include PRINT Image Matching data (mode events, and even can be used in place of an alarm clock. setting and other camera setup information). A printer that You can also have a specific image appear on the supports PRINT Image Matching reads this data and...
-
Page 13: Precautions
CASIO risk of electric shock when exposed. Always leave authorized service center. Using the camera under these maintenance and repair work up to a CASIO authorized conditions creates the danger of fire and electric shock. service center. -
Page 14: Data Error Precautions
AC adaptor power cord from the power — Disconnecting the USB cable, removing the camera outlet, and contact your dealer or nearest CASIO from the USB cradle, or disconnecting the AC adaptor authorized service center. -
Page 15: Operating Conditions
INTRODUCTION Operating conditions Condensation • This camera is designed for use in temperatures ranging • When you bring the camera indoors on a cold day or from 0°C to 40°C (32°F to 104°F). otherwise expose it to a sudden change of temperature, •... -
Page 16: Led Backlight
Doing so can crack the LCD monitor screen. replaced by a CASIO authorized service center. Note that • The camera may become slightly warm during use. This you will be charged for LED backlight replacement. The does not indicate malfunction. -
Page 17: Quick Start Guide
QUICK START GUIDE QUICK START GUIDE First, charge the battery! Load the battery (page 25). Place the camera onto the USB cradle to charge the battery (page 26). • Note that the shape of the AC adaptor depends on the area where you purchased the camera. -
Page 18: To Configure Display Language And Clock Settings
QUICK START GUIDE To configure display language and clock settings IMPORTANT! • Be sure to configure the following settings Press the power button to turn on the camera. before using the camera to record images (See page 38 for details). Press [ ], [ ], [ ], and [ ] to select the language you want. -
Page 19: To Record An Image
QUICK START GUIDE To record an image To view a recorded image (See page 41 for details.) (See page 70 for details.) Press the power button to turn on the Press the power button to turn on the camera. camera. Align the mode selector with “REC”. -
Page 20: To Delete An Image
QUICK START GUIDE To delete an image (See page 83 for details.) 3, 4, 5, 6 Press the power button to turn on the camera. Align the mode selector with “PLAY”. Press [ ] ( Use [ ] and [ ] to display the image you want to delete. Use [ ] and [ ] to select “Delete”. -
Page 21: Getting Ready
File memory can be any one of the This term as used in this following three locations. Means this: manual: “this camera” or “the The CASIO EX-S3 Digital • The camera’s built-in Flash memory camera” Camera • An SD memory card loaded in the camera “file memory”... -
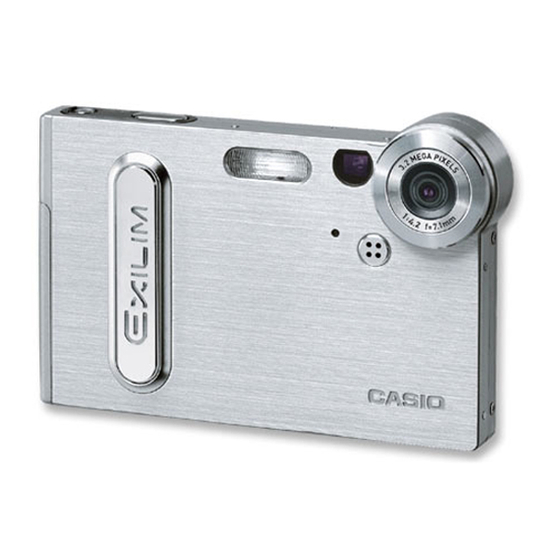
Page 22: General Guide
GETTING READY General Guide The following illustrations show the names of each component, button, and switch on the camera. Camera ! Front ! Back Viewfinder Operation/Flash charge Power button lamp Shutter release button [MENU] button Flash Mode selector Lens Strap bar Microphone Battery cover Self-timer lamp... -
Page 23: Usb Cradle
GETTING READY ! Bottom USB Cradle Simply placing your CASIO digital camera onto the USB cradle lets you perform the following tasks. • Battery charging (page 26) • Automatic transfer of images to a computer (page 112) • Viewing of images using the Photo Stand slideshow Connector feature (page 81). -
Page 24: Monitor Screen Contents
GETTING READY Monitor Screen Contents The monitor screen uses various indicators and icons to keep you informed of the camera’s status. REC mode REC modes Snapshot Self-timer Digital zoom indicator Best Shot None 1-Image Movie White balance indicator Memory capacity Self-timer 10 sec (Remaining number None... -
Page 25: Play Mode
GETTING READY PLAY mode Changing the Contents of the Monitor Screen Folder number/ Image size Each press of the [DISP] button changes the contents of File number 2048 1536 pixels 1600 1200 pixels the monitor screen as shown below. 1280 960 pixels Image protection 480 pixels... -
Page 26: Indicator Lamps
GETTING READY Indicator Lamps Attaching the Strap You can find out the operational status of the camera and Attach the strap to the strap bar as shown in the illustration. the USB cradle at a glance by checking the color of the indicator lamps, and whether a lamp is lit or flashing. -
Page 27: Power Requirements
GETTING READY Swing the battery cover closed, and then slide Power Requirements it in the direction indicated by the arrow while Your camera is powered by a rechargeable lithium ion pressing down on it. battery (NP-20). To load the battery Pressing the battery cover on the side of the camera, slide it in the direction indicated by mark and then swing it open. -
Page 28: To Charge The Battery
GETTING READY To charge the battery NOTE • The bundled AC adaptor is designed for operation with any power supply in the range of 100V to 240V Connect the bundled AC adaptor to the [DC IN AC. Note, however, that the shape of the AC power 5.3V] connector of the USB cradle, and then cord plug varies according to country or geographic plug it in to a household power outlet. - Page 29 GETTING READY NOTE IMPORTANT! • The AC adaptor is designed for operation on power • It takes about two hours to achieve a full charge. ranging from 100V AC to 240V AC. Note, however, Actual charging time depends on current battery that the shape of the power cord plug varies capacity and charging conditions.
- Page 30 Check to make sure that the AC adaptor’s power cord is connected securely to the power outlet and USB cradle. • If the same symptoms occur again when you place the camera on the USB cradle after taking the above steps, contact a CASIO authorized service center.
- Page 31 GETTING READY ! Battery Life Guidelines • Recording one image per minute under the above conditions reduces battery life to about one sixth of that The battery life guideline values given below indicate the noted above. amount of time at standard temperature (25°C (77°F)) until •...
-
Page 32: Power Supply Precautions
. Charge the battery immediately NOTES whenever either of these indicators appears. • The term “battery” in this manual refers to the CASIO NP-20 Rechargeable Lithium Ion Battery. Battery Level High • The term “optional charger unit” in the following... - Page 33 GETTING READY • Failure to observe any of the following precautions • Should you ever notice leakage, strange odor, heat while using the battery creates the risk of over-heating, generation, discoloration, deformation, or any other fire, and explosion. abnormal condition while using, charging, or storing a —...
- Page 34 GETTING READY " PRECAUTIONS DURING USE " BATTERY STORAGE PRECAUTIONS • The battery is designed for use with this CASIO digital • Make sure you remove the battery when you do not camera only. plan to use the camera for a long time. A battery left in •...
- Page 35 Doing so creates the danger of fire and electric shock. • Should the cord of the AC adaptor become damaged (exposed internal wiring), request a replacement from a CASIO authorized service center. A damaged AC adaptor cord creates the danger of fire or electric shock.
-
Page 36: Turning The Camera On And Off
GETTING READY Turning the Camera On and Off Auto Power Off (APO) Press the power button to turn the Auto Power Off (APO) automatically turns off the camera camera on and off. when you do not perform any operation for a certain Pressing the power button to turn amount of time. -
Page 37: Using The On-Screen Menus
GETTING READY Use [ ] and [ ] to change the currently Using the On-screen Menus selected setting, and then press [SET]. Pressing [MENU] displays menus on the monitor screen that you can use to perform various operations. The menu To do this: Select this setting: that appears depends on whether you are in the REC... - Page 38 GETTING READY " Menu Screen Operations Press [MENU]. [MENU] When you want to do this: Do this: Move between tabs Press [ ] and [ ]. MENU PLAY Move from the tab to the Press [ ]. settings Move from the settings to DISP Press [ ].
- Page 39 GETTING READY Press [ ] or [ ] to select the tab you want, Perform one of the following operations to and then press [SET] to move the selection apply the setting you configured. cursor from the tab to the settings. To do this: Perform this key operation: Use [ ] and [ ] to...
-
Page 40: Configuring Display Language And Clock Settings
GETTING READY IMPORTANT! Configuring Display Language and Clock Settings • The camera’s clock settings are cleared whenever power is totally cut off. This can happen if the battery Be sure to configure the following settings before using the goes dead while the camera is not being supplied camera to record images. -
Page 41: To Configure Display Language And Clock Settings
GETTING READY To configure display language and clock Use [ ], [ ], [ ], and [ ] to select the settings geographical area where you live, and Press the power button to turn on the camera. then press [SET]. Use [ ], [ ], [ ], and [ ] to select the language you want,... - Page 42 GETTING READY Press [SET] to register the settings and exit Use [ ] and [ ] to the setting screen. change the date format setting, and then press [SET]. Example: October 23, 2003 To display the date like this: Select this format: 03/10/23 YY/MM/DD 23/10/03...
-
Page 43: Basic Image Recording
BASIC IMAGE RECORDING BASIC IMAGE RECORDING This section describes the basic procedure for recording an Compose the image 1600 1600 1200 1200 image. on the monitor NORMAL NORMAL screen. • The focusing range of Recording an Image the camera is 03/12/24 03/12/24 approximately 80 cm... -
Page 44: About The Rec Mode Monitor Screen
BASIC IMAGE RECORDING Press the shutter About the REC Mode Monitor Screen release button to • The image shown on the monitor screen in the REC record the image. mode is a simplified image for composing purposes. The actual image is recorded in accordance with the image quality setting currently selected on your camera. -
Page 45: Recording Precautions
BASIC IMAGE RECORDING Recording Precautions Using Zoom • Never open the battery cover or place the camera onto You can use the digital zoom feature of your camera to the USB cradle while the operation/flash charge lamp is zoom in on the center of an image. Performing a zoom flashing. - Page 46 BASIC IMAGE RECORDING In the REC mode, use [ ] and [ ] to change IMPORTANT! the digital zoom factor. • Zoom is disabled whenever the monitor screen is turned off (page 23). [ ] : Zoom in. • Using digital zoom can cause degradation of the [ ] : Zoom out.
-
Page 47: Using The Flash
BASIC IMAGE RECORDING Record the image. Using the Flash Perform the following steps to select the flash mode you IMPORTANT! want to use. • The flash unit of this camera fires a number of times when you record an image. The initial flashes are In the REC mode, press [MENU]. -
Page 48: Flash Precautions
BASIC IMAGE RECORDING ! About Red-eye Reduction Flash Precautions Using the flash to record at night or in a dimly lit room can Take care that your fingers do not block the flash when you cause red spots inside the eyes of people who are in the hold the camera. -
Page 49: Using The Self-Timer
BASIC IMAGE RECORDING • When the red-eye reduction mode ( ) is selected, flash Using the Self-timer intensity is adjusted automatically in accordance with the exposure. The flash may not fire at all when the subject is The self-timer lets you select either a 2-second or 10- second delay of the shutter release after you press the brightly lit. - Page 50 BASIC IMAGE RECORDING Record the image. To do this: Select this setting: Specify a 10-second self-timer 10 sec • When you press the shutter release button, Specify a 2-second self-timer 2 sec the self-timer lamp Specify Triple Self-timer flashes and the shutter Disable the self-timer releases after the self- timer reaches the end...
-
Page 51: Specifying Image Size And Quality
BASIC IMAGE RECORDING NOTES Specifying Image Size and Quality • If you plan to make large prints of your images or You can specify the image size and image quality to suit otherwise use them in applications where high- the type of image you are recording. resolution is your top priority, select the “2048 x 1536”... -
Page 52: To Specify Image Quality
BASIC IMAGE RECORDING To specify image quality NOTE • Use the “Fine” setting when image quality is your top priority and file size is secondary. Conversely, use In the REC mode, press [MENU]. the “Economy” setting when file size is your top priority and image quality is secondary. -
Page 53: Other Recording Functions
OTHER RECORDING FUNCTIONS OTHER RECORDING FUNCTIONS This chapter describes the other powerful features and Use [ ] and [ ] to functions that are available for recording. change the exposure compensation value, and then press [SET]. Exposure Compensation (EV Shift) •... -
Page 54: Adjusting White Balance
OTHER RECORDING FUNCTIONS • To cancel EV Shift, adjust the value until it becomes Adjusting White Balance 0.0. The wavelengths of the light produced by various light Record the image. sources (sunlight, light bulb, etc.) can affect the color of a subject when it is recorded. -
Page 55: Adjusting White Balance Manually
OTHER RECORDING FUNCTIONS Use [ ] and [ ] to select the setting you Adjusting White Balance Manually want, and then press [SET]. Under some light sources, automatic white balance under the “Auto” setting can take a long time to complete. Also, When shooting under these conditions: Select this setting: the auto white balance range (color temperature range) is... -
Page 56: Using The Best Shot Mode
OTHER RECORDING FUNCTIONS Point the camera at a white piece of paper or Using the Best Shot Mode similar object under the lighting conditions Selecting one of the 15 Best Shot scenes automatically for which you want to set the white balance, sets up the camera for recording a similar type of image. - Page 57 OTHER RECORDING FUNCTIONS In the REC mode, press [MENU]. IMPORTANT! • Sample scene number 4 is Coupling Shot scene Select the “REC” tab, select “REC Mode”, and (page 58). Sample scene number 5 is a Pre-shot then press [ ]. scene (page 60).
-
Page 58: Creating Your Own Best Shot Setup
OTHER RECORDING FUNCTIONS Creating Your Own Best Shot Setup Use [ ] and [ ] to display the image You can use the procedure below to save the setup of an whose setup you image you recorded for later recall when you need it again. want to register as a Recalling a setup you save automatically sets up the Best Shot scene. - Page 59 OTHER RECORDING FUNCTIONS ! To delete a Best Shot user setup IMPORTANT! • Setups that you register as Best Shot sample scenes are located after the built-in sample scenes. In the REC mode, press [MENU]. • When a Best Shot user setup is recalled, the monitor screen in step 4 of the procedure on page 55 Select the “REC”...
-
Page 60: Combining Shots Of Two People Into A Single Image (Coupling Shot)
OTHER RECORDING FUNCTIONS Combining Shots of Two People into a Single Image (Coupling Shot) • Combined The Coupling Shot mode lets you record images of two Images people and combine them into a single image. This makes it possible for you to include yourself in group images, even when there is no one else around to record the image for you. - Page 61 OTHER RECORDING FUNCTIONS Use the monitor Next, use the monitor screen to compose screen to compose and record the left the right side of the side of the image. image, taking care to align the actual • The exposure, white background with the balance, zoom, and semi-transparent...
-
Page 62: Recording A Subject Onto An Existing Background Image (Pre-Shot)
OTHER RECORDING FUNCTIONS • Freeze the background on Recording a Subject onto an Existing the monitor screen. Background Image (Pre-shot) Pre-shot helps you get the background you want, even if you need to ask someone else to record the image for you. Basically, Pre-shot is a two-step process. - Page 63 OTHER RECORDING FUNCTIONS In the REC mode, press [MENU]. Next, use the monitor screen to compose Select the “REC” tab, select “REC Mode”, and the subject with the then press [ ]. semi-transparent background shown Use [ ] and [ ] to select “ (Best Shot)”, on the monitor and then press [SET].
-
Page 64: Using The Movie Mode
OTHER RECORDING FUNCTIONS Remaining capacity Use [ ] and [ ] to Using the Movie Mode select (Movie), and You can record movies with audio, up to 30 seconds long. then press [SET]. • “Remaining capacity” • File Format: AVI shows how many 30- AVI format conforms to the Motion JPEG format promoted second movies can still... -
Page 65: Using The Histogram
OTHER RECORDING FUNCTIONS IMPORTANT! Using the Histogram • The flash does not fire in the Movie mode. You can use the [DISP] button to display a histogram on • This camera also records audio. Note the following the monitor screen. The histogram lets you check exposure points when recording a movie. - Page 66 OTHER RECORDING FUNCTIONS • When the histogram is too far IMPORTANT! to the left, it means that there • Note that the above histograms are shown for are too many dark pixels. illustrative purposes only. You may not be able to This type of histogram results achieve exactly the same shapes for particular when the overall image is...
-
Page 67: Rec Mode Camera Settings
OTHER RECORDING FUNCTIONS IMPORTANT! REC Mode Camera Settings • Increasing ISO sensitivity can cause static to appear inside an image. Select the ISO sensitivity setting Specifying ISO Sensitivity that suits your shooting needs. Use the following procedure to select the ISO sensitivity •... -
Page 68: Turning Image Review On And Off
OTHER RECORDING FUNCTIONS Turning Image Review On and Off Assigning Functions to the [ ] and [ ] Keys Image review displays an image on the monitor screen as soon as you record it. Use the following procedure to turn A “key customization”... -
Page 69: Assigning Functions To The [ ] And [ ] Keys
OTHER RECORDING FUNCTIONS Assigning Functions to the [ ] and [ ] When you want to assign this function to Select this: [ ] and [ ] keys: Keys Recording mode A “key customization” feature lets you configure the [ ] •... -
Page 70: Specifying Power On Default Settings
OTHER RECORDING FUNCTIONS Specifying Power On Default Settings When you want to assign this function to Select this: [ ] and [ ] keys: The camera’s “mode memory” feature lets you specify the Recording mode power on default settings individually for the recording •... -
Page 71: Resetting The Camera
OTHER RECORDING FUNCTIONS In the REC mode, press [MENU]. Resetting the Camera Use the following procedure to reset all of the camera’s Select the “Memory” tab, select the item you settings to their initial defaults as shown under “Menu want to change, and then press [ ]. Reference”... -
Page 72: Playback
PLAYBACK PLAYBACK You can use the camera’s built-in monitor screen to view Use [ ] (forward) or [ ] (back) to scroll images after you record them. through files on the monitor screen. Basic Playback Operation Use the following procedure to scroll through files stored in the camera’s memory. -
Page 73: Flipping The Display
PLAYBACK In the PLAY mode, use [ ] and [ ] to scroll Flipping the Display through images on the monitor screen and The following procedure flips the image 180 degrees. This display the one you want. comes in handy when you want to show someone standing in front of you an image on the monitor screen. -
Page 74: Zooming The Display Image
PLAYBACK To scroll the image Zooming the Display Image on the display, press Perform the following procedure to zoom the image [SET] and then press currently on the monitor screen up to four times its normal [ ], [ ], [ ], or [ ]. size. -
Page 75: Resizing An Image
PLAYBACK Use [ ] and [ ] to select the setting you Resizing an Image want, and then press [SET]. You can use the following procedure to change a snapshot image to either SXGA size (1280 x 960 pixels) or VGA size To do this: Select this: (640 x 480 pixels). -
Page 76: Cropping An Image
PLAYBACK When the cropping Cropping an Image boundary is the size Use the following procedure when you want to crop a you want, press [DISP] portion of an enlarged image and use the remaining part of to lock it. the image as an e-mail attachment, Web page image, etc. •... -
Page 77: Playing A Movie
PLAYBACK IMPORTANT! Playing a Movie • Cropping an image creates a new file that contains Use the following procedure to play back a movie that was the cropped image. The file with the original image recorded in the movie mode. also remains in memory. -
Page 78: Displaying The Calendar Screen
PLAYBACK • You can perform the following operations while a Displaying the Calendar Screen movie is playing. Use the following procedure to display a 1-month calendar. To do this: Do this: While the calendar is on the display, you can select a date, which displays the first image recorded on that date. -
Page 79: Playing A Slide Show
PLAYBACK • Pressing [ ] while the date selection cursor is Playing a Slide Show located anywhere in the top line of the calendar causes the previous month to appear. Slide Show automatically plays back images in sequence at a fixed interval. •... - Page 80 PLAYBACK Configure the slideshow settings. IMPORTANT! • Note that all buttons are disabled while an image • See the pages indicated below for more information. change is in progress. Wait until an image is stopped on the monitor screen before performing a button For information about Go here: configuring this setting:...
-
Page 81: To Specify The Slideshow Images
PLAYBACK ! Selecting a Particular Image for a Slideshow To specify the slideshow images When you select “One image” as the slideshow type, the slide show displays only one image, without changing it. Use [ ] and [ ] to select “Images”, and then Use this setting when you want a particular image to press [ ]. -
Page 82: To Specify The Slideshow Time
PLAYBACK To specify the slideshow time To set the slideshow interval Use [ ] and [ ] to select “Time”. Use [ ] and [ ] to select “Interval”. Use [ ] and [ ] to specify the time setting Use [ ] and [ ] to specify the interval setting you want, and then press [SET]. -
Page 83: Using The Photo Stand Feature
PLAYBACK Using the Photo Stand Feature IMPORTANT! • The battery is not charged while a Photo Stand The “Photo Stand” feature lets you specify what should slideshow is in progress. To charge the battery, stop appear on the camera’s monitor screen while the camera is the slideshow. -
Page 84: Rotating The Display Image
PLAYBACK Use [ ] and [ ] to Rotating the Display Image select “Rotate”, and Use the following procedure to rotate the image 90 degrees then press [SET]. and register the rotation information along with the image. • This rotates the image After you do this, the image is always displayed in its 90 degrees to the right. -
Page 85: Deleting Files
DELETING FILES DELETING FILES You can delete a single file, or you can delete all files Deleting a Single File currently in memory. Perform the following steps when you want to delete a single file. IMPORTANT! • Note that file deletion cannot be undone. Once you In the PLAY mode, delete a file, it is gone. -
Page 86: Deleting All Files
DELETING FILES IMPORTANT! Deleting All Files • If a file cannot be deleted for some reason, the The following procedure deletes all unprotected files message “The function is not supported for this file.” currently in memory. appears when you try to delete it. In the PLAY mode, press [ ] ( Use [ ] and [ ] to select “All Files Delete”, and then press [SET]. -
Page 87: File Management
FILE MANAGEMENT FILE MANAGEMENT The file management capabilities of the camera make it Each folder can hold files numbered up to 9,999. easy to keep track of images. You can protect files against Trying to store the 10,000th file in a folder causes the next deletion, and even use its DPOF feature to specify images serially numbered folder to be created. -
Page 88: Protecting Files
FILE MANAGEMENT Use [ ] and [ ] to Protecting Files select “On”, and then Once you protect a file it cannot be deleted (page 83). You press [SET]. can protect files individually or you can protect all files in •... -
Page 89: To Protect All Files In Memory
FILE MANAGEMENT To protect all files in memory DPOF The letters “DPOF” stand for “Digital Print In the PLAY mode, press [MENU]. Order Format”, which is a format for recording on a memory card or other medium Select the “PLAY” tab, select “Protect”, and which digital camera images should be then press [ ]. -
Page 90: To Configure Print Settings For A Single Image
FILE MANAGEMENT To configure print settings for a single Use [ ] and [ ] to specify the number of copies. image • You can specify up to 99 for the number of copies. Specify 00 if you do not want to have the image In the PLAY mode, press [MENU]. -
Page 91: To Configure Print Settings For All Images
FILE MANAGEMENT To configure print settings for all images To turn on date stamping for the prints, press [DISP] so is displayed. In the PLAY mode, press [MENU]. • To turn off date stamping for the prints, press [DISP] is not displayed. Select the “PLAY”... -
Page 92: Print Image Matching Ii
FILE MANAGEMENT PRINT Image Matching II Exif Print Images include PRINT Image Matching Exif Print is an data (mode setting and other camera internationally supported, setup information). A printer that open standard file format supports PRINT Image Matching that makes it possible to reads this data and adjusts the printed capture and display vibrant image accordingly, so your images... -
Page 93: Using Usb Direct-Print
FILE MANAGEMENT Use the DPOF procedure on page 87 to Using USB DIRECT-PRINT specify the images in file memory that you want to print. Your camera supports USB DIRECT-PRINT, which was Connect the USB cradle to the printer. developed by Seiko Epson Corporation. - Page 94 FILE MANAGEMENT Load paper for printing the images into the IMPORTANT! printer. • Contact your printer manufacturer for information about models that support USB DIRECT-PRINT, Configure print quality, paper, and other upgrades, etc. settings for your printer. • Never disconnect the USB cable, or perform any camera or USB cradle operation while printing is in •...
-
Page 95: Using The Favorite Folder
FILE MANAGEMENT Use [ ] and [ ] to Using the FAVORITE Folder select “Save”, and You can copy scenery shots, photos of your family, or other then press [SET]. special images from a file storage folder (page 124) to the •... -
Page 96: To Display A File In The Favorite Folder
FILE MANAGEMENT NOTES To display a file in the FAVORITE folder • Copying an image file with the above procedure creates a 320 x 240-pixel QVGA-size image in the In the PLAY mode, press [MENU]. FAVORITE folder. • A file copied into the FAVORITE folder is Select the “PLAY”... -
Page 97: To Delete A File From The Favorite Folder
FILE MANAGEMENT NOTE To delete a file from the FAVORITE • Holding down [ ] or [ ] scrolls images at high folder speed. In the PLAY mode, press [MENU]. IMPORTANT! Select the “PLAY” tab, select “Favorites”, and • Note that a FAVORITE folder is created in the then press [ ]. - Page 98 FILE MANAGEMENT IMPORTANT! • You cannot use the delete operations on page 83 to delete images from the FAVORITE folder. Performing the memory format operation (page 106), however, does delete FAVORITE folder files.
-
Page 99: Other Settings
OTHER SETTINGS OTHER SETTINGS Turning the Key Tone On and Off Specifying an Image for the Startup Screen Use the following procedure to turn the tone that sounds You can specify an image you recorded with the camera as when you press a key on and off. the startup screen image, which causes it to appear on the monitor screen for about two seconds whenever you turn on the camera in the REC mode. -
Page 100: Specifying The File Name Serial Number Generation Method
OTHER SETTINGS IMPORTANT! Specifying the File Name Serial Number Generation Method • You can select any one of the following types of image as the startup image. Use the following procedure to specify the method for — The camera’s built-in startup image generating the serial number used for file names (page 85). -
Page 101: Using The Alarm
OTHER SETTINGS To do this for a newly saved file: Select this setting: Using the Alarm Store the last file number used and You can configure up to three alarms that cause the increment it, regardless of whether camera to beep and display a specified image at the time files are deleted or whether the Continue you specify. -
Page 102: Stopping The Alarm
OTHER SETTINGS Press [DISP]. Stopping the Alarm • You could press [SET] in place of [DISP] if you want When an alarm time is reached while the camera is turned to configure the alarm without an image. off, the alarm will sound for about one minute (or until you stop it), and then the camera will turn on. -
Page 103: Setting The Clock
OTHER SETTINGS Use [ ] and [ ] to select “City”, and then Setting the Clock press [ ]. Use the procedures in this section to select a Home Time Zone, and to change its date and time settings. Use [ ], [ ], [ ], and [ ] to select the geographical area that contains location you IMPORTANT! want to select as your Home Time zone, and... -
Page 104: To Set The Current Time And Date
OTHER SETTINGS To set the current time and date Changing the Date Format You can select from among three different formats for In the REC mode or the PLAY mode, press display of the date. [MENU]. In the REC mode or the PLAY mode, press Select the “Set Up”... -
Page 105: Using World Time
OTHER SETTINGS To configure World Time settings Using World Time You can use the World Time screen to view a time zone In the REC mode or the PLAY mode, press that is different from the home time zone when you go on a [MENU]. -
Page 106: To Configure Summer Time (Dst) Settings
OTHER SETTINGS Use [ ] and [ ] to To configure summer time (DST) select the city you settings want, and then press [SET]. In the REC mode or the PLAY mode, press • This displays the current [MENU]. time in the city you select. -
Page 107: Changing The Display Language
OTHER SETTINGS After the setting is the way you want, press Changing the Display Language [SET]. You can use the following procedure to select one of ten • This displays the current time in accordance with languages as the display language. your setting. -
Page 108: Formatting Built-In Memory
OTHER SETTINGS Use [ ] and [ ] to select “Format”, and then Formatting Built-in Memory press [SET]. Formatting built-in memory deletes any data stored in it. • To exit the format operation without formatting, select “Cancel”. IMPORTANT! • Note that data deleted by a format operation cannot be recovered. -
Page 109: Using A Memory Card
USING A MEMORY CARD USING A MEMORY CARD You can expand the storage IMPORTANT! capabilities of your camera by using • Make sure you turn off the camera before inserting or a commercially available memory removing a memory card. card (SD memory card or •... -
Page 110: Using A Memory Card
CASIO authorized service center. • Never remove a card from the camera while the To remove a memory card from the operation/flash charge lamp is flashing. Doing so can... -
Page 111: Formatting A Memory Card
USING A MEMORY CARD Formatting a Memory Card Load the memory card into the camera. Formatting a memory card deletes any data already stored Turn on the camera. Next, enter the REC on it. mode or PLAY mode and press [MENU]. IMPORTANT! Select the “Set Up”... -
Page 112: Memory Card Precautions
USING A MEMORY CARD Memory Card Precautions Copying Files • Use only an SD memory card or a MultiMediaCard with Use the procedures below to copy files between built-in this camera. Proper operation is not guaranteed when memory and a memory card. any other type of card is used. -
Page 113: To Copy A File From A Memory Card To Built-In Memory
USING A MEMORY CARD Use [ ] and [ ] to select “Built-in Card”, Use [ ] and [ ] to select “Copy”, and then and then press [SET]. press [SET]. • This starts the copy operation and displays the •... -
Page 114: Using The Camera With A Windows Computer
VIEWING IMAGES ON A COMPUTER VIEWING IMAGES ON A COMPUTER After using the USB cradle to establish a USB connection Using the Camera with a Windows between the camera and your computer, you can use your Computer computer to view images in file memory and copy images The following are the general steps for viewing and copying to your computer’s hard disk or other storage media. - Page 115 VIEWING IMAGES ON A COMPUTER IMPORTANT! On the menu screen that appears, click the • Do not try to establish a connection between the camera and computer before installing the USB language button in the driver onto the computer. upper left corner of the •...
- Page 116 VIEWING IMAGES ON A COMPUTER Connect the bundled AC adaptor to the [DC IN Connect the USB cable that comes bundled 5.3V] connector of the USB cradle, and then with the camera to the USB cradle and your plug it in to a household power outlet. computer’s USB port.
- Page 117 VIEWING IMAGES ON A COMPUTER After making sure the camera is turned off, Press the USB cradle’s [USB] button. place the camera onto the USB cradle. • This will cause the “Add New Hardware...” dialog box to appear on the computer screen as the computer •...
- Page 118 VIEWING IMAGES ON A COMPUTER On your computer, double-click “My Depending on the version of Windows you are Computer”. running, use one of the following procedures to terminate the USB connection. Double-click “Removable Disk”. ! WindowsMe/98 Users • Your computer sees the camera’s file memory as a •...
-
Page 119: Usb Connection Precautions
VIEWING IMAGES ON A COMPUTER USB Connection Precautions Using the Camera with a Macintosh Computer • Be sure to read the documentation that comes with your The following are the general steps for viewing and copying computer for other important information about USB files from a Macintosh. - Page 120 VIEWING IMAGES ON A COMPUTER IMPORTANT! What you should do first depends on whether your Macintosh is running under Mac OS 8.6 • If you want to transfer files from the camera’s built-in memory to a computer, make sure there is no or Mac OS 9/OS X.
- Page 121 • Note that the shape of the AC adaptor depends on the “Extensions” folder to open it. the area where you purchased the camera. Double-click the “CASIO” folder and then the “ENGLISH” folder. Next, double-click the CD- ROM’s “USB Driver” folder to open it.
- Page 122 VIEWING IMAGES ON A COMPUTER Connect the USB cable that comes bundled After making sure the camera is turned off, with the camera to the USB cradle and your place the camera onto the USB cradle. computer’s USB port. • Do not place the camera onto the USB cradle while it is turned on.
- Page 123 VIEWING IMAGES ON A COMPUTER Press the USB cradle’s [USB] button. To copy all the files in file memory to your Macintosh hard disk, drag the “DCIM” folder • Pressing the [USB] button enters the USB mode, to the folder to which you want to copy it. which causes the USB cradle’s [USB] lamp to light green (page 146).
-
Page 124: Operations You Can Perform From Your Computer
VIEWING IMAGES ON A COMPUTER USB Connection Precautions Operations You Can Perform from Your Computer • Be sure to read the documentation that comes with your The following are the operations you can perform while computer for other important information about USB there is a USB connection between your camera and connections. -
Page 125: Using A Memory Card To Transfer Images To A Computer
VIEWING IMAGES ON A COMPUTER Using a Commercially Available SD Memory Card Using a Memory Card to Transfer Images Reader/Writer to a Computer See the user documentation that comes with the SD The procedures in this section describe how to transfer memory card reader/writer for details about how to use it. -
Page 126: Memory Data
VIEWING IMAGES ON A COMPUTER Memory Directory Structure Memory Data Images recorded with this camera and other data are ! Directory Structure stored in memory using DCF (Design rule for Camera File System) protocol. DCF protocol is designed to make it <¥DCIM¥>... -
Page 127: Image Files Supported By The Camera
VIEWING IMAGES ON A COMPUTER ! Folder and File Contents Image Files Supported by the Camera • DCIM folder • Image files recorded with the CASIO EX-S3 Digital Folder that stores all of the digital camera files Camera • DCF protocol image files •... -
Page 128: Built-In Memory And Memory Card Precautions
VIEWING IMAGES ON A COMPUTER Built-in Memory and Memory Card Precautions • Note that the folder named “DCIM” is the parent (top) folder of all the files in memory. When transferring memory contents to a hard disk, CD-R, MO disk, or other external storage, treat all the contents inside a DCIM folder as a set and always keep them together. -
Page 129: Using The Album Feature
USING THE CAMERA WITH A COMPUTER USING THE CAMERA WITH A COMPUTER The album feature of the camera creates files that make it • You can use the Web browser shown below to view or possible for you to view images on your computer in a print the contents of an album. -
Page 130: Selecting An Album Layout
USING THE CAMERA WITH A COMPUTER • The PLAY mode screen reappears after creation of Selecting an Album Layout the album is complete. You can select from among 10 different display layouts for • Creating an album causes a file folder named an album. -
Page 131: Configuring Detailed Album Settings
USING THE CAMERA WITH A COMPUTER ! Background Color Configuring Detailed Album Settings You can specify white, black, or gray as the color of the album background using the procedure under “Configuring In the PLAY mode, press [MENU]. Detailed Album Settings”. Select the “PLAY”... - Page 132 USING THE CAMERA WITH A COMPUTER ! Image Use ! Auto Album Creation On/Off This setting lets you select from among three different This setting controls whether an album is created image uses, as described below. Select the image use that automatically whenever you turn off the camera.
-
Page 133: Viewing Album Files
USING THE CAMERA WITH A COMPUTER NOTE Viewing Album Files • Depending on the number of images in memory, it You can view and print album files using your computer’s can take quite a bit of time to complete auto album Web browser application. - Page 134 USING THE CAMERA WITH A COMPUTER If you created the album after selecting “Normal” type or “Index/Info” as the album type under “Configuring Detailed Album Settings” on page 129, you can click one of the following display options. Album : Displays an album created by the camera. Index : Displays a list of images stored in a folder.
- Page 135 USING THE CAMERA WITH A COMPUTER • The following describes the information that appears NOTES on the Info Screen. • When printing an album page, you should set up your Web browser as described below. This Info Screen item: Shows this: —...
-
Page 136: Saving An Album
USING THE CAMERA WITH A COMPUTER Saving an Album Installing the Software from the CD-ROM • To save an album, copy the “DCIM” folder from camera About the bundled CD-ROM memory or the memory card to your computer’s hard disk, a CD-R, an MO disk, or some other storage medium. -
Page 137: Computer System Requirements
USING THE CAMERA WITH A COMPUTER Internet Explorer (for Macintosh) Computer System Requirements This is a browser application for reading HTML files. Computer system requirements depend on each of the Images loaded by Photo Loader are stored in folders called applications, as described below. -
Page 138: Installing Software From The Cd-Rom In Windows
USING THE CAMERA WITH A COMPUTER Getting Started Installing Software from the CD-ROM in Windows Start up your computer and insert the CD-ROM into its Use the procedures in this section to install the software CD-ROM drive. This will from the bundled CD-ROM to your computer. automatically launch the menu application, which displays a NOTE... -
Page 139: Viewing The Contents Of The "Read Me" File
USING THE CAMERA WITH A COMPUTER Viewing the Contents of the “Read me” Installing an Application File Click “Install” for the application you want to You should always read the “Read me” file for any install. application before installing it. The “Read me” file contains information you need to know when installing the Follow the instructions that appear on your application. -
Page 140: Viewing User Documentation (Pdf Files)
USING THE CAMERA WITH A COMPUTER Viewing User Documentation (PDF Files) User Registration You can perform user registration over the Internet. To do In the “Manual” area, click the name of the so, of course, you need to be able to connect to the manual you want to read. -
Page 141: Installing Software From The Cd-Rom On A Macintosh
USING THE CAMERA WITH A COMPUTER ! To install Internet Explorer and Outlook Installing Software from the CD-ROM on a Express Macintosh The CD-ROM contains applications and user Open the file named “Internet Explorer”. documentation in various languages in folders named for each language: English, French, German, Spanish, Italian, Open the folder for the language version you Dutch, and Chinese. -
Page 142: Viewing User Documentation (Pdf Files)
USING THE CAMERA WITH A COMPUTER IMPORTANT! Viewing User Documentation (PDF Files) • If you are upgrading to the new version of Photo To perform the following procedures, you must have Loader from a previous version and you want to use Acrobat Reader installed on your Macintosh. - Page 143 ! To register as a user Internet registration only is supported. Visit the following On the CD-ROM, open the “Manual” folder. CASIO website to register: http://world.casio.com/qv/register/ Open the “Digital Camera” folder, and then open the folder for the language whose user’s guide you want to view.
-
Page 144: Appendix
APPENDIX APPENDIX L/R Key REC Mode / Flash / EV shift / White Balance Menu Reference / ISO / Off The following shows lists of menus that appear in the REC U/D Key REC Mode / Digital Zoom / Flash / White mode and PLAY mode, and their settings. - Page 145 APPENDIX " Set Up tab menu ! PLAY mode Beep On / Off " PLAY tab menu Startup On (Selectable image) / Off Slideshow Start / Images / Time / Interval File No. Continue / Reset Calender – World Time Home / World Favorites Show / Save / Delete / Cancel...
-
Page 146: Indicator Lamp Reference
APPENDIX " Set Up tab menu Indicator Lamp Reference Beep On / Off Camera Indicator Lamps Startup On (Selectable image) / Off File No. Continue / Reset The camera has two indicator lamps: an operation/flash World Time Home / World charge lamp and a self-timer lamp. - Page 147 APPENDIX ! REC Mode ! PLAY Mode Operation/Flash Operation/Flash Self-timer Lamp Self-timer Lamp Charge Lamp Meaning Charge Lamp Meaning Color Status Color Status Color Status Color Status Green Power on Green Power on Amber Pattern 1 Flash charging Green Pattern 2 Deleting image Green Monitor screen off...
-
Page 148: Usb Cradle Indicator Lamps
APPENDIX USB Cradle Indicator Lamps The USB cradle has two indicator lamps: a [CHARGE] lamp and a [USB] lamp. These lamps light and flash to indicate the current operational status of the USB cradle and camera. [USB] lamp [CHARGE] lamp [CHARGE] lamp [USB] lamp Meaning... -
Page 149: Troubleshooting Guide
APPENDIX Troubleshooting Guide Symptom Possible Cause Action Power does not turn on. 1) The battery is not oriented correctly. 1) Orient the battery correctly (page 25). 2) The battery is dead. 2) Charge the battery (page 26). If the battery goes dead soon after being charged, it means the battery has reached the end of its life and needs to be replaced. - Page 150 APPENDIX Symptom Possible Cause Action Color of the playback Sunlight or light from another source is shining Position the camera so sunlight does not shine image is different from the directly into the lens during recording. directly into the lens. image on the monitor screen during recording.
-
Page 151: Display Messages
SYSTEM ERROR Your camera system is corrupted. Contact your Formatting the memory card deletes all files on retailer or a CASIO service center. the memory card. Before formatting, try transferring recoverable files to a computer or The card is locked. -
Page 152: Specifications
APPENDIX Specifications There are no printing There are no DPOF settings specifying images and images. the number of copies of each for printing. Set up DPOF. Configure the required DPOF settings (page 87). Main Specifications This file cannot be The image file or audio file is corrupted, or is a Product: ...... - Page 153 APPENDIX Approximate Memory Capacity and File sizes: Delete: ......... Single-file, all files (with protection) • Snapshots Effective Pixels ....3.2 million File Size Approximate Built-in flash SD Memory Imaging Element ....1/1.8-inch square pixel color CCD Quality (Total pixels: 3.35 million) (pixels) Image File Size memory 10MB...
- Page 154 APPENDIX Built-in Flash ! Power Requirements Flash Modes: ....AUTO, ON, OFF, Red eye reduction Power Requirements: ..Rechargeable lithium ion battery Flash Range: ....0.8 to 2 meters (2.6' to 6.6') (NP-20) x 1 (ISO Sensitivity: “Auto”) Approximate Battery Life: Recording Functions: ..
- Page 155 APPENDIX ! Rechargeable Lithium Ion Battery (NP-20) ! Special AC Adaptor (Inlet Type) Rated Voltage: ....3.7 V Power Requirement ..100 to 240V AC, 50/60Hz, 0.12A Rated Capacitance: ... 680 mAh Output ......... 5.3V DC, 1.0A Dimensions ......48(W) x 28(H) x 66(D) mm Operating Temperature (1.9"(W) x 1.1"(H) x 2.6"(D)) Range: .........
- Page 156 APPENDIX Power Supply • Use only the special NP-20 rechargeable lithium ion battery to power this camera. Use of any other type of battery is not supported. • This camera does not have a separate battery for the clock. The date and time settings of the camera are cleared whenever power is totally cut off (from both the battery and USB cradle).